Baked Chicken Katsu
Chicken katsu is one of those dishes that feels indulgent but is actually very achievable at home. This baked version keeps the crisp, golden exterior you’d expect from classic tonkatsu while trimming the fuss and oil of deep-frying. The result is juicy, thin chicken cutlets with a crunchy panko crust and a bright, tangy tonkatsu-style sauce.
I’ll walk you through every practical detail—what to buy, how to pound and bread the chicken so it cooks evenly, and how to get the crust evenly golden in the oven. There are also quick swaps and common slip-ups to avoid if you want the best texture with minimal stress.
This recipe serves as a dependable weeknight dinner: pair it with steamed rice, shredded cabbage, and the homemade sauce that comes together in minutes. Read on for a clear ingredients list, step-by-step instructions, troubleshooting tips, and storage advice.
The Essentials
Ingredients
- 3 tablespoons ketchup — forms the sweet-tart base of the tonkatsu-style sauce.
- 3 tablespoons Worcestershire sauce — adds savory depth and umami to the sauce.
- 1 tablespoon molasses — boosts sweetness and gives the sauce a rich color.
- 1 teaspoon low-sodium soy sauce — balances the sauce with salty, savory notes.
- ½ teaspoon garlic powder — used both in the sauce and for seasoning; gives mild garlic flavor.
- ⅛ teaspoon peeled, grated fresh ginger root — adds a fresh, slightly spicy lift to the sauce.
- 2 (8 oz) boneless, skinless chicken breasts, or 4 chicken cutlets — the primary protein; cutlets make the process quicker.
- Kosher salt + black pepper, to taste — basic seasoning for the chicken before breading.
- 1 teaspoon garlic powder, divided — part included in the flour mixture to season the coating.
- ½ cup all-purpose flour — the first dredge that helps the egg adhere to the chicken.
- 2 large eggs, beaten — binds the panko to the flour-coated chicken.
- 1 tablespoon water — thins the beaten eggs so they coat evenly.
- 1½ cups panko bread crumbs — gives the characteristic light, crispy crust.
- Cooking spray for baking — helps the panko brown in the oven without oil.
- Steamed rice — traditional accompaniment for serving.
- Finely shredded cabbage — bright, crunchy side that pairs perfectly with katsu.
- Green onions — optional garnish for color and mild onion flavor.
Method: Baked Chicken Katsu
Sauce (Tonkatsu-style)
- In a small bowl combine 3 tablespoons ketchup, 3 tablespoons Worcestershire sauce, 1 tablespoon molasses, 1 teaspoon low-sodium soy sauce, ½ teaspoon garlic powder, and ⅛ teaspoon peeled, grated fresh ginger root.
- Whisk until smooth, cover with plastic wrap, and refrigerate until you’re ready to serve so flavors meld.
Prepare Chicken and Oven
- Preheat the oven to 425°F (215°C). Place an oven-safe baking rack on a rimmed baking sheet and lightly spray the rack with non-stick cooking spray.
- Trim any fat from 2 (8 oz) boneless, skinless chicken breasts. If you are using whole breasts, cut each crosswise into two pieces to make 4 cutlets.
- Place a cutlet between two layers of plastic wrap and pound with a meat mallet or heavy skillet until the cutlet is ¼–½ inch thick (¼ inch is best for even, quick cooking).
- Season both sides of each cutlet with ½ teaspoon kosher salt and ½ teaspoon black pepper (adjust to taste).
Breading Station
- In a shallow dish mix ½ cup all-purpose flour with ½ teaspoon salt and 1 teaspoon garlic powder.
- In a second shallow dish whisk 2 large eggs with ½ teaspoon salt and 1 tablespoon water until combined.
- Place 1½ cups panko bread crumbs in a third shallow dish.
Bread the Chicken
- Work with one cutlet at a time. Dredge the seasoned chicken in the flour mixture, shaking off excess so there’s a thin, even coating.
- Dip the floured cutlet into the beaten egg, coating both sides. Let excess egg drip off so the panko will adhere properly.
- Press the cutlet into the panko crumbs, using your hands to firmly press the crumbs into the surface and ensure even coverage.
- Place the breaded cutlet onto the prepared baking rack. Repeat for remaining cutlets.
Bake
- Spray the top of each breaded cutlet generously with cooking spray so the panko glistens—this encourages browning in the oven.
- Bake at 425°F (215°C) for 15–18 minutes, or until the crust is golden and an instant-read thermometer inserted into the thickest part of the chicken reads 165°F (74°C).
- Remove from oven and let the cutlets rest 2–3 minutes before slicing to keep juices intact.
Serve
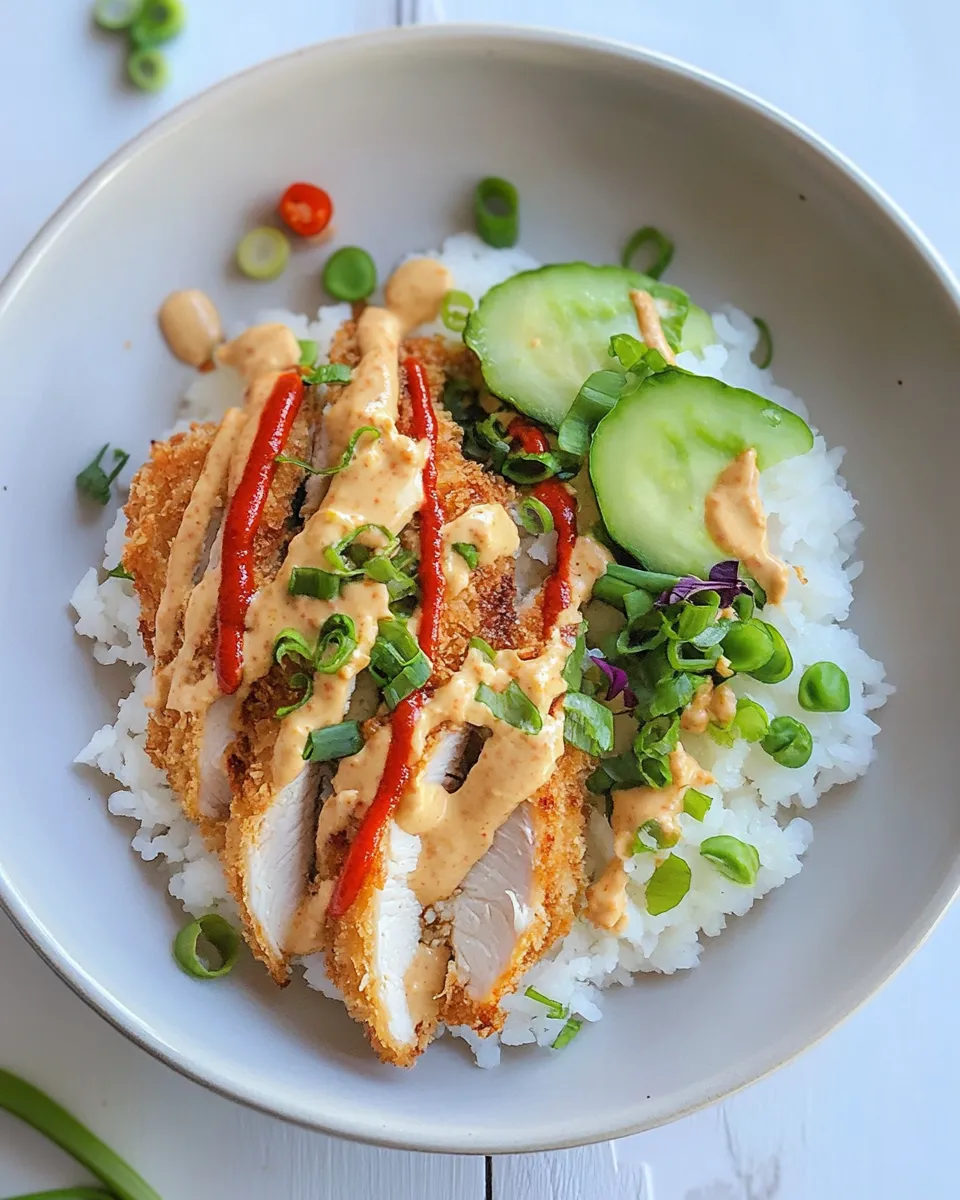
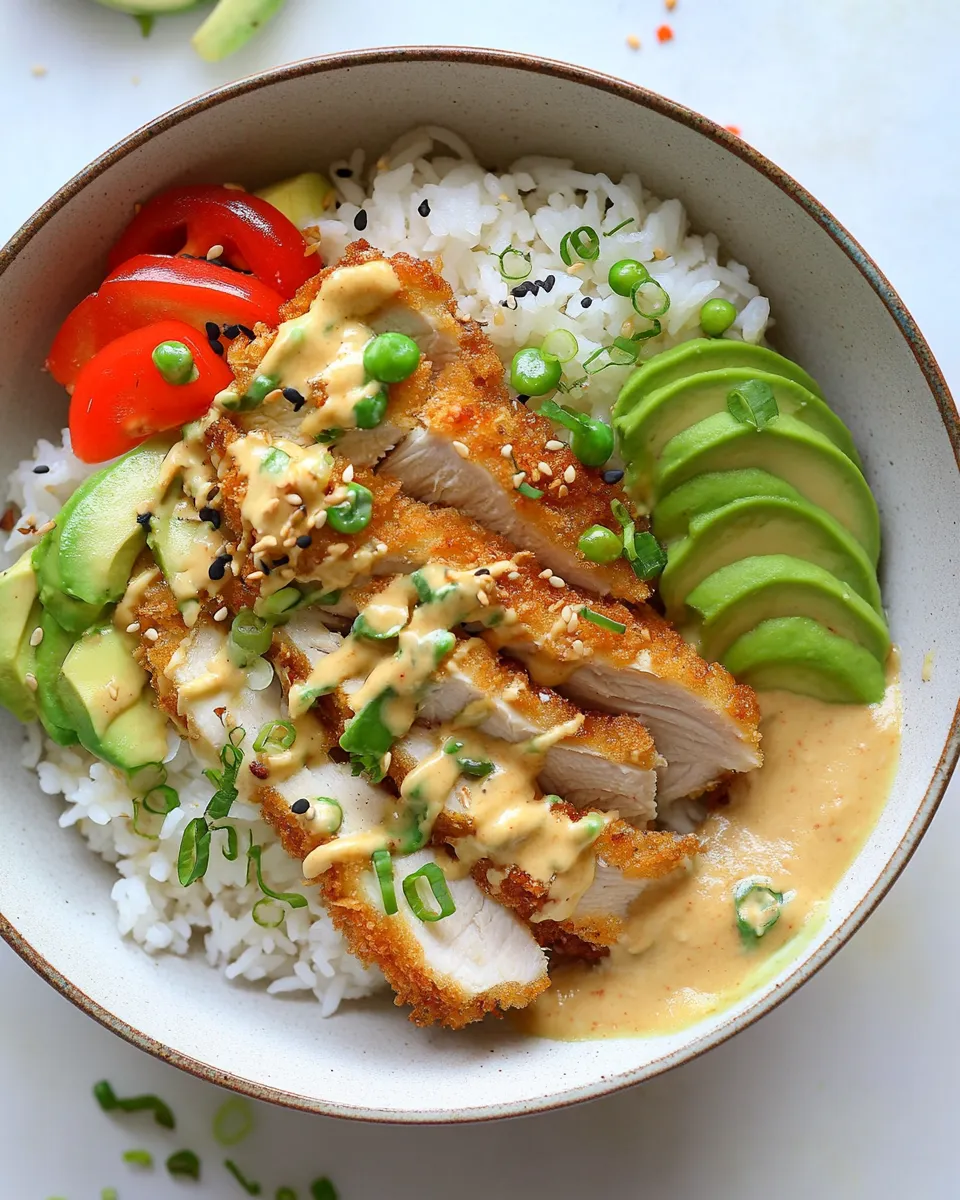
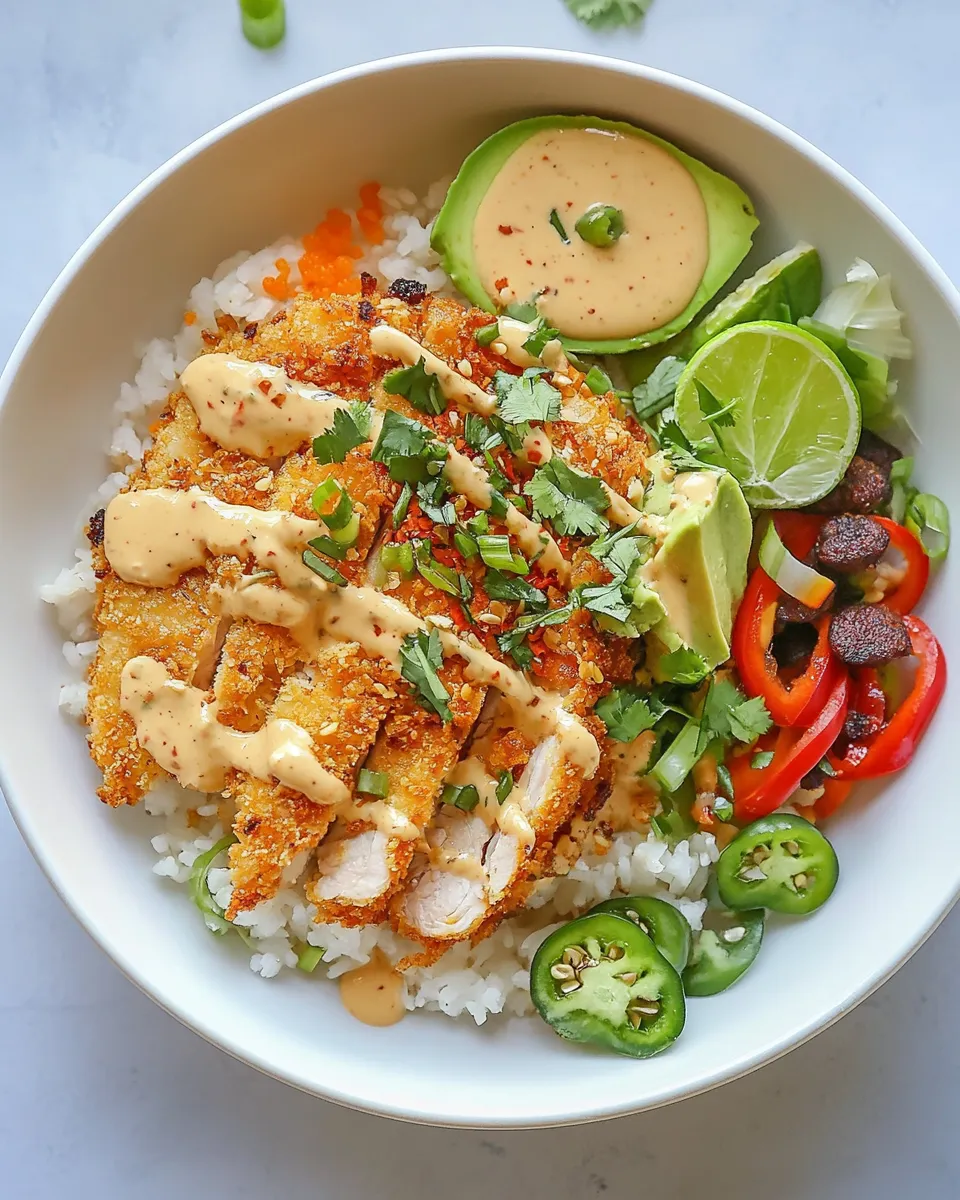
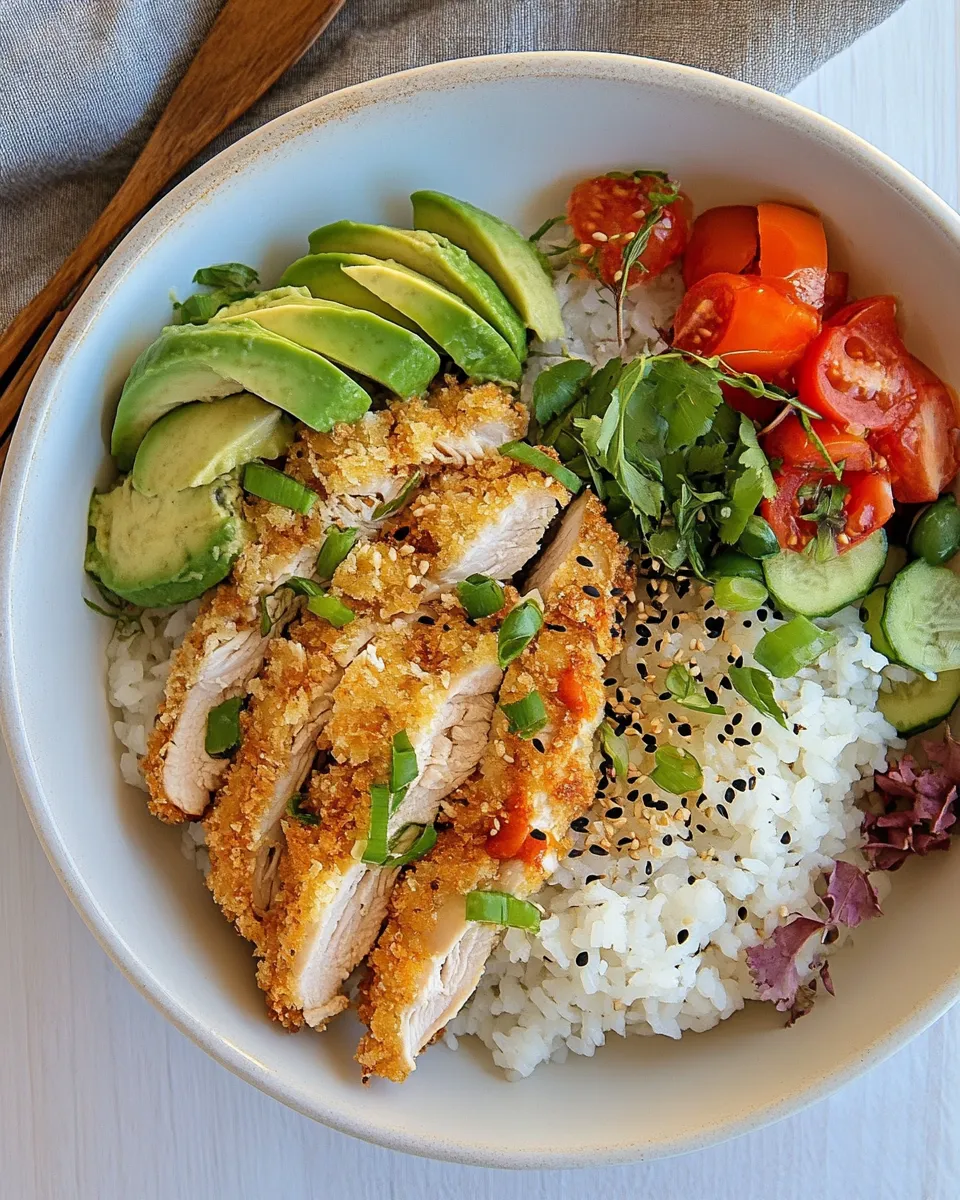
- Slice each cutlet into thick slices. Serve over steamed rice with the refrigerated sauce spooned over or served on the side. Add finely shredded cabbage and green onions if using.
Why This Recipe Works
Pounding the chicken thin ensures rapid, even cooking so the crust crisps without overcooking the interior. The three-step breading—flour, egg, panko—creates a secure coating that browns well in the oven when paired with a generous spray of oil.
The sauce balances sweet, tangy, and umami notes which complement the crunchy, savory cutlets. Baking at a high temperature (425°F) gives you a short cook time and efficient browning without deep-frying.
Swap Guide
- Chicken type: You can use thin pork cutlets for a pork katsu variation; adjust cooking time slightly if cutlets are thicker.
- Panko: Use fine or regular panko only—standard breadcrumbs won’t give the same light crunch.
- Sauce sweetener: If you don’t have molasses, substitute with an equal amount of dark brown sugar, though flavor will be slightly different.
- Gluten-free: Use a gluten-free 1:1 flour substitute and gluten-free panko crumbs.
- Oil option: If you prefer extra crispness, lightly brush the cutlets with neutral oil instead of using spray.
Tools of the Trade
- Rimmed baking sheet with oven-safe rack — elevates cutlets so hot air circulates and bottoms crisp.
- Meat mallet or heavy skillet — for pounding cutlets to even thickness.
- Three shallow dishes — makes the breading process efficient and tidy.
- Instant-read thermometer — ensures chicken reaches 165°F (74°C) without overcooking.
Slip-Ups to Skip
- Don’t skip pounding—uneven thickness leads to dry edges or undercooked centers.
- Avoid heavy-handed flour coating. Excess flour forms clumps and prevents the egg and panko from adhering smoothly.
- Don’t under-spray the panko; it will remain pale and not develop the desired crunch and color.
- Resist opening the oven early—letting heat escape can lengthen cook time and affect browning.
Seasonal Adaptations
Spring/Summer: Serve with a crisp cabbage slaw dressed lightly in rice vinegar and a squeeze of lemon for brightness.
Fall/Winter: Add a pinch of ground ginger or a dash of smoked paprika to the panko for warming spice, and serve with steamed rice mixed with toasted sesame seeds.
Behind-the-Scenes Notes
Small details matter here: the grated fresh ginger in the sauce is subtle but lifts the flavor; don’t skip it if you can grate a little. Using low-sodium soy sauce gives you more control over final saltiness. The resting period after baking lets internal juices redistribute—this keeps each slice moist.
Storage & Reheat Guide
- Refrigerate: Store leftovers in an airtight container for up to 3 days. Keep sauce separate if possible to maintain crispness.
- Freeze: Freeze breaded, unbaked cutlets on a tray until solid, then transfer to a bag for up to 2 months. Bake from frozen, adding 5–8 minutes to the cook time and checking internal temperature.
- Reheat: Re-crisp in a 375°F (190°C) oven for 8–10 minutes, or until heated through and crust is crisp. Avoid microwaving—the crust will go soggy.
Questions People Ask
- Can I shallow-fry instead? Yes—use 1/4-inch oil in a skillet over medium-high heat and fry 2–3 minutes per side until golden and cooked through.
- Why is my panko not browning? Either there wasn’t enough oil on the crumbs, or your oven temperature is low. Make sure you sprayed the cutlets and bake at 425°F (215°C).
- Can I make the sauce ahead? Absolutely—sauce can be made and refrigerated up to 3 days ahead to let flavors meld.
- How thin should I pound the chicken? Aim for ¼–½ inch; ¼ inch cooks fastest and gives the best texture balance between crisp crust and juicy center.
Ready, Set, Cook
Set out your three shallow dishes, preheat the oven to 425°F, and make the sauce first so it can chill and meld. Trim and pound the chicken, then bread each cutlet, place on the prepared rack, spray generously, and bake 15–18 minutes until 165°F. Slice, serve over steamed rice with shredded cabbage, and spoon the sauce over the top or on the side for dipping.
This baked Chicken Katsu gives you the satisfying crunch and the classic tonkatsu flavors with less oil and less fuss. Enjoy—this one’s perfect for weeknights and always a crowd-pleaser.
Baked Chicken Katsu
Ingredients
- 3 tablespoons ketchup
- 3 tablespoons Worcestershire sauce
- 1 tablespoon molasses
- 1 teaspoon low-sodium soy sauce
- 1/2 teaspoon garlic powder
- 1/8 teaspoon fresh ginger, peeled and grated
- 2 boneless skinless chicken breasts (8 oz each) or 4 chicken cutlets
- kosher salt to taste
- black pepper to taste
- 1 teaspoon garlic powder divided
- 1/2 cup all-purpose flour
- 2 large eggs beaten
- 1 tablespoon water
- 1 1/2 cups panko bread crumbs
- cooking spray for baking
- steamed rice for serving
- finely shredded cabbage for serving
- green onions for serving
Instructions
- Make the sauce: in a small bowl whisk together ketchup, Worcestershire sauce, molasses, soy sauce, 1/2 teaspoon garlic powder, and grated ginger; cover and refrigerate until serving.
- Preheat the oven to 425°F (215°C). Place an oven-safe wire rack on a rimmed baking sheet and lightly spray the rack with nonstick spray.
- Prepare the chicken: trim any fat from the chicken breasts and slice each breast crosswise to make 4 cutlets if not already cut; place a cutlet between plastic wrap and pound to 1/4–1/2 inch thickness.
- Season both sides of each cutlet with kosher salt and black pepper (about 1/2 teaspoon salt and 1/2 teaspoon pepper per cutlet total, as desired).
- Set up breading stations: in one shallow dish combine the all-purpose flour, 1/2 teaspoon salt, and the remaining 1 teaspoon garlic powder; in a second dish whisk the eggs with 1 tablespoon water and 1/2 teaspoon salt; place the panko in a third dish.
- Bread the chicken: dredge each cutlet in flour and shake off excess, dip into the egg mixture, then press into panko to coat evenly; transfer to the prepared rack and repeat with remaining cutlets.
- Spray the breaded cutlets generously with cooking spray so the panko glistens, then bake on the rack for 15–18 minutes until golden and an instant-read thermometer reads 165°F (74°C).
- Slice the cooked cutlets into thick pieces and serve over steamed rice with the sauce, shredded cabbage, and green onions alongside.
Equipment
- rimmed baking sheet
- oven-safe wire rack
- three shallow dishes or bowls
- meat mallet or rolling pin
- small bowl
- whisk or fork
- measuring spoons and cups
- instant-read thermometer
Notes
- Store leftover tonkatsu sauce in an airtight container in the refrigerator for up to 7 days.
- For best crispness, serve chicken katsu immediately after baking.
- Leftover chicken can be refrigerated for up to 3 days.
- Reheat leftover cutlets under a broiler or in a dry skillet to restore crispness.
- Do not microwave leftovers as the breading will become soggy.
- Use panko breadcrumbs for the lightest, crispiest coating.