Garlic Hummus
Garlic hummus is a small ritual in my kitchen: a quick whirl in the food processor, a taste, a tweak, and it’s ready to brighten snacks, lunches, or weeknight dinners. This version is straightforward, honest, and built from pantry staples. It’s garlicky without being bossy, creamy from tahini, and brightened by lemon.
I like recipes that are practical and repeatable. You can make this in about ten minutes with one appliance and a few simple ingredients. If you have canned chickpeas, garlic, tahini, and a lemon, you’re already halfway there.
Below you’ll find the exact ingredients, a clear step-by-step method, storage advice, and a few variations so you can make this hummus your own.
What You’ll Gather
This recipe uses a single food processor and common pantry items. Everything is listed below so you can set up and move through each step without stopping to hunt for tools or flavors.
Build Garlic Hummus Step by Step
Instructions
- Drain and rinse the chickpeas: Open 1 can chickpeas, pour them into a sieve, and rinse under cold water until the water runs clear. Shake off excess water.
- Prepare the garlic: Peel and crush 3 cloves garlic. Crushing helps release more flavor than chopping; if you prefer milder garlic, reduce to 2 cloves.
- Measure and add to the processor: Into the food processor bowl add the drained chickpeas, crushed garlic, 2 tablespoons tahini, 2 teaspoons lemon juice, 1/4 teaspoon oregano, 2 teaspoons olive oil, 1/2 teaspoon salt, and 1/4 teaspoon black pepper.
- Process to a paste: Secure the lid and pulse a few times to break up the chickpeas, then run the processor until the mixture becomes a smooth paste. Stop and scrape down the sides as needed to ensure even blending. Depending on your processor and desired texture, this usually takes 1–3 minutes.
- Adjust texture if needed: If the hummus is too thick for your liking, you can add a teaspoon of water or a little more olive oil and process again briefly until you reach the desired creaminess. (This is optional—amounts above are the source of truth.)
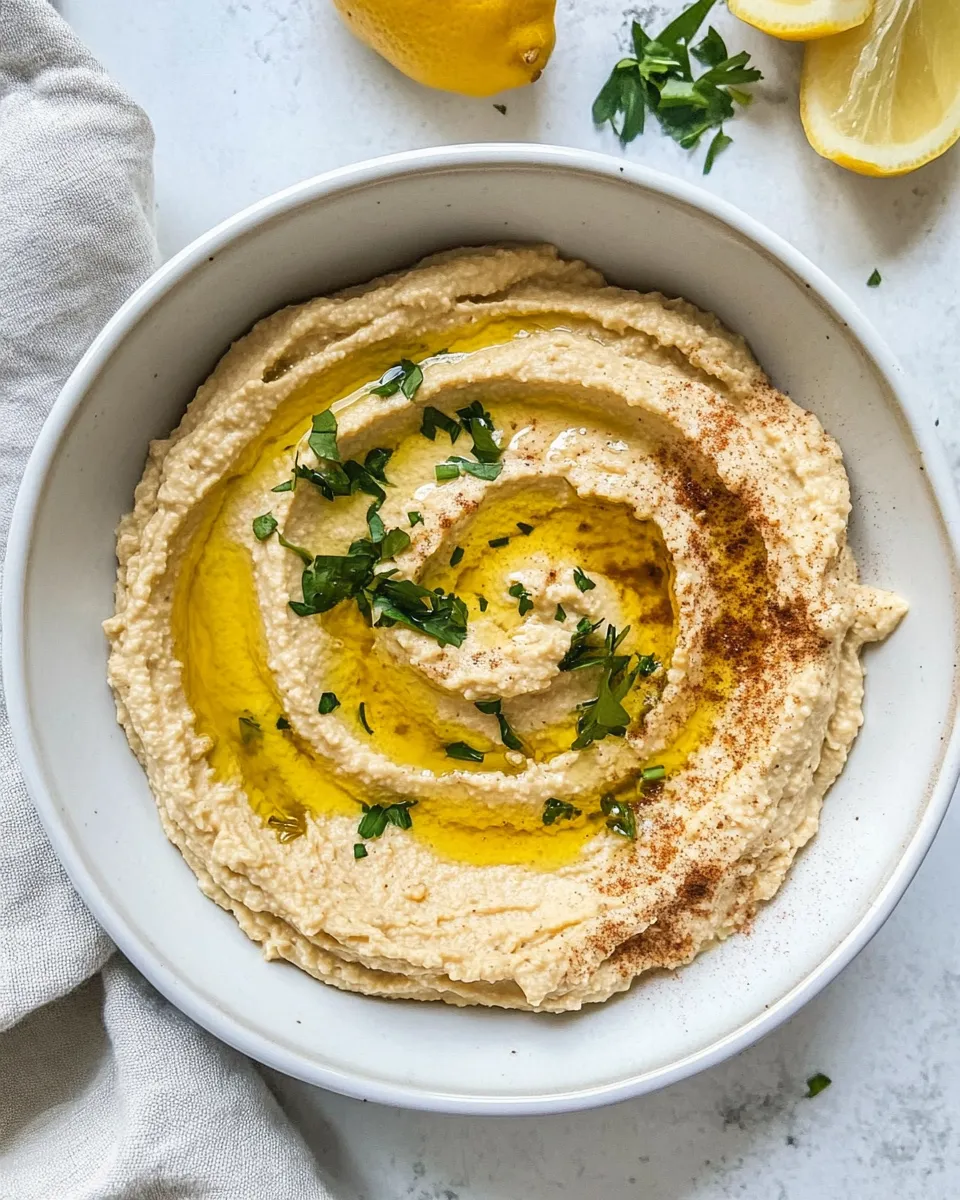
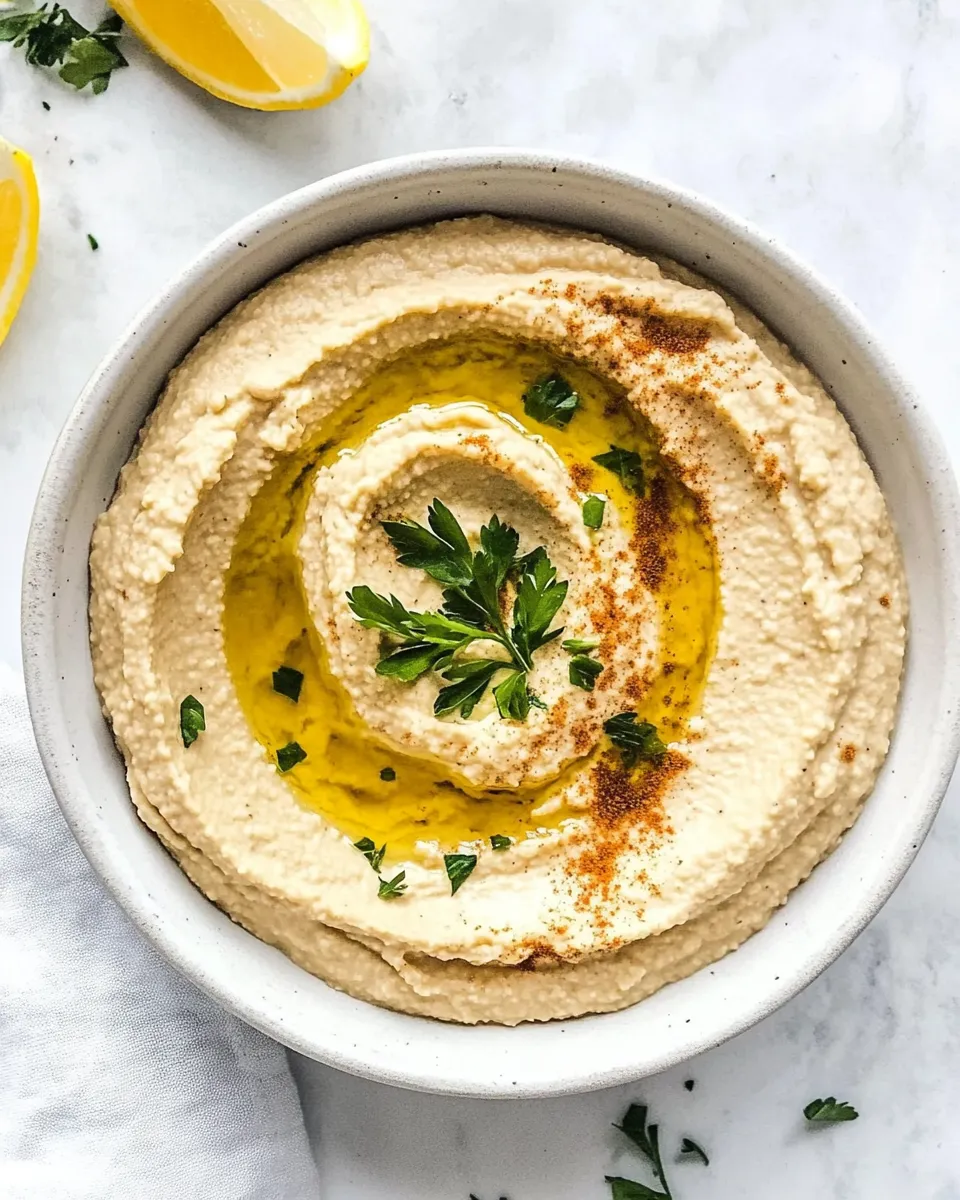
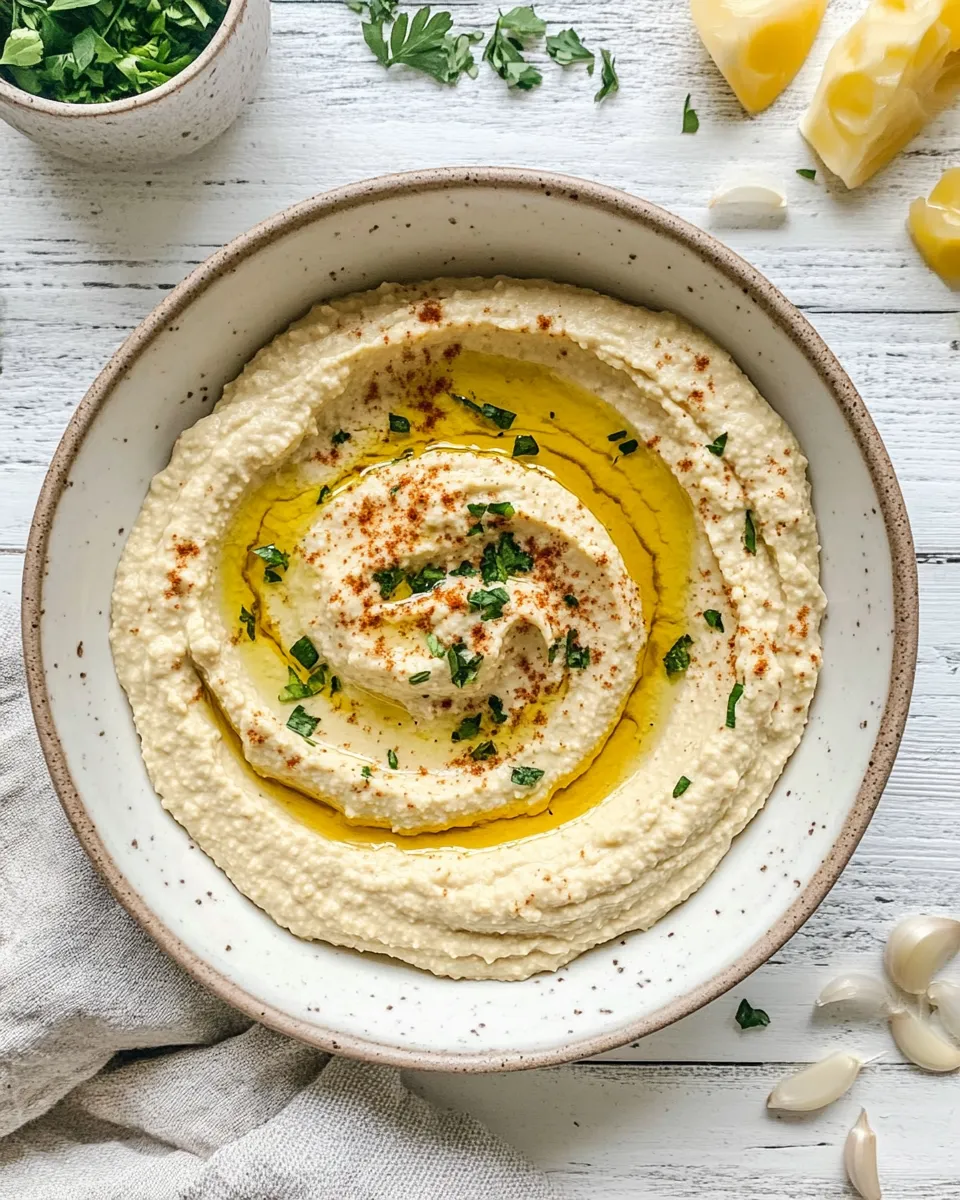
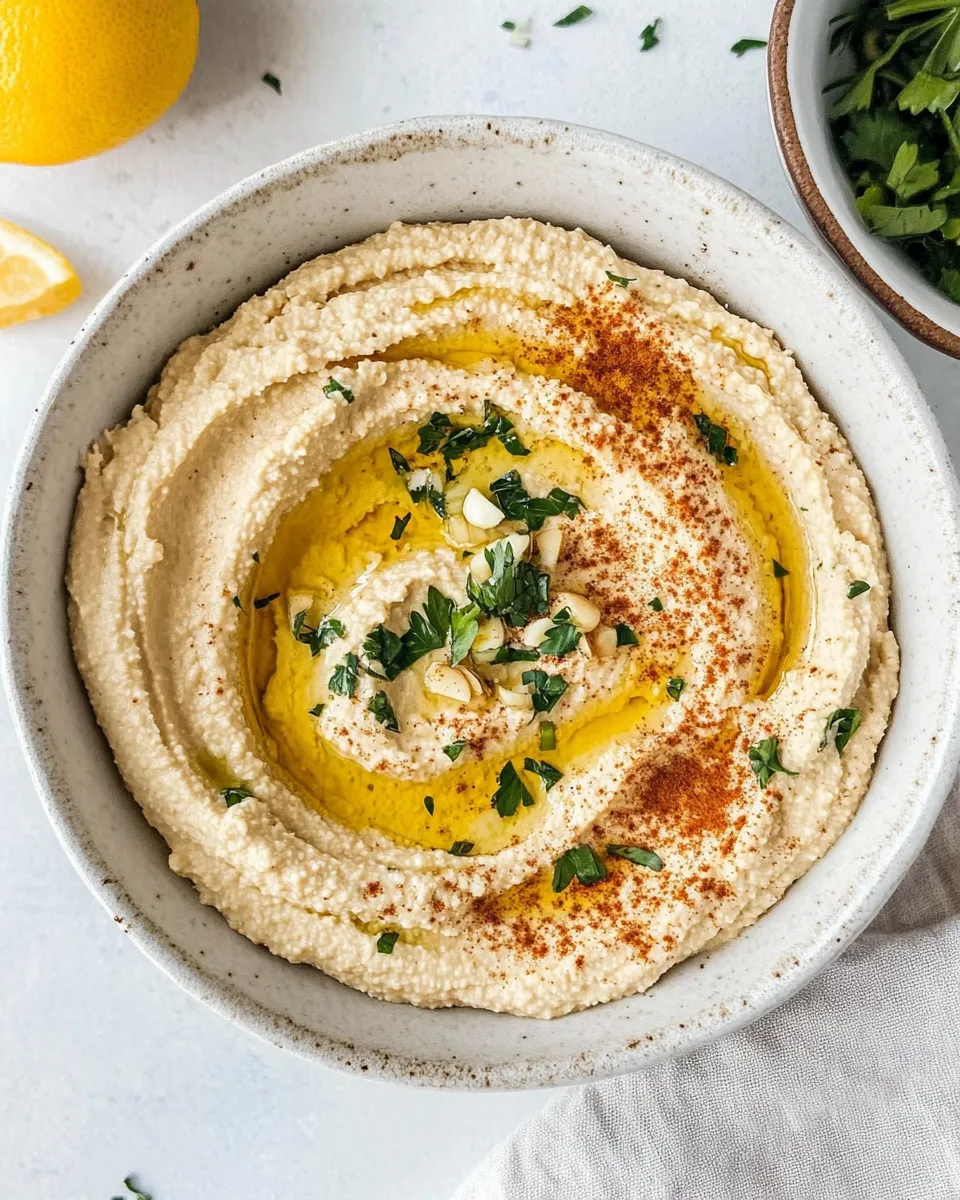
- Transfer and finish: Spoon the hummus into a serving bowl. Drizzle a little olive oil over the top for shine and richness.
- Garnish and serve: Top with finely chopped onions, fresh parsley, or fresh cilantro as desired. Serve with pita, veggies, or use as a spread.
Why You’ll Love This Recipe
This hummus is fast, flavorful, and adaptable. The garlic is front-and-center, but balanced by lemon and tahini so it never feels harsh. It makes a reliable snack, sandwich spread, or appetizer for guests.
It’s also forgiving: you can tweak the garlic, salt, or oil to suit your taste and get consistent results even if you’re new to making hummus at home.
No-Store Runs Needed
Most of the ingredients are pantry staples: canned chickpeas, dried oregano, olive oil, and tahini. The only fresh items are lemon, garlic, and optional parsley or cilantro—things you may already have or can substitute with dried herbs in a pinch.
Equipment at a Glance
- Food processor — essential for a smooth, even texture.
- Sieve or colander — to drain and rinse the canned chickpeas.
- Spoon or spatula — to scrape down the bowl and transfer the hummus.
- Small bowls or a cutting board — for prepping garlic and herbs.
Avoid These Mistakes
- Overworking dry chickpeas — start with pulses to break them up, then blend continuously; scraping down the sides prevents uneven texture.
- Skipping the rinse — canned chickpea liquid can be slightly metallic or salty; rinsing improves the final flavor.
- Adding too much liquid immediately — add water or extra oil a teaspoon at a time to reach texture you like.
- Under-seasoning — hummus benefits from a final taste test. Adjust lemon, salt, or pepper after blending.
Make It Fit Your Plan
Low-effort weeknight dip: make the recipe as written and serve with raw veggies.
Meal prep: double the batch and portion into airtight containers for 4–5 days of lunches or snacks.
Entertaining: transfer to a shallow bowl, make a decorative swirl, drizzle extra olive oil, and scatter finely chopped parsley, cilantro, or onions on top.
Author’s Commentary
I reach for this recipe when I want something satisfying that doesn’t demand attention. The garlic here is purposeful—crushed to unlock aroma and flavor—yet the tahini and lemon keep each bite silk-smooth and lively. It’s a reliable base for creativity: add roasted red pepper, cumin, or a spoonful of yogurt for different moods.
How to Store & Reheat
Refrigerator: Store the hummus in an airtight container for up to 4 days. If a thin watery layer forms on top, stir it back in; that’s normal.
Freezer: I don’t recommend freezing this batch—tahini and garlic can change texture and flavor after freezing and thawing.
Serving from cold: Remove from the fridge 20–30 minutes before serving to let it soften slightly. Stir and add a small drizzle of olive oil if it looks dry.
Troubleshooting Q&A
- Q: My hummus is grainy. A: Pulse first, then blend longer. Scrape the bowl and continue processing until smooth. A drop or two of water or extra oil can help achieve a creamier texture.
- Q: It tastes flat. A: Add a little more lemon juice and a pinch of salt, then blend briefly and taste again.
- Q: Too garlicky. A: Next time reduce to 2 cloves or let the garlic sit peeled in milk for a few minutes before using to soften the bite. For the current batch, serve with extra tahini or a yogurt-based sauce alongside to mellow the intensity.
- Q: Oil separated on top. A: Stir it back in—this is normal. Use the oil to add gloss when plating.
Let’s Eat
Spoon the hummus into a shallow bowl, make a small well in the center, and shower it with a light drizzle of olive oil. Sprinkle finely chopped onions and either parsley or cilantro for freshness and a little textural contrast. Serve with warm pita, crisp cucumber slices, carrot sticks, or as a spread on sandwiches.
Simple, quick, and made from pantry staples—this garlic hummus will be one of those recipes you come back to when you want something wholesome without fuss.
Ingredients
- 1 can chickpeas, drained and rinsed — the creamy base and main source of protein; rinse to remove canned liquid.
- 3 cloves garlic, crushed — provides the garlicky punch; crush for more aroma and flavor release.
- 2 tablespoons tahini — adds creaminess and a nutty depth; essential for traditional hummus texture.
- 2 teaspoons lemon juice — brightens and balances the richness.
- 1/4 teaspoon oregano — subtle herbal note; distribute evenly in the processor.
- 2 teaspoons olive oil — blends into the hummus for silkiness and adds flavor.
- 1/2 teaspoon salt — brings flavors forward; adjust to taste.
- 1/4 teaspoon black pepper — a gentle background spice.
- olive oil — for drizzling on top when serving to add shine and richness.
- finely chopped onions — optional garnish for crispness and bite.
- fresh parsley — optional garnish for color and freshness.
- fresh cilantro — optional garnish if you prefer a brighter, citrusy-herb finish.
Garlic Hummus
Ingredients
- 1 can chickpeas drained and rinsed
- 3 cloves garlic crushed
- 2 tablespoons tahini
- 2 teaspoons lemon juice
- 1/4 teaspoon oregano
- 2 teaspoons olive oil plus extra for drizzling
- 1/2 teaspoon salt
- 1/4 teaspoon black pepper
- finely chopped onions for topping
- fresh parsley for topping
- fresh cilantro for topping
Instructions
- Drain and rinse the canned chickpeas well, then add them to a food processor.
- Add crushed garlic, tahini, lemon juice, oregano, 2 teaspoons olive oil, salt, and black pepper to the processor.
- Process until smooth, stopping to scrape down the sides with a spatula as needed; add a little water or more olive oil if the hummus is too thick.
- Transfer the hummus to a serving bowl and drizzle with additional olive oil.
- Top with finely chopped onions, parsley, and/or cilantro before serving.
Equipment
- Food Processor
- Measuring cups and spoons
- Spatula
- Serving Bowl
Notes
- Use canned chickpeas for a quick recipe.
- Adjust garlic and lemon to taste.
- Add water or oil to reach desired consistency.
- Garnish with chopped onions and herbs just before serving.