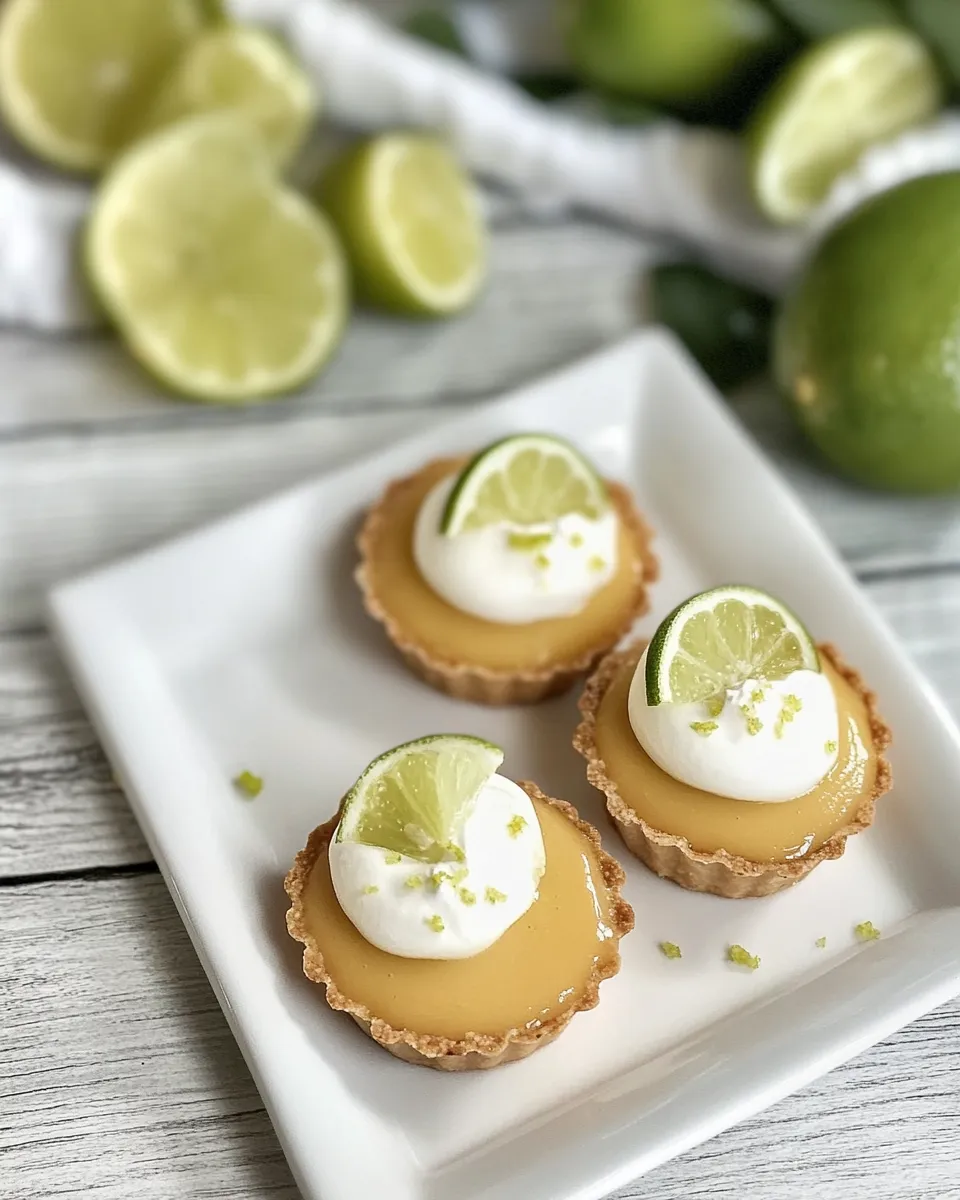
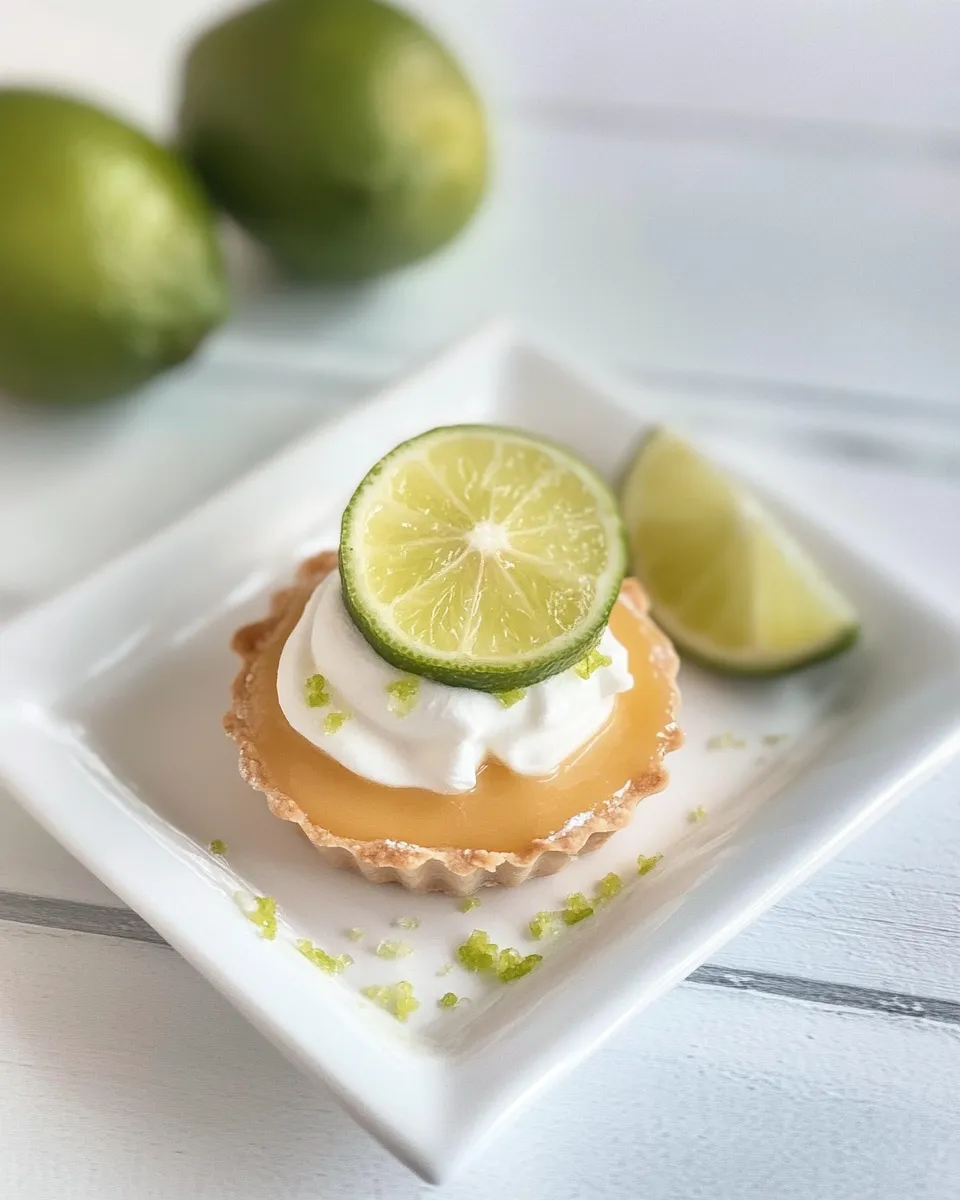
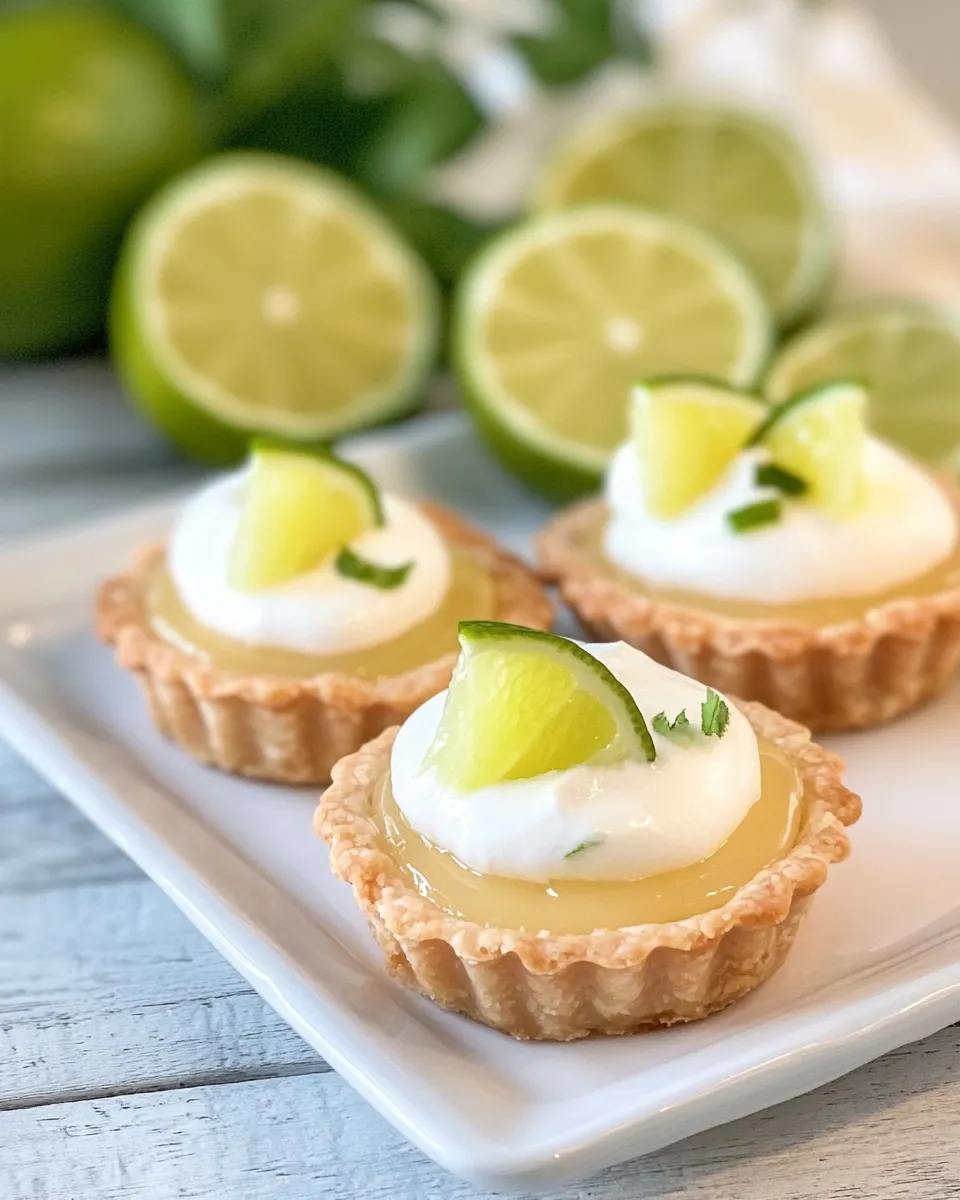
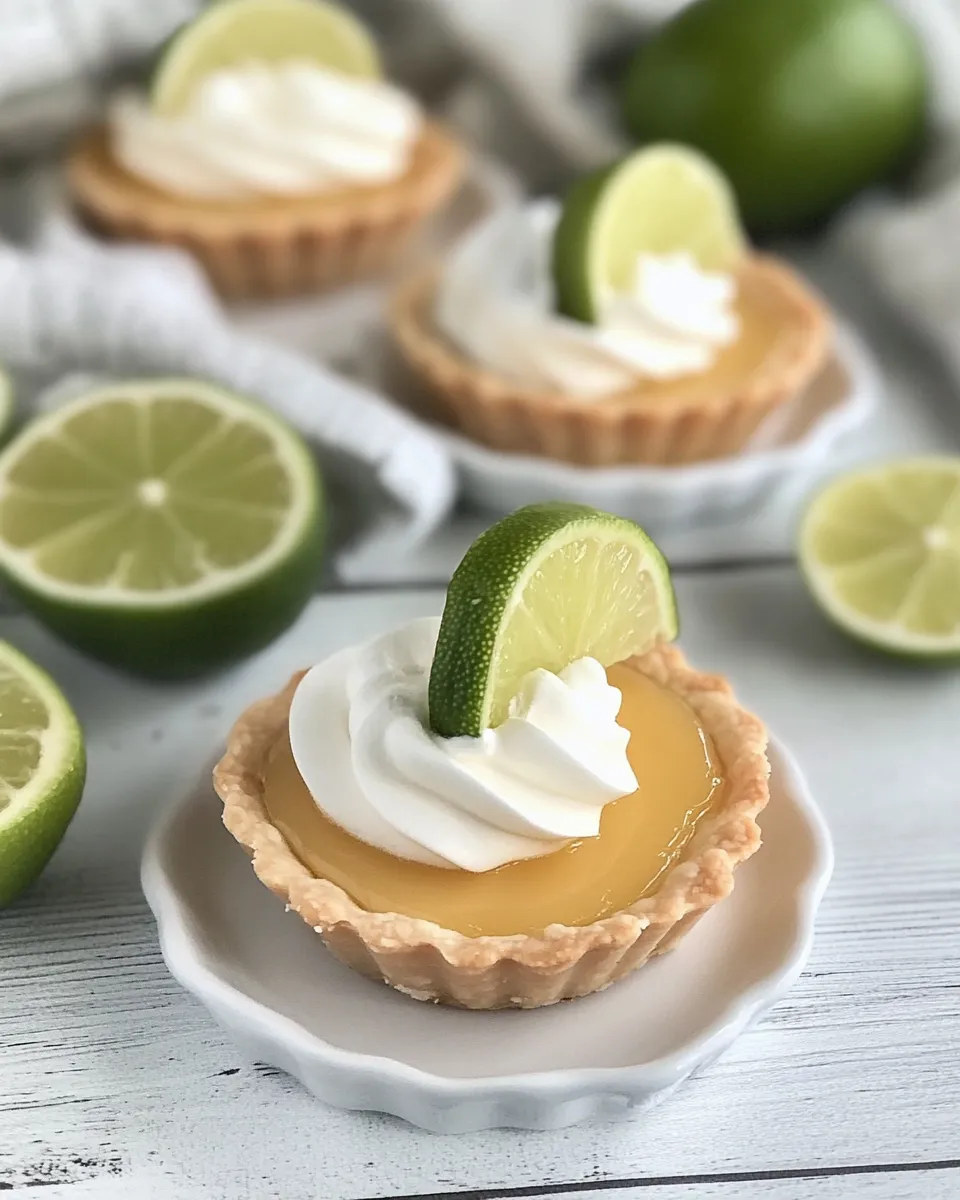
Key Lime Tartlets
I make these Key Lime Tartlets whenever I want a bright, no-fuss dessert that feels elevated but is actually very manageable. The tang from the lime, the gentle sweetness of the crust, and a cloud of whipped cream on top hit the spot every time. They’re small, elegant, and perfect for dinner parties or an easy weeknight treat.
This recipe focuses on the buttery graham crust and a simple baking-and-chill method that guarantees clean slices and a silky filling. I’ll walk you through the shopping list, the step-by-step bake, common issues, swaps for what you might already have, and how to store them so they stay fresh.
Your Shopping Guide
Shopping for Key Lime Tartlets is straightforward: you need pantry-stable ingredients and a couple of fresh items if you plan to garnish. Buy good-quality graham crackers for the best flavor in the crust and a real Key lime or two if you want the authentic aroma for garnish. Butter should be unsalted unless you prefer a touch of saltiness in the crust.
Small tart pans or a square pan with removable sections make assembly simple. If you don’t have those, a few mini tart pans or even a muffin tin with confident pressing work fine. Pick up heavy cream if you plan to make sweetened whipped cream for serving.
Key Lime Tartlets: Step-by-Step Guide
Ingredients
- 8 tablespoons (1 stick) butter, melted — binds the graham crumbs and adds richness to the crust.
- 1 ½ cups graham cracker crumbs — provides the base texture and honeyed flavor.
- 3 tablespoons sugar — sweetens the crust and helps it brown slightly when baked.
Instructions
Follow these steps in order. The ingredient amounts above are the source of truth—do not change them.
- Preheat the oven to 325ºF. Position a rack in the center so the tart shells bake evenly.
- In a medium bowl, combine 1 ½ cups graham cracker crumbs and 3 tablespoons sugar. Stir to distribute the sugar through the crumbs.
- Pour 8 tablespoons (1 stick) melted butter over the crumb mixture. Mix thoroughly until the crumbs are evenly moistened and hold together when pressed.
- Firmly press the crumb mixture into the bottoms of the openings in a Lift and Serve Tart Squares Pan, creating an even layer. If you have extra crumbs, press them into two 4-inch tart pans—use the leftover mixture first to make full use of the batch.
- Chill the prepared crusts in the refrigerator for about 10 minutes. This helps them set so they keep their shape during baking.
- Bake the chilled crusts at 325ºF for 10–15 minutes, or until they are just golden. Watch closely toward the end so they don’t over-brown. Remove from oven and cool on a rack.
- While crusts cool, prepare your filling (follow your usual Key lime filling recipe or a trusted source). Once ready, pour the filling into the cooled tart shell openings, filling each to just below the rim.
- Increase the oven temperature to 350ºF. Return the filled tart shells to the oven and bake: about 12–15 minutes for individual tartlets, or 15–20 minutes if you’ve filled a larger pie-style pan. The filling should be just barely set—slightly jiggly in the very center but not liquid.
- Remove the tarts from the oven and cool to room temperature on a rack. After they reach room temperature, chill them in the refrigerator until fully cold; this firms the filling and improves slicing/serving.
- Serve chilled with sweetened whipped cream and garnish with thin Key lime slices if desired.
Top Reasons to Make Key Lime Tartlets
- Bright, refreshing flavor that finishes a meal cleanly.
- Small portions—perfect for parties or portion control.
- Quick to bake; crusts can be prepared ahead and filled the day of.
- Minimal ingredients deliver big flavor without complicated technique.
Easy Ingredient Swaps
- Graham cracker crumbs — substitute with digestive biscuit crumbs or vanilla wafer crumbs for similar texture and sweetness.
- Butter — use salted butter if you prefer a slightly savory contrast; reduce any added salt elsewhere.
- Sugar — swap with light brown sugar for a touch of molasses flavor (texture will remain similar).
Toolbox for This Recipe
- Lift and Serve Tart Squares Pan (recommended) — makes removal clean and simple.
- Two 4-inch tart pans — optional, for using leftover crumbs.
- Mixing bowls and a spoon or spatula — to combine crumbs, sugar, and butter.
- Measuring cups and spoons — for accurate ingredient amounts.
- Baking rack — to cool the tartlets evenly.
- Oven thermometer (optional) — to confirm accurate oven temperature.
Common Errors (and Fixes)
- Crust falls apart — Fix: press crumbs more firmly into the pan and chill before baking so the butter re-solidifies and binds the crumbs.
- Overbrowned crust — Fix: reduce bake time, move the rack up if the bottoms are browning too fast, or tent with foil in the final minutes.
- Filling too jiggly after recommended bake time — Fix: bake a few minutes longer but watch closely; the filling should finish setting during the cooling and chilling stage.
- Soggy bottom — Fix: ensure crust is fully baked and cooled before adding filling; you can also bake the crust slightly longer at 325ºF if needed.
Adaptations for Special Diets
- Vegetarian — this recipe is vegetarian-friendly as written.
- Dairy-free — swap the butter for a dairy-free stick margarine; expect a subtle change in flavor and texture.
- Gluten-free — use gluten-free graham-style crumbs or crushed gluten-free cookies in place of graham crackers.
- Lower sugar crust — reduce the crust sugar slightly if serving with a sweeter filling; texture will remain close to original.
Method to the Madness
The technique here is all about control: evenly moisten the crumbs with butter, press firmly, chill, and bake just enough to set and flavor the crust. Cooling the crust before filling prevents steam from making the base soggy. Then, bake the filled tartlets until the center is nearly set; residual heat and chilling finish the job. These small steps make a big difference in texture and presentation.
Storing Tips & Timelines
- Refrigerate finished tartlets in an airtight container for up to 3 days. The filling stays best and the crust remains reasonably crisp for that window.
- For longer storage, freeze unfilled baked crusts in a sealed container for up to 1 month. Thaw in the refrigerator before filling and baking as directed.
- Assembled tartlets freeze well for up to 1 month; thaw overnight in the refrigerator and refresh with whipped cream just before serving.
Key Lime Tartlets FAQs
- Q: Can I make the crust ahead? — Yes. Make the crusts, bake, cool, and store in an airtight container for up to 2 days before filling.
- Q: Why bake the crust before filling? — Prebaking stabilizes the crust, preventing it from becoming soggy when the filling is added.
- Q: How do I know when the filling is done? — The filling should be barely set; the center will have a slight wobble that firms during cooling and chilling.
- Q: Can I use regular limes? — Yes; Key limes give a distinctive aroma, but regular Persian limes work fine for flavor and acidity.
Wrap-Up
These Key Lime Tartlets are a dependable go-to when you want a dessert that’s bright, pretty, and practical. The simple graham crust is the backbone: with just three ingredients it bakes up tender and buttery. Follow the steps for chilling, prebaking, and baking filled tartlets, and you’ll get consistent results every time.
Make them ahead for effortless entertaining or whip them up at the last minute if you have the crusts ready. Keep a little extra whipped cream on hand for serving—it’s the finishing touch that balances the lime’s tang beautifully.

Key Lime Tartlets
Ingredients
- 8 tablespoons butter melted (1 stick)
- 1 1/2 cups graham cracker crumbs
- 3 tablespoons sugar
Instructions
- Preheat the oven to 325°F (165°C).
- In a bowl, combine the melted butter, graham cracker crumbs, and sugar until the mixture is evenly moistened.
- Press the crumb mixture firmly into the bottoms of the cavities of a lift-and-serve tart squares pan; press any remaining crumbs into two 4-inch tart pans if using.
- Chill the crusts in the refrigerator for about 10 minutes, then bake at 325°F for 10–15 minutes, until just golden. Remove and let cool.
- Prepare the Key lime filling (use your preferred recipe) and pour it into the cooled tart crusts.
- Raise the oven temperature to 350°F (175°C). Bake the tartlets for about 12–15 minutes, until just barely set.
- Cool the tartlets to room temperature, then chill before serving.
- Serve with sweetened whipped cream and garnish with Key lime slices if desired.
Equipment
- Lift and Serve tart squares pan (or two 4-inch tart pans)
- Mixing bowls
- Measuring cups and spoons
- spatula or spoon
- Oven
- Refrigerator
Notes
- Press crumbs firmly to form a compact crust.
- Bake crusts until just golden to avoid overbrowning.
- Allow tartlets to chill fully for best texture when serving.
- Use fresh Key lime juice for the brightest flavor.