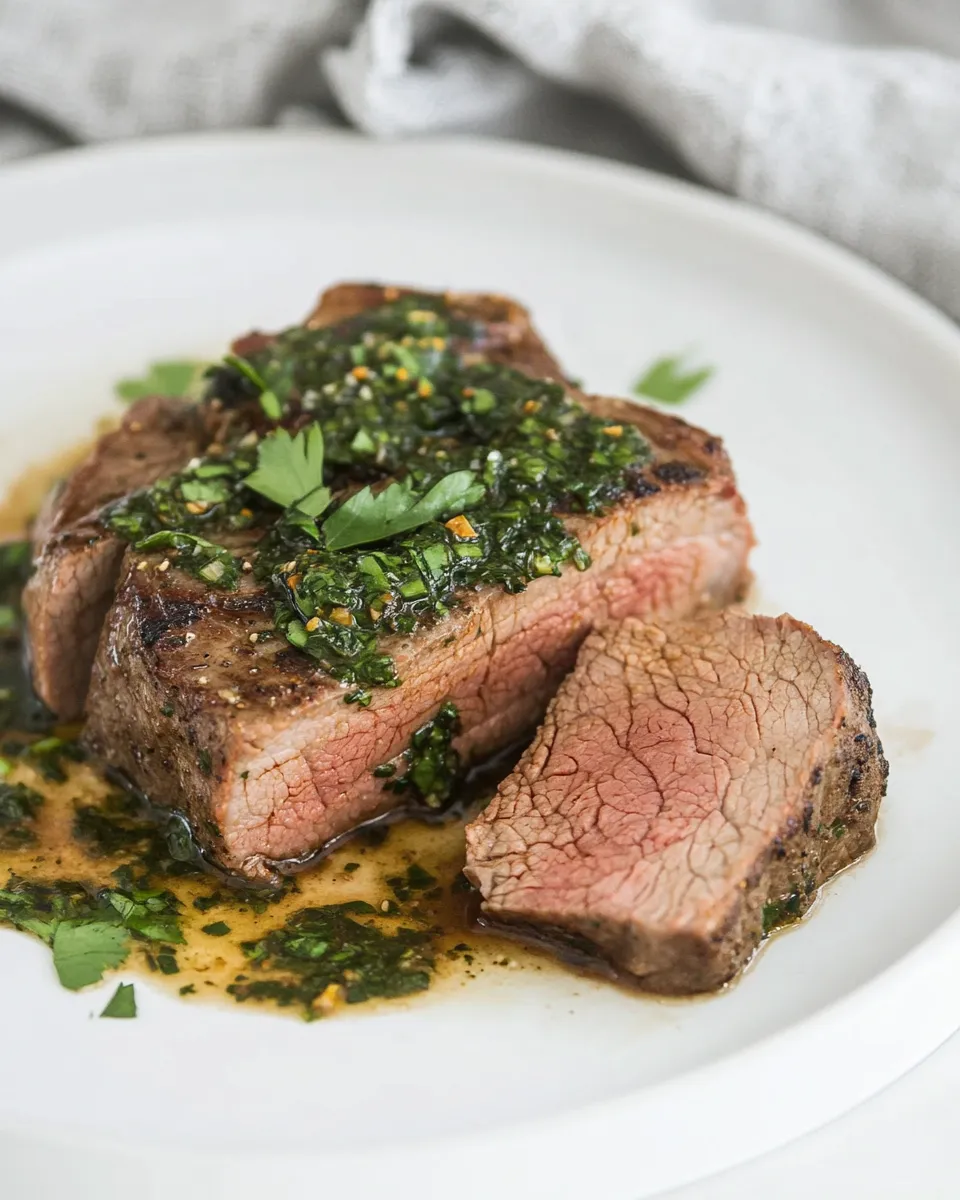
Sous Vide Tri-Tip
I love tri-tip for its beefy flavor, forgiving texture, and how reliably it turns into dinner theater when treated right. This sous vide method removes the guesswork: consistent medium-rare through and through, a thin, perfect crust, and slices that stay juicy. It’s one of my favorite weeknight-to-weekend transitions—simple prep, long hands-off time, and a quick, satisfying finish.
You don’t need a long ingredient list or special skills. The seasoning is straightforward and built to accent, not mask, the cut. The key is temperature control and a hot sear at the end. Follow the steps below and you’ll get tender, sliceable tri-tip that’s perfect for salads, sandwiches, or a classic plated dinner with chimichurri.
I’ll walk you through what each ingredient does, the exact sous vide routine, searing tips, and a few swaps and troubleshooting notes so this dish works the first time and every time.
Ingredient Notes
- 2 pounds tri-tip roast — The star. Trim any excessive fat if you prefer, but a little fat adds flavor and keeps the roast juicy during long cooking.
- 2 teaspoons salt — Essential for seasoning and helping the meat retain moisture. Use kosher or sea salt for best control.
- 1 teaspoon black pepper — Adds bright bite; freshly ground is preferable for better aroma.
- 1/2 teaspoon smoked paprika — Brings a gentle smokiness and color to the crust without overpowering the beef.
- 3/4 teaspoon garlic powder — Provides savory depth; powdered garlic distributes evenly in the seasoning mix.
- 3/4 teaspoon onion powder — Adds rounded, sweet-savory background notes to the flavor profile.
- 1/2 teaspoon dried thyme — Earthy, slightly floral; pairs naturally with beef.
- 3/4 teaspoon dried oregano — A touch of herbal warmth that complements the thyme and paprika.
- 2 teaspoons neutral oil — For high-heat searing. Use avocado, grapeseed, or refined canola to avoid burned flavors.
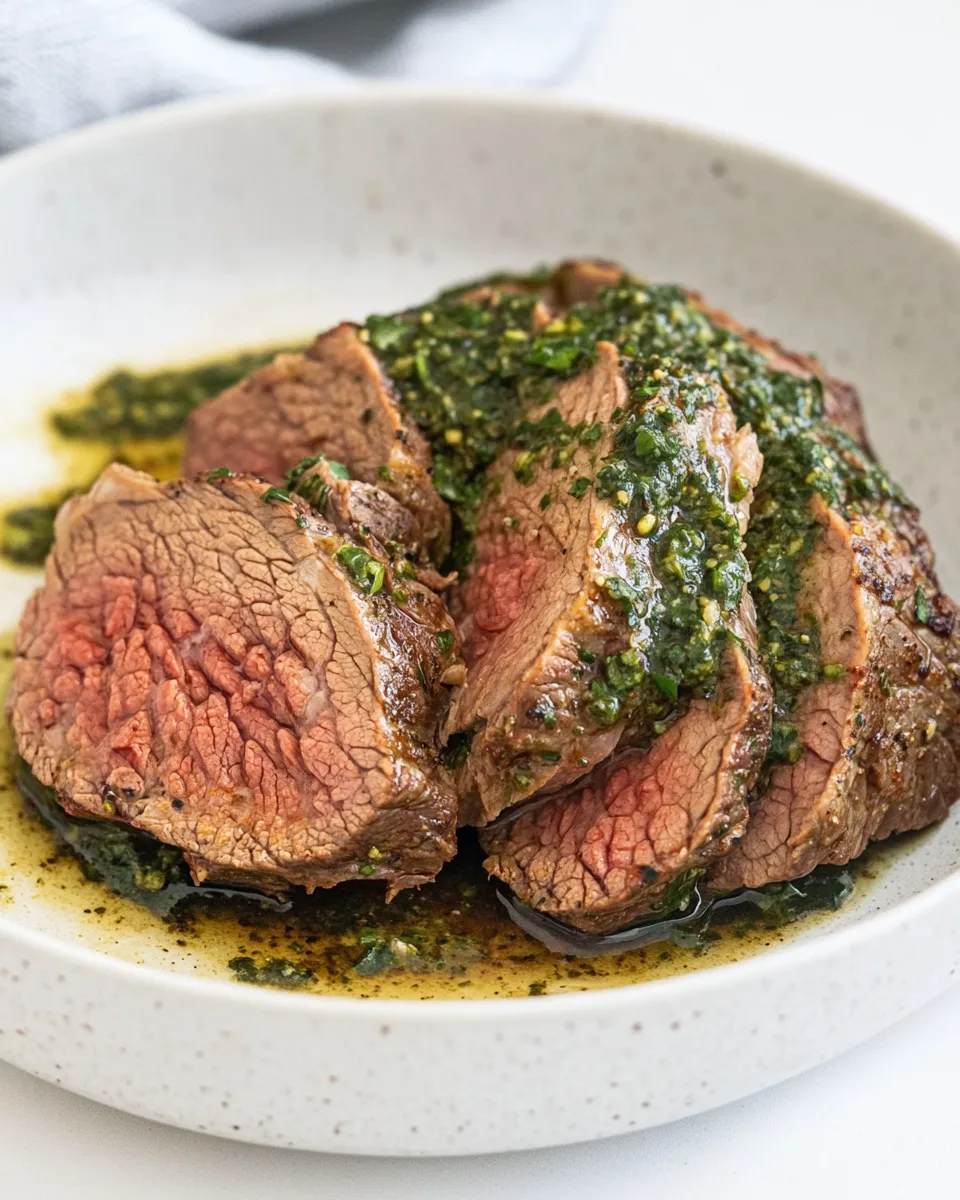
- Chimichurri sauce — For serving, optional — bright herb sauce that cuts through richness. Serve on the side to taste.
Sous Vide Tri-Tip: Step-by-Step Guide
- Remove the tri-tip from the refrigerator and let it sit at room temperature for 30 minutes. This evens out the chill so the roast cooks more uniformly in the bath.
- While the meat comes to temperature, set your sous vide water bath to 131°F (55°C) for a classic medium-rare finish. Allow the circulator to reach target temperature before sealing the meat.
- Combine the seasonings in a small bowl: 2 teaspoons salt, 1 teaspoon black pepper, 1/2 teaspoon smoked paprika, 3/4 teaspoon garlic powder, 3/4 teaspoon onion powder, 1/2 teaspoon dried thyme, and 3/4 teaspoon dried oregano. Mix to distribute evenly.
- Season all sides of the tri-tip generously with the seasoning mix, pressing gently so the rub adheres to the surface.
- Place the seasoned tri-tip into a resealable freezer bag. Use the water displacement method to remove as much air as possible: seal the bag most of the way, submerge it slowly into the water until the air is pushed out, then finish sealing the bag. Ensure there are no large air pockets and that the bag is tightly closed.
- Submerge the sealed bag fully in the preheated water bath, making sure the meat is completely immersed. Clip the bag to the side or weigh it down if needed so it stays submerged during the cook.
- Cook for 6 hours. This long, gentle cook breaks down connective tissue and yields a tender, evenly cooked roast. Six hours is the target time—do not shorten this if you want the intended texture.
- When the 6 hours are up, remove the bag from the water bath. Carefully take the tri-tip out of the bag and discard any accumulated juices or place them aside for sauces if desired.
- Pat the tri-tip thoroughly dry with paper towels. Drying is crucial for getting a good crust during searing.
- Heat a heavy skillet (cast iron preferred) over high heat until very hot. Add 2 teaspoons neutral oil and let it shimmer but not smoke aggressively.
- Sear the tri-tip for 1 to 2 minutes per side, working quickly to develop a brown crust without overcooking the interior. Rotate sides as needed to get even color. If your tri-tip has thin edges, briefly sear those too for an even finish.
- Transfer the seared tri-tip to a cutting board and let it rest for 5 minutes. Resting lets juices redistribute so slices remain moist.
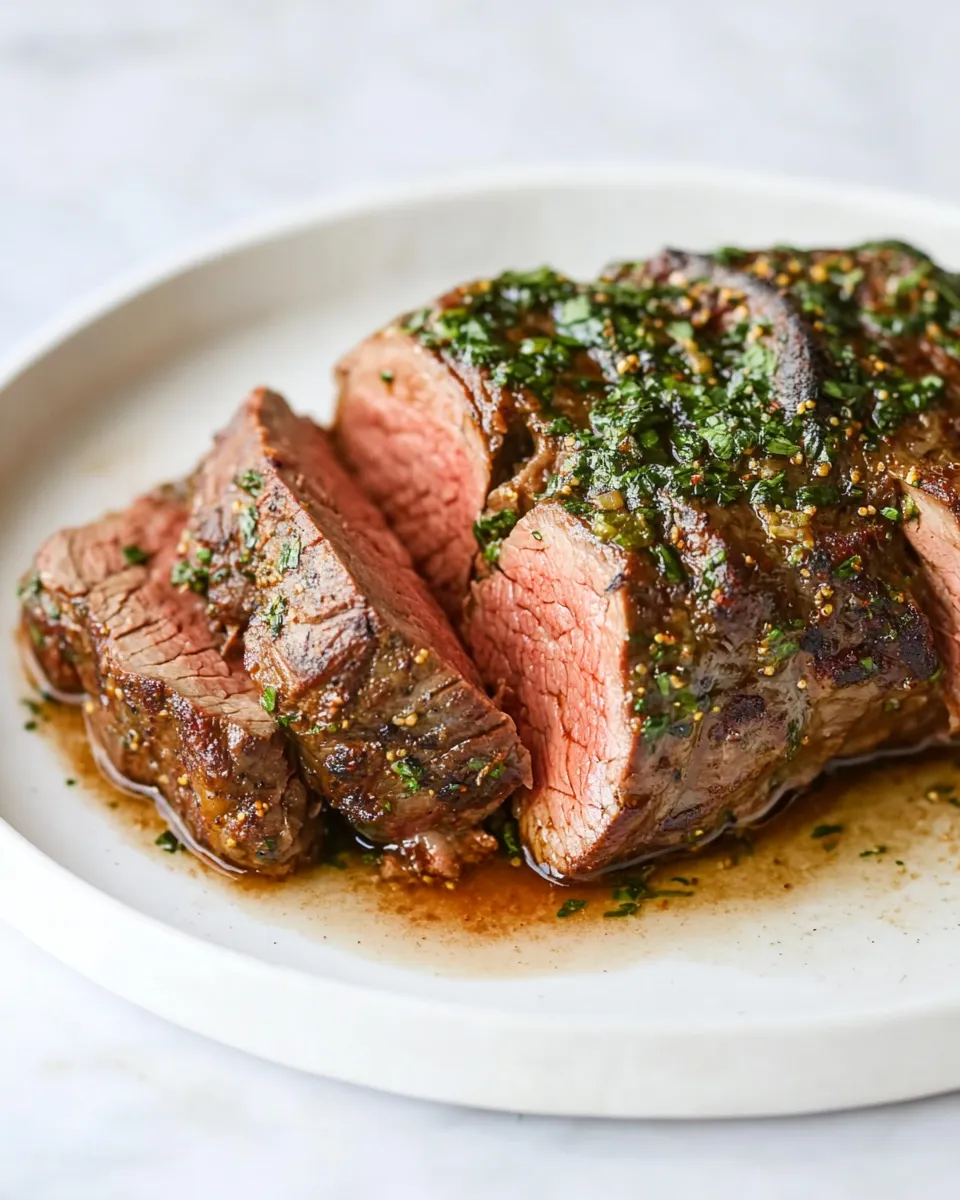
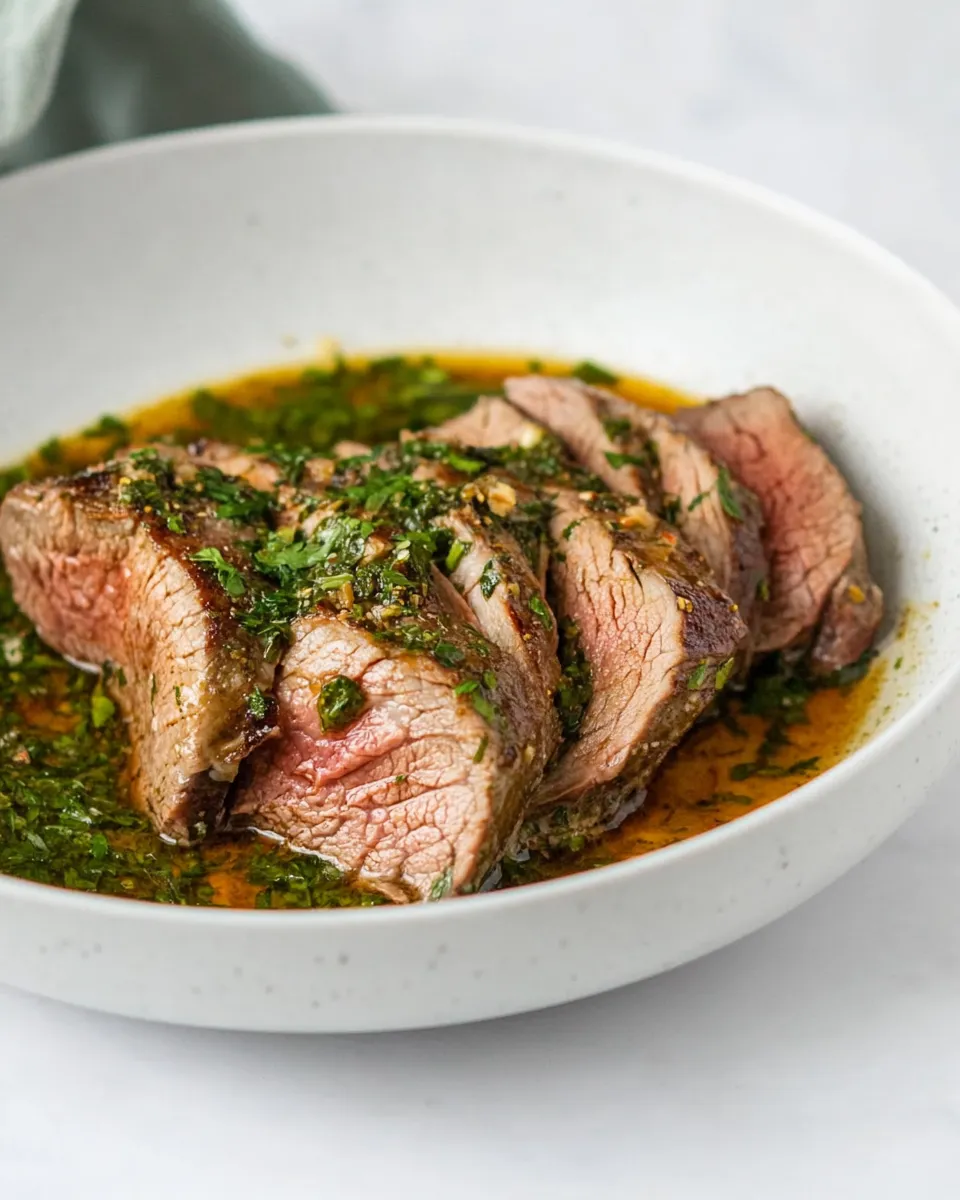
- Slice thinly against the grain. Tri-tip grain direction can change along the roast—observe the fibers and adjust your slicing direction to keep it tender. Serve immediately with chimichurri sauce on the side if desired.
Why This Recipe Belongs in Your Rotation
This recipe is low-effort with high payoff. You do most of the work up front, then let the sous vide handle the rest. It’s reliable for dinner parties because you can time the sear and finishing to coincide with guests arriving without worrying about overcooking.
The flavor profile is simple and adaptable: the seasoning enhances the natural beef taste rather than masking it. The result slices well for family-style serving, sandwiches, or a composed salad. If you love predictable, tender steak at a reasonable price point, tri-tip sous vide deserves recurring spots on your menu.
Dairy-Free/Gluten-Free Swaps
- Dairy-free: This recipe is naturally dairy-free—no swaps necessary.
- Gluten-free: The recipe is inherently gluten-free as listed. Ensure your chimichurri (if using store-bought) is labeled gluten-free, and check any preblended spices for cross-contamination if needed.
Prep & Cook Tools
- Immersion circulator (sous vide device) and a container or large pot for the water bath.
- Resealable freezer bag (for the water displacement method) or vacuum sealer and bags if you prefer vacuum sealing.
- Cast iron or heavy stainless steel skillet for searing.
- Paper towels for drying the meat before searing.
- Instant-read thermometer (optional) to spot-check sear temperatures—though the sous vide sets interior doneness.
Steer Clear of These
- Skipping the 30-minute temper at room temperature — a very cold roast goes into the bath and can lose edge on even cooking.
- Searing a damp surface — moisture prevents the crust from forming. Pat the meat dry until the surface is dry to the touch.
- Using a low-heat pan for searing — you want a hot, fast sear. Low heat creates long contact and can overcook the edges.
- Reducing the 6-hour cook time — this recipe’s texture relies on that window for connective tissue breakdown. Shorter times will yield a firmer result.
Fresh Seasonal Changes
- Spring — Serve thin slices on a bed of peppery arugula with lemon vinaigrette and shaved asparagus for freshness.
- Summer — Offer tri-tip tacos with charred corn salsa, avocado, and a spoonful of chimichurri for bright contrast.
- Fall — Plate with roasted root vegetables and a drizzle of pan juices for cozy, earthy pairing.
- Winter — Pair with creamy polenta and wilted kale; add a dollop of chimichurri to cut through richness.
Cook’s Commentary
I adore the flexibility of sous vide tri-tip. The same cook can feed a hungry family on a weeknight or be stretched into steaks for an elegant weekend meal. The simple seasoning keeps prep under 10 minutes, and the long sous vide time lets you multitask—make sides, prep a salad, or just enjoy the afternoon.
Searing is where the magic finishes. Aim for color, not char. A 1–2 minute per side sear is enough to develop crust without pushing the internal temperature. If you prefer a deeper crust, rest briefly and give a second quick flash in the pan—but keep an eye on it.
For portioning, a 2-pound tri-tip serves about 3–4 people as a main depending on sides and appetite. Slice thinly to make it stretch farther for sandwiches or salads.
Make Ahead Like a Pro
- Cook ahead: Finish the full sous vide cook and chill the sealed bag in an ice bath until cold, then refrigerate for up to 48 hours. When ready to serve, remove from the fridge, bring to room temp briefly, pat dry, and sear as directed.
- Advance prep: Mix the seasoning blend in advance and store it in an airtight container so you can season quickly the day of.
- Partial finish: If short on time, you can sous vide the roast and refrigerate; then reheat in a 130°F water bath for 30–45 minutes before searing.
Troubleshooting Q&A
- Q: My crust won’t brown. A: The surface is likely too wet. Pat the tri-tip thoroughly with paper towels and preheat the pan until very hot. Use a neutral oil with a high smoke point, and sear quickly.
- Q: The meat seems too soft after 6 hours. A: Sous vide tenderizes connective tissue; tri-tip becomes very tender but should still hold together. If it feels mushy, you may have extended the cook significantly longer than 6 hours or chosen a very thin cut. Stick to the 6-hour window for best texture.
- Q: How do I know the grain direction? A: Look closely at the muscle fibers on the roast. Tri-tip often has a change in grain direction—slice each section against the grain for maximum tenderness.
- Q: Can I cook to medium instead? A: Yes—raise the water bath temp (e.g., 140°F) if you want a firmer interior, but that changes the specified temperature in this recipe. This recipe is built around 131°F for medium-rare.
Save & Share
If this method works for you, bookmark it. It’s a dependable template for other cuts too—adjusting temp/time for thickness or doneness. Share photos of your slices and finishing crust, your chimichurri pairing, or how you plated it seasonally. I love seeing readers’ versions and hearing what they served it with—simple tweaks can become your signature.
Sous Vide Tri-Tip
Ingredients
- 2 pound tri-tip roast
- 2 teaspoon salt
- 1 teaspoon black pepper
- 1/2 teaspoon smoked paprika
- 3/4 teaspoon garlic powder
- 3/4 teaspoon onion powder
- 1/2 teaspoon dried thyme
- 3/4 teaspoon dried oregano
- 2 teaspoon neutral oil
- chimichurri sauce for serving, optional
Instructions
- Remove the tri-tip from the refrigerator and let it sit at room temperature for 30 minutes.
- Preheat the sous vide water bath to 131°F for medium-rare.
- Mix the salt, black pepper, smoked paprika, garlic powder, onion powder, dried thyme, and dried oregano in a small bowl.
- Season all sides of the tri-tip evenly with the spice mixture.
- Place the seasoned tri-tip into a resealable freezer bag and remove as much air as possible using the water-displacement method, then seal the bag tightly.
- Submerge the sealed bag in the preheated water bath, ensuring the meat is fully immersed, and cook for 6 hours.
- When cooking is complete, remove the bag from the water bath, take the tri-tip out of the bag, and pat it dry thoroughly with paper towels.
- Heat a heavy skillet over high heat and add the neutral oil. Sear the tri-tip 1 to 2 minutes per side until a brown crust forms.
- Let the meat rest for 5 minutes, then slice thinly against the grain and serve with chimichurri if desired.
Equipment
- sous vide circulator and water bath
- resealable freezer bag or vacuum sealer
- large skillet (preferably heavy, e.g., cast iron)
- Tongs
- Paper Towels
- meat thermometer (optional)
Notes
- Bring the meat to room temperature before cooking.
- Use the water-displacement method if you don't have a vacuum sealer.
- Pat the meat very dry before searing to get a good crust.
- Slice against the grain for the most tender bites.