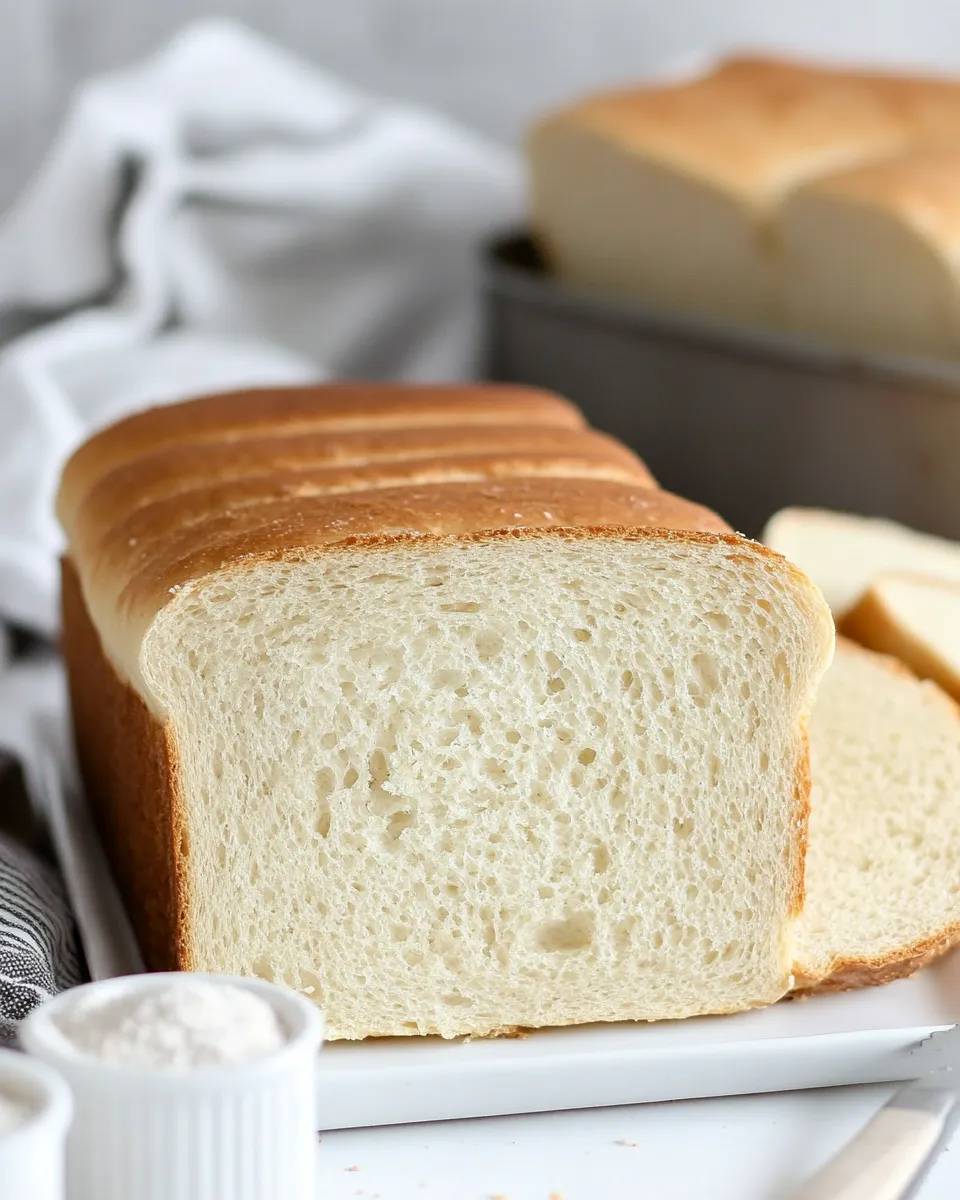
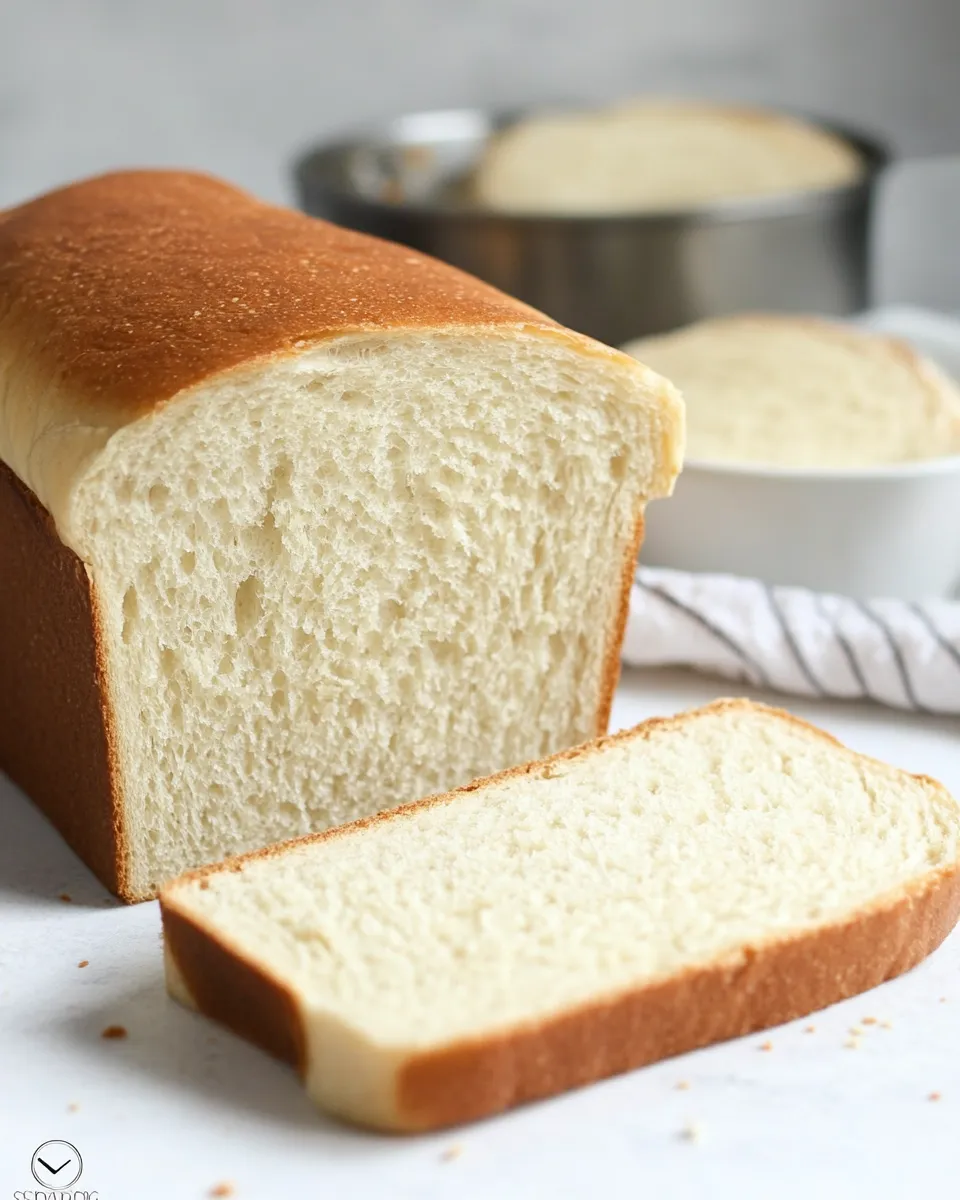
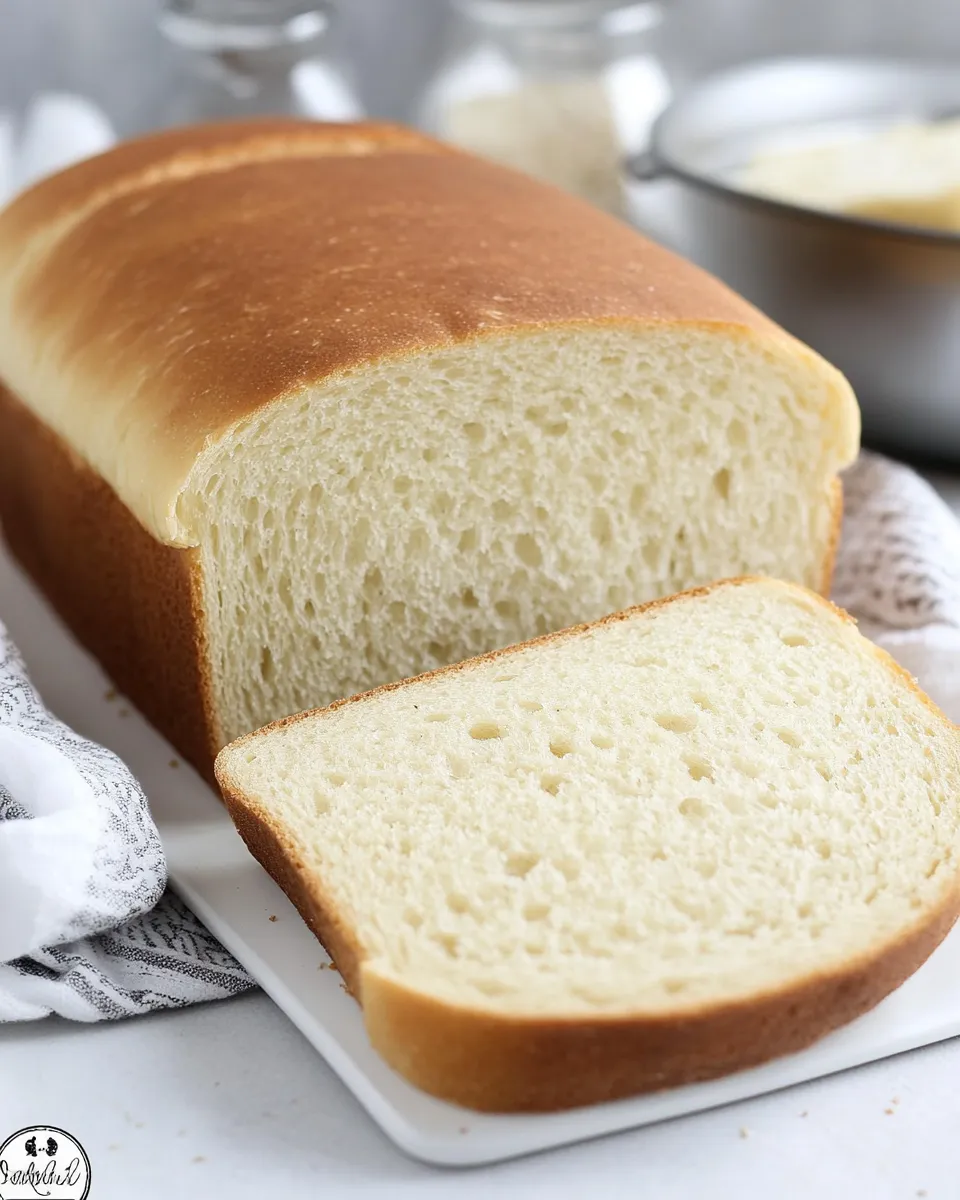
Sandwich Bread Recipe
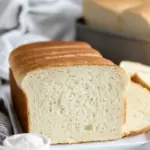
Good sandwich bread is the kind of thing that quietly improves every meal. It’s soft enough for kids to eat without complaint, sturdy enough to hold a hefty sandwich, and neutral enough to let fillings shine. This recipe delivers a classic, slightly sweet loaf with a tender crumb and crisp crust—well suited to toast, club sandwiches, and anything that needs reliable bread.
No special techniques, no exotic ingredients: just warm milk, yeast, butter, flour, salt, and a touch of sugar. The steps are straightforward and forgiving, and I’ll walk you through proofing, kneading, shaping, and baking so your loaf comes out predictable and satisfying.
Ingredient Rundown
- 1 2/3 cup (363 g) milk, warmed to 100ºF – 110ºF — feeds the yeast and hydrates the dough; use whole or 2% for best flavor and texture.
- 2 teaspoons (6 g) instant yeast — provides rise; instant yeast is convenient and can be mixed directly into warmed milk for this method.
- 6 tablespoons (85 g) unsalted butter, softened to room temperature — adds richness and tender crumb; room-temperature butter mixes more evenly.
- 2 teaspoons (5 g) kosher salt — balances sweetness and controls yeast activity; measure accurately for best results.
- 3 tablespoons (37 g) granulated sugar — feeds yeast and lends a hint of sweetness to the crust and crumb.
- 4 – 4 3/4 cups (480 – 570 g) all-purpose flour — start with 4 cups and add up to 3/4 cup more as needed to reach a smooth, slightly tacky dough.
Sandwich Bread Recipe, Made Easy
Step-by-step instructions
Follow these steps in order. Quantities and timing match the ingredients above.
- Warm the milk to 100ºF–110ºF. Pour it into a large glass or metal bowl and stir in 1 tablespoon of the granulated sugar and the 2 teaspoons instant yeast. Let sit about 3 minutes so the yeast can proof; you should see some bubbling or foaming. If it stays flat, the yeast may be inactive—start over with fresh yeast.
- When the yeast is active, add the softened butter, the remaining 2 tablespoons of sugar, and the 2 teaspoons kosher salt to the bowl. Stir to combine.
- Add 4 cups (480 g) of the all-purpose flour to the liquid mixture. Stir until the dough starts to pull away from the sides of the bowl. The dough will be shaggy at this point.
- If the dough is still too sticky to handle, add more flour 1/4 cup (about 30–35 g) at a time, up to the full 4 3/4 cups (570 g) as needed, until it pulls away from the bowl and forms a cohesive mass.
- Lightly grease a countertop or work surface and turn the dough out onto it. Knead by hand for about 8–12 minutes until the dough is smooth, elastic, and slightly tacky but not sticky. You should be able to stretch a small piece thin without it tearing quickly.
- Place the kneaded dough in a lightly greased bowl, turning it once so the top is lightly coated with oil or butter. Cover the bowl with plastic wrap and set it in a warm, draft-free spot to rise until doubled in bulk, about 1½ to 2 hours.
- After the dough has doubled, gently deflate it and turn it out onto the lightly greased countertop. Shape the dough into one or two loaves depending on the size and number of loaf pans you plan to use.
- Lightly grease your loaf pan(s) and place the shaped loaf or loaves into them. Cover loosely with plastic wrap and let the dough rise until it comes within about 1 inch of the lip of the pan, about 15–20 minutes. While the dough is finishing this short rise, preheat the oven to 350ºF.
- Remove the plastic wrap and place the loaf pans in the preheated oven. Bake until an instant-read thermometer inserted into the center of the loaf registers 190ºF, about 40–45 minutes. The loaf should be golden brown on top.
- When baked, remove the loaves from the pans right away and turn them out onto a wire rack to cool completely before slicing.
- For short-term storage, keep in a bread box or under a cake dome for up to a week. For longer storage, wrap the cooled loaf tightly in plastic wrap, then in foil, and freeze for up to 6 months.
The Upside of Sandwich Bread Recipe
This sandwich bread is versatile: mild flavor, soft crumb, and a structure that holds fillings without falling apart. It toasts evenly and melts fillings beautifully. Because the recipe uses common pantry ingredients and a single rise, it’s a practical bake any day of the week.
The texture is tender thanks to butter and milk but still firm enough for grilled sandwiches and thick-cut toast. Leftovers make excellent French toast or breadcrumbs, so nothing goes to waste.
Low-Carb/Keto Alternatives
Traditional sandwich bread relies on wheat flour and won’t be low-carb. For keto-friendly options, you can use almond flour or coconut flour blends, but they require very different ratios and often additional binders like eggs and psyllium husk. Because this recipe’s structure depends on gluten development, substituting low-carb flours will produce a different product—look for a keto “bread” recipe specifically formulated for those flours and ingredients.
Equipment & Tools
- Large glass or metal mixing bowl — for proofing yeast and mixing the dough.
- Instant-read thermometer — to check milk temperature for proofing and internal loaf temperature (190ºF) for doneness.
- Loaf pan(s) — one or two, depending on how you shape the dough.
- Plastic wrap — to cover dough during rises and keep drafts off.
- Wire cooling rack — to cool baked loaves completely and prevent sogginess.
- Measuring cups and kitchen scale — weight measurements give most consistent results (grams provided).
Mistakes Even Pros Make
- Using milk that’s too hot — kills the yeast. Keep milk between 100ºF and 110ºF.
- Not proofing the yeast — skipping the proof step can hide inactive yeast until it’s too late; always watch for bubbling.
- Adding too much flour early — makes a dense loaf. Add extra flour gradually and stop when the dough is smooth and elastic.
- Under-kneading — yields an uneven crumb and poor rise. Knead until smooth and elastic (8–12 minutes by hand).
- Over-proofing the final rise — a loaf that rises past the pan lip can collapse in the oven. Watch timing and dough behavior rather than the clock alone.
Seasonal Adaptations
In winter, proofing takes longer in a cool kitchen—place the covered dough in a warmed (but turned-off) oven with the oven light on, or near a warm stove. In summer, dough will rise faster; check earlier to avoid over-proofing.
For autumn and holiday variations, fold in 1–2 tablespoons of warm spices like cinnamon or ginger to the dough for a cozy twist, or brush the top with melted butter and sprinkle seeds before baking for a heartier crust. Keep alterations light so they don’t interfere with rise.
Notes on Ingredients
- Milk — warmed to activate yeast; whole milk gives richer flavor, but 2% works fine.
- Instant yeast — labeled “instant” or “rapid-rise”; it’s convenient and reliable for this method.
- Unsalted butter — use unsalted so you control salt level; soften to room temperature to blend smoothly.
- Kosher salt — measure by weight when possible; different salts have different volumes.
- Granulated sugar — helps feed yeast and adds mild sweetness; total amount is 3 tablespoons, with 1 used in proofing.
- All-purpose flour — start with 4 cups and add up to 4 3/4 cups as needed; humidity and flour brand affect absorption.
Storing Tips & Timelines
- Room temperature: Store in a bread box or under a cake dome for up to 1 week; keep whole for slower staling.
- Freezing: Wrap cooled loaf tightly in plastic wrap, then foil. Freeze up to 6 months. Thaw at room temperature or slice frozen.
- Reheating: For fresh-slice texture, reheat slices in a toaster or warm whole loaves in a 300ºF oven for 10–15 minutes wrapped loosely in foil.
Top Questions & Answers
- Can I use active dry yeast instead of instant? — Yes. If using active dry yeast, proof it in the warm milk with the sugar for 5–10 minutes until foamy, then proceed. Use the same weight (2 teaspoons) unless your yeast package suggests otherwise.
- What if my dough is sticky after 12 minutes of kneading? — Add flour 1 tablespoon at a time until it becomes smooth and slightly tacky but not wet. Avoid adding too much flour to prevent a dense loaf.
- How do I know the loaf is done besides temperature? — A fully baked loaf sounds hollow when tapped on the bottom and has a deep golden color. The internal temperature of 190ºF is the most reliable check.
- Can I make this by machine? — Yes. Use a stand mixer with a dough hook and knead on low to medium speed about 6–8 minutes until smooth and elastic, then follow rising and shaping steps.
- Why two rises? — The first rise develops flavor and gluten; the second (in the pan) refines shape and ensures a good oven spring for an even, uniform loaf.
The Takeaway
This Sandwich Bread Recipe is straightforward, forgiving, and dependable. With basic pantry ingredients and a little hands-on time, you get a soft, slightly sweet loaf that works for every sandwich and toast craving. Proof your yeast, knead until smooth, and watch the dough rather than the clock—do that and you’ll have great results every time.
Sandwich Bread Recipe
Ingredients
- 1 2/3 cup milk warmed to 100°F–110°F (363 g)
- 2 teaspoons instant yeast (6 g)
- 6 tablespoons unsalted butter softened to room temperature (85 g)
- 2 teaspoons kosher salt (5 g)
- 3 tablespoons granulated sugar (37 g)
- 4–4 3/4 cups all-purpose flour (480–570 g), add gradually
Instructions
- Pour the warmed milk into a large glass or metal bowl and stir in the instant yeast and 1 tablespoon of the granulated sugar; let sit about 3 minutes until bubbly and foamy.
- Stir in the softened butter, kosher salt, the remaining sugar, and 4 cups of the all-purpose flour until the dough starts to pull away from the sides of the bowl.
- If the dough is still sticky, add additional flour 1/4 cup at a time (up to the 4 3/4 cups total) until it is manageable and slightly tacky.
- Turn the dough onto a lightly greased counter and knead by hand about 8–12 minutes, until smooth and elastic.
- Place the dough in a lightly greased bowl, cover with plastic wrap, and set in a warm, draft-free spot to double in bulk, about 1½–2 hours.
- After the first rise, turn the dough onto the counter and shape into one loaf to fit a 13-inch loaf pan (or two loaves for two pans).
- Lightly grease the loaf pan(s), place the shaped dough inside, cover loosely with plastic wrap, and let rise until the dough is within about 1 inch of the pan lip, about 15–20 minutes; preheat the oven to 350°F while the dough rises.
- Remove the plastic wrap and bake until an instant-read thermometer inserted into the center registers 190°F, about 40–45 minutes.
- Turn the baked loaf onto a cooling rack and cool completely before slicing.
Equipment
- Large Bowl
- Measuring cups and spoons
- loaf pan (13-inch)
- Plastic Wrap
- countertop or work surface
- instant-read thermometer
- spatula or wooden spoon
Notes
- Total time does not include rising times.
- First rise: approximately 1½ hours.
- Second rise: approximately 15 minutes.
- Adapted from: USA Pans.