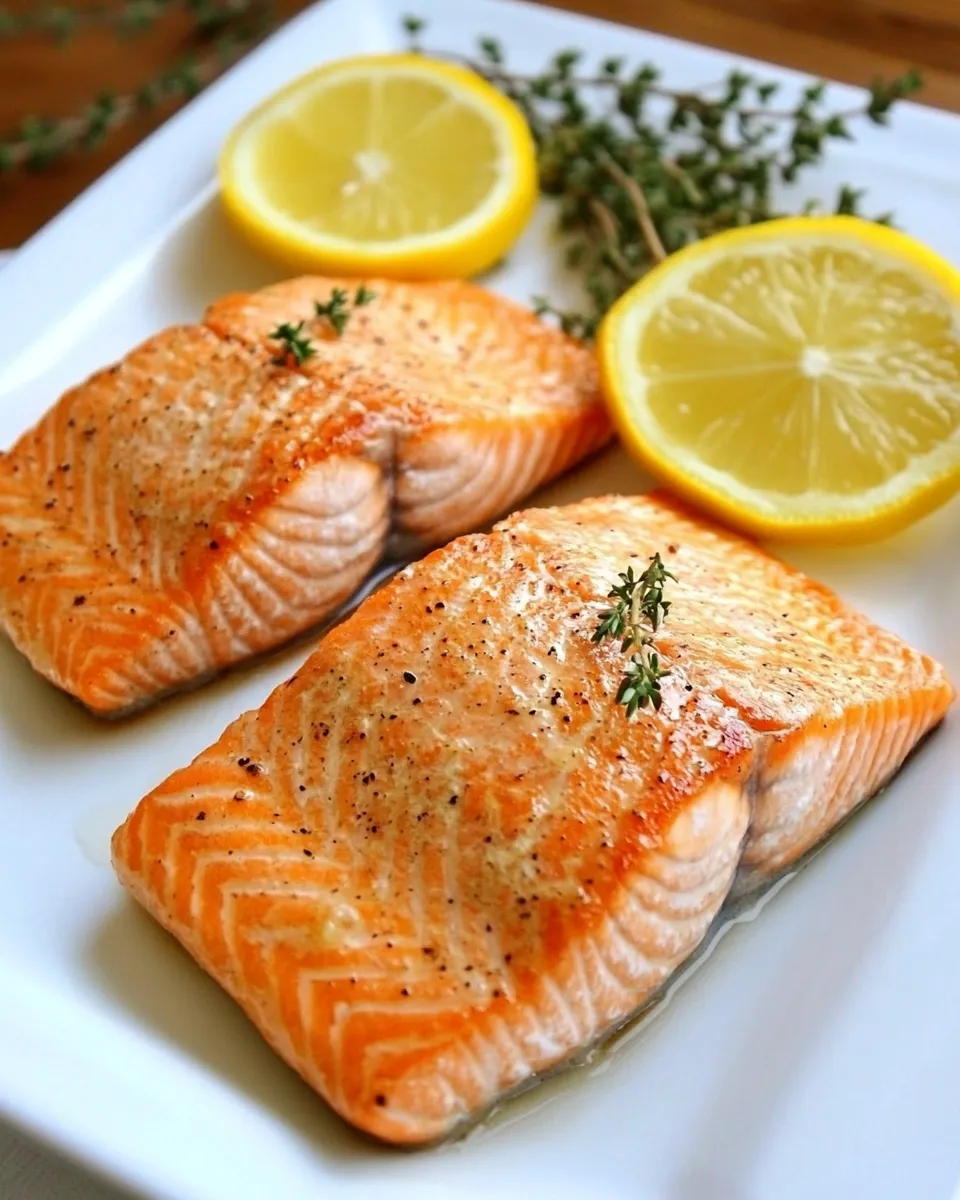
How to Sear Salmon
I love the quick satisfaction of a perfectly seared salmon fillet: a crisp, golden crust outside and tender, juicy flesh inside. This method is straightforward, fast, and forgiving—great for weeknights or any time you want something elegant without fuss. I’ll walk you through the exact steps, gear, and small techniques that make a difference.
There’s nothing pretentious here. The goal is reliable results: a hot pan, minimal flipping, a short oven finish, and a confident hand with seasoning. Read through the shopping guide and the step-by-step directions, then follow the checklist and troubleshooting notes to avoid common pitfalls.
Your Shopping Guide
Ingredients
Directions: Sear Salmon
- Preheat the oven to 425°F (218°C). This ensures the oven is hot enough to finish the fillets quickly after searing.
- If you have time, let the salmon sit at room temperature for 15–20 minutes. This helps it cook more evenly. If you’re short on time, you can sear straight from the refrigerator—results will still be good.
- Pat the fillets dry with paper towels. Season both sides generously with salt and a few grinds of black pepper.
- Place a heavy skillet (cast iron or stainless steel preferred) over medium-high heat and let it warm for 3–4 minutes. Test by sprinkling a few drops of water onto the surface—if they sizzle and bead, the pan is ready.
- When the pan is hot and dry, pour in 2 tablespoons olive oil and tilt or swirl the pan to coat the bottom evenly. The oil may shimmer and begin to smoke lightly; that’s normal—don’t let it burn.
- Gently lower the salmon fillets into the skillet, skin-side up if using skin-on. Arrange up to 4 fillets without crowding; the fillets should not touch each other.
- Turn the burner to high heat and let the salmon sear undisturbed for 2–3 minutes. Watch the edge of the fillet where it meets the pan for a developing golden-brown crust. Do not lift or flip the fillets during this time.
- Once you see the crust forming at the edge, transfer the entire skillet to the preheated oven. Leave the fillets in the pan; the oven will finish cooking them gently while preserving the crust.
- Roast in the oven for 6–10 minutes, depending on fillet thickness and desired doneness. For a fillet about 1 inch thick, plan on roughly 7–8 minutes for fully cooked, flaking salmon that remains moist. Adjust toward 6 minutes for a slightly rare center or toward 10 minutes for thicker fillets or firmer texture.
- To check doneness, cut into the thickest part of a fillet with a sharp knife. The flesh should flake and be opaque throughout for fully cooked salmon.
- Using an oven mitt, carefully remove the hot skillet from the oven—remember the oil will be sizzling. Transfer the fillets to plates with tongs or a fish spatula, plating them crust-side up.
- If you’re not serving immediately, remove the fillets from the hot skillet. Leaving them in the skillet will continue cooking from residual heat and can overcook them.
- Serve with an optional squeeze of fresh lemon and enjoy immediately.
The Upside of Sear Salmon
Searing then roasting gives you the best of both worlds: a caramelized, savory crust from the high-heat pan and gentle, even cooking from the oven. This method minimizes overcooking and dries out the salmon less than pan-only methods. It scales easily—cook up to four fillets per batch depending on skillet size—and it works with skin-on or skin-off fillets. The technique is fast, uses minimal ingredients, and highlights the natural flavor of salmon.
International Equivalents
Salmon is enjoyed around the world and this technique maps well to many cuisines. In Japan, a similar approach is used for grilling or broiling salmon (“yakizakana”) with salt. In Nordic cuisine, a quick sear followed by oven finish pairs nicely with dill, mustard-dill sauce, or a pickled accompaniment. In the Mediterranean, finish with a drizzle of olive oil and lemon; in Latin kitchens, top with a fresh salsa or chimichurri. The core idea—high-heat sear, short roast—translates cleanly to these flavor profiles.
Gear Checklist
Common Errors (and Fixes)
Warm & Cool Weather Spins
Warm-weather spin: Finish with a bright salsa—tomato, cucumber, radish, lime, and cilantro—served cold alongside the hot fillet for contrast. Grill-marked asparagus or a chilled bean salad make great sides.
Cool-weather spin: Serve the fillet over a warm bed of braised greens, lentils, or a creamy root-vegetable mash. Add a warm butter-based sauce (brown butter with lemon and capers) for a comforting finish.
Behind the Recipe
This technique stems from the simple physics of cooking fish: a hot surface creates the Maillard reaction that builds flavor and texture almost instantly, while the oven provides steady ambient heat so the interior reaches the right temperature without the exterior becoming tough. Minimal seasoning and a neutral oil let the salmon’s natural flavor shine. Letting the fish rest at room temperature before cooking helps it cook evenly, and not disturbing the fillets during searing preserves the prized crust.
Save It for Later
Cooked salmon keeps well refrigerated for up to 3 days. Store in an airtight container and reheat gently—either in a warm oven (300°F) for 8–10 minutes or in a skillet over low heat with a splash of oil to revive the crust. Leftover salmon is excellent flaked into salads, tossed with pasta, or used in sandwiches.
Frequently Asked Questions
Before You Go
This is the sear-and-roast technique I use when I want dependable, restaurant-quality salmon at home. It’s fast, forgiving, and showcases the fish. Keep your pan hot, don’t crowd it, and resist the urge to fuss with the fillets while they develop their crust. Enjoy the results—and if you try a flavor spin, I’d love to hear which one became your favorite.

How to Sear Salmon
Ingredients
- boneless salmon fillets (skin off or skin on) up to 4 per batch, adjust size to skillet
- 2 tablespoons olive oil or avocado oil
- salt to taste
- black pepper to taste
Instructions
- Preheat the oven to 425°F (220°C). If time allows, let the salmon sit at room temperature for a few minutes for even cooking.
- Pat the salmon dry with paper towels and season both sides generously with salt and pepper.
- Place an oven-safe skillet over medium-high heat for 3–4 minutes, until drops of water sizzle and bead on the surface.
- Add 2 tablespoons oil to the hot skillet and swirl to coat. The oil may begin to smoke lightly.
- Gently place the salmon fillets in the skillet, meat side down, without crowding; if using skin-on fillets, place them skin side up so the meat contacts the pan.
- Increase the heat to high and sear the fillets undisturbed for 2–3 minutes, until a golden brown crust forms at the edge where the fish touches the pan.
- Do not flip the fillets; transfer the skillet to the preheated oven and roast for 6–10 minutes depending on thickness and desired doneness (about 7–8 minutes for a 1-inch-thick fillet).
- Carefully remove the hot skillet from the oven with an oven mitt, then lift the fillets out with tongs or a fish spatula, plating them crust-side up.
- Serve immediately; note that the fillets will continue to cook if left in the hot skillet.
Equipment
- oven-safe skillet (cast iron or PFOA-free nonstick) with metal handle
- tongs or fish spatula
- Measuring spoons
Notes
- Use a heavy, oven-safe skillet for best crust.
- Avocado oil is a higher smoke point alternative.
- Do not crowd the pan to ensure proper searing.
- Cooking time varies with fillet thickness.
- Letting fish rest briefly at room temperature helps even cooking.