Healthy Peanut Butter Bars
These Healthy Peanut Butter Bars are the kind of recipe I reach for when I want something that feels indulgent but actually supports my day. They’re dense, nutty, and sweet without relying on white sugar or long ingredient lists. I love them straight from the fridge or slightly softened at room temperature.
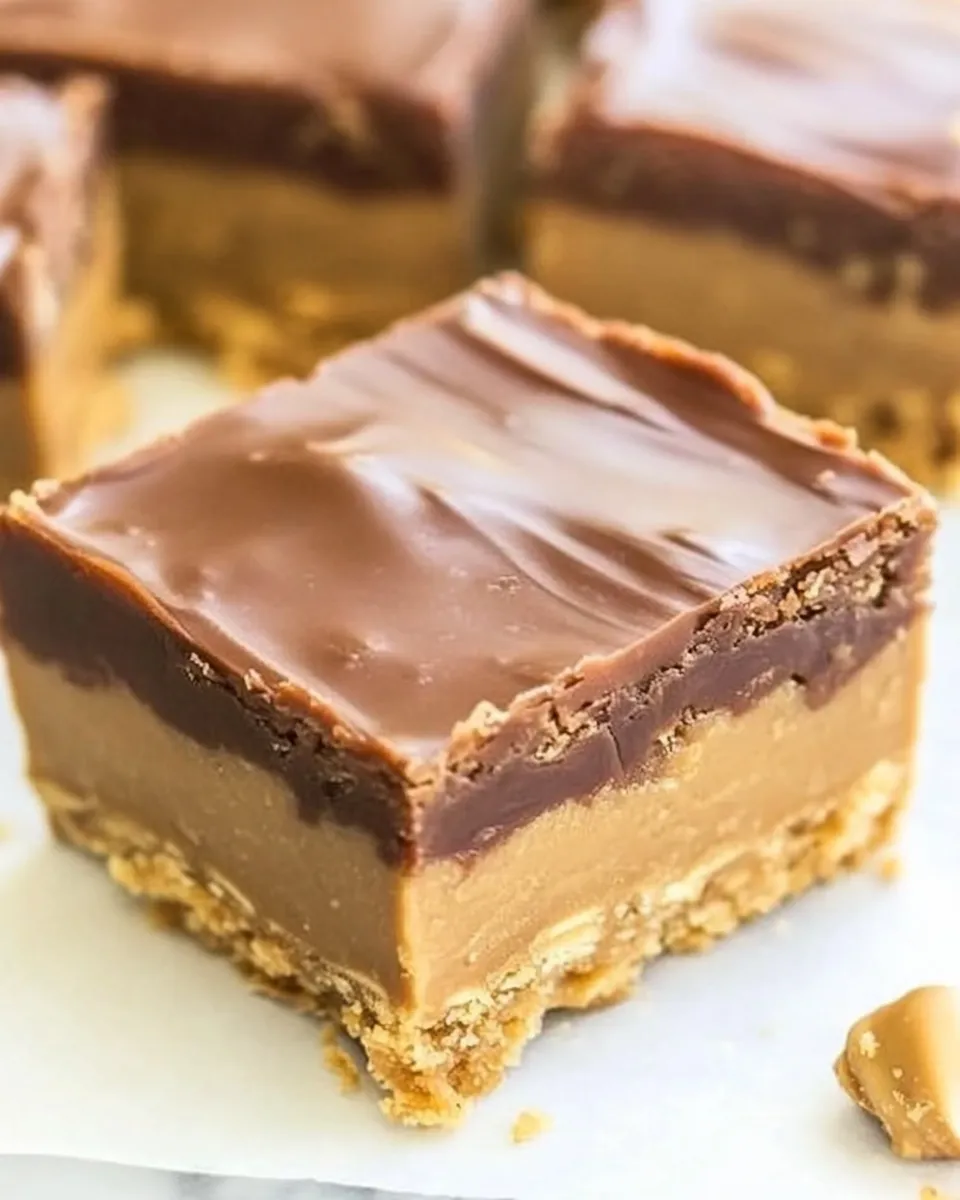
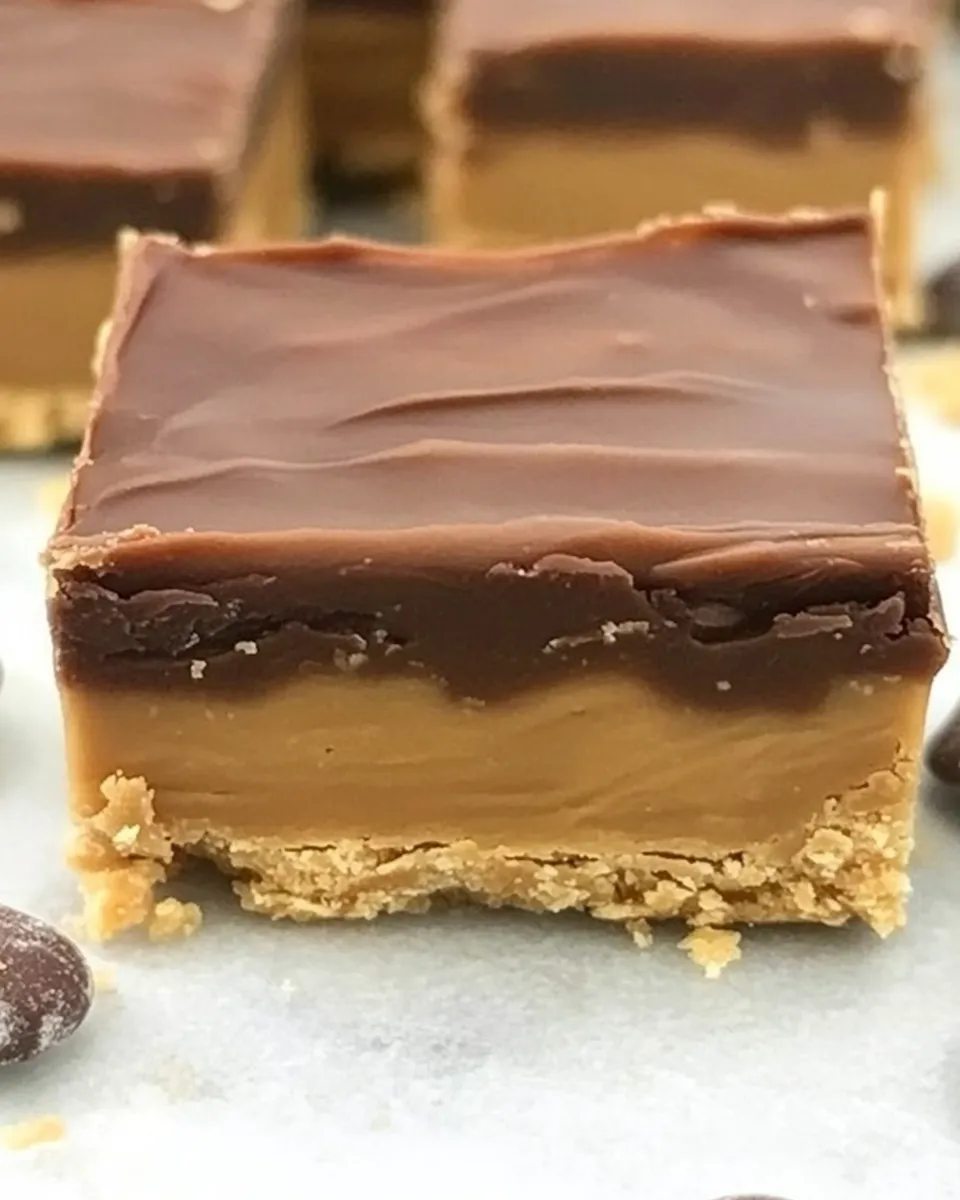
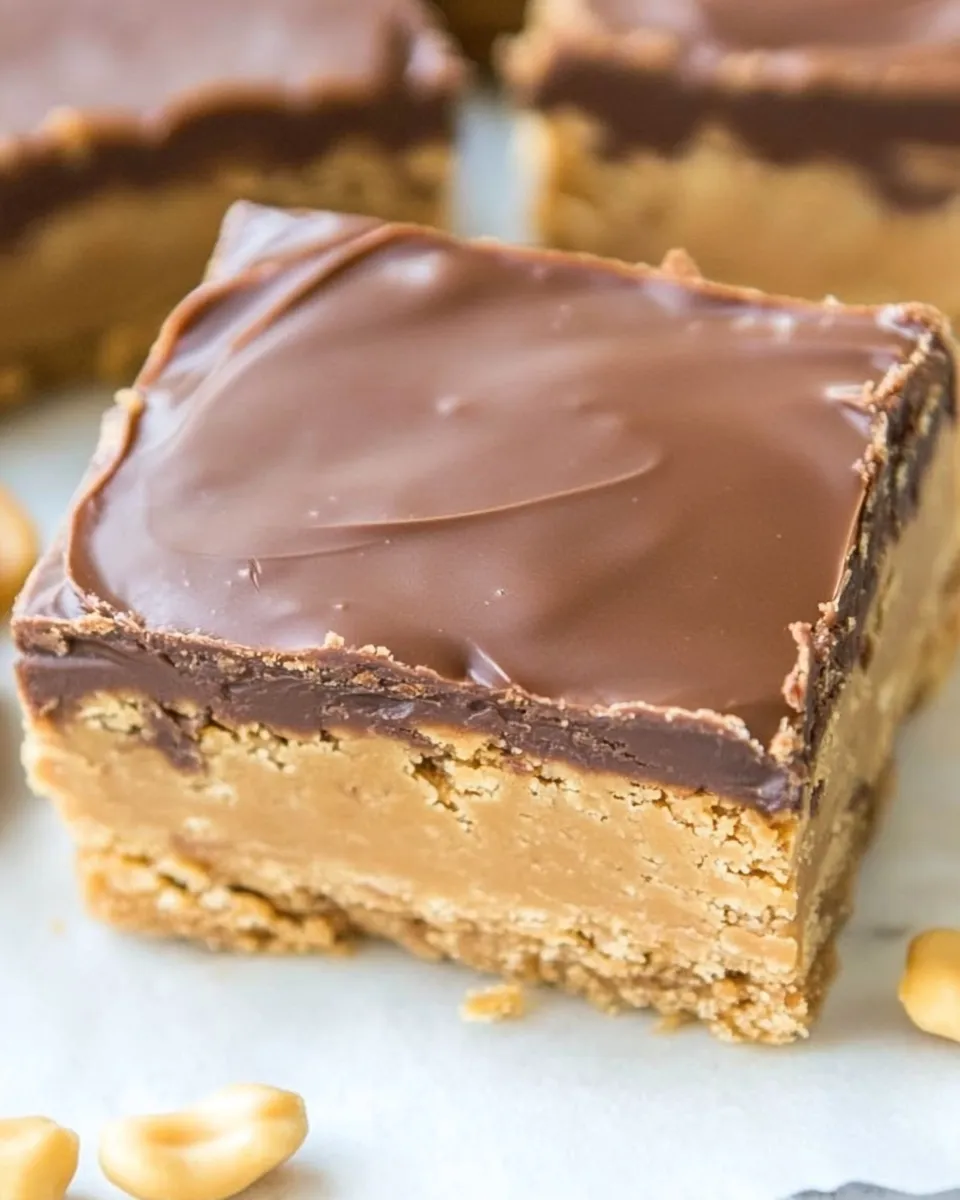
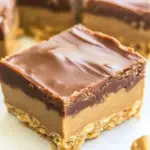
The bars layer a chewy oat base with a fudgy peanut butter center and a simple frosting on top. They come together quickly—mostly hands-off chilling—so they’re a great make-ahead snack or packed-lunch treat. I’ll walk you through exactly what to do, common mistakes, and easy swaps to suit your pantry.
Ingredient Breakdown
- 3 cups rolled oats — Provides bulk and chew for the base; use old-fashioned oats for the best texture.
- 1 cup peanut butter — Binds the oat base and adds flavor; any smooth nut or seed butter can be substituted.
- 3/4–1 cup maple syrup — Sweetens and moistens the base; range allows you to adjust sweetness and stickiness.
- 2 cups peanut butter — Main component of the fudge center; pick a creamy peanut butter for a smoother filling or a thicker one for more structure.
- 1 cup maple syrup — Sweetener for the fudge layer; helps the center set while keeping it tender.
- 1 1/2 cups oat flour — Thickens the fudge layer into a batter-like consistency; you can make it by pulsing rolled oats in a blender.
- 1 serving chocolate frosting* — Optional topping to finish the bars; adds a shiny, dessert-like surface. Use a prepared frosting or make a simple chocolate drizzle.
Cooking Healthy Peanut Butter Bars: The Process
- Line an 8 x 8-inch (or larger) baking dish with parchment paper, leaving some overhang for easy removal. Set the dish aside.
- Make the base: In a large mixing bowl combine 3 cups rolled oats, 1 cup peanut butter, and 3/4–1 cup maple syrup. Stir until the mixture is uniformly combined and holds together when pressed—add the higher maple syrup amount if it feels too dry.
- Press the oat mixture evenly into the prepared baking dish to form the base layer. Use the bottom of a measuring cup or your hands (lightly dampened) to compress it so the layer is firm and flat. Place the dish in the refrigerator to chill while you prepare the center.
- Prepare the fudge center: In a microwave-safe bowl or in a small saucepan over low heat, combine 2 cups peanut butter and 1 cup maple syrup. Warm gently until the peanut butter softens and the mixture is smooth and pourable. If using the stovetop, stir constantly to prevent scorching.
- Once smooth, stir in 1 1/2 cups oat flour (ground or store-bought) until you have a thick, fudgy batter. The mixture should be cohesive and thick enough to spread but still pliable. If it seems too dry, add a teaspoon of maple syrup or a splash of warm water; if too loose, add a tablespoon of oat flour at a time.
- Pour or spoon the fudge batter over the chilled oat base, spreading it into an even layer with a spatula. Return the pan to the refrigerator to allow both layers to firm up for at least 20–30 minutes.
- Top with frosting: While the bars are setting, add 1 serving of chocolate frosting to the top. Spread gently to cover the fudge layer. If your frosting is thick, warm it briefly (5–10 seconds in the microwave) to make spreading easier, then smooth it over the center.
- Chill again: Place the pan back into the refrigerator for another 30 minutes or until the frosting and the whole bar assembly are firm to the touch.
- Remove from the pan using the parchment paper overhang and transfer to a cutting board. Cut into bars of your desired size with a sharp knife (wipe the blade between cuts for cleaner edges). Serve chilled or at room temperature.
Why You’ll Keep Making It
These bars hit a sweet spot: simple pantry ingredients, minimal hands-on time, and a texture that satisfies both cookie and candy cravings. They store well, freeze beautifully, and are easy to portion for lunches, snacks, or on-the-go energy.
Because the recipe is built on oats and nut butter, it’s filling and offers a decent mix of complex carbs, healthy fats, and protein—much better than many store-bought bars that hide long ingredient lists. Once you make one batch you’ll see how customizable and dependable this formula is.
Healthier Substitutions
- Nut/seed butter swap — Replace peanut butter with almond, cashew, or sunflower seed butter if you have allergies or prefer a different flavor.
- Syrup alternatives — Use brown rice syrup or date syrup if you prefer less pronounced maple flavor; note texture may shift slightly.
- Oat flour options — If you don’t have oat flour, pulse rolled oats in a food processor until fine. For a gluten-free result, ensure oats are certified gluten-free.
- Lower sugar — Reduce the maple syrup in the base to 3/4 cup (already allowed) and consider a slightly less sweet frosting or a dark chocolate drizzle.
- Frosting ideas — Swap the chocolate frosting for melted dark chocolate (70% cacao) for a simpler, less processed topping.
Equipment at a Glance

- 8 x 8-inch (or larger) baking dish — lined with parchment for easy removal.
- Large mixing bowl — to combine the base ingredients.
- Small saucepan or microwave-safe bowl — for warming and smoothing peanut butter/maple mixture.
- Spatula or offset spatula — for spreading layers cleanly.
- Measuring cups and spoons — for precise quantities.
- Food processor or blender (optional) — to make oat flour if you don’t have it ready-made.
Common Errors (and Fixes)
- Base too crumbly — The mix needs enough maple syrup or slightly more peanut butter to bind. Add a tablespoon of maple syrup or a teaspoon of warm water and press again.
- Fudge center too runny — Stir in another tablespoon of oat flour at a time until it thickens. Chill the pan to help it set faster.
- Frosting doesn’t spread — Warm the frosting briefly to soften; spread gently with an offset spatula. Avoid overheating, which can make it too thin.
- Bars fall apart when cut — Fully chill the bars until firm. Use a sharp knife and wipe it clean between cuts for neater slices.
Make It Your Way
Flavor ideas
- Add a pinch of sea salt to the top before chilling for contrast with the sweet layers.
- Fold 1/3 cup mini chocolate chips into the fudge layer for pockets of chocolate.
- Mix in 1/4 cup crushed roasted peanuts into the base for crunch.
Serving options
- Cut into smaller bites and place in muffin liners for portion-controlled snacks.
- Serve slightly warmed (10–15 seconds in the microwave) for a softer, more dessert-like experience.
Behind the Recipe
I developed this version because I wanted a bar that used whole-ingredient pantry staples and could be made quickly without baking. The strategy is simple: an oat-rich base for structure, a concentrated peanut butter maple center for richness, then a finish that makes them feel like a treat. The layering and chilling method gives you neat bars without an oven or complicated tempering.
Texture is the secret. Oats keep things substantial and chewy while oat flour helps the center set without becoming rock-hard. The maple syrup is the mild sweetener that also keeps the bars pliable—use the lower or higher amount depending on how sweet and soft you prefer them.
Keep It Fresh: Storage Guide
- Refrigerator: Store the bars in an airtight container for up to 1 week. Keep layers cool to maintain firmness.
- Freezer: Wrap individual bars in plastic wrap and place in a freezer-safe bag for up to 3 months. Thaw overnight in the fridge or at room temperature for 20–30 minutes.
- Room temperature: They can sit at room temperature for a few hours, but to keep the frosting and center firm, refrigeration is recommended, especially in warm weather.
Troubleshooting Q&A
- Q: My base is soggy after chilling. What happened? — A: It was likely under-compressed or had too little syrup. Press the base firmly and let it chill longer. If soggy persists, blot excess moisture and re-press with a bit more maple syrup mixed in.
- Q: The center separated or became grainy after cooling. Why? — A: Overheating the peanut butter can change texture. Warm gently and stir until smooth, then mix in oat flour off the heat.
- Q: How do I get cleaner slices? — A: Use a sharp knife warmed under hot water and wiped dry between cuts. Chill bars thoroughly before slicing.
Let’s Eat
Cut yourself a bar, pour a cup of coffee, and enjoy something that feels like a treat but was made with whole ingredients you can pronounce. If you like, store a few in the freezer for mornings when you need an easy, satisfying breakfast-on-the-go.
If you try flavor variations or swaps, I’d love to hear which one became your new favorite. These bars are forgiving and adaptable—once you make them, you’ll find a dozen reasons to keep them in rotation.
Healthy Peanut Butter Bars
Ingredients
- 3 cups rolled oats
- 1 cup peanut butter can substitute any nut or seed butter of choice
- 0.75-1 cup maple syrup
- 2 cups peanut butter can substitute any nut or seed butter of choice
- 1 cup maple syrup
- 1.5 cups oat flour
- 1 serving chocolate frosting *
Instructions
- Line an 8 x 8 (or larger) baking dish with parchment paper and set aside.
- Make the base: in a large mixing bowl combine 3 cups rolled oats, 1 cup peanut butter, and 3/4–1 cup maple syrup; mix until fully combined and press evenly into the prepared pan. Refrigerate while preparing the fudge layer.
- Prepare the fudge center: in a microwave-safe bowl or small saucepan, gently heat 2 cups peanut butter with 1 cup maple syrup until pourable; stir in 1½ cups oat flour until a thick fudge batter forms.
- Pour the fudge batter over the chilled base, spread evenly, and return to the refrigerator to firm up.
- When the bars are firm, spread 1 serving of chocolate frosting over the top and refrigerate about 30 minutes more, or until the frosting is set.
- Lift the bars from the pan using the parchment, slice into 24 bars, and serve.
Equipment
- 8 x 8 (or larger) baking dish
- Parchment Paper
- large mixing bowl
- Microwave-safe bowl or small saucepan
- Spatula
- measuring cups
- Refrigerator
Notes
- Use sunflower seed butter or tahini for a nut-free option.
- Sprinkle coarse sea salt on top before slicing for extra flavor.
- Add dried fruit, chopped nuts, or shredded coconut for texture.
- Any nut butter can be substituted for peanut butter.
- Almond and cashew butters work well as alternatives.