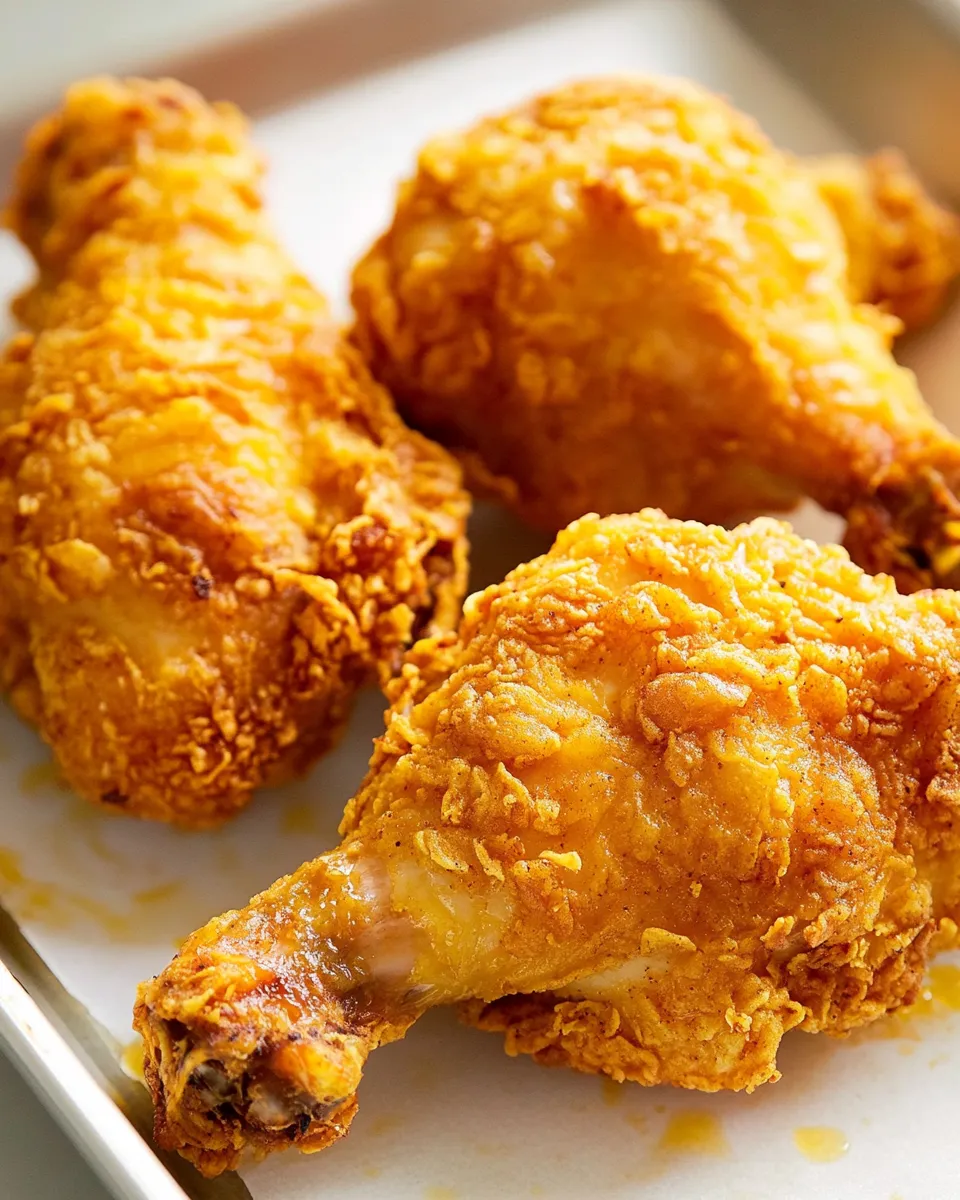
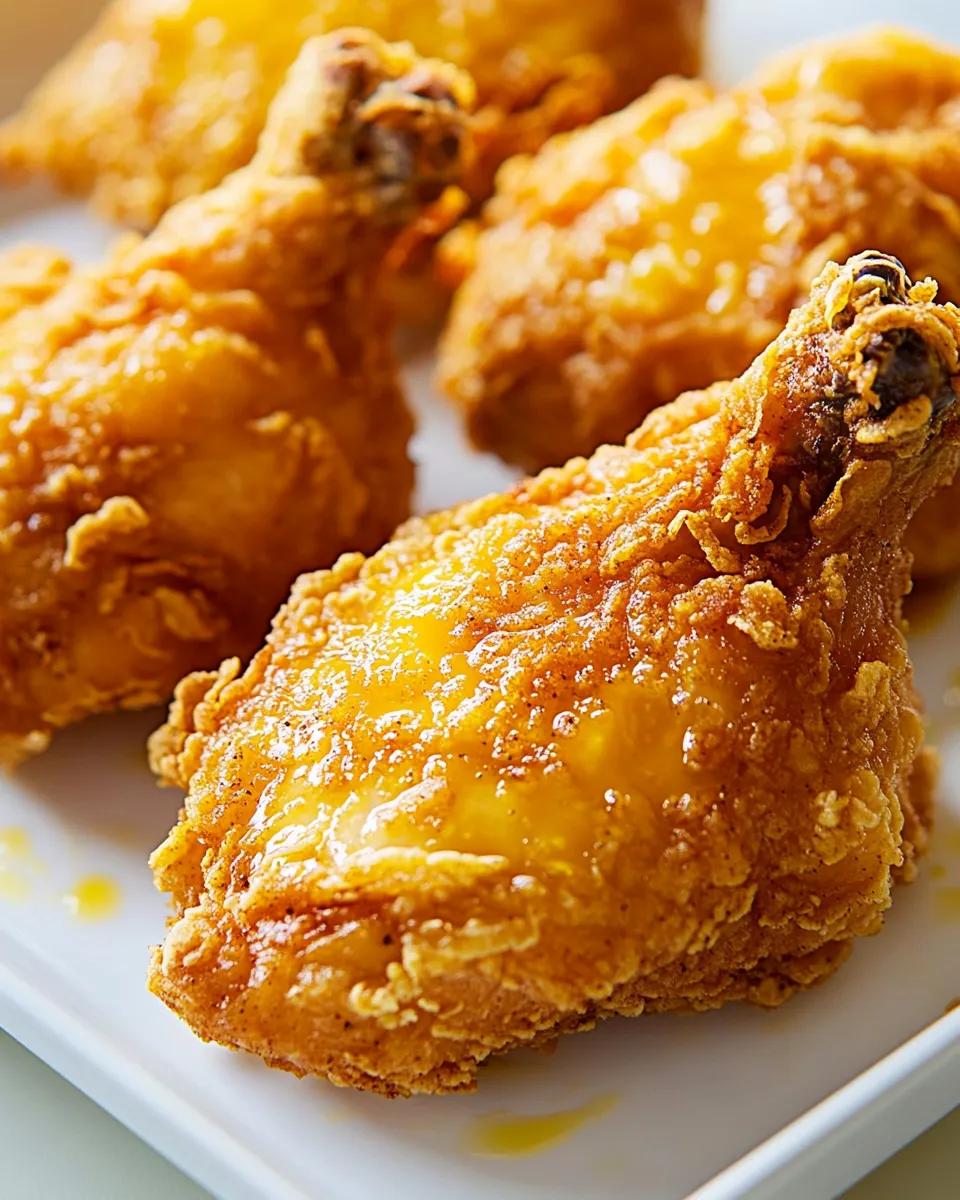
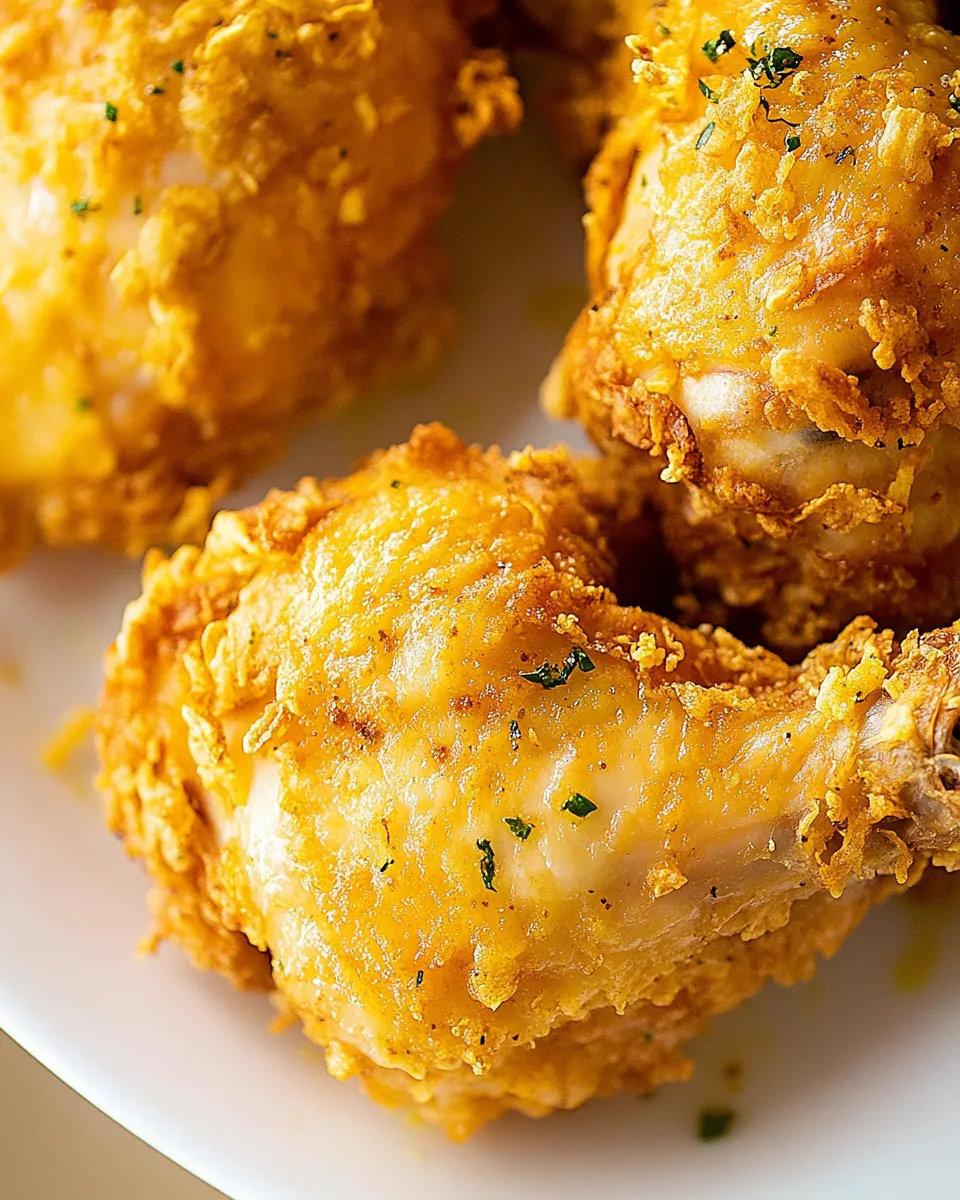
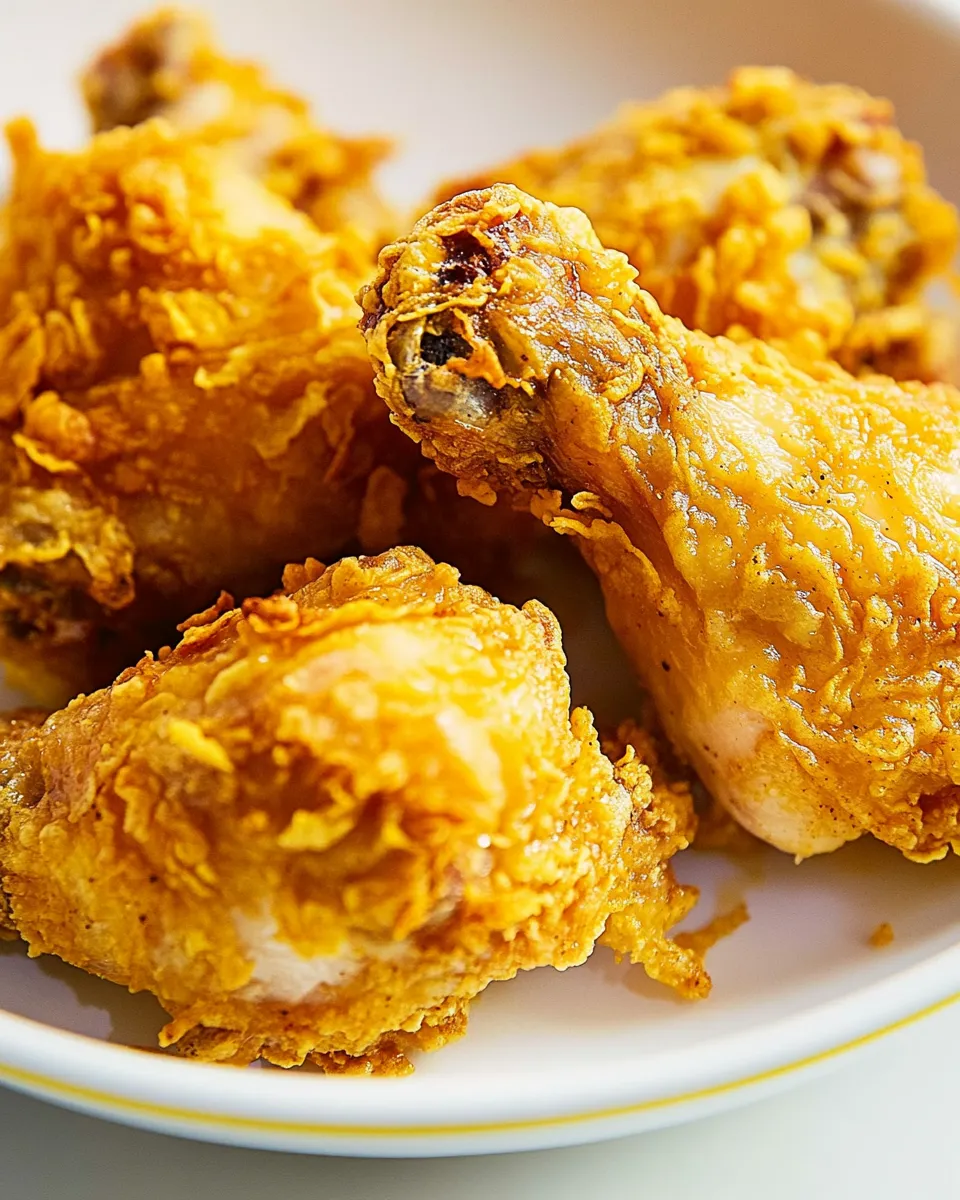
Crispy Broasted Chicken
There’s a reason broasted-style chicken is so addictive: wet brine, a light seasoned flour, and hot oil that seals in juiciness while creating a crackly, snappable crust. This version keeps things straightforward and practical—no mystery powders, no unusual equipment unless you want the pressure-cooker shortcut. It’s about predictable technique and honest flavors.
Plan for time up front: the buttermilk brine does the heavy lifting for tenderness and seasoning, so don’t rush it. The rest is mostly patience—dredge, rest, and fry at steady temperatures for even color and doneness. I’ll walk you through the exact steps I follow at home, plus gear, swaps, and fixes for common problems.
Follow the recipe exactly for consistent results, but I’ve added small tips so you can adapt it to the tools you own—Dutch oven, deep fryer or Instant Pot that reaches sauté temperatures. Ready? Let’s make Crispy Broasted Chicken you’ll want to repeat.
What’s in the Bowl
- 3–4 pound fryer pack of chicken — whole chicken cut into 2 breasts, 2 wings, 2 thighs, 2 drumsticks; provides a balanced mix of white and dark meat for even cooking and variety.
- 1 quart buttermilk — acids and enzymes tenderize and flavor; the wet brine helps the flour adhere.
- 3 tablespoons salt — used in the brine to season the meat throughout; do not skip.
- 1 teaspoon salt — added to the flour for the breading to season the crust.
- 1 cup all-purpose flour — the base of the dry coating; gives structure and crunch.
- 1 teaspoon turmeric — adds color and a mild earthy note to the crust.
- ½ teaspoon paprika — for a warm, sweet smokiness (smoked paprika is a great option).
- ½ teaspoon chili powder — brings gentle heat and depth; adjust if you prefer milder crusts.
- ½ teaspoon black pepper — sharpness in the seasoning mix; freshly cracked is best.
- 2 quarts oil for frying — canola, peanut, or vegetable oil; enough oil to deep-fry pieces safely.
Crispy Broasted Chicken, Made Easy
Use these steps exactly as written for reliable results. I keep the same ingredient amounts and the same sequence as the tested version, but tightened for clarity.
- Prepare the brine: Pour 1 quart buttermilk into a large baking dish or a large zip-top bag. Add 3 tablespoons salt and stir or shake until dissolved.
- Brine the chicken: Place the chicken pieces into the buttermilk mixture so each piece is submerged. If using a baking dish, cover with plastic wrap. If using a zip bag, seal tightly to prevent leaks. Refrigerate and brine for at least 4 hours or overnight for best tenderness and flavor.
- Prep the dry mix: When you’re ready to cook, set out a second baking dish or a wide shallow bowl for the flour. Combine 1 cup all-purpose flour with 1 teaspoon salt, 1 teaspoon turmeric, ½ teaspoon paprika, ½ teaspoon chili powder, and ½ teaspoon black pepper. Mix thoroughly until the spices are evenly distributed.
- Dredge the chicken: Set a tray or baking sheet nearby. Working one piece at a time, remove a chicken piece from the buttermilk, let the excess drip off briefly, then roll it in the flour mixture. Turn to coat evenly, then gently tap off the loose flour so the breading remains light. Place the dredged pieces on the prepared tray. Dredge all pieces before you heat the oil—this resting time helps the breading adhere and prevents clumping in the fryer.
- Heat the oil (broaster or fryer): If you’re using a broaster or a deep fryer, pour in the oil and preheat to 360°F. When the oil reaches the correct temperature, gently place each chicken piece into the hot oil, starting with the breasts. Close the lid and cook for 8–10 minutes until golden and the internal temperature reads 165°F. Use a meat thermometer to check doneness.
- Heat the oil (Dutch oven method): Place a large 6–8 quart Dutch oven on the stovetop and attach a cooking thermometer to the side. Pour in the oil and heat over medium-high until the thermometer reads 375°F.
- Fry in the Dutch oven: Once the oil is at 375°F, gently add the dredged chicken pieces to the oil, one at a time. Stir them gently so they don’t stick together. Adjust the burner as needed to keep the oil temperature steady between 350–360°F. When the temperature stabilizes, remove the thermometer and place a lid on top of the pot. Fry for 12–15 minutes until the crust is golden brown and the internal temperature of the thickest part of the meat reaches 165°F. Note: putting the lid on may raise the temperature slightly; it’s fine to remove the lid a few minutes in to re-check and adjust heat.
- Pressure-cooker/Instant Pot option (only if your model allows high sauté temps): If your Instant Pot can be adjusted to ~360–375°F on the sauté “more” setting, preheat it to 360–375°F and add the oil. Place the breasts down first, then add remaining pieces. Position the lid so it covers the chicken but doesn’t trigger the unit’s default shut-off if necessary. Fry for 14–16 minutes until golden and the internal temperature is 165°F.
- Drain and rest: Remove cooked chicken carefully with tongs and place it on a baking rack set over a sheet pan to drain and dry. This keeps the crust crisp instead of steaming on paper towels.
- Serve: Serve the chicken warm with your favorite comfort-food sides.
Why It Works Every Time
The buttermilk brine tenderizes and flavors the meat while creating a slightly sticky surface for the flour to cling to. The two-stage temperature guidance—initial high heat to seal and an adjusted range to finish—ensures crispness without overcooking the interior. Resting the dredged pieces before frying lets the coating set, reducing flour fall-off and uneven crusts.
Swap Guide
- Buttermilk — If you don’t have buttermilk, you can make a quick substitute with 1 quart milk + 4 tablespoons lemon juice or vinegar, left to sit 10 minutes. (Not in the original ingredients; only use if you must.)
- Oil — Peanut, canola, or vegetable oil all work. Use a neutral, high-smoke-point oil for safest results.
- Paprika — Swap smoked paprika for regular paprika for added smokiness if you like.
- Chili powder — Reduce or omit for a milder crust.
Gear Checklist
- Large baking dish or heavy-duty zip-top bag for brining.
- Wide shallow bowl or second baking dish for dredging.
- Baking sheet or tray to rest dredged pieces.
- Deep fryer, broaster, Dutch oven (6–8 qt), or Instant Pot that reaches high sauté temps.
- Instant-read or probe meat thermometer (essential).
- Tongs and a baking rack set over a sheet pan for draining.
Missteps & Fixes
Greasy, soggy crust
- Cause: Oil temperature too low or overcrowding. Fix: Bring oil up to the target range before adding chicken and fry in batches so temperature recovers quickly.
Breading falls off
- Cause: Dredging then immediately frying. Fix: Dredge all pieces and let them rest on a tray before frying so the coating adheres.
Undercooked interior, overbrowned exterior
- Cause: Oil too hot. Fix: Monitor temperature and cook the exterior at the suggested ranges (350–360°F when using a Dutch oven after initial heat).
Spring–Summer–Fall–Winter Ideas
- Spring — Serve with a light pea salad or lemony slaw to cut the richness.
- Summer — Pair with grilled corn, vinegar-based coleslaw, and fresh tomato slices.
- Fall — Roast root vegetables and offer a warm apple-cabbage slaw alongside.
- Winter — Serve with mashed potatoes, gravy, and roasted carrots for a cozy meal.
If You’re Curious
Yes, brining in buttermilk is worth the time—it tenderizes and seasons deeply rather than only salting the surface. The combination of acid and dairy also affects browning, giving the crust a golden color from the milk sugars plus the turmeric and paprika.
Keep-It-Fresh Plan
Leftover cooked chicken keeps well in the fridge for 3–4 days in an airtight container. Re-crisp in a 375°F oven on a wire rack for 8–12 minutes, flipping once, until heated through and the crust regains texture. Do not microwave unless you don’t mind a softened crust.
Crispy Broasted Chicken Q&A
Q: Can I use bone-in vs. boneless pieces? A: This recipe uses the specified bone-in pieces (breasts, wings, thighs, drumsticks) from the fryer pack for predictable timing and texture.
Q: How important is the thermometer? A: Very. Internal temp of 165°F is the safest and most reliable doneness indicator for chicken.
Q: Can I bake instead of fry? A: Baking will be less crisp. For best broasted-style results, frying at the temperature ranges given produces the signature crust and juiciness.
Before You Go
This recipe rewards planning: brine overnight if you can, dredge everything before the oil is hot, and keep a close eye on oil temperature during frying. Follow the sequence and temperatures here and you’ll get consistent golden, juicy Crispy Broasted Chicken every time. Now grab a cold drink, put on your favorite playlist, and enjoy the satisfying sizzle.

Crispy Broasted Chicken
Ingredients
- 3-4 pound fryer whole chicken, cut into pieces about 3–4 lb; cut into 2 breasts, 2 wings, 2 thighs, 2 drumsticks
- 1 quart buttermilk
- 3 tablespoons salt for brine
- 1 teaspoon salt for breading
- 1 cup all-purpose flour
- 1 teaspoon turmeric
- 1/2 teaspoon paprika or smoked paprika
- 1/2 teaspoon chili powder
- 1/2 teaspoon black pepper
- 2 quarts oil for frying canola, peanut, or vegetable oil
Instructions
- Pour the buttermilk into a large baking dish or zip-top bag, stir in 3 tablespoons salt, then add the chicken pieces making sure they are fully submerged. Cover or seal and refrigerate for at least 4 hours or overnight.
- In a shallow dish or bowl combine the flour, 1 teaspoon salt, turmeric, paprika, chili powder, and black pepper; mix thoroughly.
- Set a baking sheet or tray nearby. Remove one piece of chicken at a time from the buttermilk, let excess drip off, then dredge in the seasoned flour, tapping gently to remove excess. Arrange coated pieces on the sheet and dredge all pieces before heating the oil to allow the coating to rest.
- Prepare your frying vessel: if using a broaster follow manufacturer instructions and preheat oil to 360°F. If using a Dutch oven or deep pot, fit a thermometer and heat oil to 375°F.
- If deep-frying in a pot, carefully add chicken pieces to the hot oil a few at a time (start with breasts), monitoring temperature and keeping it between 350–360°F; gently move pieces so they fry evenly.
- Cover with a lid (if using a broaster or as directed) and fry until golden and an instant-read thermometer inserted into the thickest part reads 165°F—about 8–10 minutes in a broaster or 12–15 minutes in a Dutch oven; adjust times for Instant Pot sauté method per manufacturer guidance (about 14–16 minutes with lid partially covering if required).
- When cooked, remove chicken with tongs and transfer to a wire rack to drain and rest briefly before serving.
Equipment
- large baking dish or large zip-top bag
- baking sheet or tray
- large mixing bowl
- deep pot or Dutch oven (6–8 quart) or broaster/pressure-fryer
- candy or deep-fry thermometer
- Tongs
- Wire Rack
Notes
- Cool completely before storing in an airtight container.
- Store leftovers in the refrigerator for up to 3–4 days.
- Reheat in the oven or air fryer for best crispness.
- Do not microwave if you want crunchy skin.