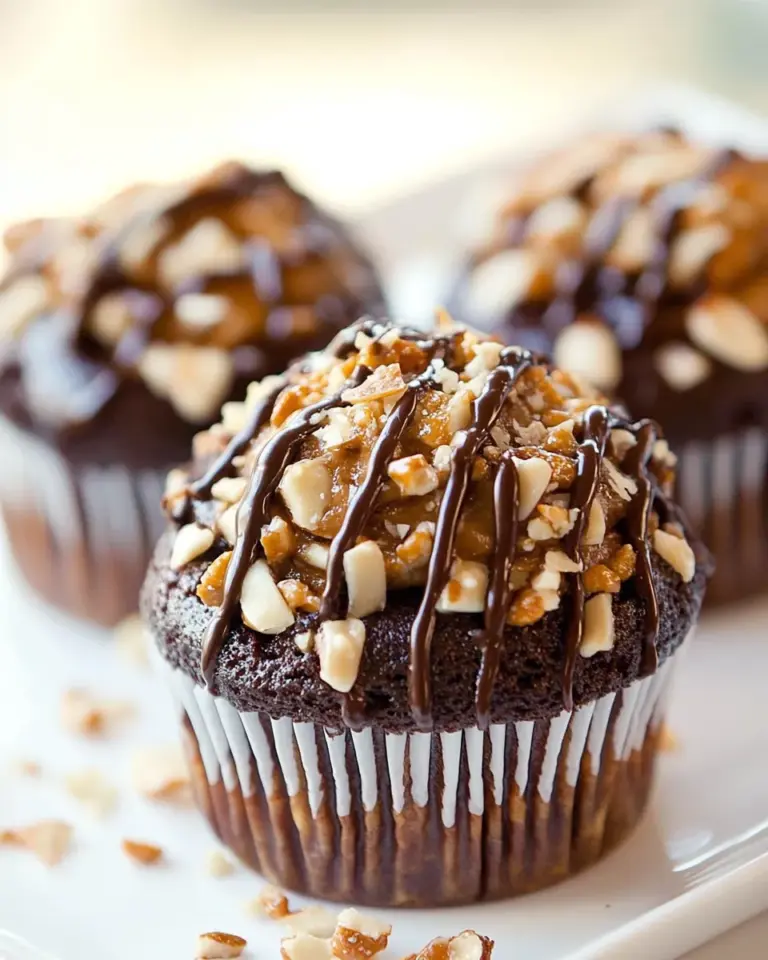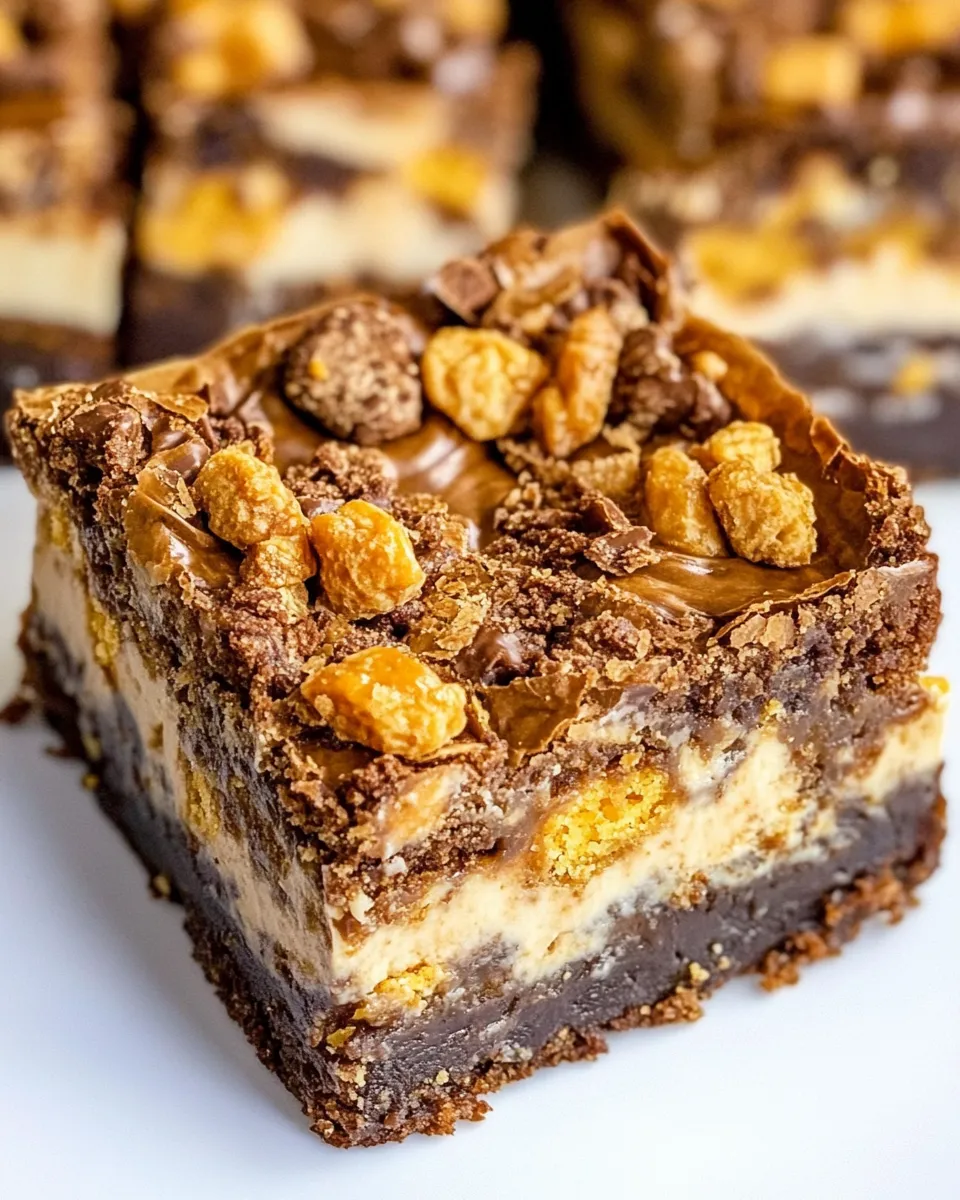
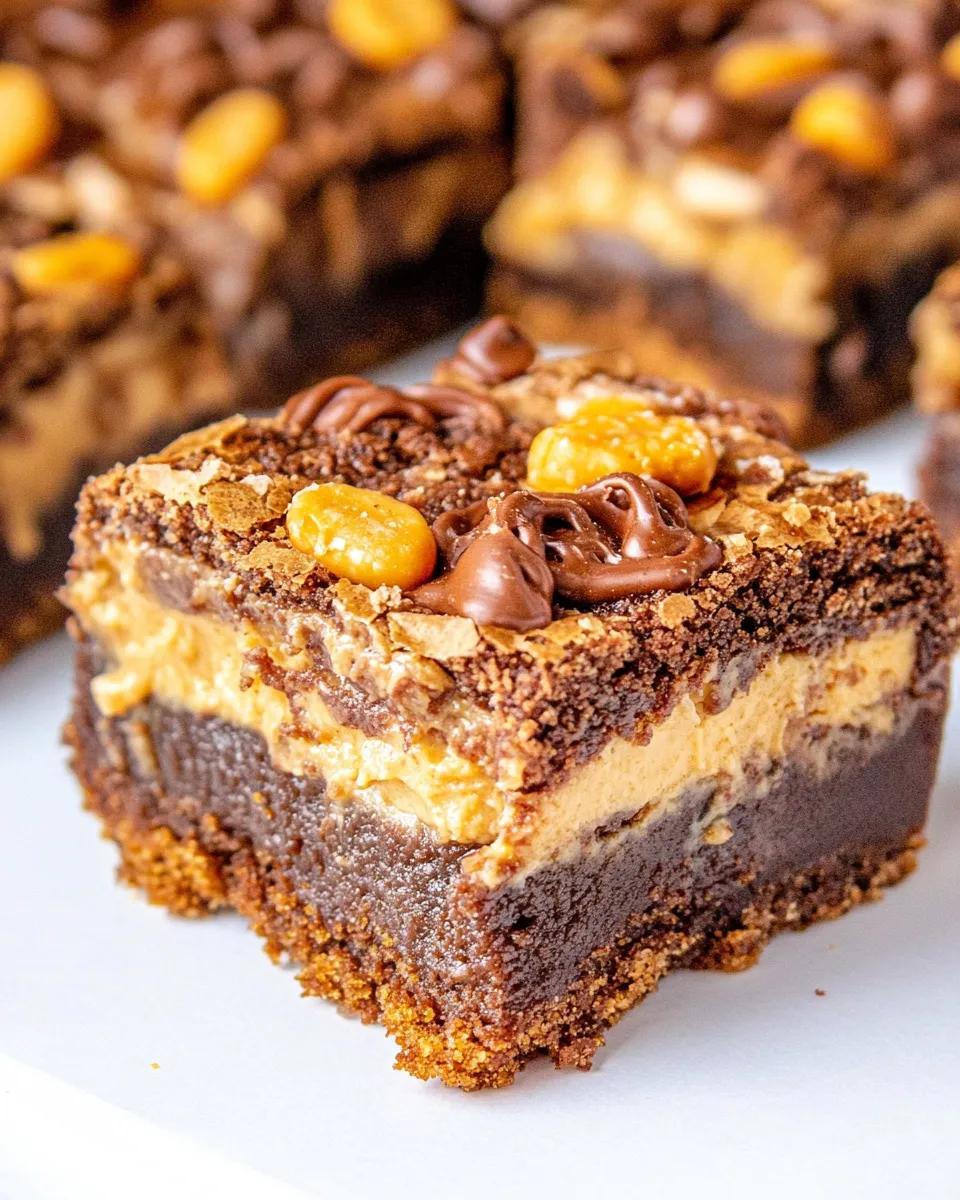
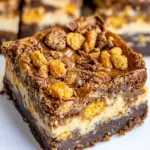
Butterfinger Cheesecake Brownies
These Butterfinger Cheesecake Brownies are the kind of dessert I make when I want to impress without fuss. Rich fudgy brownie, a creamy cheesecake layer studded with crunchy Butterfinger pieces, and a peanut-butter glaze on top—each bite hits multiple textures and flavors. They’re decadent but straightforward to pull together.
I like to keep this recipe practical: prep an 8×8 pan, melt chocolate and butter gently, and mix two simple batters. The trick is to cool them completely before cutting so the swirls stay pretty and the bars slice cleanly. Make them for a potluck, a weekend bake, or when you need a reliable showstopper.
Below you’ll find a clear shopping list, a detailed step-by-step method using the exact ingredient amounts, notes on gear and pitfalls, low-carb alternatives, storage tips, and a short Q&A to troubleshoot common questions. Read through once, then set a timer and enjoy the process.
Shopping List
- 1 stick (4 ounces) unsalted butter — for the brownie base; unsalted lets you control salt.
- 2 ounces semi-sweet chocolate, chopped — melts into the butter for a fudgy chocolate backbone.
- 1 cup granulated sugar — sweetens the brownie batter.
- 2 large eggs + 1 egg yolk — provide structure and richness to the brownie layer.
- 1/2 teaspoon salt — balances sweetness in the brownie.
- 3/4 cup all-purpose flour — the sole dry binder in the brownie.
- 8 ounces full-fat cream cheese, very soft — makes the cheesecake layer smooth and tangy.
- 1/2 cup granulated sugar — for the cheesecake filling; keeps it sweet but not cloying.
- 1 large egg + 1 egg yolk — adds creaminess and helps set the cheesecake.
- 12 mini Butterfinger bars (or 5 regular), roughly chopped, divided — crunchy chocolate-caramelized peanut-flavored candy folded into the cheesecake, with some reserved for topping.
- 1 cup creamy peanut butter — used in the glaze; creamy versions melt smoothly.
- 2 tablespoons confectioners’ sugar — sweetens and thickens the peanut butter glaze.
- Parchment paper & non-stick spray — for easy removal and cleaner edges.
How to Prepare Butterfinger Cheesecake Brownies
- Preheat the oven to 350°F (175°C). Line an 8×8-inch square baking pan with parchment paper so the paper hangs over two opposite sides for easy lifting. Lightly spray the parchment and any exposed pan edges with non-stick spray; set the pan aside.
- Place 1 stick (4 ounces) unsalted butter and 2 ounces chopped semi-sweet chocolate in a small saucepan over medium-low heat. Stir or whisk occasionally until both are fully melted and smooth. Remove the pan from heat immediately to avoid burning.
- Pour the melted chocolate mixture into a large, heatproof bowl. Add 1 cup granulated sugar and whisk until combined and slightly glossy. Add 2 large eggs and 1 egg yolk, beating until the mixture is smooth and homogenous.
- Whisk in 1/2 teaspoon salt and 3/4 cup all-purpose flour until just combined—stop when you no longer see streaks of flour. Avoid over-mixing to keep the brownie tender.
- Spread the brownie batter into the prepared 8×8 pan, smoothing the top with a rubber spatula so it’s even.
- In a separate large bowl, beat 8 ounces very soft full-fat cream cheese with a handheld mixer until completely smooth and free of lumps. Add 1/2 cup granulated sugar, then add 1 large egg and 1 egg yolk. Beat the mixture until smooth and creamy, about 1 minute.
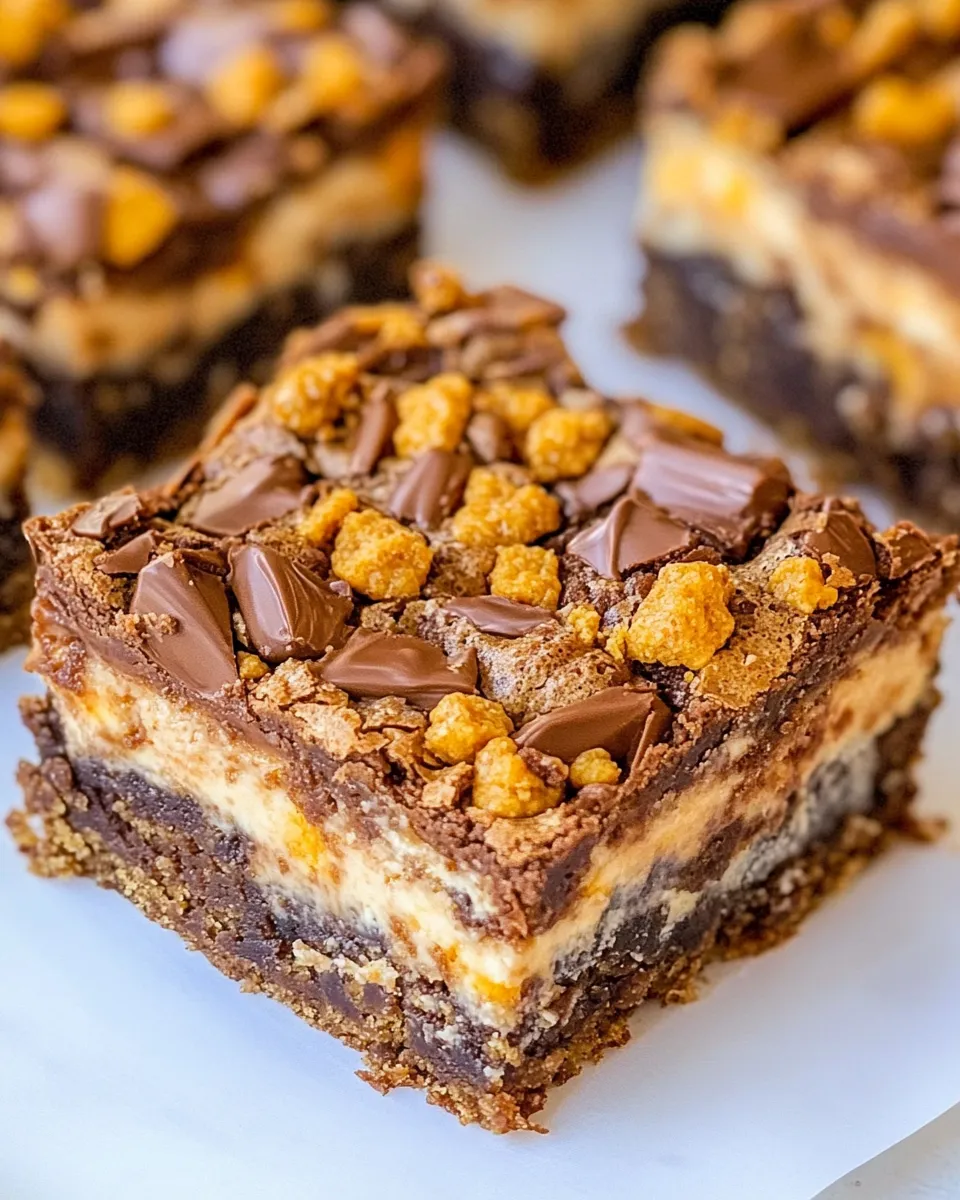
- Fold the chopped Butterfinger pieces into the cheesecake batter, reserving about 1/4 cup of the chopped candy for topping. Folding keeps the candy pieces intact and evenly distributed.
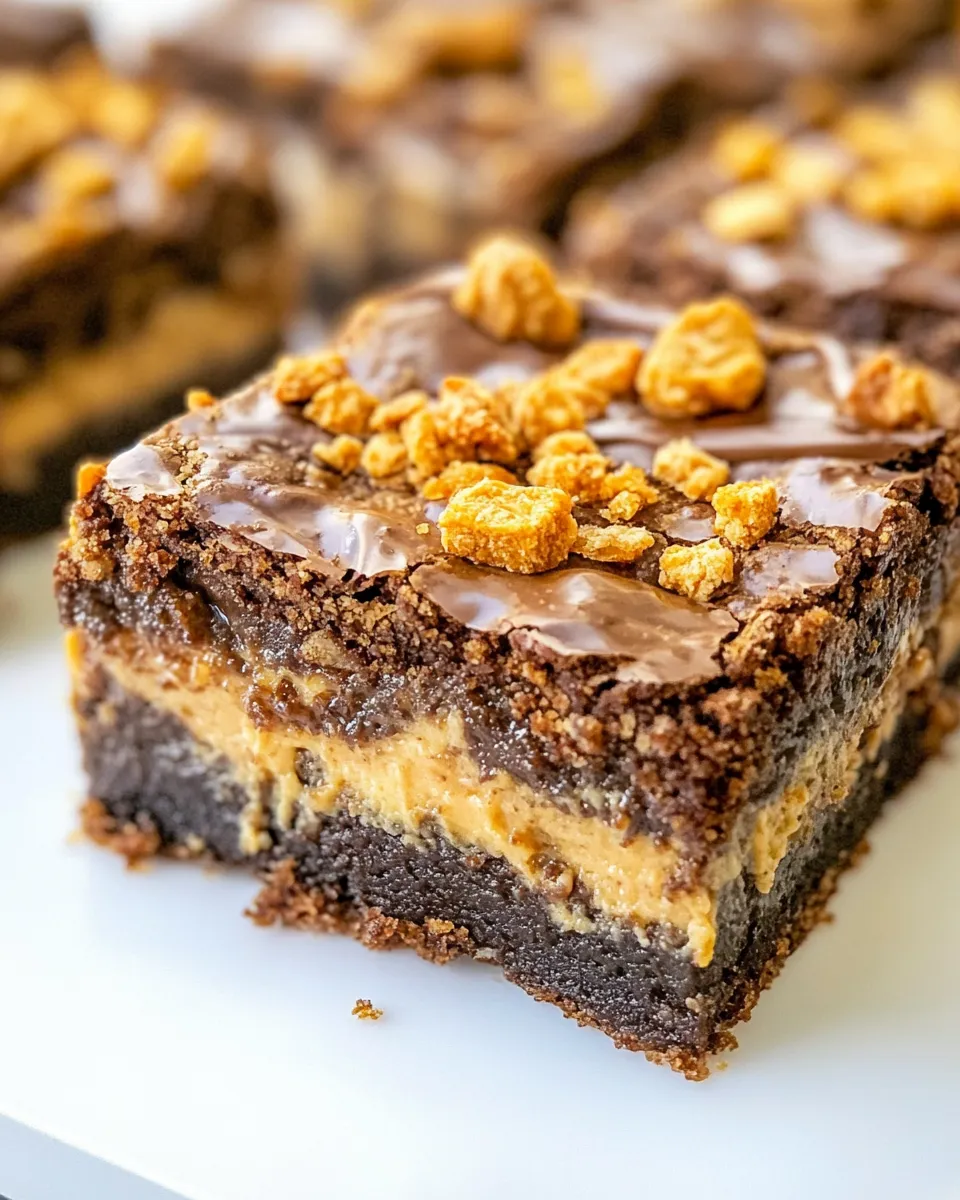
- Pour the cheesecake mixture over the brownie batter in the pan. Using a knife, gently swirl the two batters together a few times to create a marbled effect—don’t over-swirl or the layers will fully combine.
- Bake in the preheated oven for 35 minutes. The edges should be set and the center just slightly jiggly but not liquid. A toothpick inserted near the center may come out with a few moist crumbs—that’s okay.
- Remove the pan from the oven and transfer to a wire rack to cool completely in the pan. Cooling fully is important for clean slices and for the cheesecake layer to set.
- While the bars cool, make the peanut butter glaze. Put 1 cup creamy peanut butter in a small saucepan over medium-low heat and warm, stirring occasionally, until it melts and loosens. Remove from heat and whisk in 2 tablespoons confectioners’ sugar until smooth. If the glaze seems too thick, warm gently again or add a teaspoon of water to reach drizzle consistency.
- Once the bars are completely cool, lift them from the pan using the parchment overhang and place on a cutting board. Use a sharp knife to cut into bars—wipe the knife between cuts for neater edges.
- Sprinkle the reserved Butterfinger crumble over each bar, then drizzle with the peanut butter glaze. Let the glaze set a few minutes, then serve. Store any leftovers in an airtight container in the refrigerator.
The Upside of Butterfinger Cheesecake Brownies
These bars bring three textures in one: fudgy brownie, silky cheesecake, and crunchy Butterfinger shards. They travel well in a cooler for picnics or potlucks and look impressive on a dessert tray without complicated techniques. The recipe scales easily: double for a 9×13 pan (watch baking time) or halve for a smaller crowd.
Because the cheesecake layer is baked, these bars keep their shape better than a no-bake topping, so they’re ideal for slicing and serving at gatherings. The peanut butter glaze adds a glossy finish and complements the Butterfinger flavor without overpowering it.
Low-Carb/Keto Alternatives
- Swap granulated sugar and confectioners’ sugar with a granulated erythritol blend and powdered erythritol respectively—measure cup-for-cup for a starting point but taste and texture may vary.
- Replace the 3/4 cup all-purpose flour with a 1:1 low-carb baking flour blend designed for keto baking. Expect slightly different crumb and possibly a denser brownie.
- Butterfinger bars are not keto-friendly; substitute with finely chopped, sugar-free peanut crunch candy or toasted chopped peanuts with a touch of sugar-free chocolate for crunch.
- Use a natural or powdered peanut butter that’s unsweetened; sweeten the glaze with an appropriate keto sweetener to taste.
Gear Up: What to Grab
- 8×8-inch square baking pan — the recipe is scaled for this size.
- Parchment paper — for easy removal and cleaner cuts.
- Small saucepan — for melting chocolate/butter and warming peanut butter glaze.
- Large mixing bowls — one for the brownie batter, one for the cheesecake layer.
- Handheld mixer or stand mixer — helpful for getting the cheesecake smooth and lump-free.
- Rubber spatula and whisk — for folding and smoothing batters.
- Sharp knife and cutting board — for slicing neat bars (wipe the knife between cuts).
Pitfalls & How to Prevent Them
- Brownie layer too dry: Don’t overbake. Remove when the center is just set and the edges are firm.
- Cheesecake with lumps: Start with very soft, room-temperature cream cheese and beat until completely smooth before adding other ingredients.
- Bars fall apart when cutting: Cool completely in the pan before slicing. Chilling for 30–60 minutes in the fridge firms them up further for cleaner cuts.
- Butterfinger pieces sink to the bottom: Reserve some pieces for topping and fold the rest gently into the cheesecake—don’t overmix.
- Peanut butter glaze too thick or grainy: Warm gently and whisk, adding a teaspoon of water or warming slightly more if needed; use creamy peanut butter for smoothness.
Make It Year-Round
These brownies work for holidays, bake sales, and casual weeknight dessert needs. In summer, serve chilled with a scoop of vanilla ice cream. During colder months, offer warm slices with a warm drizzle of extra peanut butter glaze. For seasonal tweaks, swap Butterfinger for other crunchy candy bars you enjoy—keep the same technique and proportions.
Behind-the-Scenes Notes
I tested this recipe focusing on balance: enough brownie depth so the cheesecake layer isn’t too sweet, and enough Butterfinger for crunch without overwhelming texture. The reserved candy on top is crucial for visual contrast and fresh crunch on each bite. The glaze binds the topping and adds a glossy finish that photographs well.
When I photographed the first batch, cooling time cut down crumb tear and improved slices dramatically. If you’re photographing or gifting these, chill slightly in the fridge after the glaze sets so they look neat in boxes.
Save It for Later
- Refrigerate: Store bars in an airtight container in the fridge for up to 5 days.
- Freeze: Freeze cut bars layered between parchment for up to 2 months. Thaw in the fridge overnight before serving.
- Reheat: Warm briefly in the microwave (10–15 seconds) or in a 300°F oven for 5–8 minutes if you prefer them slightly warm—glaze may soften.
Helpful Q&A
- Q: Can I use light cream cheese? A: Full-fat cream cheese yields the best texture and flavor; low-fat versions can be runnier and less creamy.
- Q: Can I make this in a 9×9 or 9×13 pan? A: You can use a 9×9 with similar bake time; for 9×13, double the recipe and increase baking time—check for set center.
- Q: My cheesecake layer cracked—why? A: Overbeating or baking at too high a temperature can cause cracking. Beat until just smooth and bake at the specified temperature. Cooling gradually helps too.
- Q: Can I skip the peanut butter glaze? A: Yes. The bars will still be delicious; the glaze adds sweetness and shine. You can also use melted chocolate as an alternative drizzle.
Hungry for More?
If you liked these bars, try swapping the Butterfinger for chopped peanut butter cups or swirl in a caramel ribbon. Bookmark this page and tag me when you make them—there’s a lot of room for creativity within this straightforward method.
Happy baking—these are worth the few extra minutes of prep for the payoff in texture and flavor.
Butterfinger Cheesecake Brownies
Ingredients
- 1 stick (4 ounces) unsalted butter
- 2 ounces semisweet chocolate chopped
- 1 cup granulated sugar for brownie batter
- 2 eggs large (plus 1 extra egg yolk)
- 1/2 teaspoon salt
- 3/4 cup all-purpose flour
- 8 ounces full-fat cream cheese very soft
- 1/2 cup granulated sugar for cheesecake layer
- 1 egg large (plus 1 extra egg yolk)
- 12 mini bars Butterfinger roughly chopped, divided (or 5 regular bars)
- 1 cup creamy peanut butter
- 2 tablespoons confectioners' sugar
Instructions
- Preheat the oven to 350°F (175°C). Line an 8x8-inch baking pan with parchment paper and lightly spray the parchment and any exposed pan with nonstick spray; set aside.
- Make the brownie batter: melt the butter and chopped semisweet chocolate together in a small saucepan over medium-low heat, whisking occasionally until smooth. Remove from heat and transfer to a large heatproof bowl.
- Whisk the brownie sugar into the melted chocolate until combined. Add the 2 large eggs and 1 extra egg yolk and whisk until smooth.
- Gently whisk in the salt and the flour just until combined. Spread the brownie batter evenly in the prepared pan and smooth the top with a spatula.
- Make the cheesecake layer: using a handheld mixer or electric mixer, beat the softened cream cheese until completely smooth. Add the 1/2 cup sugar, 1 large egg, and 1 extra egg yolk and beat until creamy, about 1 minute.
- Fold most of the chopped Butterfinger pieces into the cheesecake batter, reserving about 1/4 cup crumble for topping.
- Pour the cheesecake batter over the brownie layer. Using a knife, swirl gently through the batters to create a marbled effect.
- Bake in the preheated oven for 35 minutes, or until the edges are set and the center is just set but not liquid. Remove from oven and cool completely in the pan on a wire rack.
- Make the peanut butter glaze: place the peanut butter in a small saucepan over medium-low heat and warm until melted and smooth, stirring occasionally. Whisk in the confectioners' sugar until combined and smooth.
- Lift the cooled bars from the pan using the parchment. Cut into squares, sprinkle each with the reserved Butterfinger crumble, and drizzle with the peanut butter glaze before serving.
Equipment
- 8x8-inch Baking Pan
- Parchment Paper
- Small Saucepan
- large heatproof bowl
- rubber spatula
- handheld mixer or electric mixer
- Wire Rack
- small bowl
Notes
- Use very soft cream cheese for a smooth cheesecake layer.
- Reserve some Butterfinger pieces for topping for extra crunch.
- Cool completely before cutting to keep clean edges.
- Warm the peanut butter slowly to avoid burning.