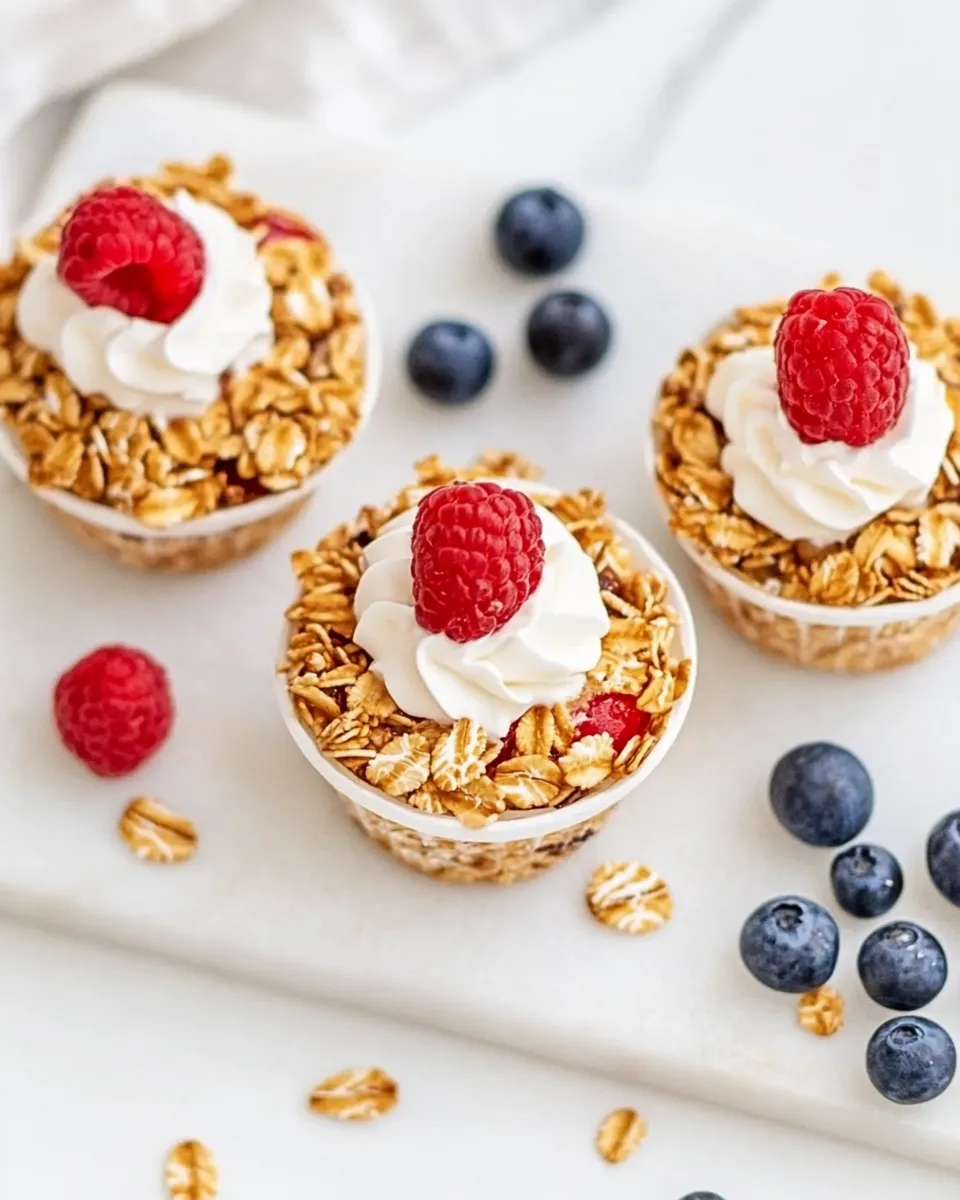
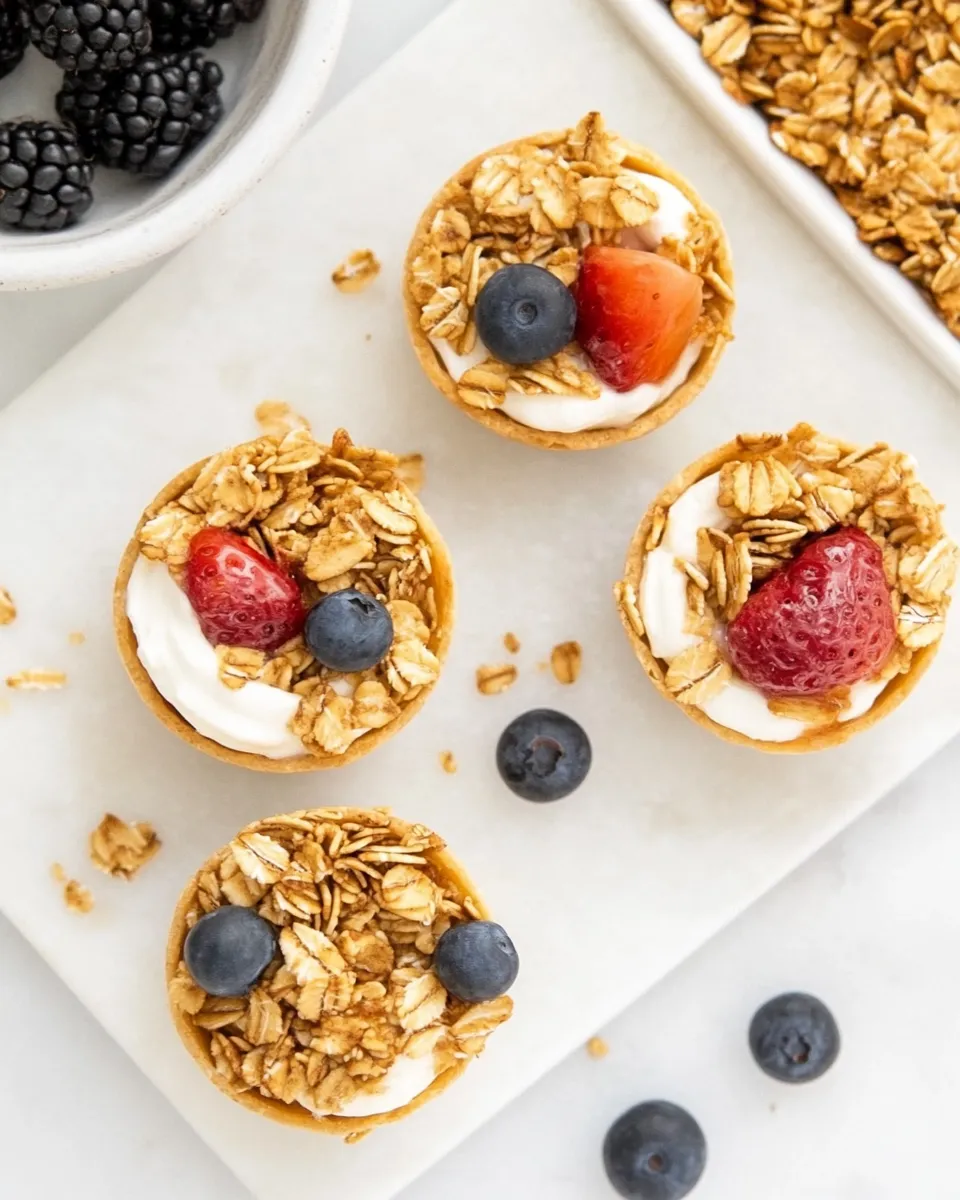
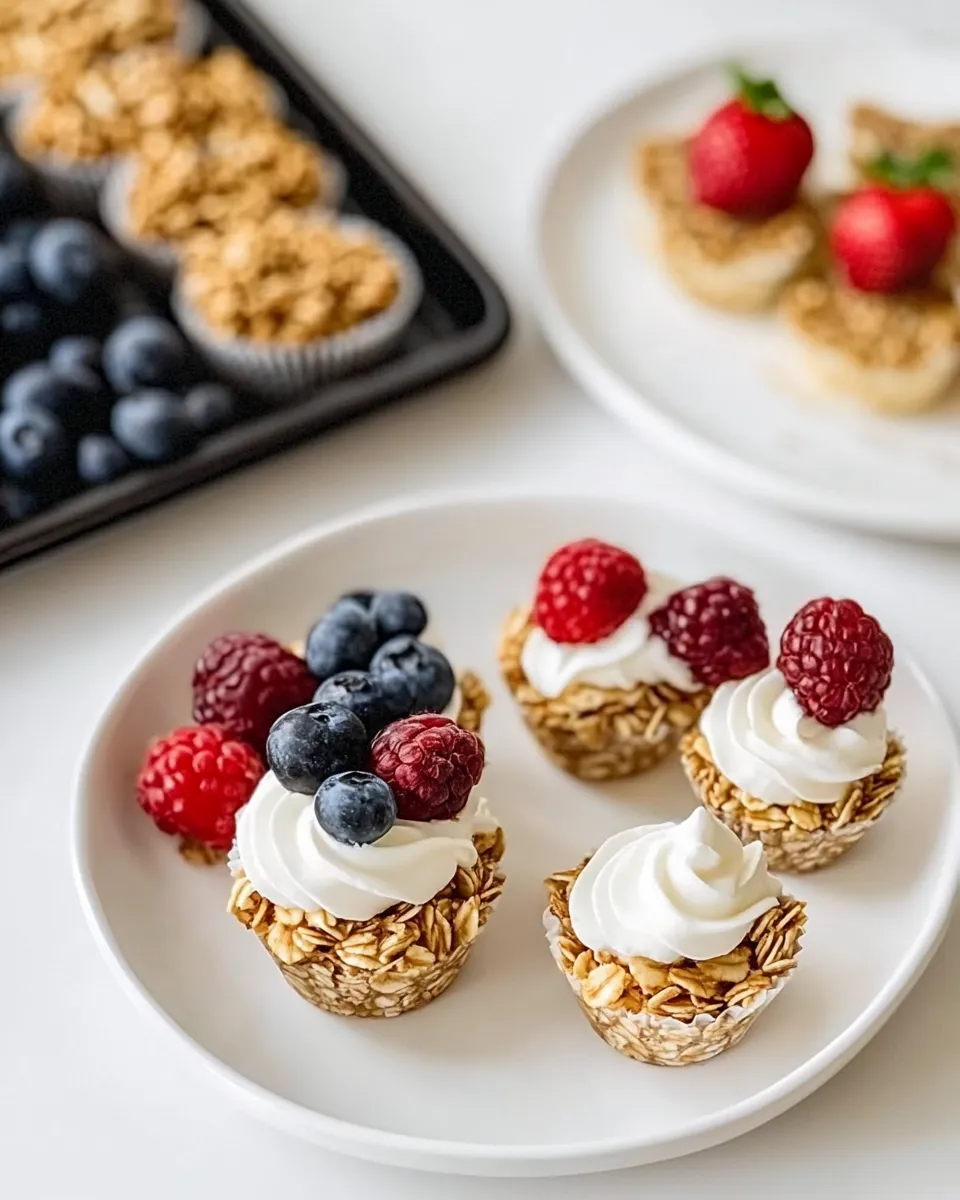
Breakfast Granola Cups
These Breakfast Granola Cups are made to be practical, portable, and reliable. They stack well in the fridge or freezer, stand up to grab-and-go mornings, and feel a little nicer than a plain bowl of cereal. The texture is crunchy at the edges with a chewier center — perfect with a spoonful of yogurt or a handful of fresh fruit.
The recipe is straightforward and forgiving: oats bind with applesauce (or mashed banana) and a touch of honey or agave, seasoned with vanilla, cinnamon, and salt. You can make six generous cups from the quantities below, or double everything to meal-prep a dozen. Baking them briefly and pressing the sides mid-bake gives them sturdier walls so they hold together when you remove them from the tin.
This post covers exact shopping items, clarified step-by-step instructions, simple swaps for allergies and diets, storage, and a few practical tips I use when testing recipes in my kitchen. No fuss — just reliable breakfasts you can depend on.
Your Shopping Guide
- Applesauce or mashed banana — choose unsweetened applesauce or a ripe mashed banana; acts as the binder and adds moisture.
- Honey or agave — sweetener and helps the oats stick together; pick agave for a vegan option.
- Pure vanilla extract — adds depth and aroma; use good quality for best flavor.
- Cinnamon — warm spice to brighten the mix; adjust to taste.
- Salt — enhances all flavors; fine sea salt works well.
- Rolled oats — the base and bulk of the cups; use old-fashioned rolled oats, not quick oats for better texture.
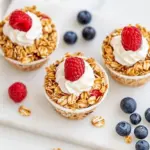
- Yogurt or fresh fruit — serving suggestions to top the cups; pick what you enjoy for texture and tang.
Stepwise Method: Breakfast Granola Cups
Yield: 6 granola cups
- Preheat and prepare: Lightly grease a six-cup muffin tin (standard size) or use a mini muffin tin if you want smaller portions. Set the tin aside while you mix the ingredients.
- Combine wet ingredients: In a medium bowl whisk together 1/4 cup applesauce (or mashed banana), 1/4 cup honey (or agave), and 1/2 tsp pure vanilla extract until smooth and well combined.
- Add spices and salt: Stir 1/2 tsp cinnamon and 1/4 tsp salt into the wet mixture so the seasoning distributes evenly.
- Fold in the oats: Add 1 1/4 cups rolled oats to the bowl and stir until the oats are evenly coated and the mixture holds together. Make sure there are no dry pockets of oats.
- Portion into tins: Divide the mixture among the six prepared muffin cups. Press the mixture up the sides of each cup and compact it firmly so the walls of each granola cup are sturdy.
- Bake: Place the muffin tin in a 330°F (165°C) oven and bake for 12 minutes.
- Press again mid-bake: Remove the tin from the oven and press the sides of each granola cup again with the back of a spoon to reinforce the walls and help the mixture adhere.
- Finish baking: Return the tin to the oven and bake until set; total time remains about 12 minutes plus the brief pause — do not exceed the original bake time significantly or the cups can over-brown.
- Cool before removing: Let the granola cups sit in the tin for 10 minutes to firm up. This cooling step reduces crumbling when you remove them.
- Serve or store: Remove gently from the tins and top with yogurt or fresh fruit as desired. If prepping for later, allow to cool completely before storing or freezing.
- Scaling note: If you’re feeding a family or meal-prepping, double all ingredients to make a dozen cups.
Why This Recipe Is Reliable
The recipe uses simple ratios — oats to binder — that create a predictable texture every time. Applesauce or mashed banana provide moisture and natural pectin, which helps the oats stick without needing oil or butter. A short bake at a moderate temperature sets the cups without over-drying them. The mid-bake pressing step is essential: it compacts the oats and reduces crumbling when you unmold the cups. Finally, the 10-minute rest in the tin lets the structure firm up, which makes these cups practical for transport and topping.
Allergy-Friendly Substitutes

- For egg/dairy allergies — this recipe contains no eggs or dairy. Use vegan honey substitute (agave) and plant-based yogurt for serving.
- For gluten sensitivity — use certified gluten-free rolled oats to avoid cross-contamination.
- Nut allergies — this base recipe is nut-free. If adding mix-ins later, avoid nuts or use seeds like pumpkin or sunflower instead.
- Sensitive to cane sugar — use agave or a mild maple syrup for a different sweetener profile, keeping amounts the same.
Hardware & Gadgets
- Muffin tin — a six-cup standard muffin tin; a mini muffin tin works if you prefer smaller portions.
- Spoon or small measuring cup — for pressing the mixture into the tins and compacting the sides.
- Mixing bowl and whisk — a medium bowl to combine wet ingredients and a whisk to break up lumps.
- Oven — for the brief bake that sets the cups.
Steer Clear of These
- Overbaking — baking longer than recommended will dry out the cups and make them brittle.
- Using quick oats — they will produce a softer, less structured cup that may crumble.
- Skipping the mid-bake press — unpressed sides tend to fall apart when unmolded.
- Removing too soon — pulling cups out of the tin immediately after baking increases crumbling; wait the 10 minutes.
Adaptations for Special Diets
- Vegan — use agave instead of honey and top with plant-based yogurt.
- Lower-sugar — reduce honey/agave slightly, or use unsweetened applesauce and rely on fruit toppings for sweetness.
- Higher-protein — top with Greek yogurt or a dairy-free high-protein yogurt; you can also fold in a tablespoon of chia seeds for extra protein and binding (note: only add if you’re okay introducing a new ingredient).
Chef’s Notes
- Texture balance — the ratio of 1 1/4 cups oats to 1/4 cup applesauce and 1/4 cup sweetener produces a sturdy but not rock-hard cup. If you experiment, adjust wet ingredients carefully.
- Flavor variations — add a pinch of nutmeg, a tablespoon of cocoa powder, or a teaspoon of citrus zest to change the profile; keep total dry-to-wet balance in mind.
- Prevent sticking — a light greasing of the tin is usually enough; use a nonstick spray or a little oil on a paper towel.
- Serving ideas — scoop yogurt or top with fresh berries, sliced banana, or a drizzle of nut butter for extra richness.
How to Store & Reheat
- Room temperature — store in an airtight container for up to 24 hours; best consumed within the first day for max crunch.
- Refrigerator — keep in an airtight container for up to 5 days. If they soften in the fridge, toast briefly in a 300°F oven for 5 minutes to crisp.
- Freezer — freeze cooled granola cups in a single layer on a tray, then transfer to a freezer bag for up to 3 months. Thaw at room temperature or in the fridge, then warm slightly before serving if desired.
Popular Questions
- Can I add mix-ins like nuts or dried fruit? — Yes, but be aware added dry ingredients will change texture; fold them in sparingly so the cups still bind well.
- Will these hold together without a sweetener? — The sweetener helps with binding and flavor. Omitting it may result in looser cups; if you must, increase the applesauce slightly.
- Can I make these in a mini muffin tin? — Yes. Baking time may be shorter; watch closely and remove when edges are lightly browned and set.
- Why press the sides twice? — Pressing before and mid-bake compacts the oats, creating sturdier walls to reduce crumbling when unmolded.
Time to Try It
These Breakfast Granola Cups are small adjustments away from becoming a routine: mix, press, bake, and cool. Follow the step-by-step method above exactly the first time, then experiment with toppings and minor flavor tweaks. Double the batch when you need a week’s worth of breakfasts, and keep extras in the freezer for truly no-fuss mornings. Enjoy — and if one cup crumbles a bit, remember: a bowl with yogurt and fruit still makes a very good breakfast.
Breakfast Granola Cups
Ingredients
- 1/4 cup applesauce or mashed banana
- 1/4 cup honey or agave
- 1/2 tsp pure vanilla extract
- 1/2 tsp ground cinnamon
- 1/4 tsp salt
- 1 1/4 cup rolled oats
- yogurt or fresh fruit (for serving)
Instructions
- Preheat the oven to 330°F (165°C) and grease a 6-cup muffin tin; set aside.
- In a mixing bowl, whisk together the applesauce or mashed banana, honey or agave, and vanilla until smooth.
- Add the cinnamon, salt, and rolled oats to the wet mixture and stir until the oats are evenly coated.
- Portion the mixture into the 6 prepared muffin cups, pressing the mixture up the sides with the back of a spoon to form cups.
- Bake for 12 minutes, then remove from the oven and press the sides again with a spoon to help shape the cups.
- Let the granola cups cool in the tin for 10 minutes before carefully removing to prevent crumbling.
- Serve with yogurt or fresh fruit, or freeze for later use if desired.
Equipment
- Muffin Tin
- Mixing Bowl
- Whisk
- Spoon
- Measuring cups and spoons
Notes
- Double the recipe to make 12 granola cups.
- Press the sides firmly before and after baking for sturdier cups.
- Let cups cool 10 minutes in the tin to prevent crumbling.
- Serve with yogurt or fresh fruit as suggested.
- Use applesauce or mashed banana interchangeably as the binder.