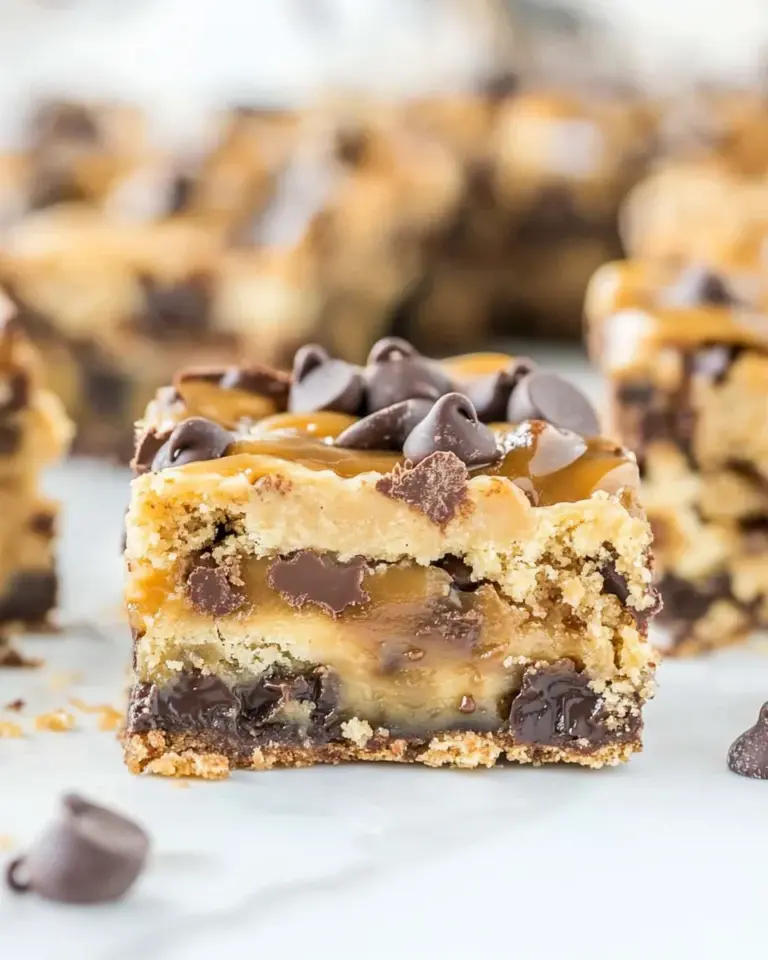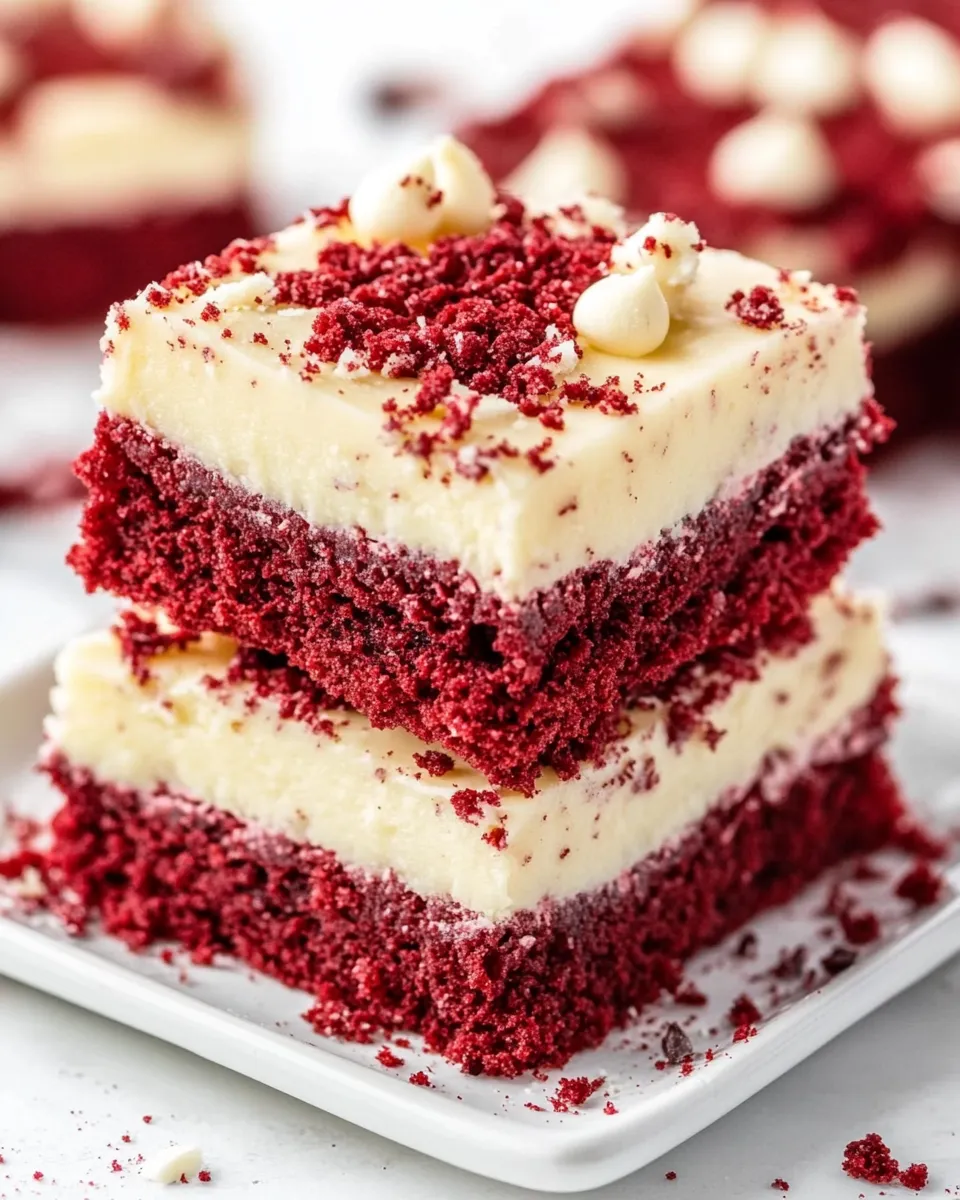
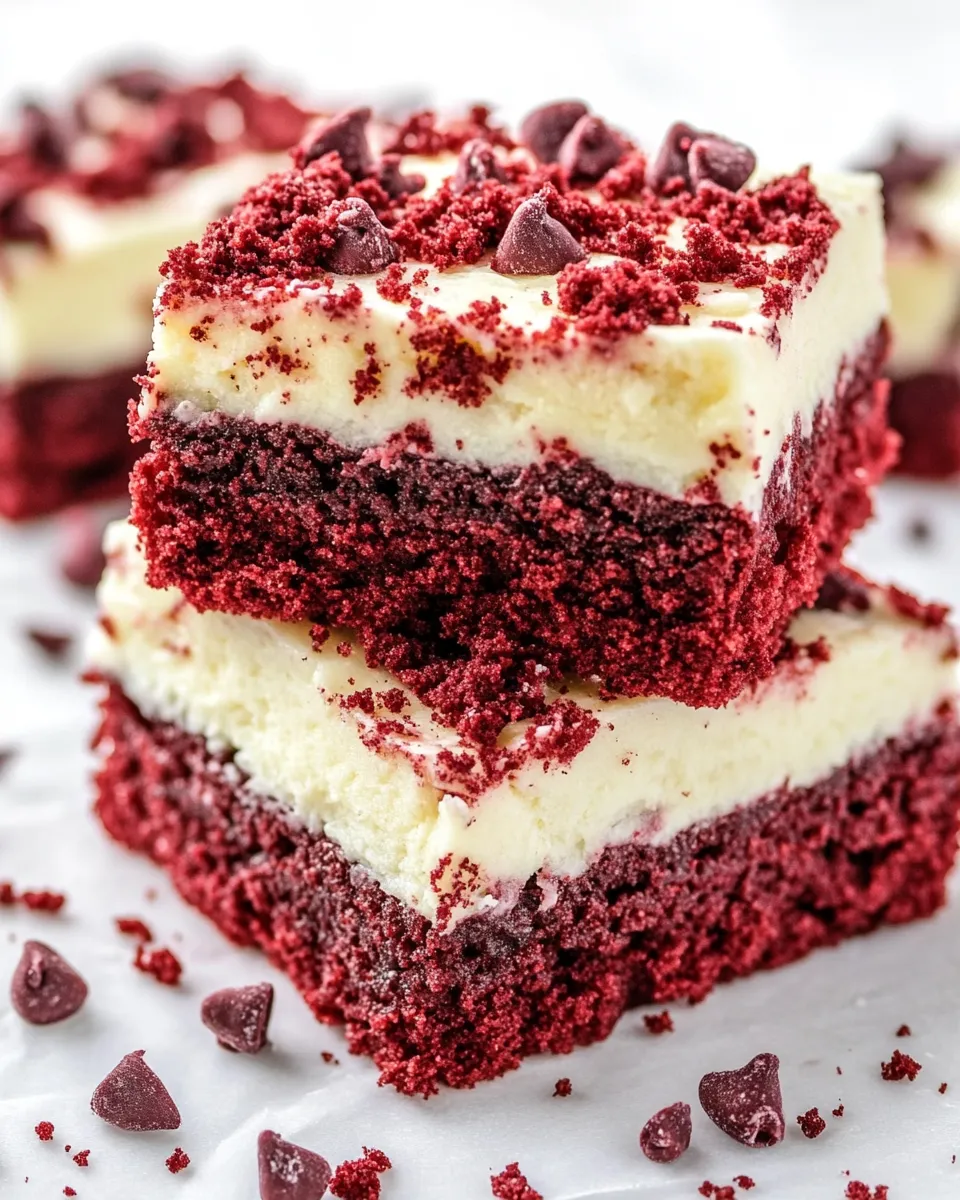
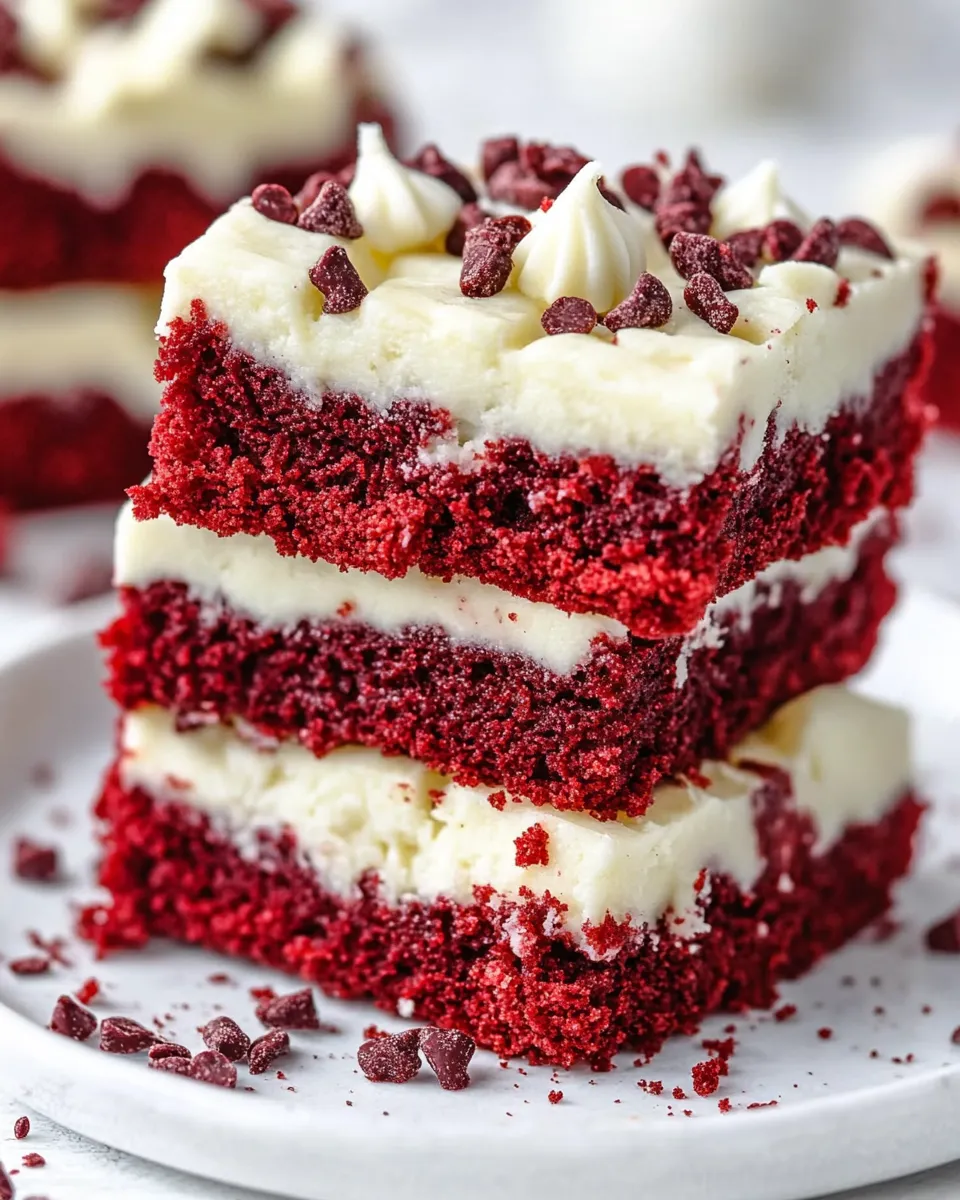
Red Velvet Gooey Bars
I test a lot of sweets, and these Red Velvet Gooey Bars keep finding their way onto my weekend rotation. They’re deceptively simple: a boxed red velvet cake mix becomes a tender, slightly crisp base and crumbly top, while a sweetened condensed milk and cream cheese layer melts into the middle with pockets of white chocolate. No complicated tempering, no multi-step custards—just straightforward baking that delivers maximum comfort.
I like this recipe because it’s forgiving. The cream cheese layer smooths out with a quick microwave nudge, the dough comes together fast in a stand mixer (or with a sturdy spoon), and the bars hold their shape once cooled. Serve them warm for gooey decadence or chilled for neat slices that still have a soft, creamy heart.
These notes and steps are practical—exact ingredient notes, clear stage-by-stage instructions, and problems-to-prevent so your batch turns out reliably every time.
Ingredient Notes
- 1 (approx) 15 ounce red velvet cake mix — The main structure and flavor. Use your preferred brand; this provides the red velvet taste and tender crumb.
- ½ cup (113g) unsalted butter, softened — Binds the cake mix into a dough and creates a rich, tender texture. Should be softened but not melted.
- 1 large egg — Adds moisture and helps the dough come together and set.
- ½ cup (180g) sweetened condensed milk — Sweet, dense liquid that blends with the cream cheese to form the gooey middle layer.
- 3 ounces (85g) cream cheese, very soft — Gives the bars their creamy, slightly tangy middle. Must be very soft so it can be whisked smooth with the condensed milk.
- 1 cup (170g) white chocolate chips — Adds sweet pockets of melted chocolate inside the bars; sprinkle over the bottom crust before adding the cream cheese layer.
Cook Red Velvet Gooey Bars Like This
- Preheat your oven to 350°F (175°C). Line a 9×9-inch baking pan with foil, leaving some overhang to lift the bars out later; spray the foil liberally with cooking spray.
- In the bowl of an electric mixer fitted with the paddle attachment (or in a large bowl with a sturdy spoon), add the red velvet cake mix, softened unsalted butter, and the large egg. Mix on low-to-medium speed until a thick, cohesive dough forms. Scrape the sides as needed so everything is evenly incorporated.
- Press about two-thirds of the dough evenly into the bottom of the prepared pan to form the crust. Use a piece of parchment or lightly greased fingers to get an even layer without sticking.
- Evenly sprinkle the white chocolate chips over the pressed dough layer.
- Prepare the cream cheese-sweetened condensed milk layer: ensure the cream cheese is very soft—if it’s not, heat it in a microwave-safe bowl in 20-second increments until it’s soft enough to whisk (do not melt completely). Whisk the softened cream cheese with the ½ cup (180g) sweetened condensed milk until smooth and fully combined.
- Pour the cream cheese and sweetened condensed milk mixture over the white chocolate chips and the crust, spreading gently to cover as much of the surface as possible without disturbing the bottom layer.
- Take the remaining dough and divide it into small pieces or balls. Arrange them evenly over the cream cheese layer and press down lightly to flatten; the dough will not fully cover the surface, and that’s expected—those gaps create the gooey contrast.
- Bake in the preheated oven for about 28–30 minutes, or until the top dough bits just begin to brown and the center is set but still slightly jiggly. Avoid overbaking to preserve the gooey middle.
- Remove the pan from the oven and cool completely on a wire rack. Chilling for at least an hour helps the filling firm up; if you try to cut them hot, the filling will be too soft and the bars will be messy.
- Use the foil overhang to lift the bars from the pan. Slice into squares with a sharp knife (wipe the blade between cuts for cleaner edges). Store as directed below.
Why It’s Crowd-Pleasing
- Familiar flavors: red velvet and white chocolate are popular and approachable.
- Textural contrast: a slightly crisp crust, creamy middle, and tender top pieces make every bite interesting.
- Simple technique: mostly mixing and pressing, which appeals to bakers of all skill levels.
- Make-ahead friendly: they hold up well for parties and potlucks when cooled and chilled.
Low-Carb/Keto Alternatives

- Red velvet cake mix — No direct low-carb equivalent; for a keto version you’d need a homemade almond/coconut flour base with cocoa and red coloring. That requires rebalancing fats and sweeteners beyond the scope of this ingredient-list recipe.
- Unsalted butter — Use the same amount of butter or swap for a keto-friendly butter substitute at a 1:1 ratio.
- Large egg — Keeps as is; eggs are keto-friendly.
- Sweetened condensed milk — Replace with an unsweetened condensed milk alternative made from evaporated coconut milk plus a low-carb sweetener, but note this alters flavor and consistency.
- Cream cheese — Fine for keto; full-fat cream cheese works best.
- White chocolate chips — Use sugar-free white baking chips, but texture and melt behavior may differ slightly.
Equipment & Tools
- 9×9-inch baking pan — Needed for the recipe’s size and bake time.
- Foil and cooking spray — For easy release and cleanup.
- Electric mixer with paddle attachment (optional)
- Mixing bowls and whisk — For the cream cheese layer and any hand-mixing.
- Spatula and parchment (optional) — For pressing dough and smoothing layers.
- Sharp knife and cooling rack — For slicing and cooling finished bars.
Problems & Prevention
- Gooey center that won’t set — Make sure the cream cheese is very soft but not watery; bake the full 28–30 minutes and cool completely before slicing.
- Dough too crumbly to press — Ensure the butter is softened (not melted) and mix until a cohesive dough forms. Warm hands or a flat-bottomed cup help press the crust evenly.
- Top pieces sinking into filling — Press the top dough pieces down gently but not fully; spacing them evenly prevents large sinkholes.
- White chocolate not melting through — Scatter chips close to one another on the bottom layer; they’ll soften into the filling during baking but won’t fully disappear—this is normal and desirable.
- Bars stick to pan — Use foil with spray and let bars cool fully; use the overhang to lift the slab out cleanly.
Adaptations for Special Diets
- Vegetarian — This recipe is already vegetarian if your white chocolate chips contain no gelatin.
- Dairy-free — Substitute butter and cream cheese with firm dairy-free alternatives and use a dairy-free sweetened condensed milk substitute. Expect slight changes in texture and flavor.
- Nut-free — The recipe uses no nuts; confirm that your cake mix and chips are processed in a nut-free facility if needed.
- Lower-sugar — Try sugar-free white chips and a reduced-sugar cake mix if available, but texture and moisture may shift.
Pro Perspective
- Texture balance is everything: the goal is a set but soft center. Slight jiggle at removal from the oven yields the best gooey mouthfeel after cooling.
- Room-temperature ingredients integrate more smoothly. Very soft butter and very soft cream cheese are key—one packs the dough, the other blends with the condensed milk without lumps.
- Use an accurate oven thermometer if your oven runs hot or cool. A few degrees can change the set time for the creamy center.
- Chill before slicing for clean edges. Professional bakeries often refrigerate a finished tray before precise cutting.
Store, Freeze & Reheat
- Store at room temperature in an airtight container for up to 3 days. Keep them chilled if your kitchen is warm to preserve the filling.
- Freeze for up to one month: wrap the cooled, sliced bars individually or layer with parchment in an airtight freezer container. Thaw in the fridge overnight.
- Reheat gently if you want a warm, gooey bite: microwave a single bar for 8–12 seconds (watch carefully) or warm in a 300°F oven for 5–7 minutes.
Handy Q&A
- Q: Can I use a different cake mix? A: Yes—chocolate or white cake mixes will change flavor but work similarly. Keep amounts the same.
- Q: My cream cheese had lumps. What now? A: Warm it in 10–15 second bursts in the microwave and whisk until smooth before combining with the condensed milk.
- Q: Can I double the recipe? A: Yes—use a 9×13-inch pan and watch bake time; it may need an extra 5–10 minutes. Test for just-browned top and slightly set center.
- Q: Why not melt the butter? A: Melted butter makes a looser dough and can affect texture. Softened butter yields the intended tender, slightly crumbly bars.
Final Thoughts
These Red Velvet Gooey Bars hit the sweet spot between simple prep and impressive results. They’re ideal for potlucks, casual dessert trays, or anytime you want something a little extra without a lot of fuss. Follow the straightforward steps—soften ingredients properly, press and layer as directed, and cool before slicing—and you’ll have reliably delicious bars every time. Enjoy.
Red Velvet Gooey Bars
Ingredients
- 1 box (about 15 oz) red velvet cake mix any brand
- 1/2 cup unsalted butter 113 g, softened
- 1 large egg
- 1/2 cup sweetened condensed milk about 180 g
- 3 oz cream cheese 85 g, very soft
- 1 cup white chocolate chips 170 g
Instructions
- Preheat the oven to 350°F (175°C). Line a 9x9-inch pan with foil and spray it with cooking spray; set aside.
- In a stand mixer fitted with the paddle attachment, combine the red velvet cake mix, softened butter, and egg. Mix until a thick dough forms.
- Press about two-thirds of the dough evenly into the bottom of the prepared pan to form the base.
- Sprinkle the white chocolate chips evenly over the pressed dough.
- Warm the cream cheese if needed until very soft (use 20-second microwave intervals), then whisk together the cream cheese and sweetened condensed milk until smooth.
- Pour the cream cheese and sweetened condensed milk mixture over the white chocolate chips in the pan.
- Divide the remaining dough into small pieces, flatten them between your fingers, and space them evenly over the top of the bars; press lightly to flatten but it need not cover completely.
- Bake for about 28–30 minutes, or until the top just begins to brown.
- Allow the bars to cool completely in the pan before slicing so the filling sets and they are easier to cut.
Equipment
- 9x9 inch baking pan
- foil
- cooking spray
- stand mixer with paddle attachment
- Mixing Bowl
- Whisk
- Measuring cups and spoons
- Microwave-safe Bowl
Notes
- Flatten dough pieces between your fingers for more even coverage.
- Cool completely before slicing.
- Store in an airtight container or freeze if desired.