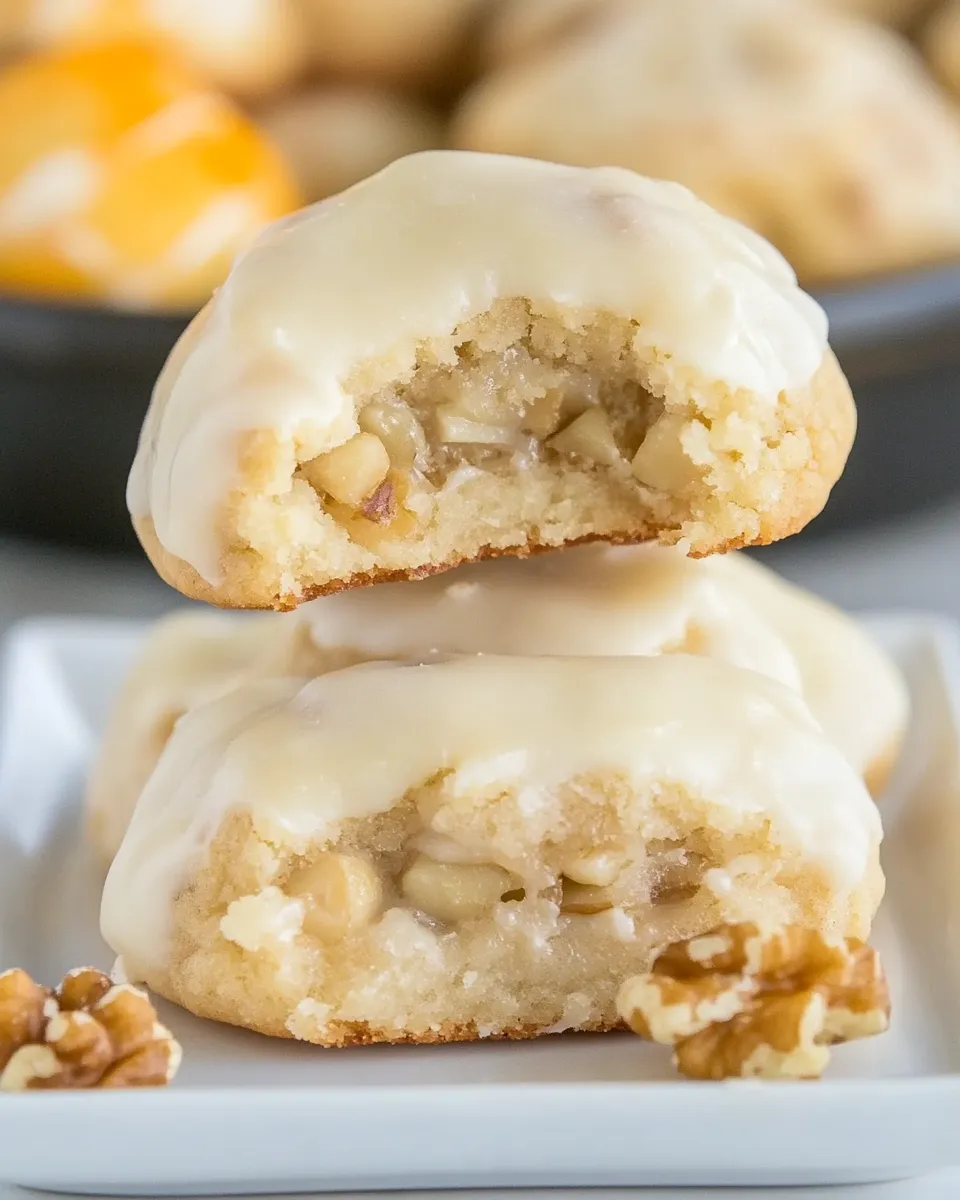
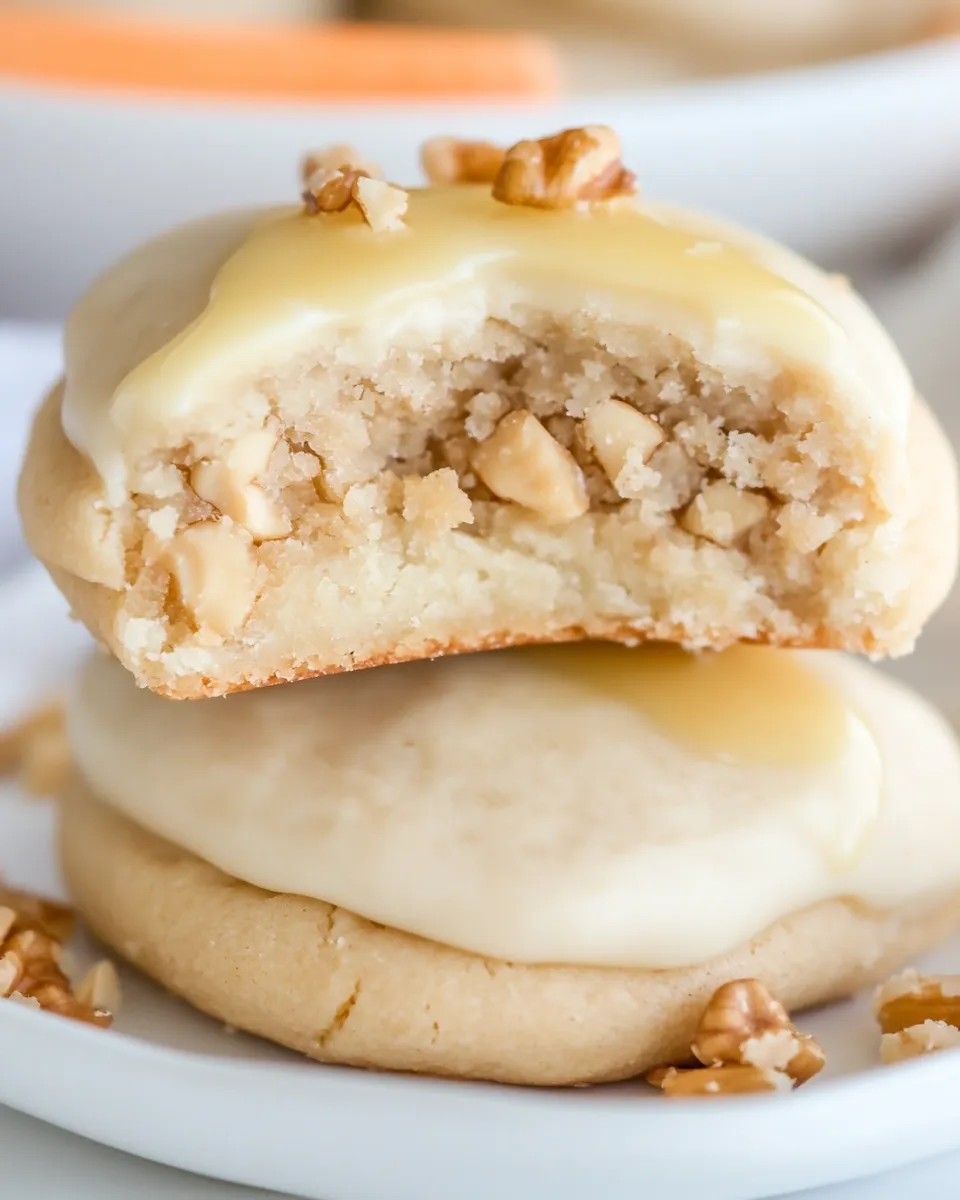
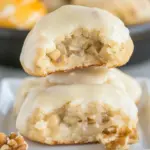
Italian Walnut Pillow Cookies
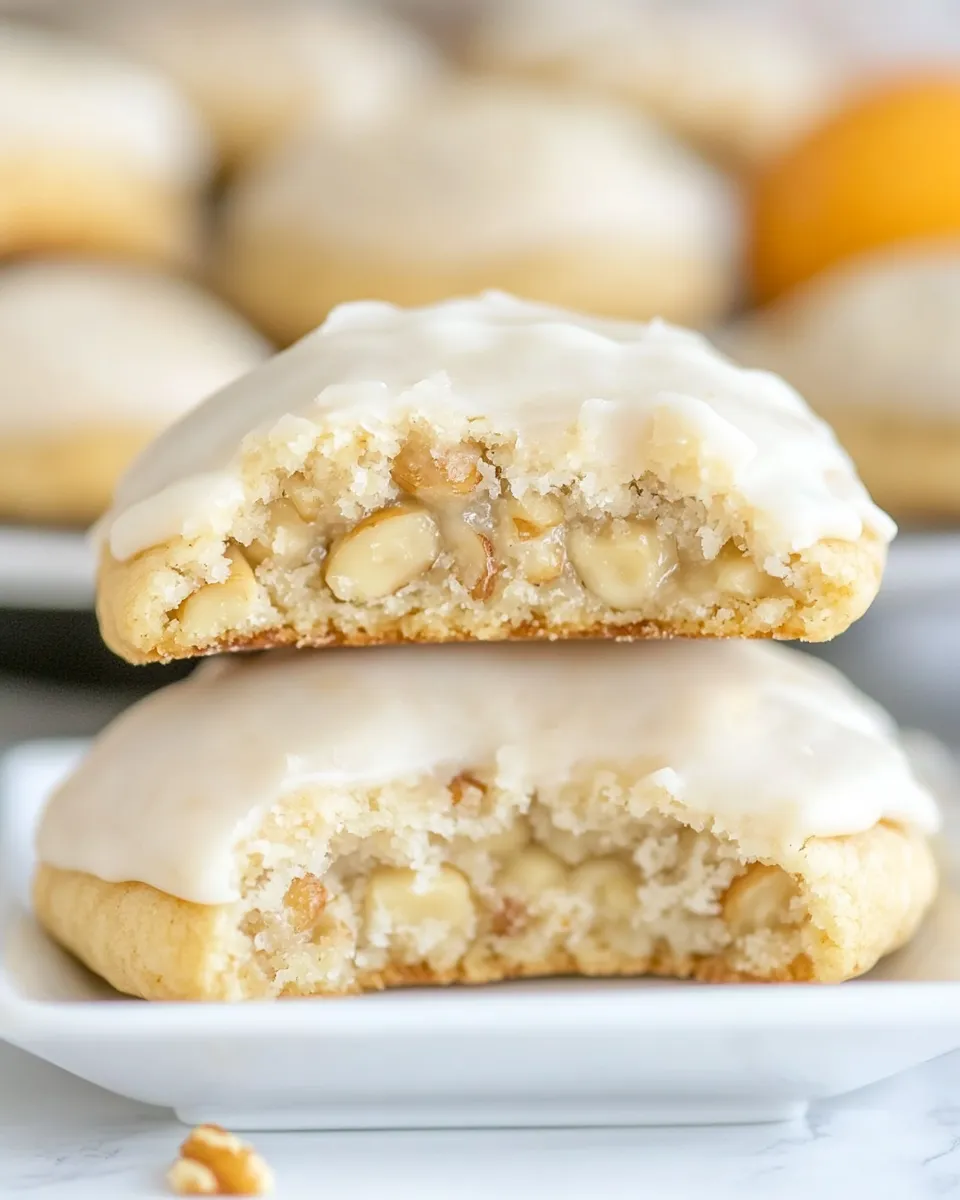
These Italian Walnut Pillow Cookies are tender, nut-filled spirals that feel like a small, buttery gift with every bite. They combine a soft, shortbread-like dough with a rich walnut-sugar filling and a simple vanilla glaze. They’re sturdy enough to ship, elegant on a cookie plate, and comforting beside a cup of espresso.
I make these when I want something that looks special but doesn’t demand fuss—most of the work is hands-on rolling and cutting. The dough rests in the fridge, the filling comes together quickly, and the assembly is straightforward once you get the rhythm of rolling and sealing. Expect a soft, slightly crumbly cookie with a crunchy walnut center and a bright, sweet glaze.
Below is a practical, step-by-step version of the recipe, plus tips for success, swaps, storage, and common mistakes to avoid. Read through once, gather your tools and ingredients, and you’ll have a tray that disappears fast.
What We’re Using
Ingredients
- 1 cup (200g) granulated sugar — for creaming with the shortening to sweeten and aerate the dough.
- 1 cup (205g) vegetable shortening — provides a tender, flaky texture in the cookie dough.
- 1 egg — binds the dough and adds richness.
- 1 teaspoon vanilla — flavor for the dough.
- 1 cup (244ml) milk, whole, 2% or 1% — hydrates the dough; use whichever you have on hand.
- 4½ cups (562.5g) all-purpose flour — the structure of the cookies; measure by weight for consistency.
- 4 teaspoons baking powder — leavening to give a light lift to the dough.
- ½ teaspoon (0.5 teaspoon) salt — balances sweetness and enhances flavor.
- 1½ lbs. (680.39g) walnuts, very finely chopped or ground in a food processor — the heart of the filling; finely chopped produces the best texture.
- ½ cup (113.5g) unsalted butter, melted — moistens the walnut-sugar filling and binds it.
- 1½ cups (300g) granulated sugar — sweetens the walnut filling and helps create a slightly caramelized flavor when baked.
- 4 egg whites, lightly beaten — gives structure and a glue-like quality to the filling so it stays together during rolling and baking.
- 2 cups (240g) powdered sugar — for the glaze; gives a smooth, sweet finish.
- 1 teaspoon vanilla — flavor for the glaze.
- 4 tablespoons milk — thins the glaze to a dip-able consistency.
Italian Walnut Pillow Cookies Made Stepwise
Preheat & Prep
Preheat the oven to 350°F (175°C). Line two cookie sheets with parchment paper and set them aside.
Make the Dough
- Whisk together 4½ cups all-purpose flour, 4 teaspoons baking powder, and ½ teaspoon salt in a medium bowl until evenly combined. Set aside.
- In a large bowl, use an electric mixer on medium speed to cream 1 cup granulated sugar with 1 cup vegetable shortening until smooth and slightly lighter in color, about 2–3 minutes.
- Add 1 egg and 1 teaspoon vanilla to the creamed mixture and beat until well combined.
- With the mixer on low, add the flour mixture and 1 cup milk alternately to the creamed mixture, beginning and ending with the flour mixture. Mix just until incorporated; the dough will be soft.
- Divide the dough into four even pieces. Wrap each piece in plastic wrap and refrigerate for at least 1 hour to firm up—it’s easier to roll when cold.
Make the Filling
- In a large bowl, combine 1½ lbs. finely chopped or ground walnuts and 1½ cups granulated sugar. Stir to distribute the sugar through the nuts.
- Add ½ cup melted unsalted butter and stir until the nuts are evenly moistened.
- Fold in 4 lightly beaten egg whites and mix until the filling is completely combined and holds together when pressed.
Assemble the Cookies
- Lightly flour a work surface. Take one piece of chilled dough and roll it into a rectangle about 6 inches by 18 inches. Keep your hands and rolling pin lightly floured to prevent sticking.
- Using an offset spatula or the back of a spoon, spread one-quarter of the walnut filling evenly over the dough, leaving a small border (about ¼ inch) around the edges to allow sealing.
- Starting from one of the long edges, roll the dough into a tight jelly-roll with the short ends to your left and right. Pinch the seams and ends to seal the roll so filling doesn’t leak out during baking.
- Cut the roll into 1-inch slices and arrange them cut-side-up on the prepared baking sheets, spacing a little apart. Repeat with the remaining dough pieces and filling. You should fit all cookies on the two sheets.
- Bake in the preheated oven until the cookies are a light golden brown, about 30 minutes. Rotate the sheets once if your oven has hot spots.
- Transfer the baked cookies to a wire rack and allow them to cool completely before glazing.
Ice the Cookies
- In a small bowl, whisk together 2 cups powdered sugar, 1 teaspoon vanilla, and 4 tablespoons milk until smooth. The glaze should be thick but pourable—add a drop more milk if needed.
- Dip the tops of the cooled cookies into the glaze, letting any excess drip off. Return cookies to the wire rack and allow the icing to set completely before storing or stacking.
- Store the cookies in an airtight container at room temperature for up to 2 weeks.
Why It Deserves a Spot
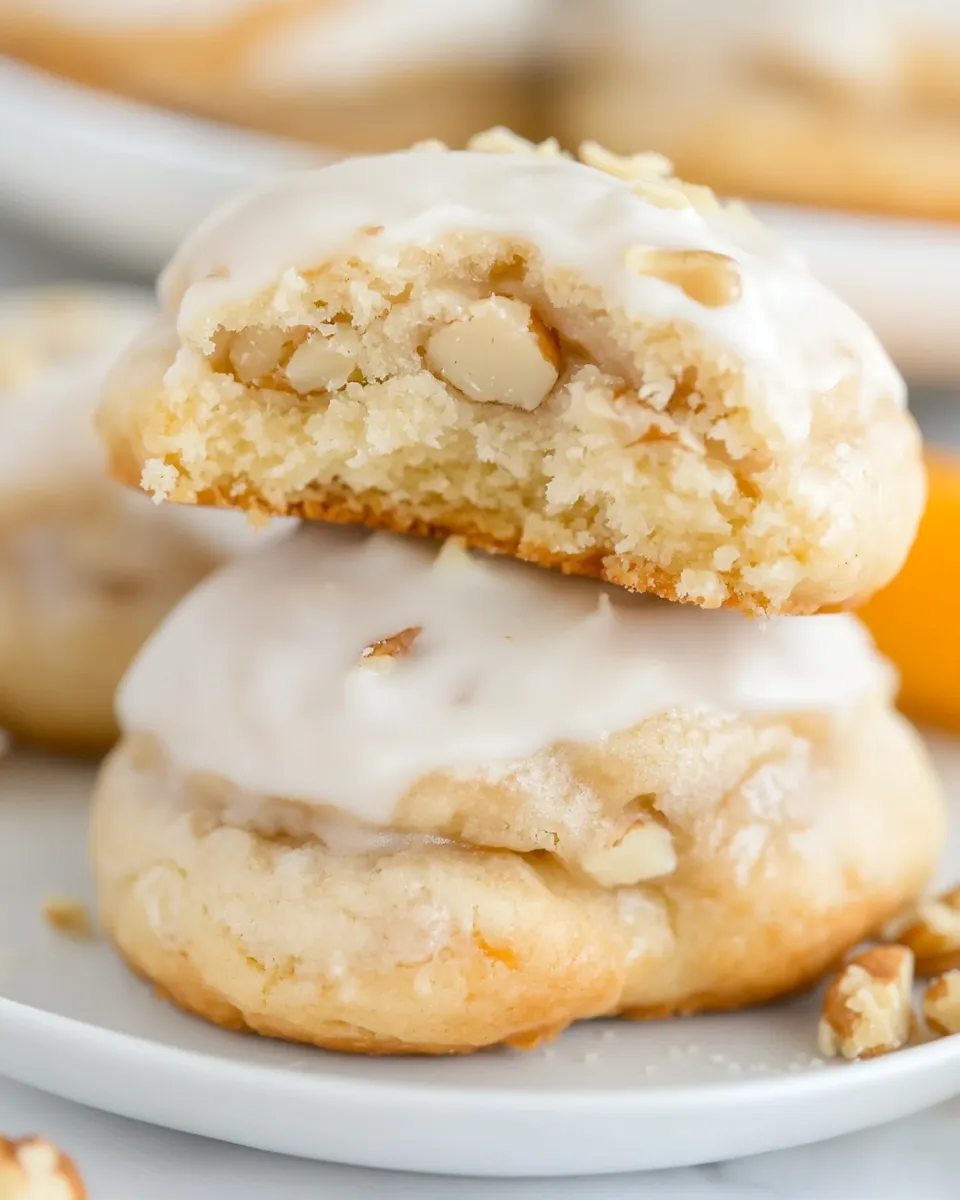
These cookies balance a tender, buttery dough with a densely nutty, lightly sweet filling. They look impressive but are surprisingly straightforward: no delicate piping, no tempering—just rolling and cutting. They hold up well for gifting and travel, and the glaze gives a clean finish that makes them feel bakery-quality.
Texture-wise, you get a contrast of soft crumb and the crunchy walnut center. Flavor-wise, the walnuts dominate nicely without being cloying because the dough and glaze are restrained. They’re a great make-ahead cookie; the flavors actually mellow and meld over a day or two.
Substitutions by Category
- Fat in dough — swap vegetable shortening for cold unsalted butter (equal weight) for a more buttery flavor, though texture will be slightly different.
- Milk — use any regular milk (whole, 2%, 1%) or even half-and-half for a richer dough; avoid non-dairy milks unless you accept a small texture change.
- Nuts — replace walnuts with pecans for a sweeter, more caramel-like note. Keep the quantity the same.
- Sweetener — granulated and powdered sugars should be kept as written; reducing them will change texture and binding in the filling and glaze.
- Glaze — for a thicker glaze use less milk; for a drizzled look, thin with a teaspoon more milk at a time.
Prep & Cook Tools
- Electric mixer — for creaming and even mixing.
- Medium bowl — for dry ingredients.
- Large bowl — for filling and dough mixing.
- Rolling pin and floured work surface — to roll dough into rectangles.
- Offset spatula or back of a spoon — to spread filling evenly.
- Sharp knife or bench scraper — to slice the roll into 1-inch cookies.
- Baking sheets and parchment paper — for even baking and easy cleanup.
- Wire rack — to cool cookies and set glaze.
- Food processor (optional) — to finely chop or grind the walnuts quickly and evenly.
What Not to Do
Do not skip chilling the dough. Warm dough will be gummy and hard to roll, causing the filling to squeeze out. Don’t overfill the roll—too much filling makes sealing impossible and the cookies fall apart. Avoid cutting slices thinner than 1 inch; they’ll bake too fast and dry out. Finally, don’t glaze while the cookies are warm or the icing will slide off and become translucent instead of opaque.
Make It Fit Your Plan
Short on time? Make the dough the day before and keep it wrapped in the fridge. The filling can be made the morning you bake and stored covered at room temperature for a few hours. These cookies freeze well (see notes below), so you can bake a double batch and keep extras in the freezer for holiday gifting.
Want to scale up? The recipe multiplies cleanly—work in batches so you can roll consistently. If you need a dairy-free option, substitute nonhydrogenated margarine for shortening and use a stable non-dairy milk in the dough and glaze, though texture will vary.
Behind-the-Scenes Notes
The dough texture is intentionally soft and short; it firms when chilled. The original recipe calls for vegetable shortening, which creates a tender, less buttery crumb that holds shape well during rolling. Using butter will deepen flavor but change the handling—chill the dough a little longer.
Finely chopping or pulsing the walnuts in a food processor gives the best filling texture—coarse chunks can create air pockets when you roll and cut, leading to crumbling edges. The egg whites in the filling are essential: they help bind the nut-sugar mixture so it slices cleanly and bakes into a cohesive center.
Freezer-Friendly Notes
These cookies freeze exceptionally well at multiple stages:
- Freeze unbaked rolls: After rolling and sealing, wrap each roll tightly in plastic and freeze up to 3 months. Slice and bake from frozen; add a few minutes to bake time.
- Freeze baked cookies: Cool and glaze, then layer in an airtight container with parchment between layers and freeze up to 3 months. Thaw at room temperature before serving.
- Freeze leftover dough: Dough pieces can be frozen wrapped; thaw overnight in the fridge before rolling.
Your Top Questions
Q: Can I use butter instead of shortening? A: Yes. Use equal weight, chill slightly longer, and expect a slightly crumblier, more buttery cookie.
Q: Why do I need egg whites in the filling? A: They bind the walnut-sugar mixture so it holds together when sliced and during baking.
Q: My filling leaked—what went wrong? A: Either the ends weren’t sealed well, you overfilled, or the dough was too warm. Chill the dough and compress the filling slightly before rolling next time.
Q: Can I toast the walnuts? A: Yes—lightly toasting brings out more flavor. Cool fully before mixing into the filling.
Serve & Enjoy
Serve these with espresso, tea, or a small glass of dessert wine. They’re perfect on a cookie tray or individually wrapped as gifts. Let the glaze set fully so they keep their pretty, white tops—then stack or box as desired. Enjoy the walnut-forward flavor and the satisfying spiral of each bite.
Italian Walnut Pillow Cookies
Ingredients
- 1 cup granulated sugar 200 g
- 1 cup vegetable shortening 205 g
- 1 egg
- 1 teaspoon vanilla extract
- 1 cup milk whole or 2% (244 ml)
- 4.5 cups all-purpose flour 562.5 g
- 4 teaspoons baking powder
- 1/2 teaspoon salt 0.5 teaspoon
- 1.5 lb walnuts very finely chopped or ground (680.39 g)
- 1/2 cup unsalted butter melted (113.5 g)
- 1.5 cups granulated sugar for filling (300 g)
- 4 egg whites lightly beaten
- 2 cups powdered sugar for icing (240 g)
- 1 teaspoon vanilla extract for icing
- 4 tablespoons milk for icing
Instructions
- Preheat the oven to 350°F (175°C) and line two baking sheets with parchment paper.
- Make the dough: Whisk the all-purpose flour, baking powder, and salt together in a medium bowl.
- In a large bowl, use an electric mixer on medium speed to cream 1 cup granulated sugar and 1 cup vegetable shortening until light and fluffy. Beat in 1 egg and 1 teaspoon vanilla until combined.
- Add the flour mixture and 1 cup milk alternately to the creamed mixture, beginning and ending with the flour mixture, mixing until just incorporated; the dough will be soft.
- Divide the dough into four equal portions, wrap each in plastic wrap, and refrigerate for at least 1 hour until firm.
- Make the filling: In a large bowl, combine the very finely chopped walnuts and 1½ cups granulated sugar. Stir in the melted butter, then mix in the lightly beaten egg whites until evenly combined.
- Assemble: On a well-floured surface, roll one chilled dough portion into a rectangle about 6 x 18 inches. Spread one-quarter of the walnut filling evenly over the dough, leaving a small border.
- Tightly roll the dough like a jelly roll from a short side, seal the ends, and cut the roll into 1-inch slices. Place each cookie cut-side up on the prepared baking sheets.
- Repeat rolling, filling, and slicing with remaining dough and filling. Bake the cookies until light golden brown, about 30 minutes.
- Cool the cookies on a wire rack completely before icing.
- Make the icing: Whisk the powdered sugar, 1 teaspoon vanilla, and 4 tablespoons milk in a small bowl until smooth. Dip the tops of the cooled cookies into the icing, allow excess to drip off, and let the icing set completely.
Equipment
- Mixing bowls
- Electric Mixer
- Food Processor
- rolling surface
- offset spatula
- Baking Sheets
- Parchment Paper
- Wire Rack
Notes
- Nutritional values are based on one cookie.