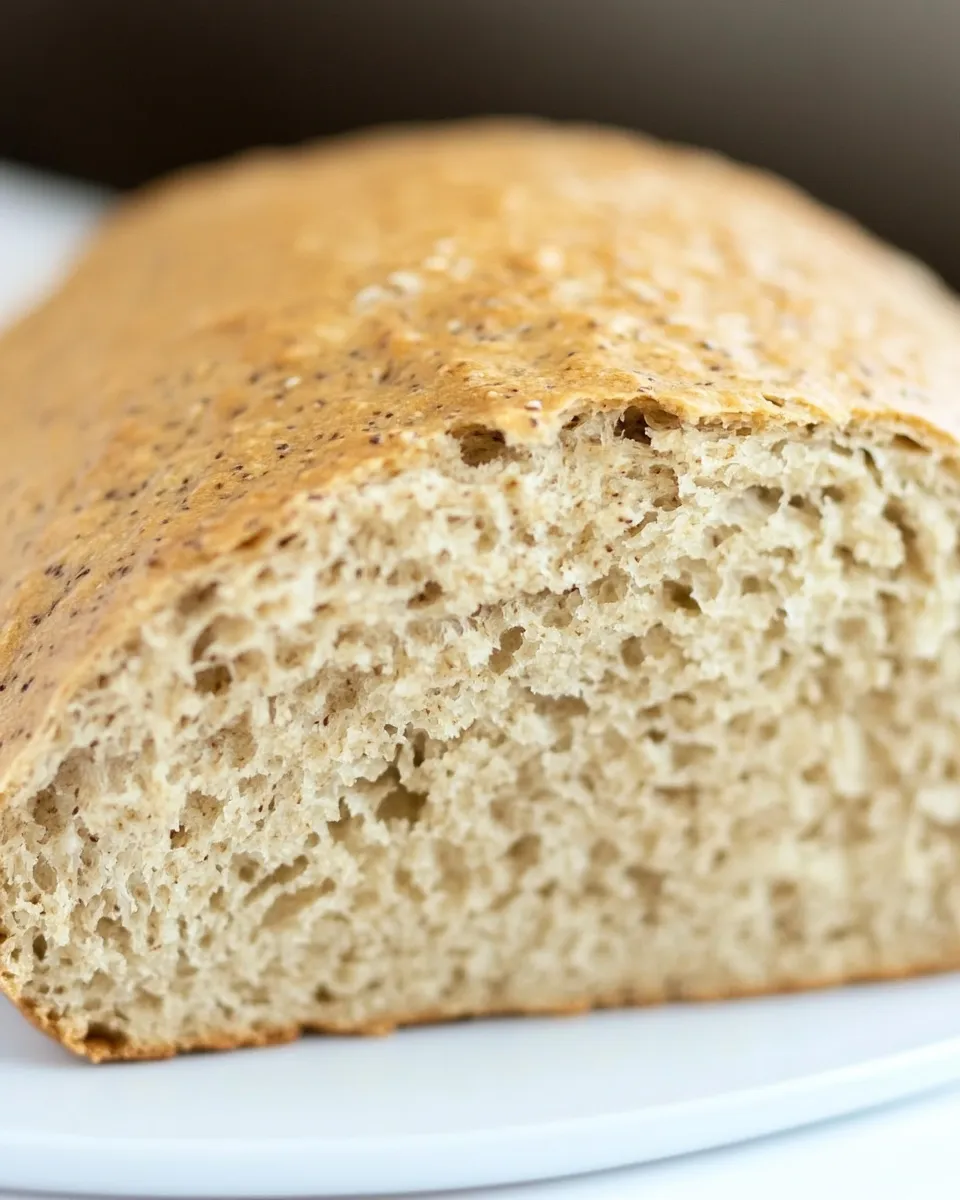
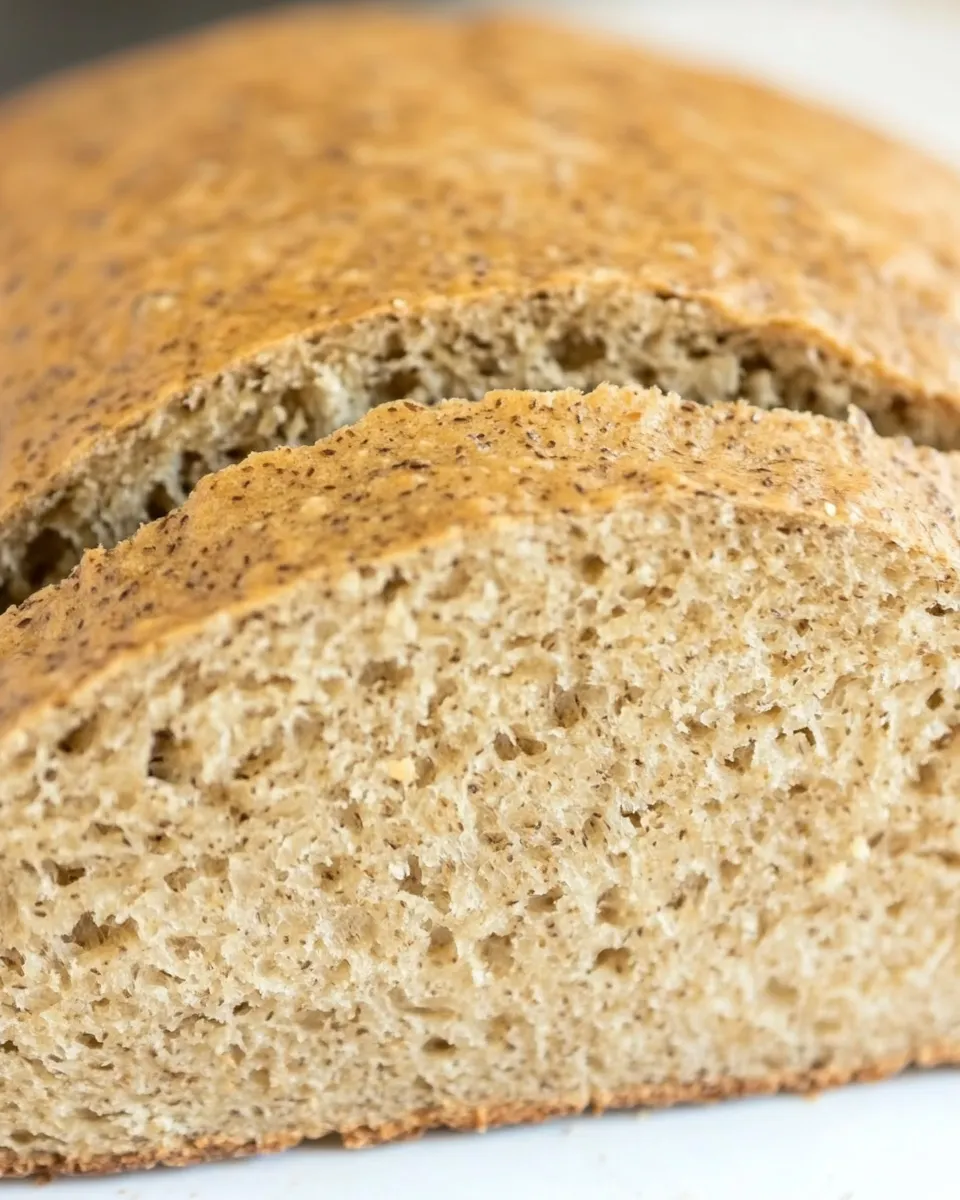
Jewish Rye Bread
This Jewish rye bread is a workhorse loaf: sturdy enough for thick deli sandwiches, rich enough to stand up to pastrami, and textured with the comforting tang of a rye sour starter. It yields two medium loaves with a deep, chewy crust and a slightly resilient crumb. The recipe leans on simple ingredients and one active fermentation step, so it’s approachable on a weeknight if you plan ahead.
My goal here is practical: clear steps, honest timing, and tips to dodge the little pitfalls that can make rye dough feel intimidating. You don’t need fancy equipment—just a bowl, a scraper, a baking sheet, and a warm spot for the dough to rise. The rye sour starter brings flavor and complexity; keep its hydration in mind because it changes how the dough behaves.
Follow the instructions below in order, and read the notes and troubleshooting sections before you start. The dough will be soft and slightly sticky; that’s expected. With a little patience, you’ll get two flavorful loaves that keep well and slice beautifully for sandwiches or toast.
Ingredients at a Glance
- 1½ tablespoons active dry yeast — kick-starts fermentation; make sure it’s fresh and dissolved in warm water.
- 1½ cups (375 ml) warm water, 110°F — feeds the yeast and hydrates the flours; aim for about 110°F so yeast activates but isn’t killed.
- 2 cups (250 g) first clear flour — gives structure and chew; used to balance the rye and build gluten.
- 1½ cups (153 g) rye flour — provides rye flavor and texture; rye weakens gluten so we rely on first clear flour for strength.
- 1½ cups (354 g) Rye Sour Starter — adds tang, depth, and fermentation power; hydration of the starter affects dough consistency.
- 1½ tablespoons salt — seasons the bread and controls fermentation; do not omit or reduce drastically.
- 2½ tablespoons caraway seeds, optional — classic aroma and flavor; adjust to taste or omit if you dislike caraway.
Jewish Rye Bread: Step-by-Step Guide
Mixing and Forming the Dough
1. Dissolve the yeast: In a large bowl, pour the warm water (110°F) over the active dry yeast. Stir gently and let sit for about 5 minutes until the mixture bubbles and foams. This confirms the yeast is active.
2. Add flours, starter, salt, and caraway: To the foamy yeast mixture add the first clear flour, rye flour, Rye Sour Starter, salt, and caraway seeds (if using). Use a wooden spoon to stir until all ingredients are fully incorporated into a sticky, shaggy dough.
Kneading the Wet Dough
3. Turn out and knead: Lightly flour a work surface. Turn the dough onto the surface and, with one hand holding a bowl scraper or dough cutter, knead the soft, wet dough by scraping, folding, pulling, and stretching. Work this way for about 5 minutes. The dough should start to feel elastic and resist stretching as gluten develops.
4. Adjust flour only if needed: Keep the dough on the softer side; wet dough makes better rye bread. If after 5 minutes the dough feels excessively slack and lacks elasticity, add more first clear flour, ¼ cup at a time. After each addition, knead by stretching and folding. Continue kneading for an additional 3 minutes after any flour additions.
Bulk Rise
5. Transfer to a wet bowl: Move the dough to a clean bowl that you’ve wetted slightly (this helps prevent sticking). With wet hands, pat the dough to smooth the top and then cover it with a very thin film of water—this minimizes skin formation.
6. Cover and rise: Cover the bowl with plastic wrap and place it in a warm spot. Let the dough rise until it has doubled in volume, about 45 to 60 minutes. The exact time will depend on room temperature and starter activity.
Shaping and Preparing to Bake
7. Prepare the baking surface: Sprinkle a baking sheet with a mix of cornmeal and rye flour. This will keep the loaves from sticking and add a pleasant texture to the bottom crust.
8. Shape the loaves: Wet a clean work surface and keep your hands wet to prevent sticking. Scoop half the dough and gently shape it into a round, being careful not to tear the dough. Repeat with the second half. Handle gently; you want surface tension but not a tight, overworked loaf.
9. Minimal standing time: Let the shaped loaves rest no longer than 10 minutes. They do not need a long proofing—these loaves can be placed in the oven immediately and should not be overproofed.
Baking with Steam
10. Preheat and prepare steam: Place an empty broiler pan on the oven floor and preheat the oven to 375°F. After 5 minutes of preheating with the broiler pan in place, the oven is ready for baking with steam.
11. First steam burst: Brush the loaves with water. Place the baking sheet with the loaves on the middle rack (or on a heated oven stone if you prefer). Carefully add 6 to 8 ice cubes or 1 cup of hot water to the broiler pan on the bottom of the oven, then immediately close the door. The steam created in this step helps develop a good crust.
12. Short initial bake and venting: Bake for 5 minutes with steam, then remove the broiler pan to stop the steam. Slide the bread out slightly and, using a skewer, prick 10 to 12 holes all around the crust of each loaf to release trapped air. Return the loaves to the oven.
13. Reduce heat and continue baking: Lower the oven temperature to 350°F and bake for 10 minutes. After this period, make another set of holes and brush the loaves with water again.
14. Finish baking until done: Continue baking until the crust is hard and unyielding to gentle pressure. This can take up to 1 hour or longer; in my kitchen it was about 50 minutes. The exact time depends on dough moisture and oven. The loaves are done when the bottom sounds hollow when tapped and the exterior is firm. If you prefer an even crustier loaf and you have an oven stone, you can transfer the loaves to the stone at this stage and bake an additional 10–15 minutes.
Cooling
15. Final touch and cool: Remove the bread from the oven and brush the tops with more water. Transfer the loaves to a wire rack to cool. Wait until the bread has cooled before slicing for best texture and crumb development.
Why I Love This Recipe
This version delivers classic rye flavor without complicated steps. The rye sour starter brings depth and acidity that tame the rye’s dense, heavy nature, while the first clear flour gives enough gluten to hold the crumb together. The method favors a moist dough and steam in the oven—two things that make rye crusts glossy and resilient instead of dry and crumbly.
It’s forgiving: a slightly longer or shorter bake won’t ruin the loaf, and small variations in starter hydration can be adjusted with a quick handful of flour during kneading. The loaves store well and freeze beautifully, making this a reliable recipe to keep on repeat.
Budget & Availability Swaps
– If first clear flour is hard to find, you can try high-protein bread flour as a substitute. The texture will be similar though the color may be lighter.
– If you don’t have a rye sour starter, you can use a stiff sourdough starter instead, but expect a different flavor balance. Commercial sour starters vary; reduce added water slightly if your starter is very wet.
– Caraway seeds are optional; fennel or anise seeds can work as alternatives if you want a different aromatic profile, but use sparingly.
Before You Start: Equipment
- Bowl for mixing — large enough to hold doubled dough.
- Wooden spoon — for initial mixing.
- Bowl scraper or dough cutter — essential for kneading wet dough.
- Measuring cups and kitchen scale — the recipe gives both; scale yields best results.
- Baking sheet and oven stone (optional) — sheet is required; stone gives extra crust intensity.
- Broiler pan or oven-safe pan on the oven floor — to create steam.
- Wire rack — for cooling.
Easy-to-Miss Gotchas
– Yeast temp: If the water is hotter than 115°F, you risk killing the yeast. Too cool and yeast won’t activate. Aim for about 110°F.
– Starter hydration: The recipe assumes a typical rye sour starter. If your starter is unusually wet or dry, the dough feel will change. Add first clear flour ¼ cup at a time only if the dough lacks elasticity.
– Don’t overproof after shaping: These loaves need little standing time. Overproofing results in flat, gummy loaves.
– Steam timing: Remove the broiler pan after the first 5 minutes. Keeping steam too long will interfere with crust development and final bake times.
In-Season Flavor Ideas
– Winter: Add toasted caraway and a tablespoon of molasses for a deeper, slightly sweet profile that pairs beautifully with smoked meats.
– Fall: Fold in a small handful of toasted pumpkin seeds on top before baking for crunch and visual contrast.
– Spring/Summer: Use lighter caraway or omit seeds and slice thin for open-faced sandwiches with fresh radish and cucumber.
Pro Tips & Notes
- Hydration is key: Rye dough often feels wetter than typical wheat-only dough. Embrace some stickiness—over-flouring makes the bread heavy.
- Use a thermometer: Measuring water and oven temps takes the guesswork out of yeast activity and baking consistency.
- Skewer vents: Those 10–12 holes with a skewer relieve internal steam pockets and help prevent big irregular holes in the crumb.
- Crust preference: For a chewier crust, finish on a preheated stone for 10–15 minutes; for a softer crust, skip the extra stone time.
- Timing: Expect total active time (mixing and kneading) to be under 30 minutes; additional hands-off rising and baking time brings total to about 2–3 hours.
Store, Freeze & Reheat
Wrapped tightly in plastic wrap, the bread keeps at room temperature for up to 1 week. For longer storage, slice and freeze in airtight bags; frozen slices can be toasted straight from the freezer. To refresh a whole loaf, heat in a 325°F oven wrapped in foil for 10–15 minutes, or unwrap and heat 5–10 minutes for a crisper crust. Avoid microwaving for texture preservation.
FAQ
Q: My dough was very sticky—did I do something wrong? A: Not necessarily. Rye doughs are often wetter. Only add more first clear flour in ¼-cup increments if the dough lacks elasticity and won’t hold shape.
Q: Can I use instant yeast instead of active dry yeast? A: Yes. Use the same amount, but you may mix it directly into the dry flours instead of proofing in water. The directions assume active dry yeast proofed in warm water.
Q: How important is the Rye Sour Starter? A: It provides characteristic tang and complexity. Without it, the bread will be less flavorful. If you must skip it, consider a small amount of commercial starter or a different sourdough starter, but expect flavor differences.
Q: Why are there two hole-making steps during baking? A: The first set of holes releases steam built up inside the crust after the initial steam burst; the second set further vents and helps shape the crust as baking continues.
See You at the Table
Give this Jewish rye bread a go when you have a couple of hours to spare and a craving for real deli-style slices. The process is straightforward, and the rewards are a reliable loaf you can lean on for sandwiches, toast, and weekend breakfasts. If you try it, slice it thin, pile on pickles and mustard, and tell me how it turned out—I’ll be imagining that perfect pastrami sandwich.
Jewish Rye Bread
Ingredients
- 1.5 tablespoons active dry yeast
- 1.5 cups warm water about 110°F
- 2 cups first clear flour about 250 g
- 1.5 cups rye flour about 153 g
- 1.5 cups rye sour starter about 354 g
- 1.5 tablespoons salt
- 2.5 tablespoons caraway seeds optional
Instructions
- Dissolve the yeast in the warm water in a large bowl and let rest 5 minutes, until foamy.
- Add the first clear flour, rye flour, rye sour starter, salt, and caraway seeds to the bowl; stir with a wooden spoon until combined.
- Turn the dough onto a well-floured surface. With a wet hand and a bowl scraper or dough cutter, knead by scraping, folding, pulling and stretching for about 5 minutes until the dough is elastic and resists stretching.
- If the dough feels insufficiently elastic, add first clear flour 1/4 cup at a time and continue kneading, up to 3 more minutes, keeping the dough fairly soft.
- Transfer the dough to a clean, wet bowl; keep your hands wet and pat the dough, then cover lightly with a film of water and plastic wrap. Place in a warm spot and let rise until doubled, about 45 to 60 minutes.
- Prepare a baking sheet by sprinkling with a mixture of cornmeal and rye flour.
- Wet a clean work surface and your hands. Divide the dough in half and gently shape each portion into a round, handling gently so it does not tear. Let rest up to 10 minutes; no further proofing is required.
- Place an empty broiler pan on the oven floor and preheat the oven to 375°F for 5 minutes.
- Brush the loaves with water and place them on the prepared baking sheet on the middle rack (or on a preheated stone). Carefully add 6–8 ice cubes or 1 cup hot water to the broiler pan on the oven floor and quickly close the door to create steam.
- Bake 5 minutes with steam, then remove the broiler pan. Use a skewer to make 10–12 holes around each loaf's crust, return to the oven, reduce heat to 350°F, and bake 10 minutes.
- Make holes again and brush the loaves with water. Continue baking until the crust is hard and the loaves sound hollow when tapped on the bottom, about up to 1 hour total (about 50 minutes in the original test).
- If desired, transfer loaves to a preheated stone and bake an additional 10–15 minutes for a crisper crust.
- Remove the bread from the oven, brush the tops with more water, and cool on a wire rack before slicing.
Equipment
- Large Bowl
- Wooden Spoon
- bowl scraper or dough cutter
- Plastic Wrap
- Baking Sheet
- Wire Rack
- oven-safe broiler pan
Notes
- First clear flour is a high-protein flour used for Jewish-style rye.
- You can substitute 1½ cups all-purpose + ⅓ cup cake flour if needed.
- The author recommends white rye flour for best results.