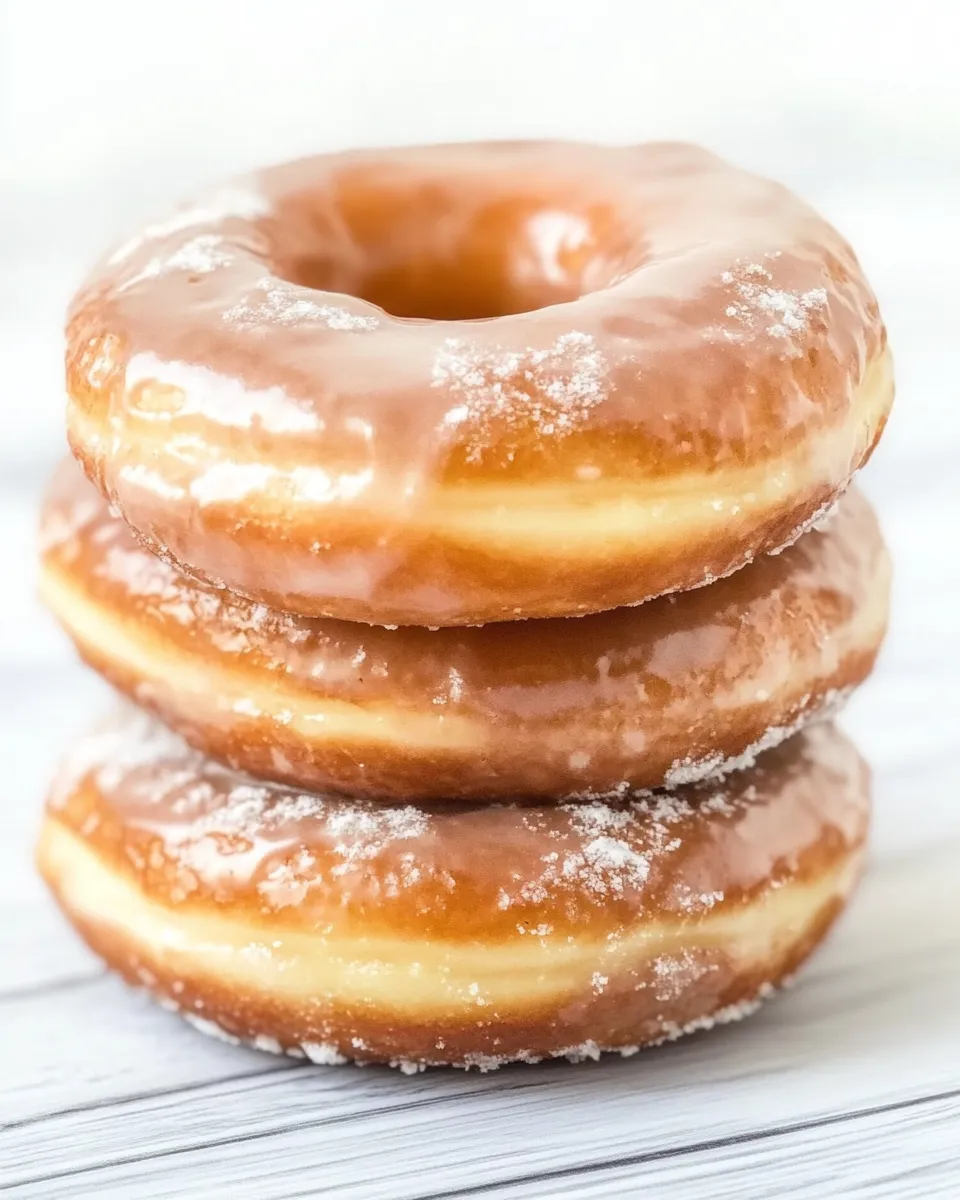
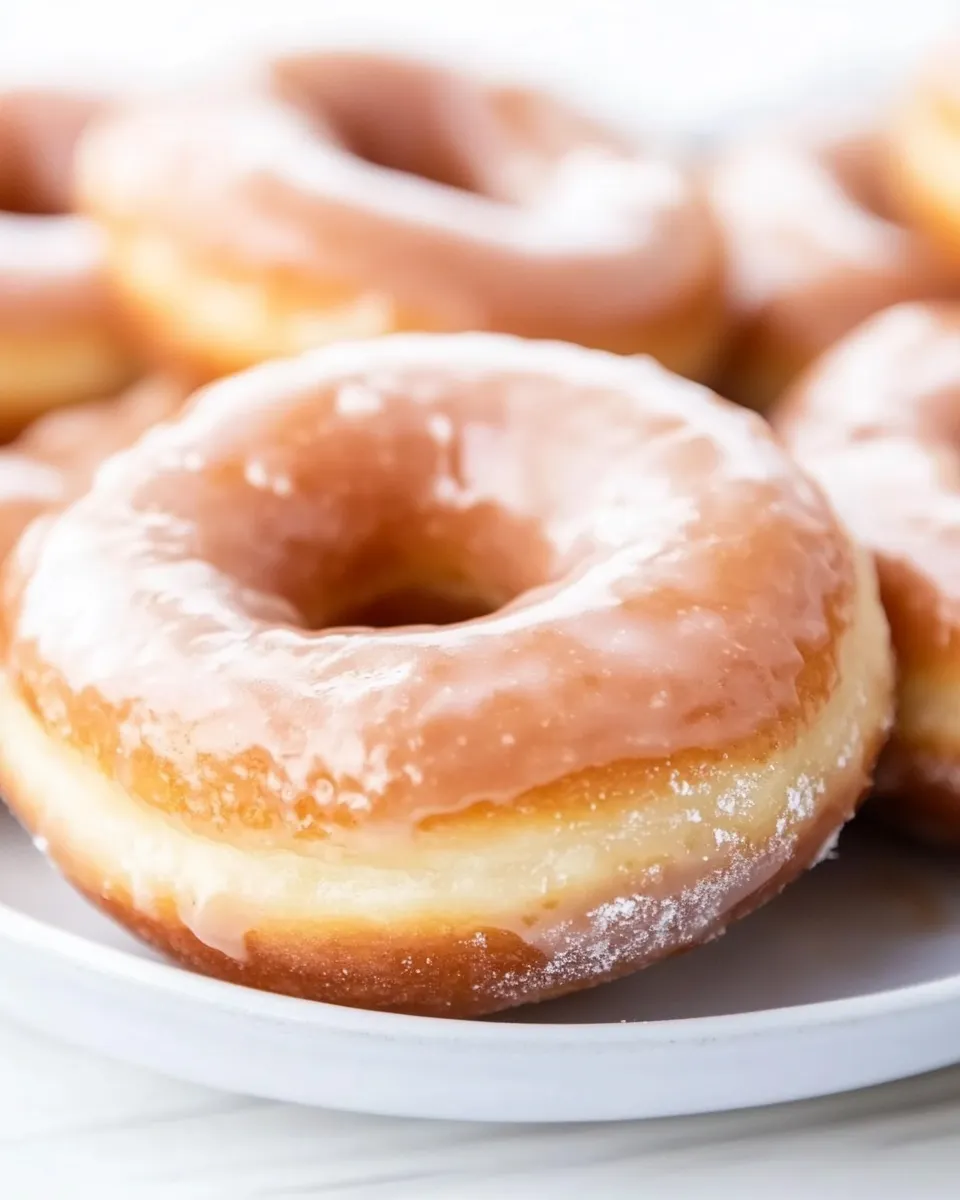
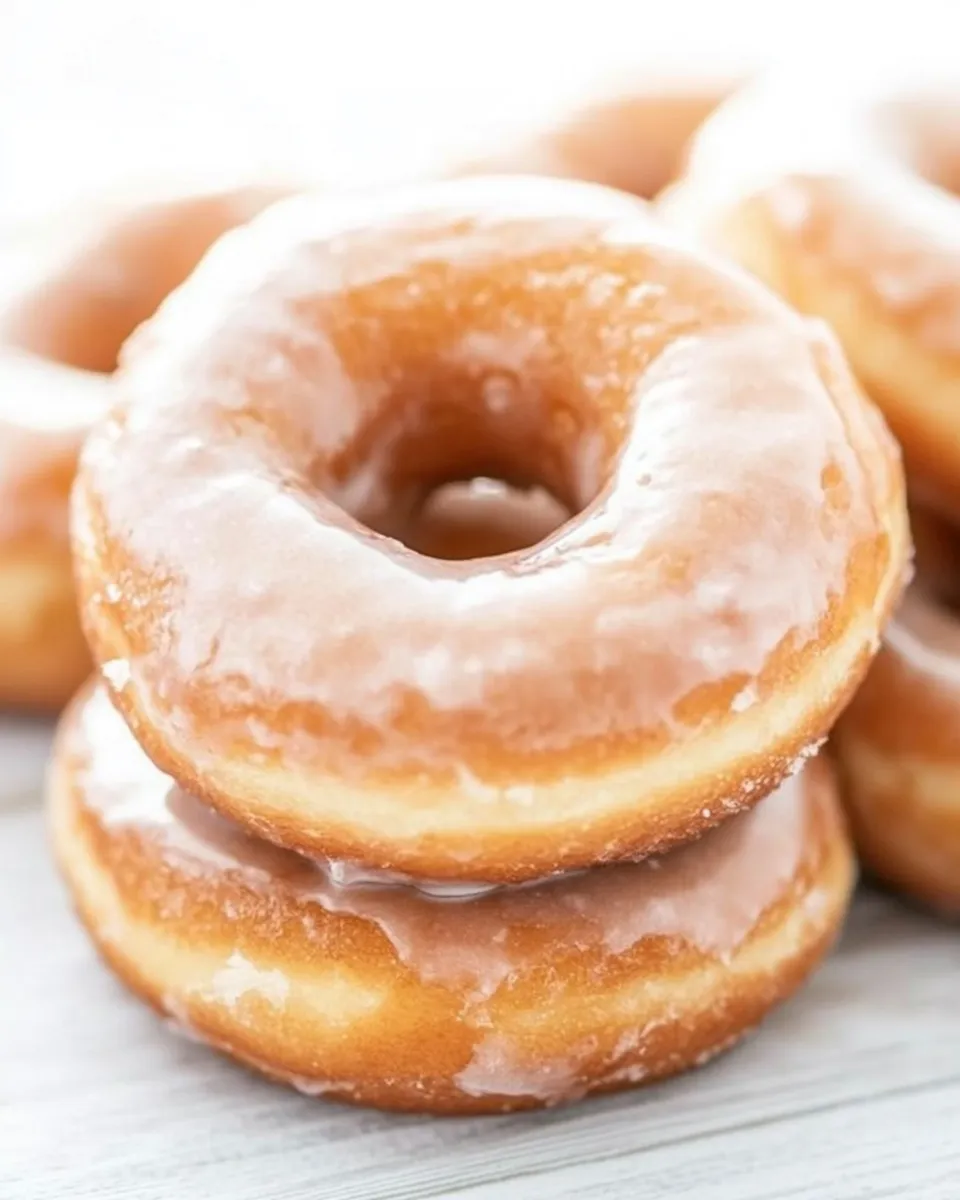
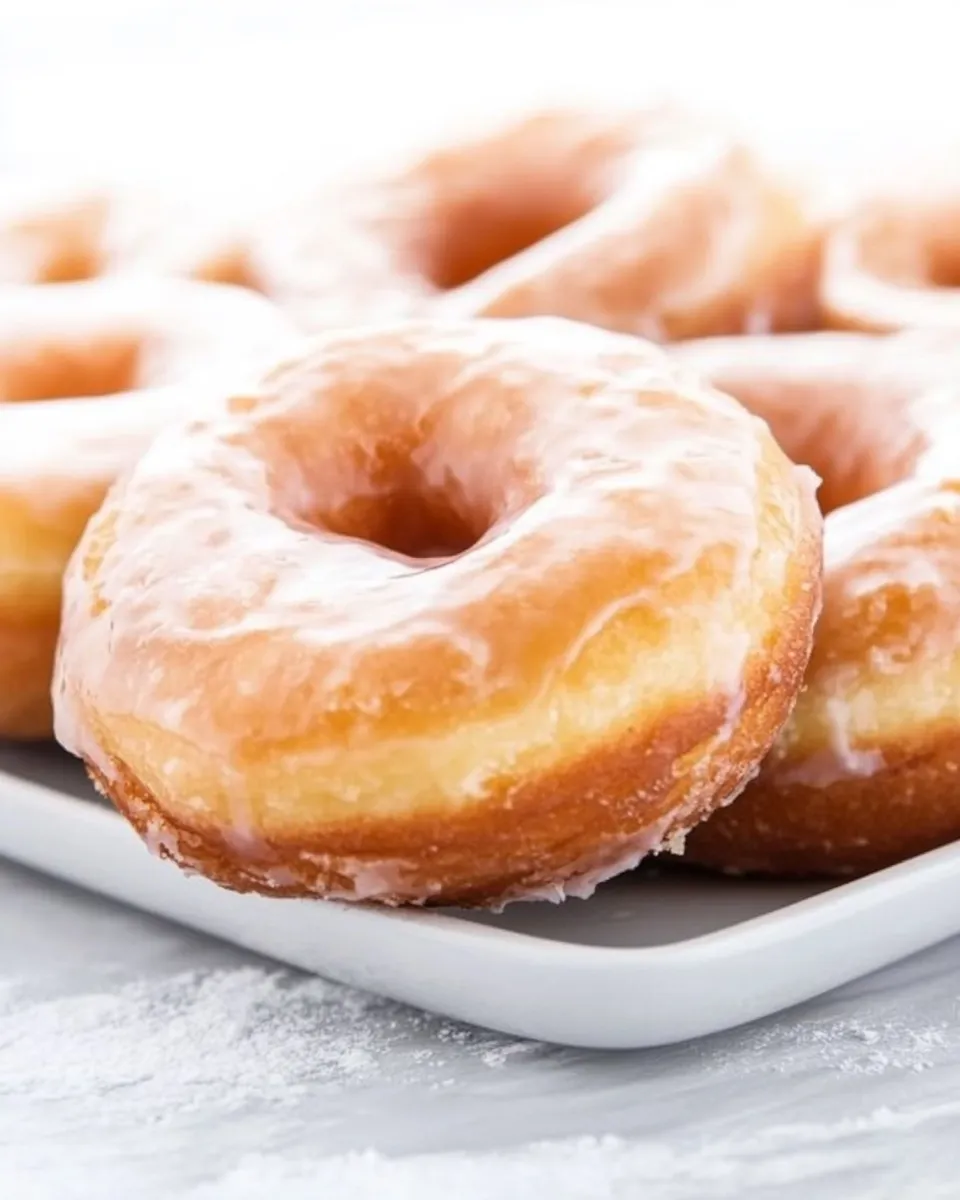
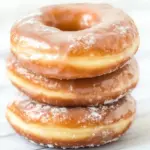
Homemade Glazed Donuts
There’s something comforting about frying a batch of fresh donuts at home: the warm steam of yeast dough, the golden edges as they hit the oil, and that first sticky, sweet bite of glaze. This recipe makes classic glazed donuts with a soft, tender interior and a thin, shiny glaze—exactly what you want with a cup of coffee or to brighten a weekend morning.
I keep the method straightforward and reliable so you can repeat it without fuss. The dough is enriched with butter, an egg and an extra yolk for softness, and a touch of almond for depth. I’ll walk you through proofing, shaping, frying, and glazing with practical tips to avoid the common pitfalls.
Read through the full set of steps before you start. Timing matters for the rises and for cooling between frying and glazing. If you follow the sequence below, you’ll get consistent results and donuts that taste better than store-bought.
Ingredient Checklist
- 2¼ teaspoons instant yeast — leavens the dough quickly; instant yeast can be mixed directly with warm water.
- ¾ cup warm water — activates the yeast; should feel warm to the touch, not hot (about 105–115°F/40–46°C).
- ⅓ cup sugar — feeds the yeast and slightly sweetens the dough.
- ½ teaspoon salt — balances flavor; add with dry ingredients, away from the yeast initial contact.
- ¼ cup unsalted butter (softened) — enriches the dough for tenderness and flavor.
- 1 egg — adds structure and moisture.
- 1 egg yolk — extra fat for a softer crumb.
- ½ teaspoon vanilla extract — aromatic base flavor; used in both dough and glaze (glaze amount specified later).
- ½ teaspoon almond extract — small amount for a rounded, bakery-style flavor.
- 2½ to 3 cups all-purpose flour — the main structure; start with 2½ cups and add up to 3 cups as needed until the dough is tacky but not sticky.
- Vegetable oil (for frying) — neutral oil with a high smoke point; you need 2–3 inches of oil in your pot.
- 2 cups powdered sugar — base of the glaze; sift if lumpy for a smooth finish.
- ¼ cup milk — thins the glaze to a pourable consistency; add slightly more or less if necessary.
- 1 teaspoon vanilla extract — flavor for the glaze.
- ½ teaspoon butter extract (optional) — optional for extra buttery note in the glaze.
Mastering Homemade Glazed Donuts: How-To
- Proof the yeast: In the bowl of a stand mixer, stir the 2¼ teaspoons instant yeast into ¾ cup warm water. Let it sit undisturbed for 10 minutes to ensure the yeast is active and slightly foamy.
- Add wet ingredients: Add ⅓ cup sugar, ½ teaspoon salt, ¼ cup softened unsalted butter, 1 egg, 1 egg yolk, ½ teaspoon vanilla extract, and ½ teaspoon almond extract to the yeast mixture. Fit the mixer with the dough hook and mix on low speed just until combined.
- Incorporate flour: With the mixer running on low, add 2½ cups all-purpose flour in about two additions (roughly half a cup at a time as specified). Continue mixing until the dough begins to pull away from the sides of the bowl.
- Adjust texture: If the dough still feels very sticky, add additional flour 1 tablespoon at a time (up to the 3 cup limit) until the dough is tacky but not sticky and starts to form a cohesive ball.
- First rise: Transfer the dough to a lightly greased bowl. Cover tightly with plastic wrap and place in a warm, draft-free spot. Let the dough rise for 2 hours, or until noticeably puffy.
- Deflate and chill: Gently press the center of the dough to deflate it. Wrap the bowl or the dough tightly in plastic wrap and refrigerate for 6 to 8 hours, or overnight. Chilling firms the dough, making it easier to roll and shaping flavors.
- Roll and cut: On a lightly floured surface, roll the chilled dough to about ½ inch thickness. Use a round donut cutter or a large round cookie cutter to cut out donut rounds. Use a smaller round cutter (about 1 inch) to cut out the centers for donut holes. Transfer donuts and holes to a parchment-lined baking sheet. Lightly cover them with plastic wrap and drape a clean, dry towel over the top. Let them rest for 1 hour (do not exceed 1 hour to avoid overproofing).
- Heat the oil: In a large Dutch oven, add enough vegetable oil to reach 2 to 3 inches deep. Warm the oil over medium heat and heat it to 350°F. Use a thermometer to monitor temperature—oil hotter than 350°F will brown the outside before the inside cooks.
- Fry the donuts: Working in small batches to avoid overcrowding, carefully lower donuts into the hot oil. Fry until golden brown on the first side, then flip and fry until the other side is golden. The goal is even, golden color and a fully cooked interior.
- Drain: Use a slotted spatula or spider to remove cooked donuts. Place them on a baking sheet lined with paper towels and a cooling rack so excess oil drains away and air circulates around the donuts.
- Prepare the glaze: In a mixing bowl, whisk together 2 cups powdered sugar, ¼ cup milk, 1 teaspoon vanilla extract, and ½ teaspoon butter extract (if using). Whisk until the glaze is smooth and lump-free. Adjust thickness with a splash more milk or a spoonful of powdered sugar if needed—the glaze should coat but still drip slightly.
- Glaze the donuts: When donuts have cooled slightly but are still warm (warm is best for setting a shiny glaze), dip each donut, one at a time, into the glaze. Flip to coat both sides, then return to the cooling rack to let the glaze set for about 10 minutes.
- Serve: After the glaze firms, serve the donuts fresh. They are best within a day or two; store loosely covered at room temperature to keep the crust from going soggy.
Why Cooks Rave About It
These donuts hit the sweet spot between bakery-style texture and homemade warmth. The overnight chill step improves flavor and handling—professional bakers use similar rests to develop character in the dough. Frying at a steady 350°F produces a crisp exterior and pillowy interior, which is the reason this method outperforms quick, hurried attempts.
The glaze is simple but effective: powdered sugar, milk, and vanilla create a glossy finish that clings well without overpowering the dough. The optional butter extract gives a bakery butteriness that elevates the overall profile without more work.
Ingredient Flex Options
- Yeast type — recipe specifies instant yeast; if you must use active dry, proof in warm water first and expect slightly longer rises.
- Flour — all-purpose is specified; for a slightly lighter texture, you can replace up to ½ cup with bread flour, but stick within the 2½–3 cup range.
- Milk in glaze — whole milk gives the richest result; use plant milk for a dairy-free option but expect a slight change in mouthfeel.
- Flavoring — almond extract is in the dough; omit if you prefer plain vanilla, but keep quantities the same.
- Glaze add-ins — a pinch of salt or a tablespoon of corn syrup (not listed) can change gloss and flavor—use sparingly if you experiment.
Toolbox for This Recipe
- Stand mixer with dough hook — speeds up kneading and ensures a consistent dough.
- Thermometer — essential for oil temperature control (350°F target).
- Large Dutch oven or deep pot — needs 2–3 inches of oil and room to fry without splashing.
- Donut cutter set or two round cutters — for uniform donuts and holes.
- Parchment-lined baking sheet and cooling rack — for proofing and draining after frying.
- Slotted spatula or spider — to safely transfer donuts in and out of hot oil.
Errors to Dodge
- Too-hot oil — above 350°F will brown outsides before interiors cook; use a thermometer and adjust heat between batches.
- Overproofing — letting the cut donuts sit more than 1 hour can lead to overly yeasty, misshapen results.
- Sticky dough — adding too much flour makes dense donuts; add flour sparingly 1 tablespoon at a time until tacky, not sticky.
- Insufficient draining — skipping a rack over paper towels traps oil and ruins texture; allow donuts to drain properly.
- Glazing too hot or too cold — glaze warm donuts for best adhesion; if donuts are piping hot the glaze will run off, and if they’re cold it won’t set smoothly.
Spring to Winter: Ideas
Spring: Top warm glazed donuts with a scattering of finely chopped fresh strawberries or a light dusting of citrus zest.
Summer: Dip half in glaze and sprinkle with toasted coconut or rainbow sprinkles for a festive touch.
Fall: Add a pinch of cinnamon or pumpkin pie spice to the glaze. A little warm spice complements the dough nicely.
Winter: Use the optional butter extract and add a splash more vanilla; serve with hot chocolate or espresso for a cozy pairing.
Pro Perspective
Professional kitchens treat donuts like any yeast-leavened product: manage temperature and timing carefully. A cool overnight rest tightens gluten and concentrates flavor, while short final proofing prevents over-aeration. When frying, maintaining a steady oil temperature is the number-one priority—this controls texture and oil absorption.
Also, work in consistent batches. Same-size cuts and evenly heated oil will yield donuts that brown uniformly and set the glaze consistently. These small controls separate good homemade donuts from great ones.
Save It for Later
Donuts are best eaten the day they’re made. To store: keep in an airtight container at room temperature up to 24 hours. For longer storage, freeze unglazed donuts in a single layer on a tray until solid, then transfer to a freezer bag for up to one month. Thaw at room temperature and refresh briefly in a 300°F oven for 3–5 minutes, then glaze.
Popular Questions
- Can I bake these instead of frying? — The recipe is written for frying. Baking will change texture and won’t produce the same crisp exterior; if you must bake, expect a denser donut and adjust time/temperature separately.
- What if my glaze is too thick or too thin? — Too thick: whisk in a little milk, a teaspoon at a time. Too thin: add powdered sugar a tablespoon at a time until desired consistency.
- How can I tell when the donuts are cooked through? — Golden brown and a light, springy interior when pressed gently. If in doubt, fry a small test donut first and slice to check.
- Can I use active dry yeast? — Instant yeast is specified. If using active dry, bloom it in the warm water first and expect slightly longer rise times.
Before You Go
These glazed donuts are a weekday treat and a weekend ritual. Follow the timing for rises and chill for the best texture, watch your oil temperature, and dip while the donuts are warm for a beautiful glossy finish. Make a double batch once you’ve practiced—the second batch will be even better.
Happy frying. If you try the recipe, take note of the exact oil temperature and your batch size; small adjustments make a big difference and help you dial this in for perfect, repeatable results.
Homemade Glazed Donuts
Ingredients
- 2 1/4 teaspoons instant yeast (not active dry yeast)
- 3/4 cup warm water
- 1/3 cup granulated sugar
- 1/2 teaspoon salt
- 1/4 cup unsalted butter softened
- 1 large egg
- 1 egg yolk
- 1/2 teaspoon vanilla extract
- 1/2 teaspoon almond extract
- 2 1/2 to 3 cups all-purpose flour
- vegetable oil for frying (2–3 inches in pot)
- 2 cups powdered sugar
- 1/4 cup milk
- 1 teaspoon vanilla extract for glaze
- 1/2 teaspoon butter extract optional, for glaze
Instructions
- In the bowl of a stand mixer, combine the instant yeast and warm water and let sit 10 minutes until foamy.
- Add the sugar, salt, softened butter, egg, egg yolk, vanilla extract, and almond extract to the yeast mixture and mix briefly to combine using the dough hook on low speed.
- Add 2 1/2 cups of the all-purpose flour to the mixer, about 1/2 cup at a time, mixing on low until the dough starts to form; if very sticky, add additional flour 1 tablespoon at a time until dough pulls away from the bowl but remains slightly tacky.
- Transfer the dough to a lightly greased bowl, cover tightly with plastic wrap, and place in a warm, draft-free spot to rise for about 2 hours, until puffed.
- Punch down the dough gently, wrap it in plastic, and refrigerate for 6–8 hours or overnight.
- On a lightly floured surface, roll the chilled dough to about 1/2-inch thickness. Cut donut rounds with a large cutter and cut centers with a ~1-inch cutter to make holes. Place donuts and holes on a parchment-lined baking sheet, lightly cover with plastic wrap and a towel, and let rest 1 hour (no more than 1 hour).
- Heat 2–3 inches of vegetable oil in a large Dutch oven over medium heat to 350°F (use a thermometer). Fry donuts in batches without overcrowding, cooking until golden brown on each side.
- Use a slotted spoon to transfer fried donuts to a paper towel–lined baking sheet set over a cooling rack to drain; repeat with remaining donuts.
- Whisk together powdered sugar, milk, vanilla extract, and optional butter extract until smooth and lump-free to make the glaze.
- Dip each slightly cooled donut into the glaze, flip to coat both sides, then return to the cooling rack and let the glaze set about 10 minutes.
Equipment
- stand mixer with dough hook
- Mixing bowls
- Plastic Wrap
- Rolling Pin
- donut cutter (or 2 round cutters)
- baking sheet lined with parchment
- Dutch oven or heavy pot
- deep-fry thermometer
Notes
- Use instant yeast, not active dry, as listed.
- Do not let the second rise exceed 1 hour to avoid overproofing.
- Maintain oil temperature at 350°F for even cooking.
- Chilling the dough overnight improves flavor and handling.