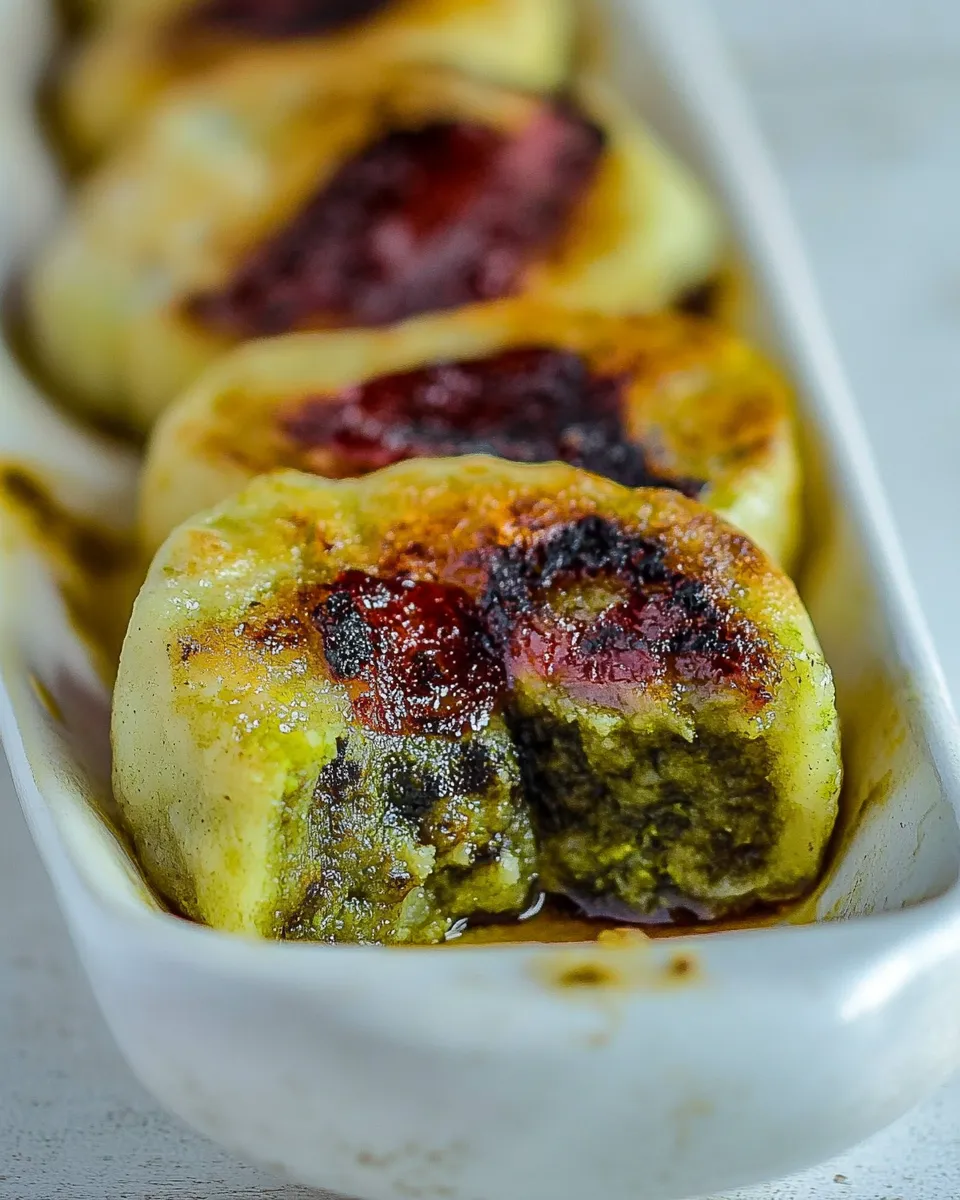
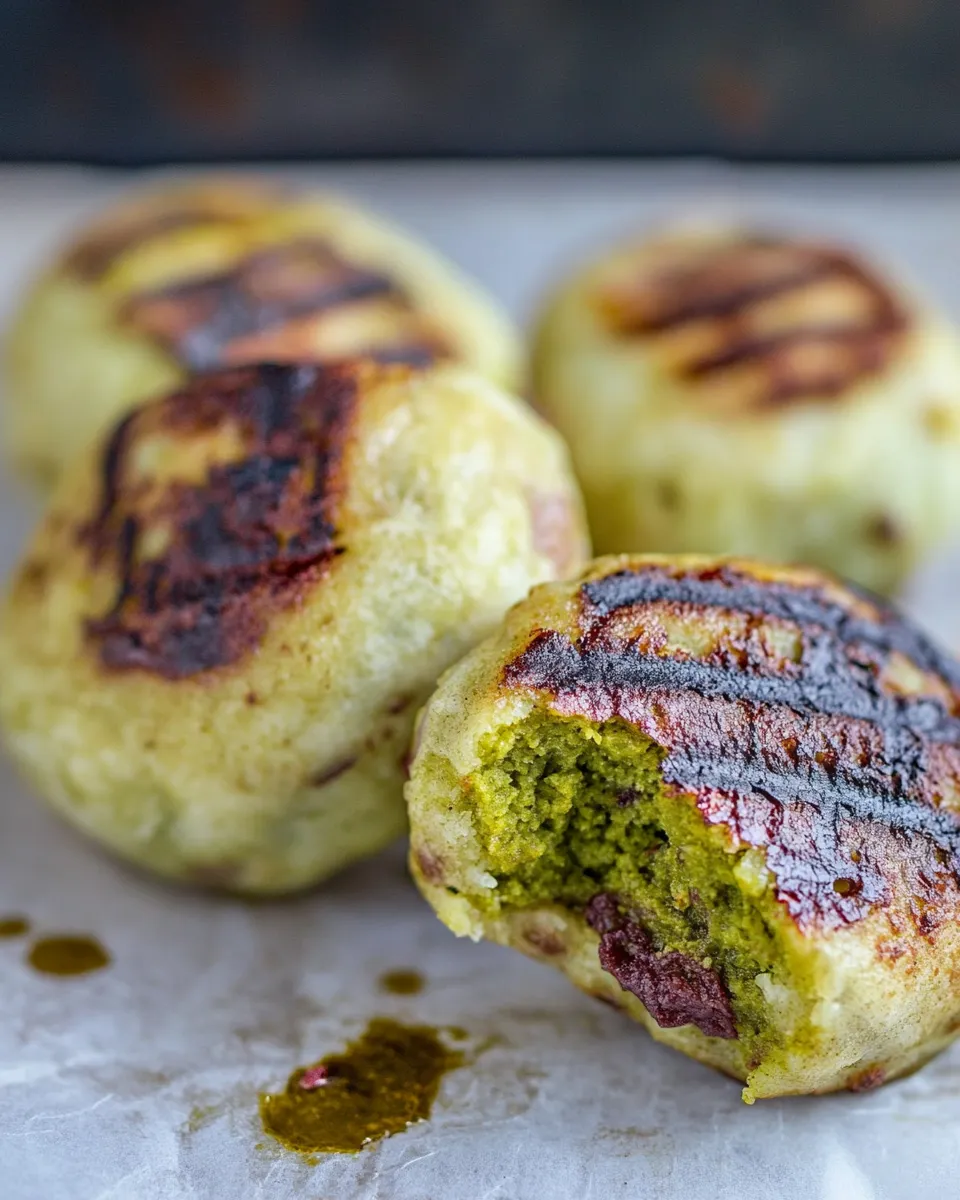
Grilled Matcha Mochi
There’s something quietly indulgent about fresh mochi—chewy, slightly sweet rice dough hugging a soft center. Grilling it adds a thin, caramelized crust and a toasty note that balances the grassy bitterness of matcha and the mellow sweetness of red bean paste. This version keeps things simple: mochiko rice flour, matcha, water, and a classic anko filling.
Expect hands-on work: mixing a pliable dough, shaping small rounds, and grilling until each side puffs and browns. The technique is forgiving—if the dough gets too wet, you dust in more flour; if it’s too dry, a splash of water brings it back. I’ll walk you through clear, practical steps so your first batch comes out reliably chewy and delicious.
The recipe yields 8–12 individually filled mochi and is ideal for an afternoon treat or a sweet finish to a casual meal. Serve them hot so the filling is soft and the exterior is slightly crisp. Ready? Let’s get into the pantry and the pan.
The Ingredient Lineup

- 1 cup sweet rice flour, Mochiko brand — the starch base; gives mochi its characteristic chew.
- 1 tsp matcha powder — provides color and that signature green-tea flavor; sift if lumpy.
- 3/4 to 1 cup water — hydrates the flour into a pliable dough; add gradually to control texture.
- 1 cup red bean paste, sweetened — classic filling (anko); keep it room temperature for easier wrapping.
Mastering Grilled Matcha Mochi: How-To
Follow these steps in order. Quantities are unchanged from the source; method is clarified for home cooks.
- Combine dry ingredients: In a large mixing bowl, add 1 cup sweet rice flour (Mochiko) and 1 tsp matcha powder. Whisk or stir thoroughly to distribute the matcha evenly through the flour.
- Start hydrating: Pour in about 1/4 cup of the 3/4–1 cup water and stir. The batter will begin to come together; keep stirring while you add liquid.
- Adjust to a doughy consistency: Continue adding water little by little until the mixture forms a cohesive, doughy mass. Use between 3/4 and 1 cup total—stop when the dough is soft but not runny. If it becomes too loose, sprinkle in a bit more sweet rice flour until it firms up.
- Prepare the work surface: Lightly sprinkle rice flour onto a clean counter or board to prevent sticking. Transfer the dough onto the floured surface.
- Knead and shape: Knead the dough briefly—just enough to make it uniform—then roll it into a long, thin log about the thickness you can comfortably divide into equal pieces.
- Portion the dough: Cut or pinch the log into 8–12 equal pieces, depending on the size you prefer. Roll each portion into a smooth ball and set them aside on the floured surface.
- Fill each mochi: Take one dough ball and place it in your well-floured palm. Gently flatten it into a small disc about 1/2 inch thick. Spoon approximately 1 tablespoon of sweetened red bean paste into the center.
- Seal the filling: Carefully lift and stretch the dough edges around the filling, pinching and smoothing to fully encase the anko. Flatten the sealed ball gently so the finished piece is roughly 1/2 inch thick. Repeat with the remaining dough and filling.
- Heat the grill or pan: Preheat and lightly grease a grill, grill pan, or heavy skillet over medium heat. The surface should be hot enough to sizzle when a mochi touches it but not so hot that it chars immediately.
- Grill the mochi: Place prepared mochi on the heated surface. Cook for 4–5 minutes per side, watching for a light golden-brown color and a slightly puffed appearance. Flip gently to avoid tearing.
- Finish and serve: Transfer cooked mochi to a plate and continue grilling the rest. Serve the mochi hot so the filling remains soft and the exterior is pleasantly toasty.
Reasons to Love Grilled Matcha Mochi
- Contrast of textures: chewy interior, light toasted crust.
- Balanced flavors: earthy matcha brightens the sweet red bean filling.
- Small-batch friendly: makes 8–12 pieces—easy to scale up or down.
- Simple ingredients: pantry-ready staples with minimal prep.
Quick Replacement Ideas
- Red bean paste — sub with sweetened chestnut paste or Nutella for a different flavor profile.
- Matcha powder — swap for cocoa powder for a chocolate mochi.
- Sweet rice flour (Mochiko) — use another brand of glutinous rice flour, but keep amounts identical.
Equipment at a Glance
- Large mixing bowl — for combining dry and wet ingredients.
- Whisk or spoon — to mix flour and matcha.
- Measuring cups and spoons — for accurate proportions.
- Clean work surface and extra rice flour — prevents sticking while shaping.
- Grill, grill pan, or heavy skillet — medium heat for even toasting.
- Spatula or tongs — for gentle flipping.
Things That Go Wrong
- Dough too sticky — you added too much water; dust with more sweet rice flour a tablespoon at a time until workable.
- Dough too dry or crumbly — add a few drops of water and knead until it comes together.
- Mochi splits when filling — flatten dough thinner and smooth edges to seal; work with slightly warmer dough if it’s cold and stiff.
- Exterior chars before interior cooks — lower heat slightly and cook longer per side to get a golden crust without burning.
In-Season Flavor Ideas
- Spring — add a few chopped preserved sakura petals into the red bean paste for a floral touch.
- Summer — serve with a spoonful of fresh mango or yuzu marmalade on the side.
- Autumn — mix a little cinnamon into the anko or use chestnut paste as a filling substitute.
- Winter — top with toasted sesame seeds or serve alongside warm green tea.
Chef’s Rationale
The goal here is to respect traditional textures while adding a toasty, caramelized layer that grilling delivers. Mochiko (sweet rice flour) hydrates differently than wheat flour, so the water range gives you control over temperature and humidity variability. I kept the matcha small—1 teaspoon—so it colors and flavors without overpowering the classic anko sweetness. Grilling for 4–5 minutes per side creates the contrast between chewy center and slightly crisp exterior without making the filling dry.
Make Ahead Like a Pro
- Assemble and refrigerate: Shape and fill mochi, then place them on a tray dusted with rice flour, cover lightly with plastic wrap, and refrigerate for up to 24 hours. Bring to room temperature before grilling.
- Freeze for longer storage: Flash-freeze arranged mochi on a tray, then transfer to a sealed bag for up to 1 month. Thaw overnight in the fridge and then grill gently.
- Pre-measure matcha mix: Whisk matcha into the flour ahead of time and store in an airtight container to save prep time.
Popular Questions
- Q: Can I steam these instead of grilling? — A: Yes. Steaming yields a soft, non-toasted mochi. Grill for the caramelized crust if you want a toasted finish.
- Q: Why did my mochi become rubbery? — A: Overcooking or using too little water can make them tough; aim for the recommended water range and keep an eye while grilling.
- Q: Can I use homemade red bean paste? — A: Absolutely. Homemade anko works well; ensure it’s not too wet to prevent tearing the dough when sealing.
- Q: Any tips for nonstick grilling? — A: Lightly oil the grill surface and use medium heat. If using a grill pan, a thin layer of neutral oil prevents sticking without adding flavor.
Final Thoughts
Grilled Matcha Mochi is an approachable way to enjoy a classic Japanese treat with a toasty twist. The technique is straightforward and forgiving: control moisture, work on a floured surface, and grill patiently. Once you’ve made one batch, you’ll see how small adjustments—matcha intensity, filling swaps, grilling time—let you tailor the snack to your taste. Serve them hot and savor the contrast of textures and flavors.
Grilled Matcha Mochi
Ingredients
- 1 cup sweet rice flour (Mochiko)
- 1 tsp matcha powder
- 3/4 to 1 cup water
- 1 cup sweetened red bean paste
Instructions
- In a large bowl, combine the sweet rice flour and matcha powder; whisk to blend evenly.
- Gradually add about 1/4 cup of water and stir until the mixture starts to come together.
- Add more water little by little (total 3/4 to 1 cup) until the mixture forms a dough that is soft but not runny; if too wet, sprinkle in a bit more rice flour.
- Lightly dust a work surface with rice flour, transfer the dough onto it, and knead briefly until smooth.
- Shape the dough into a log and divide it into 8 equal pieces (you may make 12 smaller pieces if preferred). Roll each piece into a ball.
- Flatten a dough ball in your floured palm to about 1/2 inch thick, place about 1 tablespoon of red bean paste in the center, and wrap the dough around it, sealing the seams.
- Repeat with the remaining dough and filling, placing finished mochi on a lightly floured tray.
- Heat and lightly grease a grill, grill pan, or skillet over medium heat.
- Grill the mochi, 4–5 minutes per side, until they develop light browning and slightly crisp edges.
- Transfer cooked mochi to a plate and serve hot.
Equipment
- large mixing bowl
- whisk or spoon
- Measuring cups and spoons
- work surface or cutting board
- grill, grill pan, or skillet
- spatula or tongs
Notes
- Reheat leftovers in a skillet or on the grill.