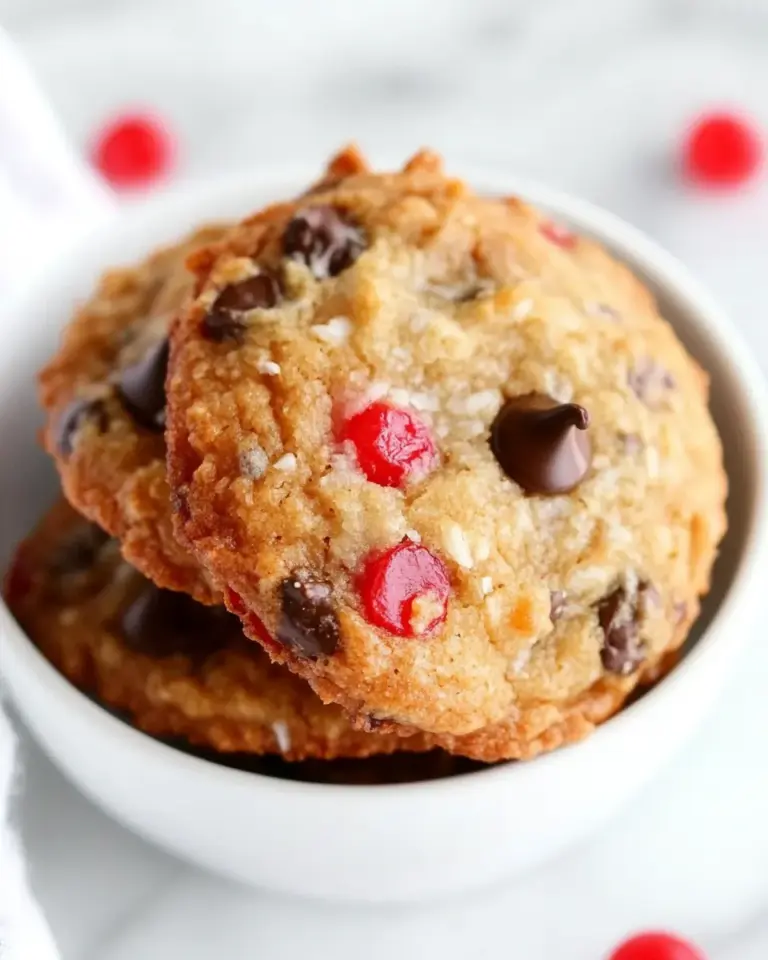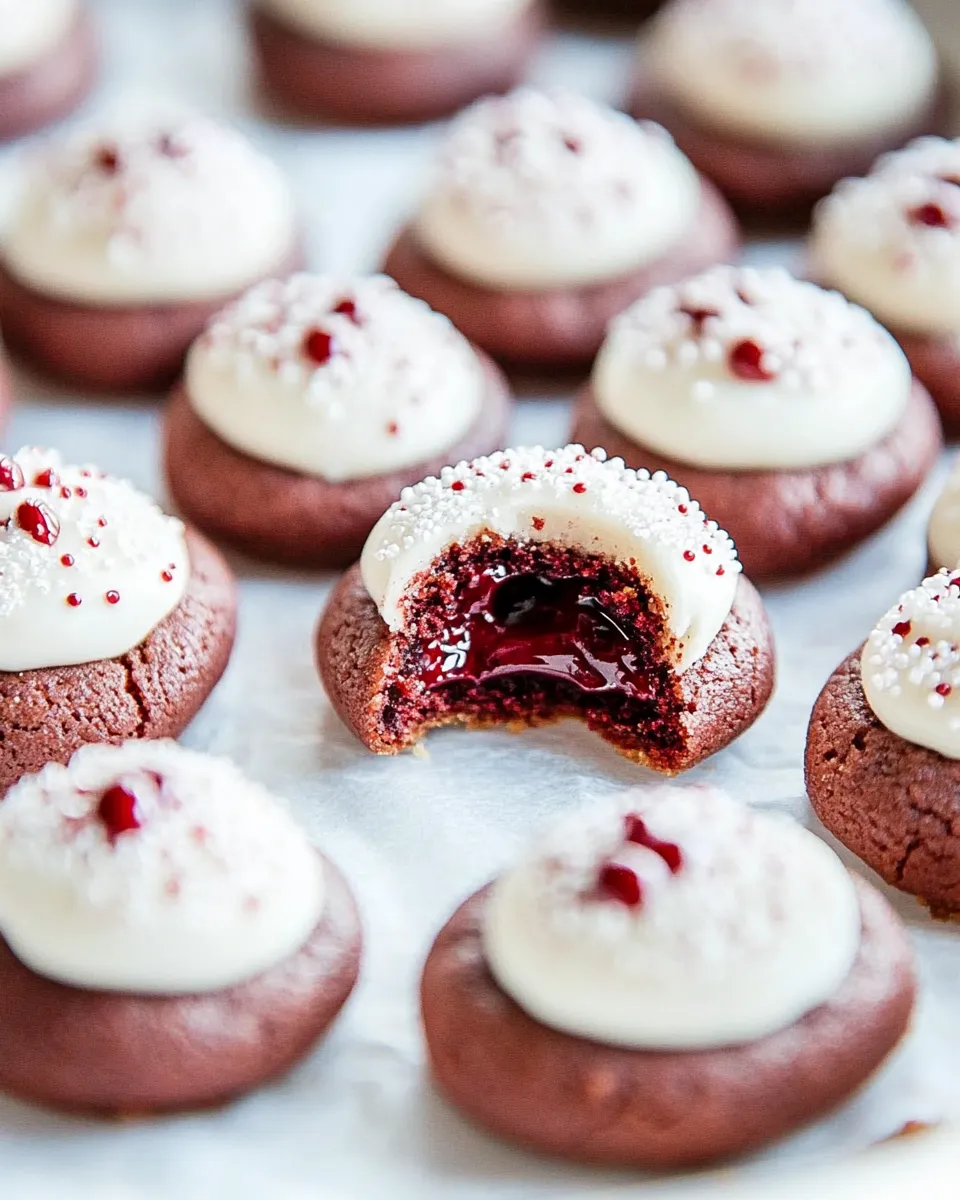
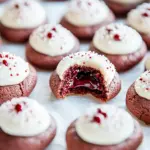
Red Velvet Kiss Cookies
These Red Velvet Kiss Cookies are my go-to when I want a festive, show-stopping treat without fuss. They come together with pantry-friendly ingredients, bake quickly, and finish with a classic Hershey’s Kiss center that melts into a glossy peak. The texture is soft and slightly cakey — like a cookie and a cupcake had a delicious, red-hued baby.
I test recipes the way I cook at home: practical steps, honest timing, and a few tips that actually save time. Below you’ll find a clear ingredient breakdown with notes, step-by-step directions that match the ingredient list exactly, and a handful of swaps and storage tips so the cookies turn out consistently.
Whether you’re baking for Valentine’s Day, a holiday cookie swap, or just because, these cookies are forgiving and fun. Read through the equipment and troubleshooting sections if you’re new to rolling dough in sugar or working with food coloring.
What You’ll Gather
Ingredients
- 14 tablespoons butter (room temperature) — provides fat for tenderness and flavor; soften to room temp for even creaming.
- 1½ cup brown sugar — adds moisture and a subtle caramel note; pack lightly when measuring.
- 1 tablespoon vanilla extract — balances the cocoa and enhances overall flavor.
- 1 egg — contributes structure and moisture.
- 1 egg yolk — adds extra richness and chew.
- 1 tablespoon red liquid food coloring — gives the signature red velvet color; use liquid as listed for accurate volume.
- ½ teaspoon salt — sharpens flavor and balances sweetness.
- 1¾ cups all-purpose flour — the primary structure of the cookie; spoon and level for accuracy.
- 1 teaspoon baking powder — helps the cookies rise gently.
- ½ teaspoon baking soda — reacts with brown sugar for lift and tender crumb.
- ½ cup cocoa powder — provides chocolate flavor and the red velvet base; sift if lumpy.
- ½ cup granulated sugar (for coating) — for rolling the dough balls to form a crisp, sweet exterior.
- 12 ounce Hershey’s Kisses (1 bag) — placed on top of each cookie right after baking so they nestle and melt slightly.
Directions: Red Velvet Kiss Cookies
- Preheat your oven to 350°F (175°C). Line two baking sheets with parchment paper and set them nearby.
- In the bowl of a stand mixer (or a large bowl with a hand mixer), add the 14 tablespoons softened butter, 1½ cup brown sugar, and 1 tablespoon vanilla extract. Beat on medium speed until the mixture is creamy and well combined, about 2–3 minutes.
- Add the whole egg and the egg yolk to the creamed butter mixture. Pour in the 1 tablespoon red liquid food coloring. Continue mixing until the eggs and coloring are fully incorporated and the batter is uniform in color.
- In a separate bowl, whisk together ½ teaspoon salt, 1¾ cups all-purpose flour, 1 teaspoon baking powder, ½ teaspoon baking soda, and ½ cup cocoa powder until evenly combined.
- Add the dry ingredients to the mixer in two additions. Start by adding half the dry mixture, mix on low until just combined, then add the second half and mix until the dough comes together. Scrape the bowl as needed so everything is evenly mixed.
- Pour ½ cup granulated sugar into a shallow plate for rolling. Using a small cookie scoop or a tablespoon, portion the dough into 1-inch balls. Roll each ball between your hands to smooth, then roll each ball in the granulated sugar to coat.
- Place the sugar-coated dough balls about 2 inches apart on the prepared baking sheets. Continue until all dough is portioned; the recipe should yield about 4 dozen cookies.
- Bake in the preheated 350°F oven for 11 to 13 minutes. Watch closely near the 11-minute mark — you want the edges set but not overbaked. The centers should still look slightly soft.
- As soon as the cookies come out of the oven, press one Hershey’s Kiss into the center of each hot cookie. The heat will soften the chocolate and allow it to settle into a little peak.
- Transfer the cookies to a wire rack and let cool completely so the chocolate sets. Once cooled, store as desired.
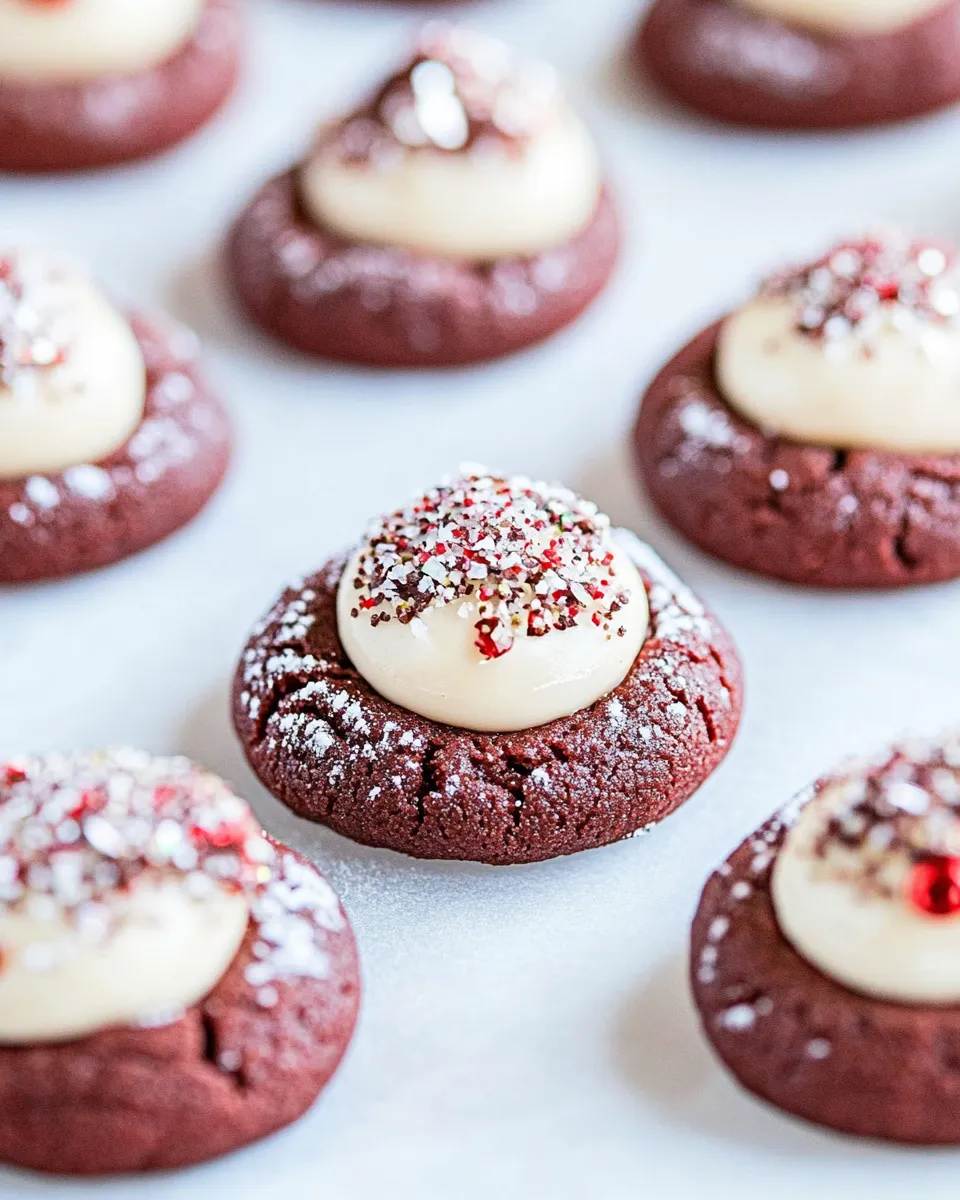
Reasons to Love Red Velvet Kiss Cookies
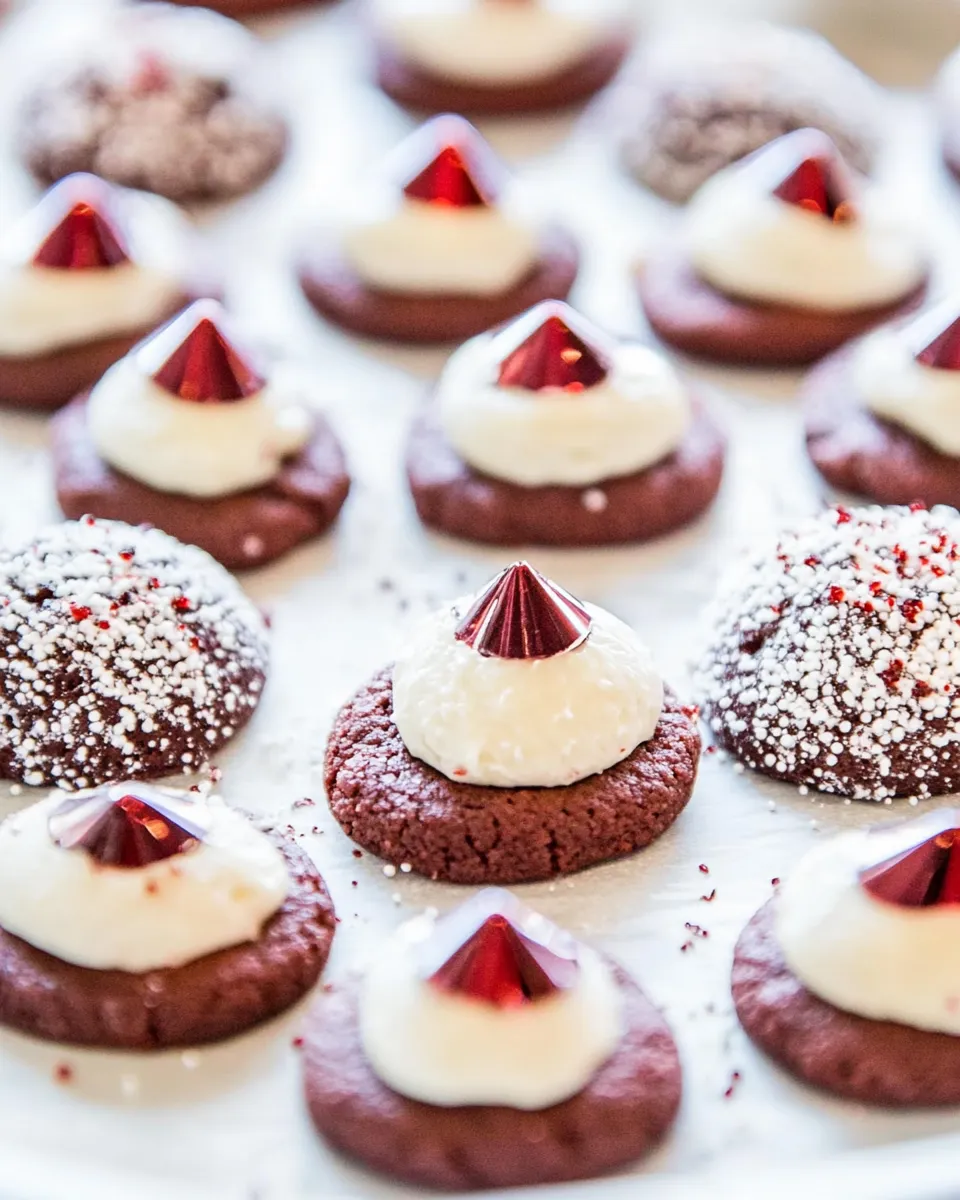
- Spectacular presentation: the red dough with a chocolate kiss is immediately festive and gift-ready.
- Simple method: no chilling required and straightforward rolling makes these accessible for bakers of all levels.
- Soft, tender texture: the combination of egg + yolk and brown sugar yields a plush cookie, not a crisp one.
- Customizable: swap kiss varieties or sprinkle decorations while the chocolate is soft.
Dairy-Free/Gluten-Free Swaps

- Dairy-free: Replace the 14 tablespoons butter with an equal amount of vegan stick butter for similar plasticity and flavor. Expect slight differences in browning and mouthfeel.
- Gluten-free: Substitute the 1¾ cups all-purpose flour with a 1:1 gluten-free baking flour blend that contains xanthan gum. The dough may be slightly more fragile; chill 10–15 minutes if it’s too sticky to roll.
- Chocolate alternative: Use dairy-free chocolate kisses for a fully dairy-free finished cookie.
Before You Start: Equipment
- Stand mixer or hand mixer — for creaming butter and sugar smoothly.
- Mixing bowls — one for wet ingredients and one for dry.
- Measuring cups and spoons — for accurate quantities.
- Cookie scoop or tablespoon — to portion consistent 1-inch balls.
- Parchment-lined baking sheets — prevents sticking and promotes even baking.
- Wire rack — for cooling and setting the Hershey’s Kisses.
Don’t Do This
- Don’t overbake — even a minute or two too long dries these cookies out. Remove at 11–13 minutes when centers still look slightly soft.
- Don’t skip rolling in the granulated sugar — it gives a pleasant exterior contrast and a little snap to the edge.
- Don’t add extra flour — stick to 1¾ cups; adding more makes the cookies dense.
- Don’t press the Kisses in before removing from the oven — they’ll melt too much during baking and won’t form the signature peak.
Seasonal Adaptations
- Valentine’s Day: Use heart-shaped Kisses or sprinkle pink sanding sugar on the warm chocolate for extra flair.
- Christmas: Swap red food coloring for a split batch (red and green) or use red dough with a peppermint Kiss instead of original chocolate.
- Autumn: Use dark chocolate or caramel-filled kisses and top with a pinch of flaky sea salt once the chocolate softens.
Pro Tips & Notes
- Room temperature butter is key — it creams properly with brown sugar and traps air for lift.
- If your batter looks unevenly colored after adding food coloring, scrape the bowl and mix a little longer; a silicone spatula helps disperse color without overworking the dough.
- For perfectly round cookies, roll dough between your palms to smooth seams, then roll in sugar for a glossy finish.
- To avoid spread, make sure your oven temperature is accurate; oven thermometers are inexpensive and useful.
- If you want taller cookies, chill the dough for 10–20 minutes before rolling; this is optional but effective.
Freezer-Friendly Notes
- Freeze unbaked, rolled dough balls on a tray until firm, then transfer to a labeled freezer bag for up to 3 months. Bake from frozen, adding 1–2 minutes to the bake time and press a Kiss on each right after baking.
- Fully baked cookies freeze well in an airtight container for up to 2 months. Thaw at room temperature—refresh in a 300°F oven for 3–5 minutes if you want the chocolate slightly melty again.
Handy Q&A
- Q: Can I use powdered food coloring instead of liquid?
A: Yes, but follow package conversions; powdered concentrates are stronger so use less. Texture may be unchanged but color intensity will differ. - Q: My cookies spread too much. Why?
A: Likely butter was too soft or oven temperature too low. Chill dough briefly and verify oven temp. - Q: Can I use milk chocolate or dark chocolate Kisses?
A: Absolutely. Each yields a different flavor profile; dark chocolate is less sweet and pairs nicely with cocoa in the dough. - Q: How do I get a deeper red color?
A: Increase red liquid food coloring slightly, but be cautious—too much can affect texture and flavor. Gel colorants are more concentrated if you want intense color with less liquid.
Save & Share
If you bake these, take a photo and tag a friend who needs a simple, festive cookie in their life. They travel well to potlucks and make great homemade gifts. Bookmark this page, or print the recipe card so you can come back to the exact steps and ingredient notes next time you bake.
Red Velvet Kiss Cookies
Ingredients
- 14 tablespoon butter room temperature
- 1.5 cup brown sugar
- 1 tablespoon vanilla extract
- 1 egg
- 1 egg yolk
- 1 tablespoon red liquid food coloring
- 0.5 teaspoon salt
- 1.75 cup all-purpose flour
- 1 teaspoon baking powder
- 0.5 teaspoon baking soda
- 0.5 cup cocoa powder
- 0.5 cup granulated sugar for coating
- 12 ounce Hershey's Kisses about 1 bag
Instructions
- Preheat the oven to 350°F (175°C) and line two baking sheets with parchment paper.
- Cream the butter and brown sugar in a large bowl with a hand mixer until light and fluffy, about 2–3 minutes.
- Add the vanilla, egg, egg yolk, and red food coloring; beat until the color is evenly incorporated and the mixture is smooth.
- In a separate bowl, whisk together the salt, flour, baking powder, baking soda, and cocoa powder until combined.
- Add the dry ingredients to the wet ingredients in two additions, mixing after each addition until just combined.
- Place the granulated sugar for coating on a shallow plate. Roll the dough into 1-inch balls, then roll each ball in the sugar to coat.
- Arrange the coated dough balls about 2 inches apart on the prepared baking sheets; this recipe yields about 48 cookies.
- Bake for 11–13 minutes, until the edges are set but the centers are still slightly soft; avoid overbaking to keep cookies tender.
- Immediately after removing the cookies from the oven, press a Hershey's Kiss into the center of each cookie. Transfer to a wire rack and cool completely.
Equipment
- baking sheets (2)
- Parchment Paper
- Hand Mixer
- Mixing bowls
- wire cooling rack
- shallow plate
Notes
- Liquid or gel red food coloring both work.
- Do not overbake to keep cookies soft.
- Roll dough balls evenly to ensure uniform baking.
- Use a shallow plate for coating with granulated sugar.
- Press Kisses into cookies while hot so they adhere.