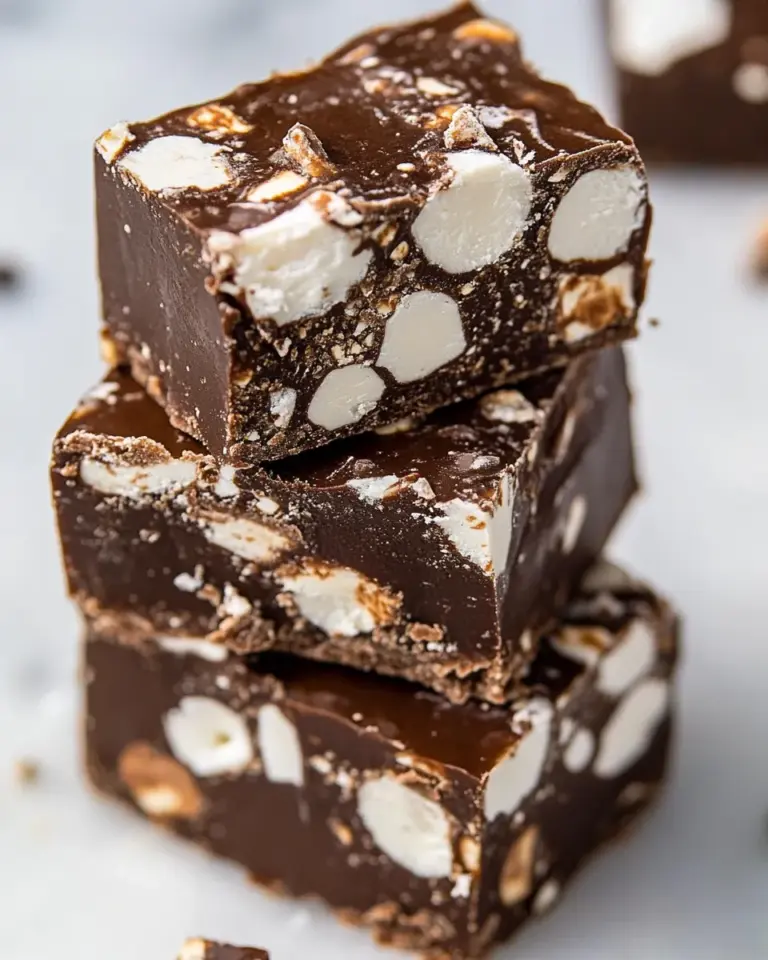
Peanut Butter Chocolate Rice Krispie Treats (No Bake Bars!)
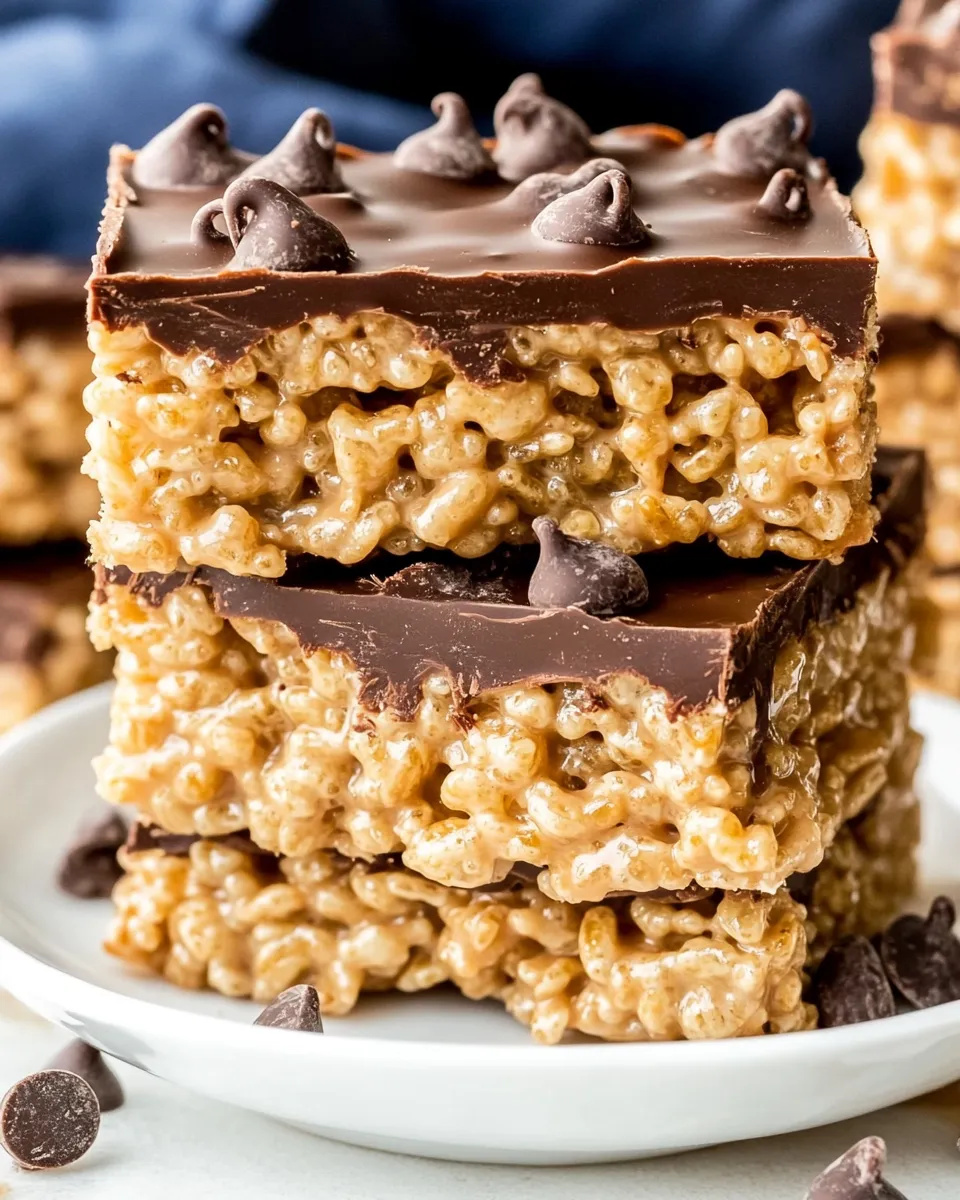
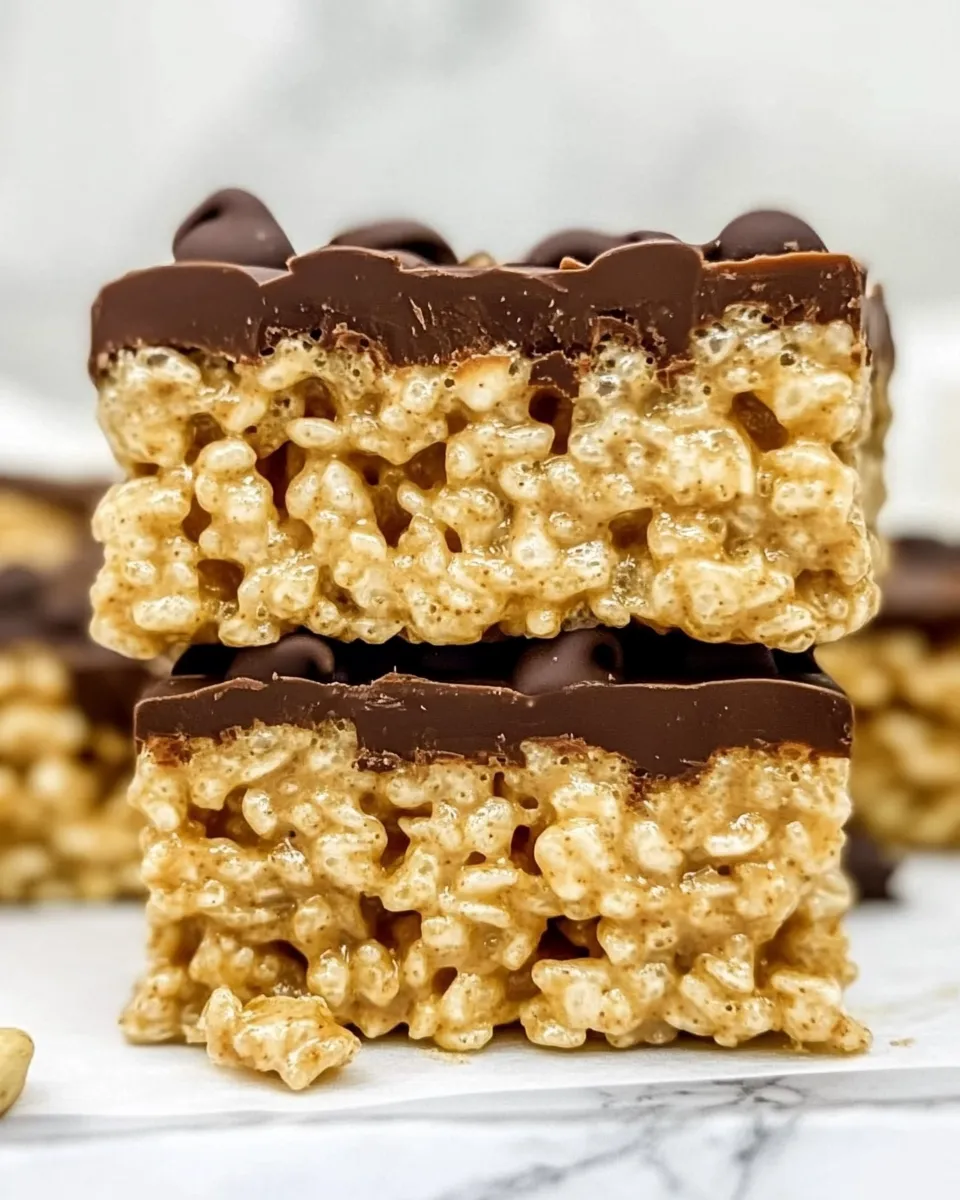
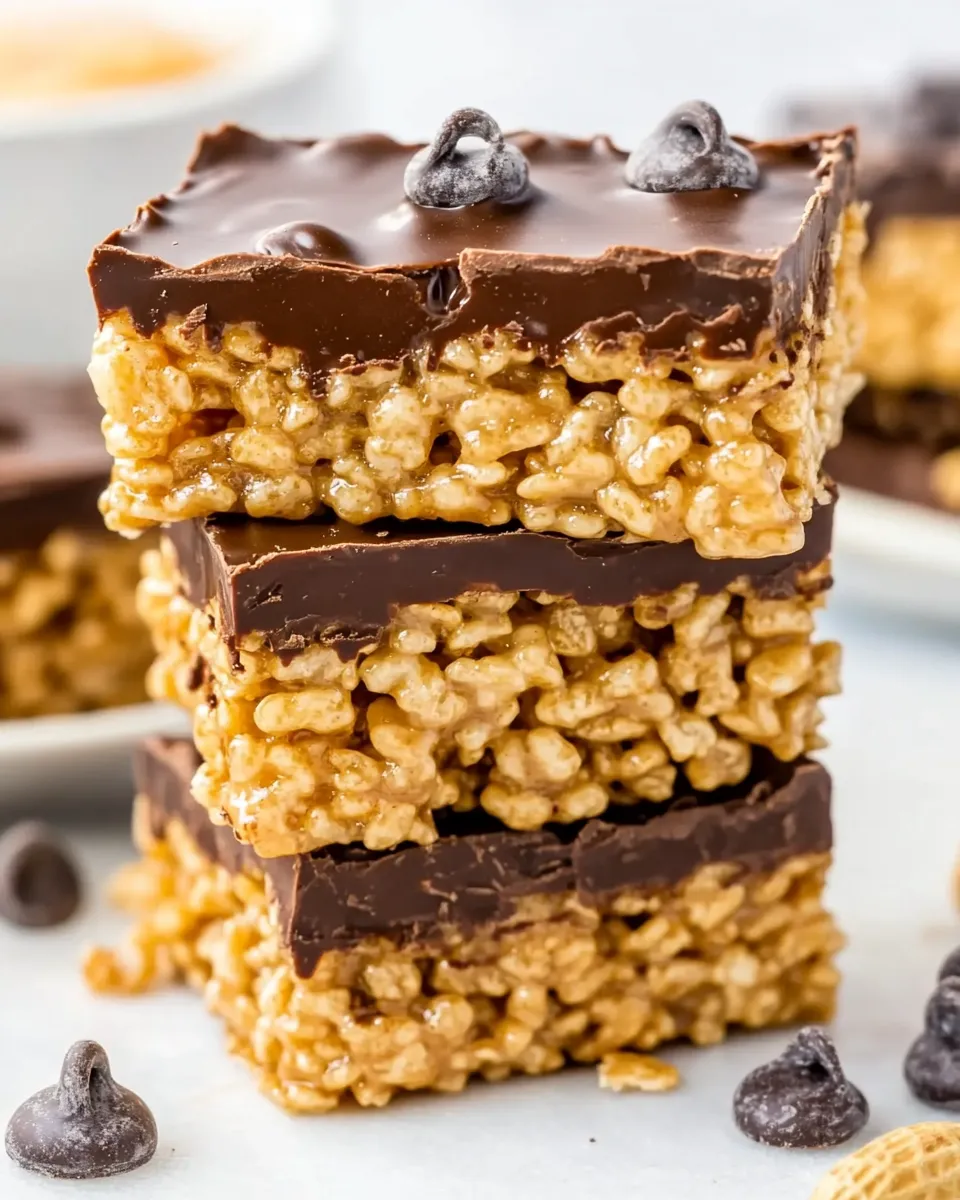
These no-bake bars are exactly what you want when you need a quick, crowd-pleasing snack with minimal fuss. Crunchy Rice Krispies meet a warm, buttery peanut butter-marshmallow base, finished with a glossy chocolate layer. They come together in one pot and a microwave bowl—no oven required.
I keep this recipe in heavy rotation because it’s fast, forgiving, and hits the nostalgia button every time. The texture is the star: crisp cereal and chewy marshmallow, with a rich peanut butter backbone and that chocolate-top polish. You can pull these out for a potluck, pack them in lunchboxes, or cut them into small bites for a party tray.
Measure once, have everything staged, and move through the steps steadily—the marshmallow stage goes quickly. I’ll walk you through exact measurements, simple troubleshooting, and smart swaps, so your bars come out perfectly every time.
The Ingredient Lineup

- 1/4 cup unsalted butter — provides fat and flavor; helps melt and bind the peanut butter and marshmallows.
- 1 cup peanut butter — the main flavor and binder; use creamy for a smooth texture.
- 5 cups mini marshmallows (10 ounce bag) — create the chewy, sticky matrix that glues the cereal together.
- 6 cups Rice Krispie Cereal — the crunchy base; fold in gently to keep pieces intact.
- 1 cup chocolate chips — melts into the glossy top layer; semi-sweet or milk depending on your preference.
- 1 tablespoon coconut oil — thins and smooths the melted chocolate so it spreads easily and sets glossy.
Peanut Butter Chocolate Rice Krispie Treats (No Bake Bars!) Made Stepwise
Prep
- Lightly oil an 8½ x 11-inch pan or line it with parchment paper with a small overhang for easy removal. Measure all ingredients and have a silicone spatula and a microwave-safe bowl ready.
Cook the butter and peanut butter
- Place a large pot over medium heat. Add 1/4 cup unsalted butter and let it melt completely.
- Add 1 cup peanut butter to the melted butter and stir constantly until the mixture becomes smooth and homogenous, about 1 minute.
Melt the marshmallows
- Reduce the heat to medium-low and add 5 cups mini marshmallows to the peanut butter-butter mixture. Stir continuously until the marshmallows begin to stretch and lose their shape—about 1–2 minutes. Turn off the heat as soon as this stage is reached.
Fold in the cereal and press into the pan
- Immediately add 6 cups Rice Krispie cereal to the hot marshmallow mixture. Mix thoroughly until every piece is coated.
- Transfer the mixture to the prepared pan. Use a silicone spatula to spread it into an even layer.
- Wet your fingers slightly and gently press the mixture into the pan to compact it. Press just enough so the pieces stick together—avoid pressing hard, which makes the bars too dense.
Finish with the chocolate layer
- Place 1 cup chocolate chips and 1 tablespoon coconut oil in a microwave-safe bowl.
- Microwave at 50% power, stirring every 30 seconds, until the chocolate and oil are melted and smooth—about 2 minutes total. Stir well to ensure an even gloss.
- Pour the warm chocolate over the pressed Rice Krispie layer. Spread it into an even layer with a spatula. Let the pan cool at room temperature until the chocolate is set and the bars are completely cool.
Slice and serve
- Use the parchment overhang (if used) to lift the slab from the pan. Slice into bars with a sharp knife. Serve at room temperature.
Why This Peanut Butter Chocolate Rice Krispie Treats (No Bake Bars!) Stands Out
The flavor balance is straightforward and reliable: salty-sweet peanut butter paired with chewy marshmallow and crisp cereal. The chocolate top gives a professional finish and a satisfying snap. No baking reduces time and complexity, and the recipe scales easily.
Texture is the other win here. These aren’t overly dense or gloopy when you press them lightly; they stay fluffy with plenty of crunch. The coconut oil in the chocolate prevents it from seizing and keeps the topping silky and easy to slice.
Substitutions by Category
- Nut butter — swap almond or sunflower seed butter 1:1 if you need a peanut-free option, though flavor shifts slightly.
- Chocolate — use dark chocolate chips for a less sweet contrast or white chocolate for a sweeter finish; keep the 1 cup amount.
- Oil — substitute vegetable oil for coconut oil if preferred; it still thins the chocolate but may be less glossy.
- Cereal — puffed rice or a gluten-free crisp rice cereal works in place of Rice Krispies.
Equipment Breakdown
- Large pot — for melting butter, peanut butter, and marshmallows evenly.
- Silicone spatula — folds cereal and spreads the mixture without scratching cookware.
- 8½ x 11-inch pan — recommended size for the intended thickness; alternatives will change bar thickness and bake time.
- Microwave-safe bowl — melts chocolate and coconut oil safely; a double boiler works too.
- Parchment paper — optional but helpful for removing bars cleanly from the pan.
Troubles You Can Avoid
- Marshmallows not melting smoothly — keep heat at medium-low once marshmallows are added and stir continuously. Over-high heat can scorch or cause uneven melting.
- Bars too dense — don’t press the mixture too hard into the pan. Gentle, even pressure keeps them light and chewy.
- Chocolate seizing — stir frequently while microwaving at half power and add the coconut oil to prevent the chocolate from becoming grainy.
- Sticky bars — allow the chocolate and slab to cool completely before slicing; chilling briefly helps if your kitchen is warm.
Health-Conscious Tweaks
- Use natural peanut butter with no added sugar to reduce refined sugar. The marshmallows still add sweetness, so flavor will be slightly less sweet but still satisfying.
- Swap the chocolate chips for a high-cocoa dark chocolate to reduce sugar and boost antioxidants.
- Use a reduced-fat butter substitute cautiously—fat affects texture and mouthfeel, so results may be drier.
- Portion into smaller squares to control serving size; the flavor remains the same but calories per serving drop.
Little Things that Matter
- Have everything measured and ready before you start—this recipe moves quickly once the marshmallows hit the pot.
- Wetting your fingers before pressing prevents sticking but don’t overdo it; excess water can change texture.
- Let the chocolate cool slightly before pouring if it’s very hot; lava-hot chocolate can melt the marshmallow surface and smear the top layer.
- Use a sharp knife wiped between cuts for cleaner slices and neater bars.
Shelf Life & Storage
- Room temperature: store in an airtight container for up to 3 days to maintain crispness and chewiness.
- Refrigerator: up to 1 week. Bars may firm up in the fridge; bring to room temperature before serving for best texture.
- Freezer: wrap pieces individually and freeze up to 1 month. Thaw in the refrigerator or at room temperature before eating.
FAQ
- Can I make these without a microwave? — Yes. Melt the chocolate chips and coconut oil in a double boiler set over gently simmering water, stirring until smooth.
- Can I add mix-ins like nuts or pretzels? — Yes. Fold in up to 1 cup of add-ins with the cereal, keeping total volume manageable so bars hold together.
- Why did my bars turn out too hard? — Likely over-pressed. Press gently to keep them chewy. Also avoid overheating the marshmallow mixture, which can create a firmer set.
- Can I use full-size marshmallows? — Yes; 10 ounces of mini marshmallows equals about 40 large marshmallows. Measure by weight if possible for accuracy.
Before You Go
These Peanut Butter Chocolate Rice Krispie Treats (No Bake Bars!) are a reliable, fast treat that delivers on texture and nostalgia. Keep the ingredients measured, stir gently, and press carefully—the small steps give the best results. Once you get the technique down, they’re a go-to for last-minute desserts and kid-friendly snacks.
Make a batch this week and adjust chocolate type or nut butter to match your household’s tastes. They store well and travel easily, so they’re perfect for school events, potlucks, or a quick homemade gift. Enjoy.

Peanut Butter Chocolate Rice Krispie Treats (No Bake Bars!)
Ingredients
- 1/4 cup unsalted butter
- 1 cup peanut butter
- 10 ounce mini marshmallows about 5 cups
- 6 cups Rice Krispies cereal
- 1 cup chocolate chips
- 1 tablespoon coconut oil
Instructions
- Prepare an 8½ × 11-inch pan by lightly oiling it or lining it with parchment paper; measure all ingredients before starting.
- In a medium pot over medium heat, melt the butter until fully liquid.
- Stir the peanut butter into the melted butter until smooth, about 1 minute.
- Add the mini marshmallows to the pot and cook over medium-low heat, stirring constantly, until they soften, stretch, and begin to lose their shape, about 1–2 minutes; then remove the pot from the heat.
- Immediately add the Rice Krispies cereal to the marshmallow mixture and stir until the cereal is evenly coated.
- Pour the mixture into the prepared pan and spread it evenly with a spatula; wet your fingers and gently press the mixture into the pan to compact it slightly without pressing too hard.
- Combine the chocolate chips and coconut oil in a microwave-safe bowl and microwave at half power, stirring every 30 seconds, until melted and smooth (about 1–2 minutes total).
- Pour the melted chocolate mixture over the pressed cereal layer and spread into an even layer with a spatula.
- Let the bars cool completely at room temperature until the chocolate is set, then slice into 12 bars and serve.
Equipment
- 8 1/2 × 11-inch pan
- medium pot
- silicone spatula or wooden spoon
- Measuring cups and spoons
- medium microwave-safe bowl
- Spoon
Notes
- Do not store these treats in the fridge as it can change their texture.
- If bars are too gooey, freeze for 15–20 minutes to firm up briefly.
- Using 5½ cups cereal makes extra-gooey bars that may not hold up well on hot days.
- You can add 1 teaspoon vanilla to the melted butter if desired.