Miracle No Knead Bread
I love a recipe that does the heavy lifting for you. Miracle No Knead Bread is one of those rare, reliable loaves that produces a deep-crusted, open-crumb sandwich of flavor with almost zero hands-on time. It’s one of my kitchen staples for busy evenings, unexpected guests, or mornings when I want fresh bread without waking the neighborhood with my mixing bowl.
This version stays true to the classic: four simple ingredients, a long slow rise, and a hot covered pot to bake it into a crunchy, tender loaf. You don’t need special flour, a mixer, or any dramatic techniques—just a spoon, a bowl, and a cast-iron pot or similar heavy, lidded vessel.
Read through the short ingredient notes, then follow the stepwise method. I’ll also walk you through equipment, common mistakes, useful substitutions, and how to keep your crust crisp after baking. Let’s get into it.
What You’ll Need
- 3 cups all-purpose flour — The structure of the loaf; measure by the scoop-and-level method for consistency.
- 1 3/4 teaspoons coarse sea salt — Flavor and crust development; use coarse salt so it distributes evenly and enhances the crust.
- 1/2 teaspoon active dry yeast — The leavening agent; small amount and a long rise create complex flavor without intensive kneading.
- 1 and 1/2 cups warm water — Hydrates the flour and activates yeast; “warm” should feel like warm bath temperature (about 95–105°F / 35–40°C).
Miracle No Knead Bread Made Stepwise
- In a large mixing bowl, combine 3 cups all-purpose flour, 1 3/4 teaspoons coarse sea salt, and 1/2 teaspoon active dry yeast. Stir briefly to distribute the dry ingredients evenly.
- Add 1 and 1/2 cups warm water to the dry mix. Using a wooden spoon or sturdy spatula, stir until the dough just comes together into a loose, sticky mass. You should have a shaggy, tacky dough—no need to knead.
- Cover the bowl tightly with plastic wrap and leave it at room temperature (on the counter) to rise undisturbed for 12–18 hours. This long, slow fermentation builds flavor and the open crumb.
- When the rise time is nearly up, preheat your oven to 450°F (230°C). Place a clean, lidded cast-iron pot inside the oven to heat for 30 minutes with the lid on.
- Lightly flour a work surface. Turn the risen dough out onto the floured surface and gently shape it into a round by folding the edges under with minimal handling—keep it loose so you don’t knock out the air.
- Place the shaped dough on a piece of parchment paper and cover it lightly with plastic wrap while you handle the hot pot.
- Carefully remove the preheated pot from the oven. Uncover the dough and lift the parchment with the dough into the hot pot. Replace the lid and return the pot to the oven.
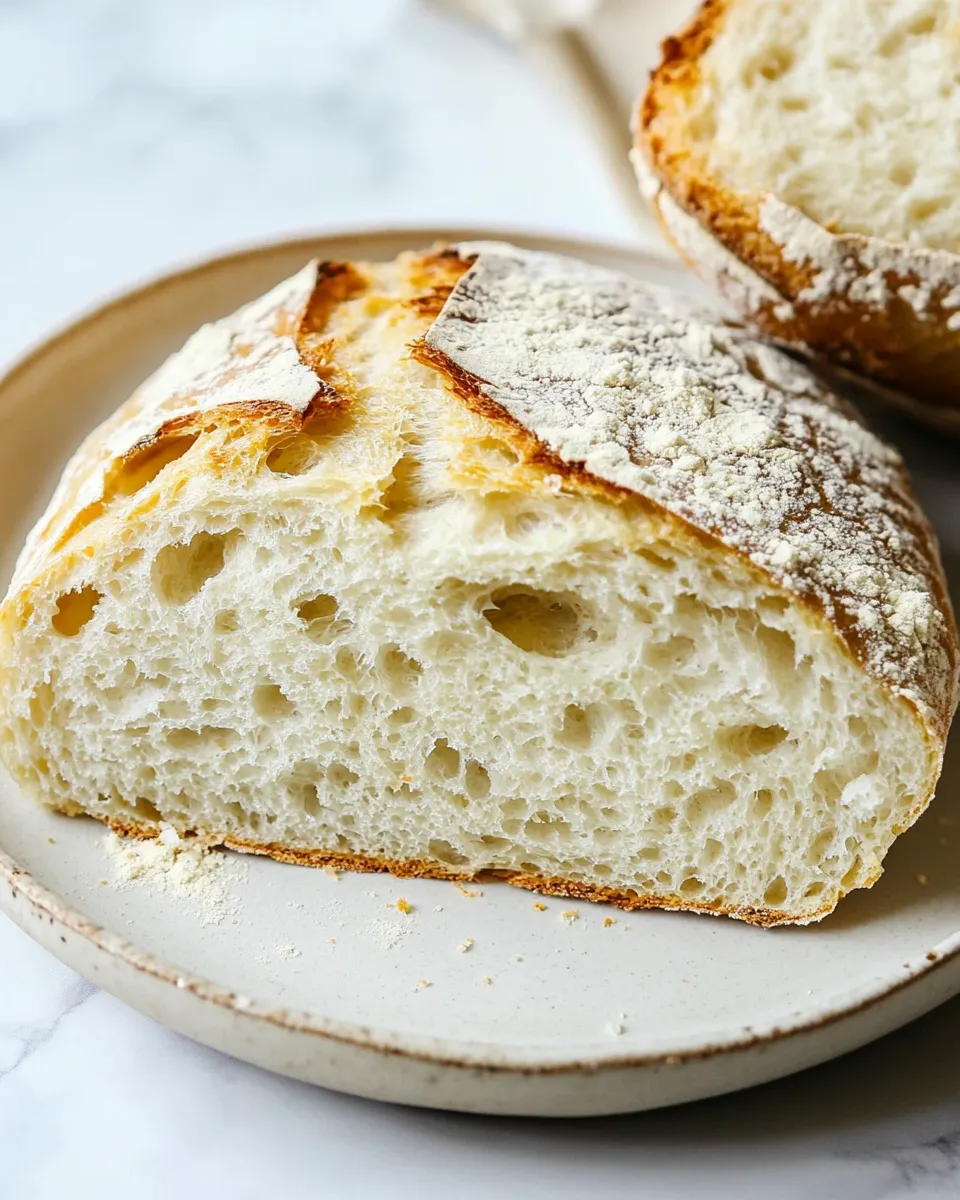
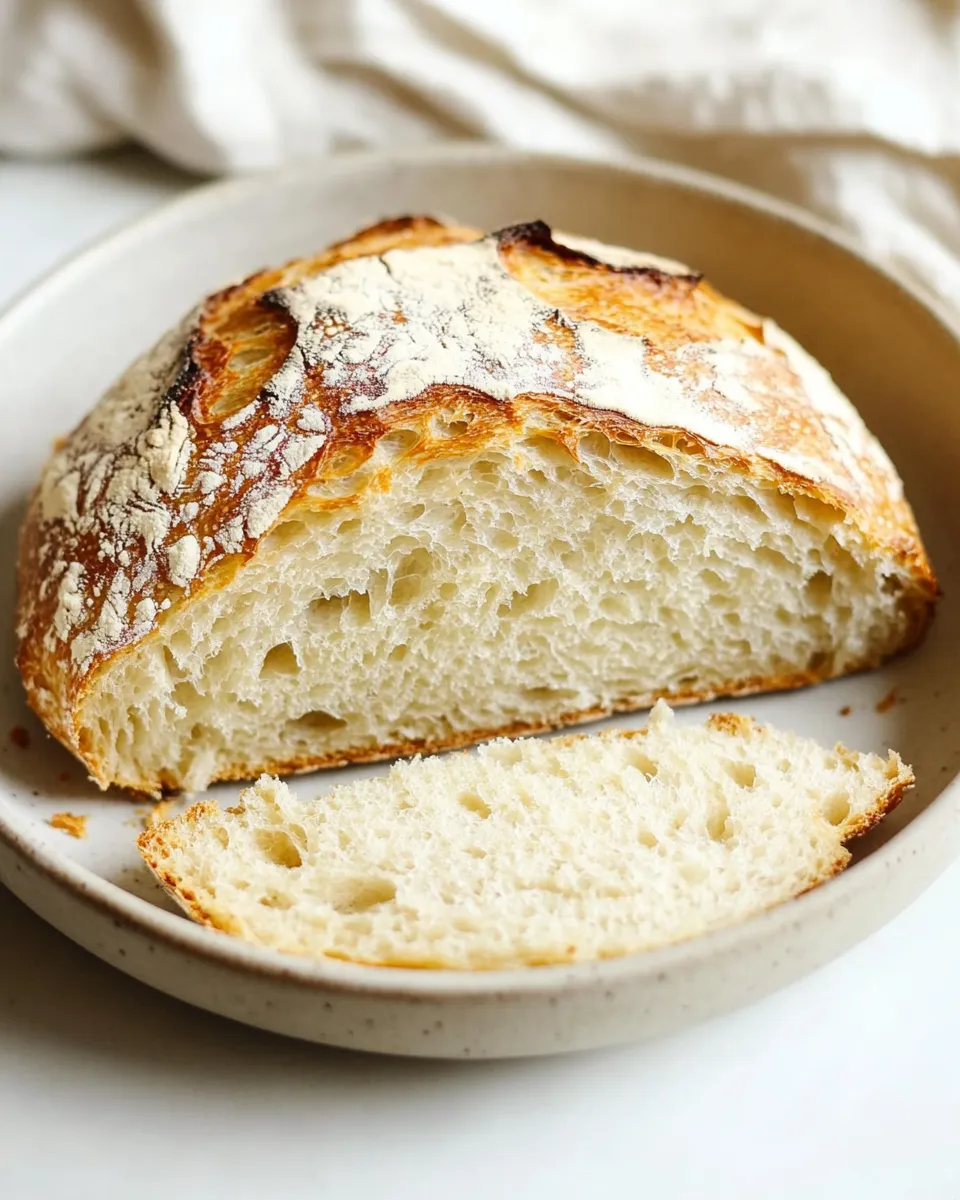
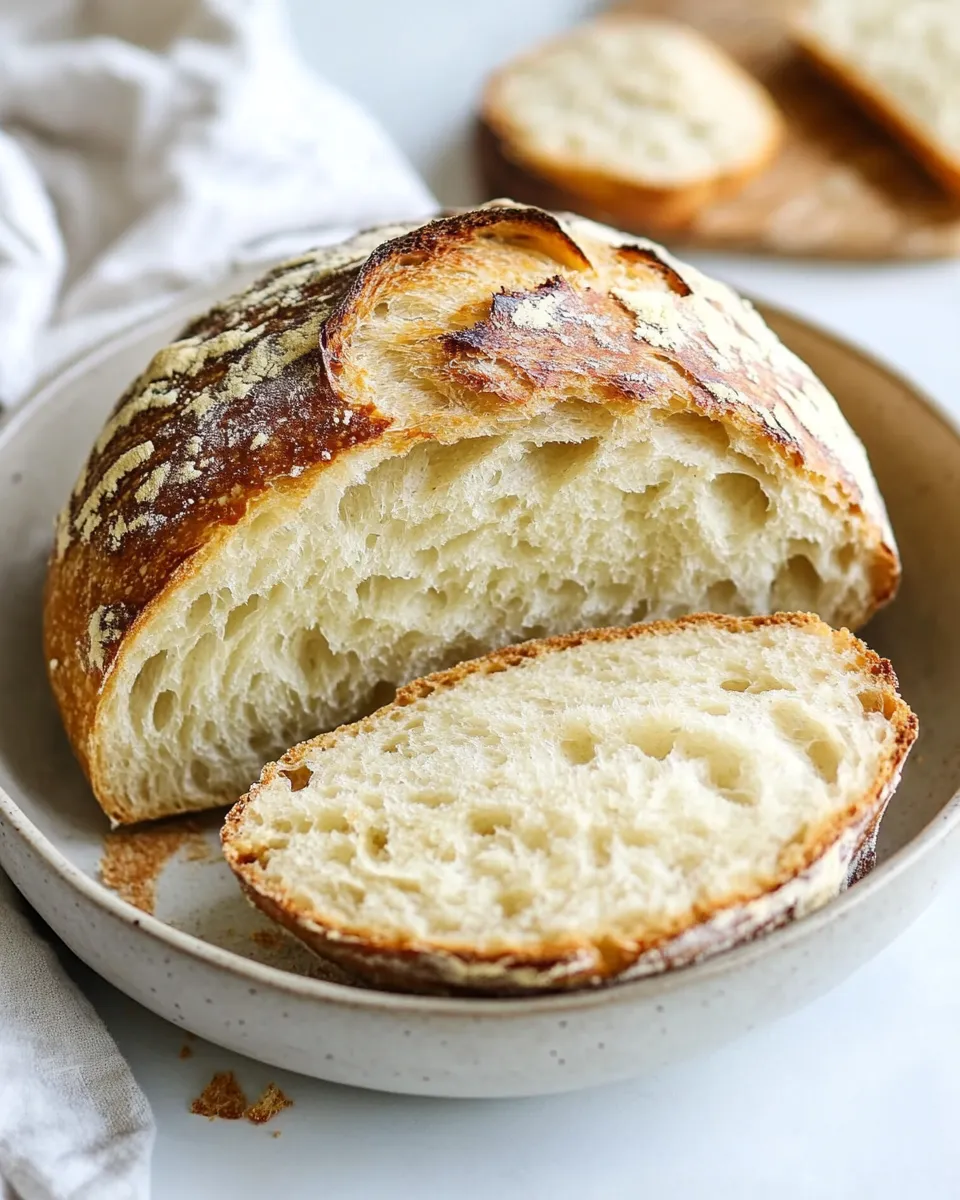
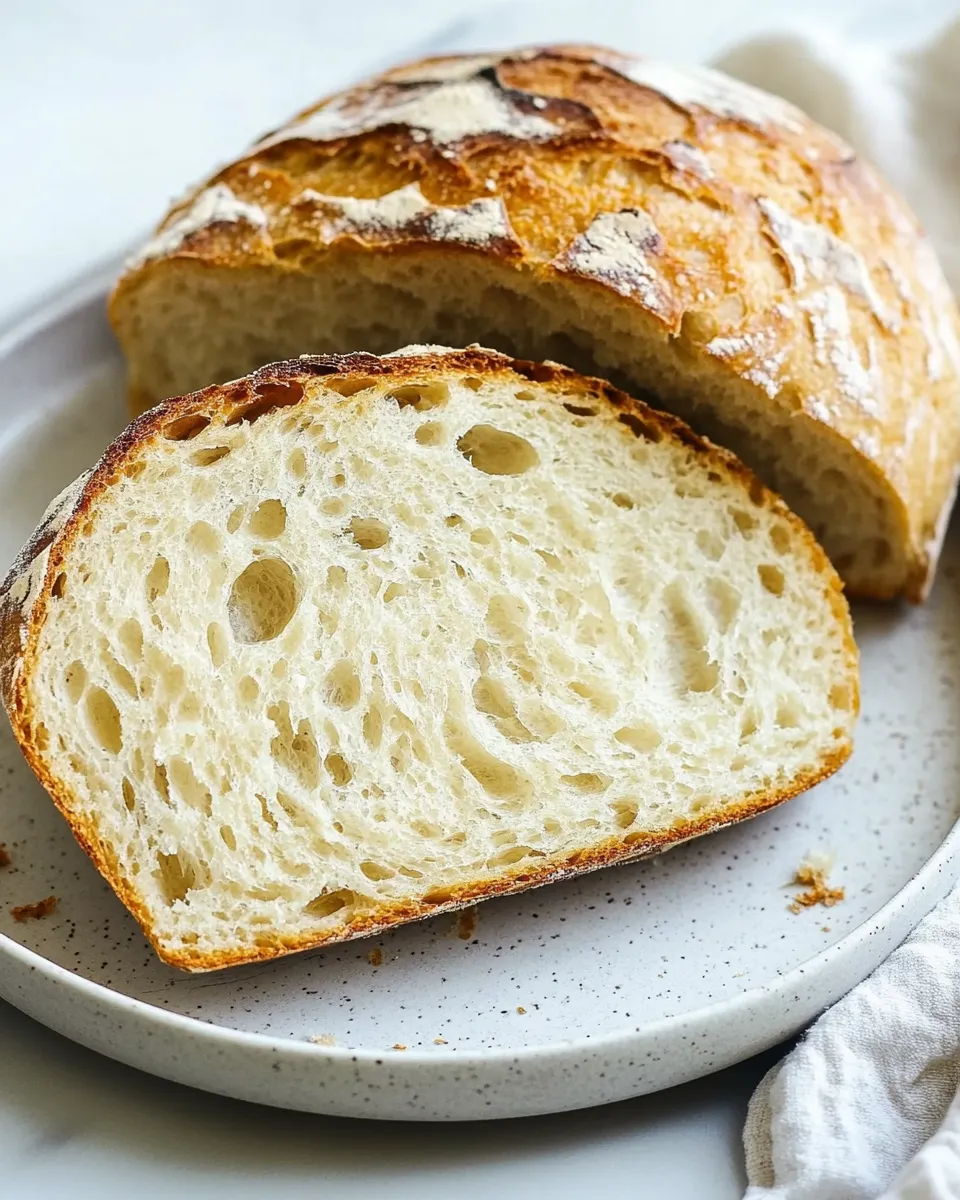
- Bake covered for 30 minutes. This traps steam to develop a crisp, blistered crust and helps the loaf rise in the initial phase.
- After 30 minutes, remove the lid and continue baking uncovered for 12–15 minutes, until the crust is deep golden brown and sounds hollow when tapped.
- Remove the bread from the oven and transfer it to a wire cooling rack. Allow the loaf to cool before slicing so the crumb sets—at least 30–60 minutes.
- Store the bread in an open paper bag to preserve a crisp crust; avoid sealed plastic if you want the crust to stay crunchy.
Why It’s My Go-To
This recipe is practical and forgiving. It turns out well for beginners and is reliable on weeknights because the long fermentation adds flavor without active effort. The method—mix, wait, bake in a hot covered pot—reproduces bakery-style results with a minimal tool list. It’s also flexible: the dough handles additions and tweaks, and the basic loaf plays nicely with both sweet and savory meals.
Substitutions by Category
Flour
- All-purpose flour — Stick with this for the recipe as written. If you want a higher rise or chewier texture, try substituting up to 50% bread flour, keeping the same water amount and monitoring dough tackiness.
Salt
- Coarse sea salt — If using fine table salt, reduce the amount slightly (about 25% less) because fine salts measure saltier by volume.
Yeast
- Active dry yeast — You can use instant yeast but omit the step of proofing; use the same 1/2 teaspoon and mix directly with the dry ingredients.
Liquid
- Warm water — Do not replace with milk or cold liquids without adjusting expectations; warmer liquid helps the 12–18 hour rise proceed reliably.
Equipment at a Glance
- Large mixing bowl — For the initial mix and bulk fermentation.
- Wooden spoon — To mix the sticky dough without a mixer.
- Plastic wrap — To cover the bowl and later to lightly cover the shaped dough.
- Cast-iron pot with lid (or other heavy lidded Dutch oven) — Essential for creating steam and achieving the crisp crust; it must be oven-safe to 450°F.
- Parchment paper — Makes transferring the dough into the hot pot safe and simple.
- Wire cooling rack — Lets the loaf cool evenly and prevents the bottom from getting soggy.
Mistakes That Ruin Miracle No Knead Bread
- Using water that’s too hot — It can kill the yeast; aim for warm, not hot (about body temperature).
- Shortening the rise drastically — Underfermented dough will lack flavor and will be dense.
- Handling the dough roughly before the second bake — Aggressive shaping knocks out the air pockets and will reduce oven spring.
- Skipping the preheated pot — Placing dough into a cold pot will yield a weaker crust and less rise.
- Baking in a pot too small — The loaf will stick to the lid or sides and won’t develop a proper shape.
Variations for Dietary Needs
- Lower-sodium — Reduce the salt slightly if you need less sodium; expect a subtle difference in flavor and crust.
- Higher-protein — Replace up to half the all-purpose flour with bread flour for a chewier texture and slightly higher rise.
- Gluten-free — This recipe is not suitable as written; gluten-free breads require specific flour blends and often additional binders, so treat this recipe as not applicable for strict gluten-free baking.
Method to the Madness
The technique here is intentionally simple: high hydration, slow fermentation, and a high-heat, steam-trapping bake. The long rest builds gluten and flavor without kneading. Heating the pot creates an oven-within-an-oven that simulates professional steam injection—essential for that glossy, blistered crust. Take the time to preheat properly and trust the dough; minimal handling preserves the airy crumb.
Cooling, Storing & Rewarming
- Cooling — Move the loaf to a wire rack and cool at least 30–60 minutes before slicing so the crumb sets cleanly.
- Short-term storage — Keep the bread in an open paper bag at room temperature; the crust stays crisp while the crumb remains tender for 1–2 days.
- Long-term storage — For longer keeping, slice and freeze in an airtight bag. Rewarm frozen slices directly in a toaster or refresh half-loaves in a 350°F oven for 10–15 minutes.
- Reviving crust — To crispen a softer crust, warm the loaf in a 375°F oven for 8–10 minutes uncovered.
Reader Q&A
Q: Can I shorten the 12–18 hour rise?
A: You can, but flavor and texture will suffer. The long fermentation develops the signature taste and open crumb. If pressed, a minimum of 8 hours can work but expect a denser loaf.
Q: My loaf was gummy inside—why?
A: That usually means the loaf wasn’t baked long enough or the internal temperature didn’t reach about 200–205°F. Make sure you finish uncovered and allow the loaf to cool before slicing.
Q: Can I add seeds or herbs?
A: Yes. Fold in a small handful (about 1/4–1/2 cup total) of seeds, nuts, or herbs during the gentle shaping step. Don’t overload the dough or you’ll weigh down the structure.
In Closing
Miracle No Knead Bread is a dependable, low-effort loaf that rewards patience more than technique. With just four ingredients and a hot lidded pot, you’ll get bakery-grade results without a lot of fuss. Once you’ve tried this basic method, you’ll find yourself making small tweaks for flavors and add-ins, but the core approach remains delightfully constant: mix, wait, and bake—then enjoy.

Miracle No Knead Bread
Ingredients
- 3 cups all-purpose flour
- 1 3/4 teaspoons coarse sea salt
- 1/2 teaspoon active dry yeast
- 1 1/2 cups warm water
Instructions
- In a large mixing bowl combine 3 cups all-purpose flour, 1 3/4 teaspoons coarse sea salt, and 1/2 teaspoon active dry yeast; stir to distribute.
- Add 1 1/2 cups warm water and stir with a wooden spoon until a sticky, shaggy dough forms.
- Cover the bowl with plastic wrap and let the dough rise at room temperature for 12 to 18 hours until bubbly and doubled in size.
- About 30 minutes before baking, preheat the oven to 450°F (230°C) with a cast-iron pot and its lid inside.
- Lightly flour a work surface and turn the dough out onto it; shape it gently into a round ball on a piece of parchment paper and cover loosely with plastic wrap while the pot heats.
- Carefully remove the hot pot from the oven, lift the parchment with the dough and place both into the pot, cover with the lid, and return to the oven.
- Bake covered for 30 minutes, then remove the lid and bake uncovered for an additional 12 to 15 minutes until the crust is deep golden brown.
- Remove the bread from the pot and cool on a wire rack before slicing.
Equipment
- large mixing bowl
- Wooden Spoon
- Plastic Wrap
- cast-iron pot with lid (or Dutch oven)
- piece of parchment paper
- wire cooling rack
Notes
- You can substitute regular table salt if you don't have sea salt.
- Warm water helps activate the yeast.
- Do not remove the lid during the covered bake time.
- Let the loaf cool before slicing for best texture.
- Timing for the long rise may vary with room temperature.