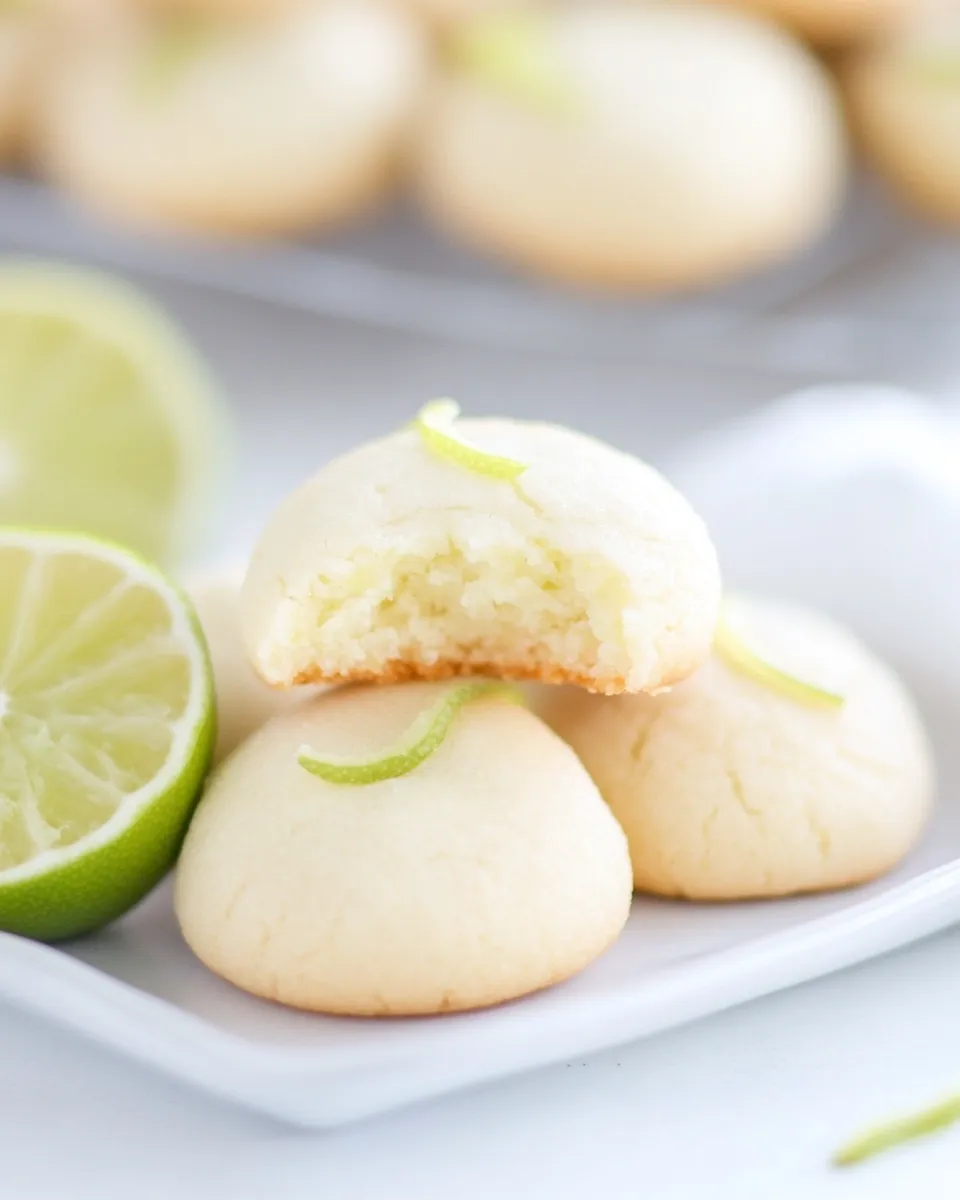
Key Lime Cookies
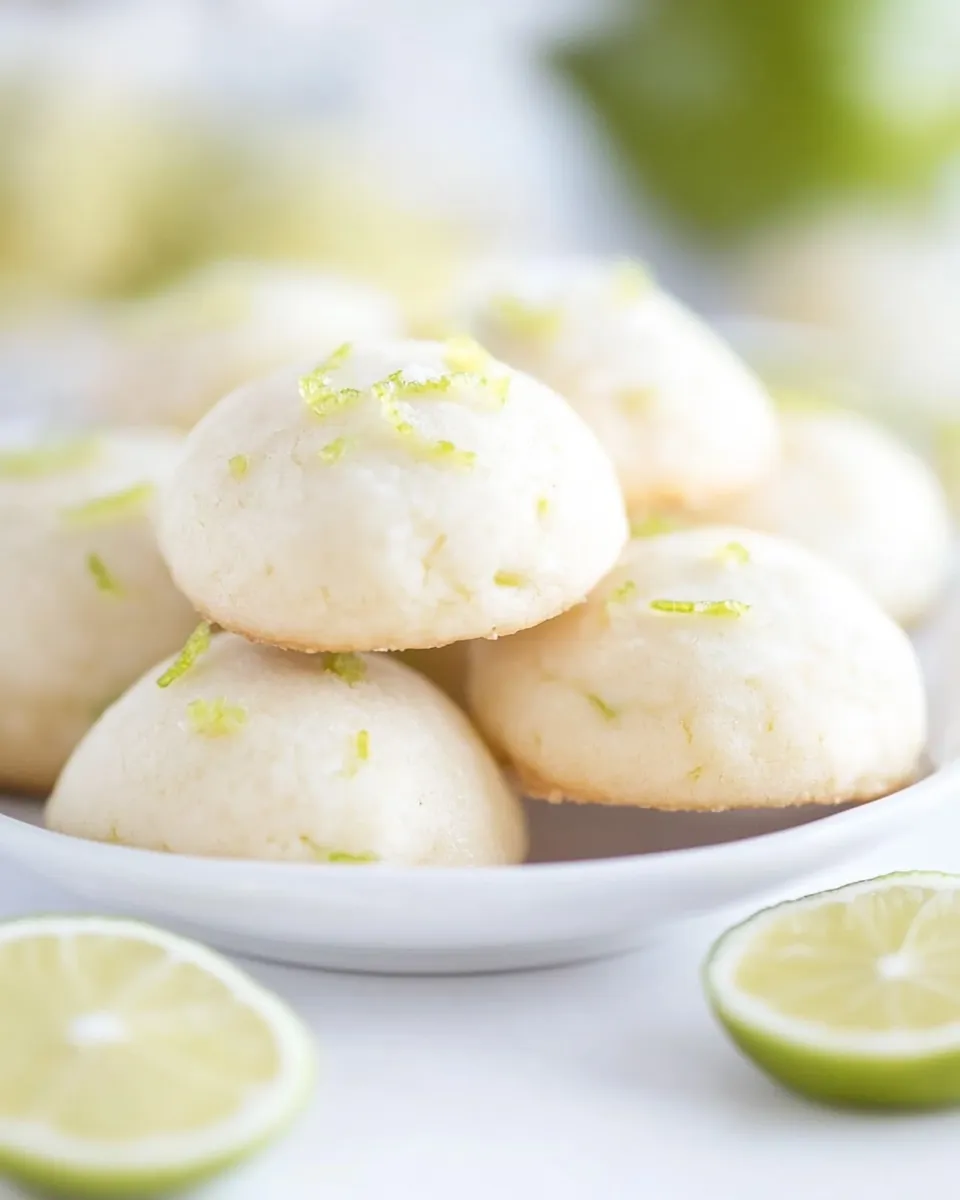
I adore cookies that taste like a bright shortcut to summertime. These Key Lime Cookies are tart, tender, and finished with a glossy lime glaze that sets them apart from your everyday sugar cookie. They’re straightforward to make, and the lime flavor comes through cleanly thanks to zest in the dough and juice in the glaze.
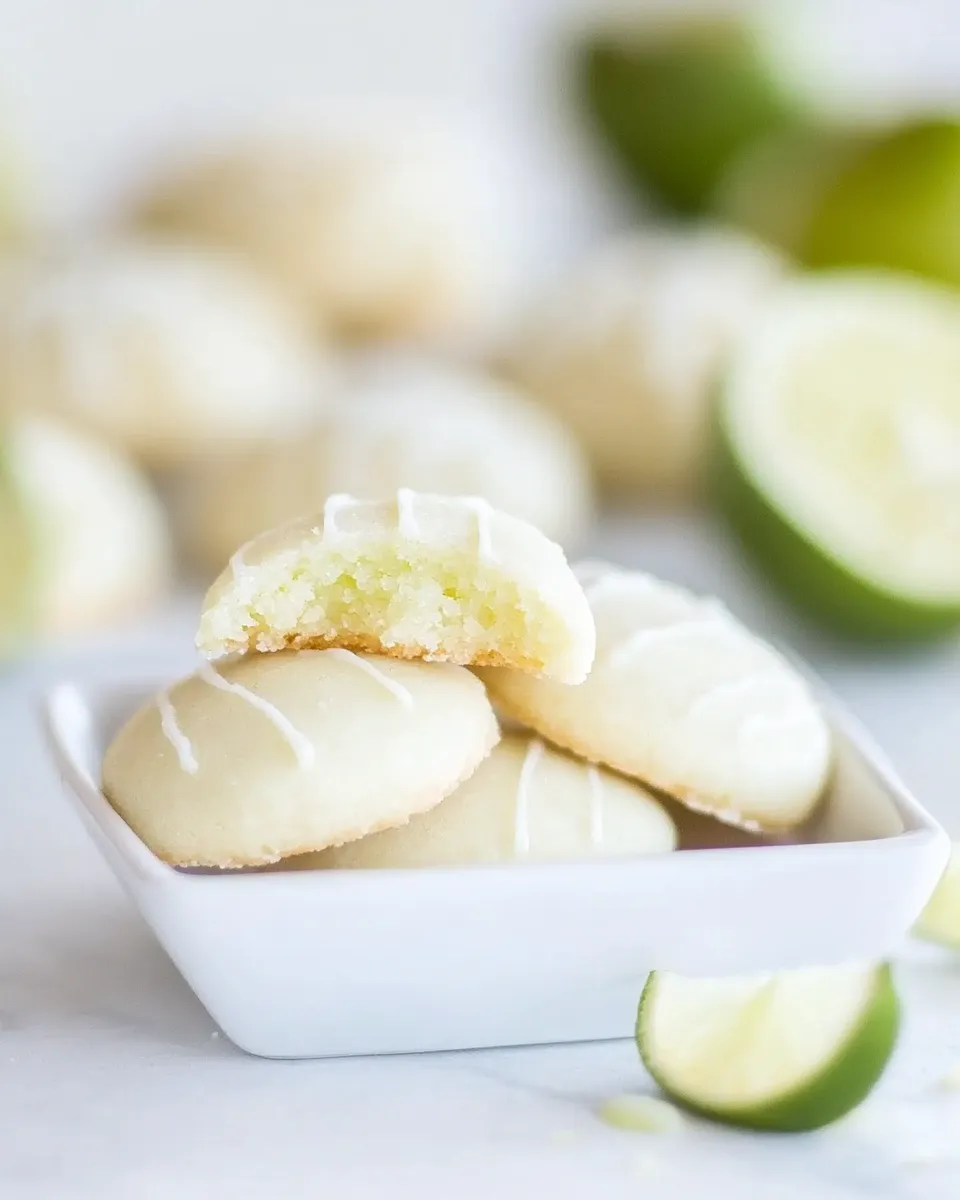
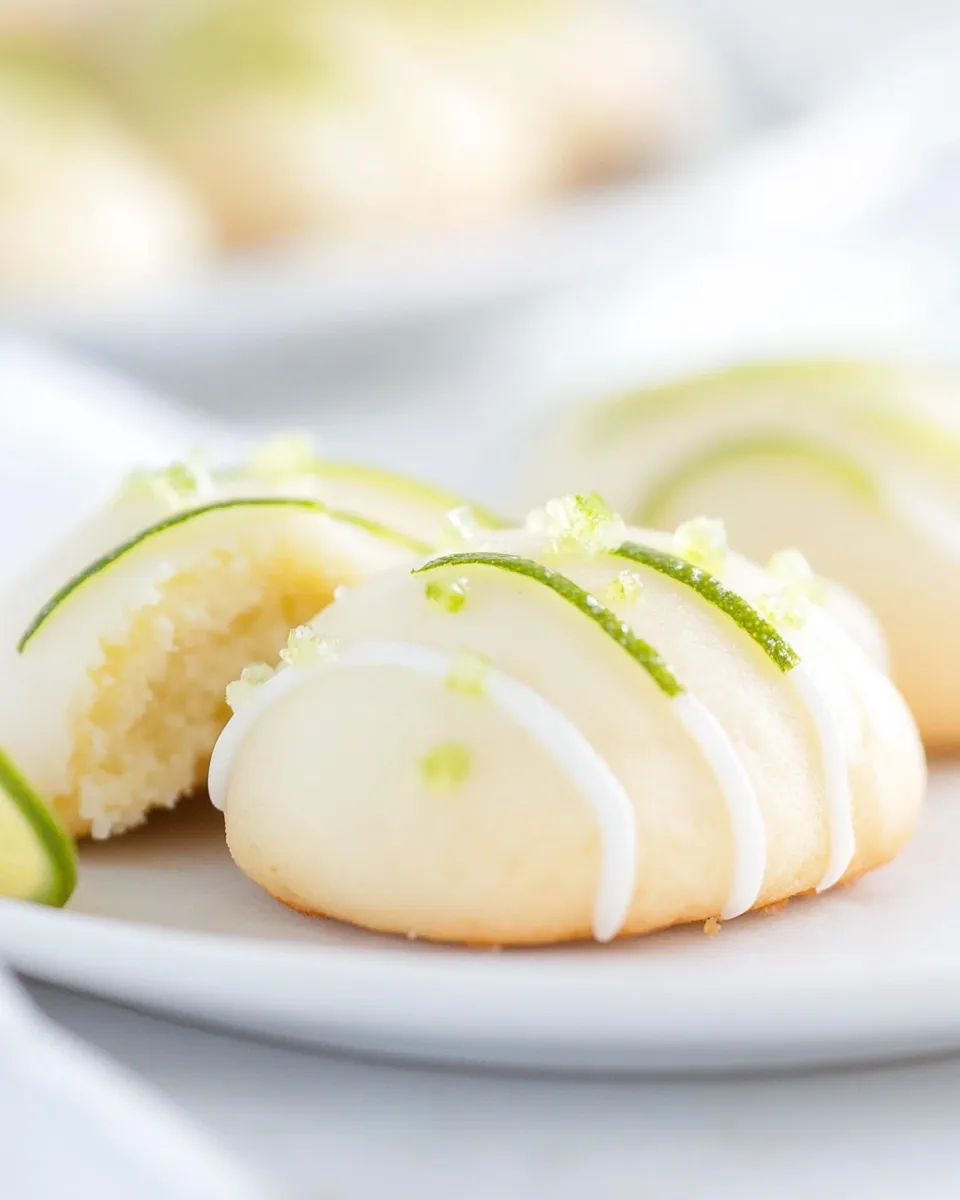
This recipe yields small, delicate cookies with a soft interior and a thin, shiny glaze that cracks slightly when you bite — the kind you can pop two or three of without feeling guilty. They’re perfect for a casual gathering, a seaside picnic, or when you want a citrus treat that’s lighter than a slice of pie.
Below you’ll find the ingredients at a glance, clear step-by-step instructions, sensible equipment tips, troubleshooting notes gathered from testing, and storage guidance so your batches stay fresh. I stick to the original ingredient amounts and keep the technique home-cook friendly.
Ingredients at a Glance
- 1 cup unsalted butter, softened — provides richness and the base structure for the cookie; use softened (not melted) for proper creaming.
- 1 ½ cups granulated sugar — sweetens and helps with the cookie’s tender crumb through creaming with butter.
- 2 large eggs — add moisture and help bind the dough.
- 6 key limes, zested and juiced — zest goes into the dough for concentrated lime aroma; reserve the juice for the glaze.
- 1 tablespoon baking powder — the leavening agent that gives the cookies a light, domed shape.
- 1 teaspoon vanilla extract — rounds and deepens the citrus notes.
- 1 teaspoon salt — balances sweetness and enhances flavor.
- 3 cups all-purpose flour — the primary dry structure; measure by spooning into the cup and leveling for accuracy.
- 2 cups powdered sugar — used in the glaze for a smooth, opaque finish.
- 2–3 tablespoons key lime juice — stirred into the powdered sugar to make a pourable glaze; start with 2 tbsp and add more if needed.
- 3 tablespoons heavy cream — thins and enriches the glaze for a glossy finish.
Step-by-Step: Key Lime Cookies
1. Preheat and prep: Place a rack in the center of your oven and heat to 350°F (175°C). Line several baking sheets with parchment paper so you can bake multiple batches without waiting for sheets to cool.
2. Cream butter and sugar: In the bowl of a stand mixer fitted with the paddle attachment (or in a large mixing bowl with an electric hand mixer), add 1 cup softened unsalted butter and 1 ½ cups granulated sugar. Beat on high speed for 3 to 5 minutes until the mixture is very light and fluffy. Stop once it’s pale and aerated — this step gives the cookies lift and tenderness. Scrape down the bowl with a rubber spatula to ensure even mixing.
3. Add eggs and flavoring: Add 2 large eggs, the zest from 6 key limes (reserve the juice), 1 tablespoon baking powder, 1 teaspoon vanilla extract, and 1 teaspoon salt to the bowl. Mix briefly until these ingredients are fully incorporated and the batter looks uniform. Scrape the bowl again so no pockets of flour or butter remain.
4. Add flour gently: With the mixer on low speed, gradually add 3 cups all-purpose flour. Mix just until the flour disappears into the dough — stop mixing as soon as it’s combined to avoid developing the gluten and making the cookies tough.
5. Portion the dough: Use a 1 ½ teaspoon cookie scoop (or a tablespoon measuring spoon) to portion the dough into small, uniform balls. Roll each portion lightly between your palms to smooth it, then place the dough balls on the prepared baking sheets about 2 inches apart to allow for slight spreading.
6. Bake: Slide one sheet into the preheated oven and bake for about 10 minutes. The cookies should appear domed on top and just barely golden around the edges — they’ll finish setting as they cool and should remain tender in the center. Repeat with remaining sheets.
7. Cool briefly before glazing: When the cookies come out of the oven, allow them to cool on the baking sheet for 5 minutes. This short rest helps them set so they don’t fall apart when glazed.
8. Make the glaze: While the cookies cool, combine 2 cups powdered sugar, 2–3 tablespoons key lime juice (start with 2), and 3 tablespoons heavy cream in a medium mixing bowl. Whisk vigorously until the glaze is very smooth and free of lumps. It should be pourable but not watery; add the extra tablespoon of lime juice only if you need to thin it.
9. Glaze the cookies: Dip the rounded top of each warm cookie into the glaze so the dome is coated. Transfer the cookie, glaze-side-up, to a wire cooling rack set over parchment or a tray. The glaze will naturally spread down the sides and create a shiny dome. If desired, sprinkle a little fresh key lime zest over the glaze while it’s still wet for a pop of color and extra aroma.
10. Set and store: Allow the glaze to set fully at room temperature. Once set, stack the cookies in an airtight container for storage. They keep well at room temperature for several days and maintain a soft texture.
Why This Recipe Belongs in Your Rotation
These cookies are an easy way to add a citrus-forward dessert to your repertoire without the fuss of making a pie or tart. They’re quick to prepare — about 15 minutes active time plus baking — and require only common baking pantry items plus key limes for a distinct flavor.
The texture is forgiving: soft centers with slightly crisp edges make them appealing to a wide range of eaters, including kids and adults. They also travel well for potlucks or picnics because the glaze sets into a stable shell.
Finally, the recipe scales nicely. If you want more cookies, double the batch and use multiple baking sheets. The dough is sturdy enough to refrigerate briefly if you need to slow down the process.
Budget & Availability Swaps
– If key limes are hard to find or expensive, you can use bottled key lime juice for the glaze and substitute 2 regular limes for zest — but fresh key lime zest is ideal for authentic aroma.
– If heavy cream feels indulgent, you can replace it with whole milk; use the same amount but expect a slightly less glossy glaze.
– Unsalted butter is recommended for control over seasoning; if you only have salted, omit the 1 teaspoon salt in the dough and reduce added salt in other recipes that accompany these cookies.
– Powdered sugar is required for a smooth glaze; don’t substitute granulated sugar for this component.
Prep & Cook Tools
- Stand mixer or hand mixer — for creaming butter and sugar thoroughly.
- Paddle attachment (if using a stand mixer) — gives the best texture for cookie dough.
- 1 ½ teaspoon cookie scoop — ensures uniform cookie size and even baking.
- Baking sheets and parchment paper — nonstick surface and easy cleanup.
- Microplane or fine grater — for zesting the key limes without the bitter pith.
- Wire cooling rack — lets glaze set evenly and prevents cookies from going soggy.
- Mixing bowls and rubber spatula — for combining ingredients and scraping the bowl clean.
Mistakes Even Pros Make
- Using melted butter: If the butter is too soft or melted you’ll lose structure — cookies will spread too much. Use softened butter that yields to pressure but still holds shape.
- Overmixing after adding flour: Mixing the flour too long can create tough cookies. Stop as soon as the flour is incorporated.
- Skipping the 5-minute cool: Glazing piping-hot cookies will cause the glaze to melt and run off. Let them rest on the sheet for five minutes first.
- Using too much lime juice in the glaze: Adding more than 3 tablespoons could make the glaze too thin. Add the third tablespoon only if needed to reach the right consistency.
Fresh Seasonal Changes
– Summer: Double down on zest. Stir a teaspoon of finely grated lime zest into the glaze for an extra aromatic kick during peak lime season.
– Citrus mix: When key limes are scarce, blend zest from one lime and one lemon into the dough for a nuanced, bright profile.
– Holiday twist: Add a teaspoon of finely grated ginger to the dough for a warm, festive counterpoint to the tart lime.
Cook’s Commentary
I like these cookies because they’re reliably bright without being overtly sweet. The two-part use of zest and juice maximizes lime flavor: zest gives volatile oils and aroma, juice gives acidity and shine. The dough should feel soft and slightly sticky; if it feels greasy you likely overworked the butter.
When scooping, aim for consistency. Small cookies bake evenly and develop that signature dome. I usually make a test batch of six to ensure my oven timing is right because ovens vary — then adjust in 30-second increments if needed.
Storing, Freezing & Reheating
– Room temperature: Store cooled, glazed cookies in an airtight container at room temperature for up to 3 days. Place layers separated with parchment to prevent sticking.
– Refrigeration: If you prefer chilled cookies, refrigerate in an airtight container for up to 5 days, but allow them to come to room temperature before serving for best texture.
– Freezing: Freeze unglazed cookie dough balls on a baking sheet until firm, then transfer to a freezer bag for up to 3 months. Bake from frozen, adding 1–2 minutes to the bake time. You can also freeze baked, unglazed cookies, then thaw and glaze before serving.
– Reheating: Warm cookies in a 300°F oven for 4–5 minutes to revive softness; avoid microwaving glazed cookies or the glaze may become tacky.
Quick Q&A
- Can I make these without a stand mixer? Yes. Use a hand mixer and a large bowl to cream butter and sugar, or beat vigorously by hand with a sturdy whisk — it will take longer but works.
- Why does the recipe call for so much flour (3 cups)? The dough produces small, tender cookies; the amount yields a body that holds shape and creates the domed top when baked.
- What if my glaze is too thin? Add a few tablespoons more powdered sugar to thicken, or chill briefly until it firms.
- Can I use regular lime instead of key lime? Yes; flavor will be slightly different (key limes are more floral), but regular limes will still produce a tasty cookie.
Ready to Cook?
Gather your ingredients, preheat the oven to 350°F, and set out your baking sheets. Cream the butter and sugar, add the eggs, lime zest, baking powder, vanilla, and salt, then fold in the flour. Scoop into 1 ½ teaspoon portions, bake for 10 minutes, and finish with a glossy lime glaze made from powdered sugar, key lime juice, and heavy cream. Keep an eye on bake time — you’re aiming for domed tops and only the slightest gold at the edges. Enjoy warm, or pack them for friends — these Key Lime Cookies are bright, easy to make, and reliably delicious.
Key Lime Cookies
Ingredients
- 1 cup unsalted butter softened
- 1 1/2 cups granulated sugar
- 2 eggs large
- 6 key limes zested and juiced (zest used in dough; juice reserved for glaze)
- 1 tablespoon baking powder
- 1 teaspoon vanilla extract
- 1 teaspoon salt
- 3 cups all-purpose flour
- 2 cups powdered sugar for glaze
- 2-3 tablespoons key lime juice for glaze
- 3 tablespoons heavy cream for glaze
Instructions
- Preheat the oven to 350°F (175°C). Line baking sheets with parchment paper and set aside.
- In the bowl of a stand mixer fitted with the paddle (or using a hand mixer), beat the softened butter and granulated sugar on high speed for 3–5 minutes until light and fluffy, scraping down the bowl as needed.
- Add the eggs, key lime zest, baking powder, vanilla extract, and salt; beat briefly to combine. Reserve the key lime juice for the glaze.
- Scrape the bowl, then with the mixer on low speed slowly add the all-purpose flour until just incorporated. Do not overmix.
- Use a 1½ teaspoon cookie scoop to portion small balls of dough. Roll between your hands if needed and place them 2 inches apart on the prepared baking sheets.
- Bake for 10 minutes, until the cookies are domed and just beginning to turn golden at the edges. Remove from the oven and let cool on the pan for 5 minutes.
- Meanwhile, make the glaze: in a medium bowl whisk together the powdered sugar, 2–3 tablespoons reserved key lime juice, and heavy cream until very smooth. Adjust juice or cream to reach a dip-able consistency.
- Dip the top of each warm cookie into the glaze, then place the cookie dome-side up on a wire rack so the glaze can spread and set. If desired, sprinkle extra key lime zest over the wet glaze.
- Allow glaze to set completely before stacking or storing the cookies.
Equipment
- stand mixer or electric mixer
- Mixing bowls
- Measuring cups and spoons
- Baking Sheets
- Parchment Paper
- cookie scoop (1½ teaspoon)
- wire cooling rack
- small bowl or whisk for glaze
Notes
- Keep the cookies in an airtight container at room temperature for up to 4 days.
- If stacking, place parchment between layers to protect the glaze.
- To freeze, put cookies in an airtight bag with excess air removed and keep for up to 3 months.
- If freezing glazed cookies, separate layers with parchment.
- Thaw frozen cookies in the fridge overnight or at room temperature for about 20 minutes.