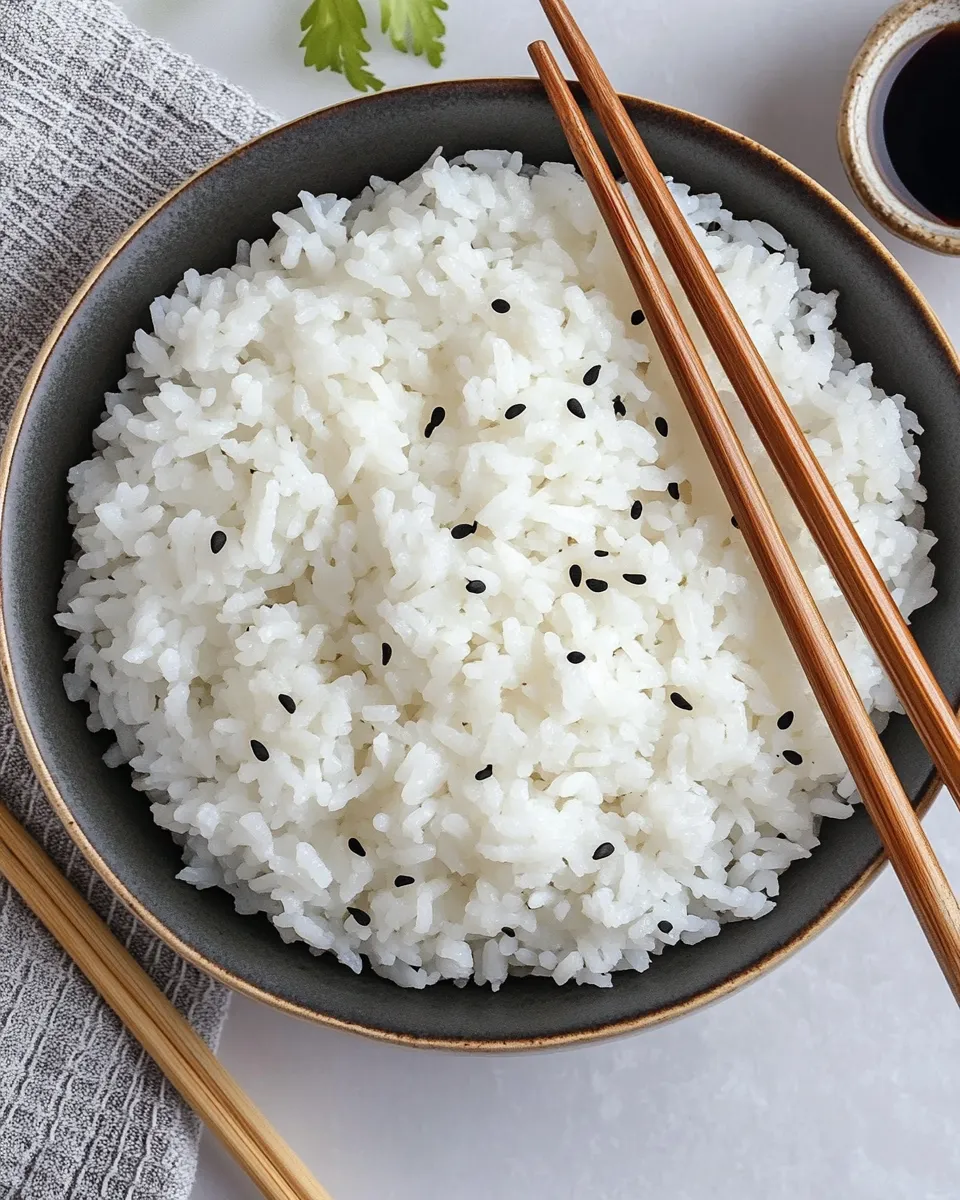
How to Make Sushi Rice
Sushi starts with rice. Get this foundation right and everything else—nigiri, rolls, hand rolls—falls into place. This recipe walks you through the straightforward, dependable method I use at home when I want glossy, slightly sticky rice that seasons evenly.
No fancy equipment is required, and there are clear steps for rinsing, cooking, and seasoning. I keep the flavors simple: rice vinegar, sugar, and salt. Follow the measures exactly for consistent results.
Read through the entire post before you start. There are small timing notes and tips that make the difference between good and great sushi rice.
Ingredient Breakdown
- 3 cups short grain rice or sushi rice — the backbone; short-grain rice gives the ideal stickiness and texture for sushi.
- 1/4 cup Japanese rice vinegar — provides the signature tang and helps the rice glisten; use rice vinegar for the clean flavor.
- 1 tablespoon granulated sugar — balances the vinegar and adds a soft sweetness.
- 1 teaspoon salt — highlights the flavors and rounds out the seasoning.
- water for cooking the rice — amount depends on your cooking method; see instructions for guidance.
Sushi Rice, Made Easy
Follow these steps in order. I include stovetop, rice cooker, and Instant Pot options so you can use whatever you have. Measurements are exact—don’t reduce the vinegar, sugar, or salt if you want balanced seasoning.
- Measure and rinse the rice. Put 3 cups of short-grain or sushi rice into a bowl. Fill the bowl with cold water, swirl gently with your hand, then pour off the cloudy water. Repeat this rinsing 4–6 times until the water runs mostly clear. Proper rinsing removes surface starch that would make the rice gummy.
- Drain and rest. After the final rinse, let the rice sit in a fine-mesh sieve or bowl to drain for 10–15 minutes. This helps the grains absorb water evenly during cooking.
- Cook the rice. Choose one method:
- Stovetop: Transfer the drained rice to a medium saucepan and add enough water for cooking—use roughly a 1:1.1–1.2 rice-to-water ratio by volume for sushi rice (about 3 1/4 to 3 1/2 cups water for 3 cups rice), depending on your pot and heat. Cover, bring to a boil over medium-high heat, then reduce to low and simmer 12–15 minutes until the water is absorbed. Remove from heat and keep covered for 10 minutes off the heat.
- Rice cooker: Add the drained rice and water to the cooker. My rice cooker takes 4 cups of water to cook 3 cups of rice; follow your cooker’s water recommendation. Turn it on and let it finish the cycle, then leave it covered for 10 minutes.
- Instant Pot: Add drained rice and an appropriate amount of water (use your Instant Pot’s short-grain rice guidance, typically around 1:1 rice-to-water). Cook on High Pressure for 4–6 minutes with a natural release of 10 minutes. Then release any remaining pressure and open the pot.
- Prepare the seasoning. While the rice cooks, combine 1/4 cup Japanese rice vinegar, 1 tablespoon granulated sugar, and 1 teaspoon salt in a small saucepan. Heat over medium-high, stirring or whisking, just until the sugar dissolves and the mixture is warm. Do not boil. Remove from heat and set aside.
- Transfer and season the rice. When the rice has finished cooking and has rested, transfer it to a large, shallow bowl or a hangiri if you have one. Pour the warm vinegar mixture evenly over the rice.
- Fold, don’t mash. Using a wide spatula or rice paddle, gently fold the vinegar into the rice—cut through and lift to mix rather than stirring vigorously. Tilt the bowl slightly and fan the rice as you fold to cool it faster and help give the rice a glossy finish. Continue gently folding until the rice reaches near room temperature and the seasoning is evenly distributed.
- Cover and rest. Cover the bowl loosely with plastic wrap (saran wrap) to keep the rice from drying out, and let it cool on the counter to room temperature before using for sushi. Use the rice the same day for best texture.
What You’ll Love About This Recipe
It’s straightforward and scalable. The flavors are balanced so the rice supports—never overpowers—your fillings and fish. Rinsing and proper folding produce a glossy, slightly sticky texture that holds together without being gluey. The whole process fits neatly into a relaxed evening of rolling sushi from start to finish.
No-Store Runs Needed
- Rice — short-grain or sushi rice is best; if you have medium-grain, it can work, but the texture will differ.
- Vinegar, sugar, salt — pantry basics. Use rice vinegar for the cleanest taste; white vinegar will be noticeably sharper.
- Water — you already need this for cooking.
Equipment & Tools
- Large mixing bowl or hangiri — a wide, shallow bowl helps you fold and cool the rice evenly.
- Fine-mesh sieve or strainer — for thorough rinsing and draining.
- Saucepan or rice cooker or Instant Pot — whichever you prefer for cooking rice.
- Small saucepan — to warm and dissolve the seasoning ingredients.
- Rice paddle or wide spatula — for gentle folding; avoid metal spoons that can crush grains.
- Fan or piece of cardboard (optional) — speeds cooling and helps the rice shine.
Slip-Ups to Skip
- Skipping rinsing — leaves excess starch; rice becomes gummy.
- Boiling the vinegar mix — can make the seasoning too sharp and evaporate too much; just warm until sugar dissolves.
- Stirring aggressively — crushes the grains. Always fold and lift.
- Not cooling — using hot rice will make rolls soggy and hard to handle; let it reach room temperature.
Seasonal Twists
Subtle seasonal mixes
- Spring — fold in a small amount of finely chopped shiso for a herbaceous lift after seasoning (use sparingly).
- Summer — a tiny zest of yuzu or lemon added to the warm vinegar mix brightens the rice; use just a pinch.
- Autumn/Winter — a splash of kombu-infused rice vinegar (steep a small piece of kombu in warm vinegar briefly) adds depth for heartier garnishes.
Pro Tips & Notes
- Measure by volume — use cup measures for rice and vinegar as written for consistent results.
- Rice temperature — the rice should be at room temperature when you assemble sushi; slightly warm is okay but not hot.
- Storage before using — keep rice loosely covered at room temperature; refrigeration will harden it.
- Reheating — avoid microwaving seasoned sushi rice; it changes texture. If necessary, steam gently and re-fluff.
Keep It Fresh: Storage Guide
Use seasoned sushi rice the same day you make it. If you must store leftovers, keep them in an airtight container at room temperature for a few hours. Do not refrigerate seasoned rice—it will lose moisture and firm up. If you have plain cooked (unseasoned) rice, store it covered in the refrigerator up to 24 hours and re-steam before seasoning.
Helpful Q&A
- Can I use regular short-grain rice instead of sushi rice? — Yes, regular short-grain rice will work. The main point is grain type: short-grain gives the desired stickiness.
- What if my rice is too wet or dry? — If too wet, let it sit uncovered briefly to release steam; if too dry, sprinkle a little warm water and cover for a few minutes before seasoning.
- How much rice does this recipe make? — 3 cups uncooked short-grain rice yields enough seasoned rice for several rolls or about 6–8 small bowls of sushi rice depending on portion size.
- Can I add sugar or salt to taste? — The listed amounts are balanced for 3 cups rice. You can adjust very slightly next time, but avoid big changes on your first try.
Bring It to the Table
Once the rice is seasoned and cooled, it’s ready for rolling sushi, shaping nigiri, or serving in bowls. Keep a bowl of water and a little rice vinegar at your station to wet your hands and prevent sticking while shaping. Work with slightly damp hands and a light touch—good rice makes sushi-building forgiving and joyful.
Enjoy the process: rinsing, cooking, seasoning, and folding are meditative steps that pay off with each tender, glossy grain. Happy rolling!
How to Make Sushi Rice
Ingredients
- 3 cups short-grain rice (sushi rice)
- 1/4 cup Japanese rice vinegar
- 1 tablespoon granulated sugar
- 1 teaspoon salt
- water for cooking the rice amount as needed per your rice cooker or stovetop method
Instructions
- Rinse the 3 cups of short-grain rice under cold water, swirling and draining until the water runs clear to remove excess starch.
- Cook the rinsed rice using your preferred method: follow your rice cooker’s instructions or cook on the stovetop with enough water for 3 cups of rice (about 4 cups water for some cookers). Cook until tender.
- While the rice cooks, combine 1/4 cup Japanese rice vinegar, 1 tablespoon granulated sugar, and 1 teaspoon salt in a small saucepan; heat over medium and whisk until the sugar and salt dissolve. Remove from heat.
- Transfer the hot cooked rice to a large mixing bowl. Pour the vinegar mixture evenly over the rice and gently fold with a spatula to coat the grains without mashing them.
- Cover the bowl loosely with plastic wrap and let the rice cool to room temperature before using it for sushi.
Equipment
- Large Bowl
- Small Saucepan
- rice cooker or pot with lid
- Spatula
- Measuring cups and spoons
Notes
- Rinse rice until water is clear to improve texture.
- Adjust water amount based on your rice cooker or stovetop method.
- Warm the vinegar mixture only until sugar dissolves; do not boil.
- Fold gently to avoid crushing the rice grains.