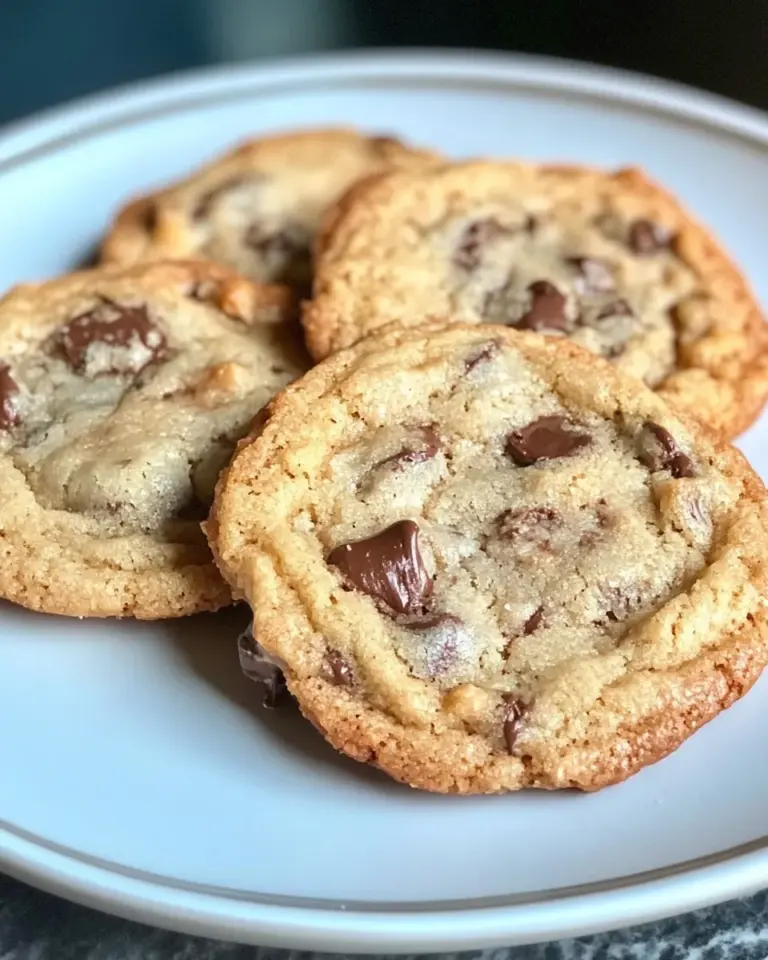
Chocolate Chip Cookie Dough Cups
There’s something truly irresistible about the combination of chocolate and cookie dough, isn’t there? The sweet, creamy cookie dough paired with rich, velvety chocolate creates a dessert that’s pure indulgence. Chocolate Chip Cookie Dough Cups are the ultimate no-bake treat—layered, flavorful, and beautifully simple to make.
Imagine biting into a crunchy cookie base, followed by a thick, smooth chocolate layer, and then topped with creamy, chocolate chip-studded cookie dough. These cups are perfect for every occasion, from parties to weeknight cravings. Plus, they’re completely egg-free and safe to eat, making them even more enjoyable.
So, whether you’re an experienced baker or a dessert newbie, this recipe is your ticket to sweet success. Ready to dive in? Let’s get started!
Recipe Overview
What Are Chocolate Chip Cookie Dough Cups?
Chocolate Chip Cookie Dough Cups are the perfect blend of textures and flavors. They feature:
- A crumbly cookie crust as the base.
- A layer of rich chocolate for balance and decadence.
- Edible cookie dough that’s buttery, sweet, and dotted with mini chocolate chips.
Each bite is a little slice of dessert heaven. They’re no-bake, quick to make, and incredibly satisfying. Whether you’re looking for a dessert to wow guests or a treat to enjoy with your family, these cookie dough cups are guaranteed to impress.
Ingredients

To make 6 generous Chocolate Chip Cookie Dough Cups, you’ll need the following ingredients:
For the Cookie Crust:
- Crushed Chocolate Chip Cookies (1 cup) – Provides a sturdy, flavorful foundation for the layers.
- Melted Butter (2 tablespoons) – Helps bind the cookie crumbs together.
For the Chocolate Layer:
- Semi-Sweet Chocolate Chips (1 cup) – Adds richness and balances the sweetness of the cookie dough.
- Coconut Oil or Butter (1 tablespoon) – Creates a glossy, smooth chocolate finish.
For the Edible Cookie Dough:
- Unsalted Butter (½ cup, softened) – Gives the dough its creamy, buttery base.
- Brown Sugar (⅓ cup) – Provides a deep, molasses-like sweetness.
- Granulated Sugar (2 tablespoons) – Adds a touch of extra sweetness.
- Vanilla Extract (1 teaspoon) – Enhances the classic cookie dough flavor.
- Heat-Treated All-Purpose Flour (¾ cup) – Ensures safety and provides structure to the dough.
- Milk (2 tablespoons) – Helps achieve the perfect, creamy consistency.
- Mini Chocolate Chips (½ cup) – The stars of the cookie dough, providing bursts of chocolate in every bite.
For Garnish:
- Extra Chocolate Chips – To sprinkle on top, making the cups visually irresistible.
Step-by-Step Instructions
1. Prepare the Cookie Crust
- Place chocolate chip cookies in a food processor and pulse until they become fine crumbs. (If you don’t have a processor, place the cookies in a zip-top bag and crush them with a rolling pin.)
- Transfer the crumbs to a bowl, then stir in the melted butter until the mixture resembles wet sand.
- Divide the mixture evenly among 6 silicone muffin molds or paper-lined muffin tins. Press firmly to form a compact crust.
- Chill the molds in the freezer for 10–15 minutes to set the crust.
2. Make the Chocolate Layer
- In a microwave-safe bowl, combine the chocolate chips and coconut oil (or butter). Microwave in 20-second intervals, stirring between each, until the chocolate is completely melted and smooth.
- Spoon a layer of the melted chocolate over the chilled cookie crusts, spreading it evenly to cover the surface.
- Return the molds to the freezer for 10–15 minutes to let the chocolate harden.
3. Prepare the Edible Cookie Dough
- In a medium bowl, beat the softened butter, brown sugar, and granulated sugar until light and fluffy.
- Mix in the vanilla extract and milk until smooth.
- Gradually add the heat-treated flour, stirring until fully incorporated.
- Fold in the mini chocolate chips to create the classic cookie dough texture.
4. Assemble the Cookie Dough Cups
- Scoop the edible cookie dough onto the set chocolate layer in each mold. Use a spoon or spatula to spread it evenly, forming a rounded top.
- Sprinkle extra chocolate chips on top of each cup for garnish.
5. Chill and Serve
- Refrigerate the assembled cups for at least 20 minutes to let all the layers set.
- Once firm, gently remove the cups from the molds or liners. Serve immediately or store for later.
Tips for Success
- Use Silicone Molds for Easy Removal
Silicone muffin molds make it easy to release the cups without breaking the layers. If using metal tins, be sure to line them with paper liners. - Heat-Treat the Flour
Raw flour can carry bacteria, so heat-treat it to make it safe. Spread the flour on a baking sheet and bake at 350°F for 5 minutes, or microwave it in a bowl for 1–2 minutes, stirring halfway through. - Chill Between Layers
Let each layer fully set before adding the next. This ensures the layers don’t mix and gives the cups a polished appearance. - Customize Your Chocolate
Swap semi-sweet chocolate for dark, milk, or even white chocolate to suit your preferences. - Work Quickly with Chocolate
Melted chocolate can harden fast, so have everything ready to go before you start pouring.
Variations and Customizations
These cookie dough cups are incredibly versatile. Here are a few ways to customize them:
Peanut Butter Lovers
Swap the cookie dough for peanut butter-flavored dough, or add a layer of peanut butter between the chocolate and cookie dough.
Gluten-Free Option
Use gluten-free cookies for the crust and substitute almond or oat flour for the all-purpose flour.
Add Some Crunch
Mix chopped nuts, pretzels, or toffee bits into the cookie dough for added texture and flavor.
Festive Twists
Incorporate colorful sprinkles into the cookie dough for a seasonal or holiday-themed treat.
Serving and Storage Tips
Serving Suggestions
- Serve these cups chilled for the best texture and flavor.
- Pair them with a scoop of vanilla ice cream or a dollop of whipped cream for an extra indulgent dessert.
Storage Tips
- Refrigerator: Store in an airtight container for up to 7 days.
- Freezer: Wrap each cup individually in plastic wrap, then store in a freezer-safe bag for up to 3 months. Let them thaw in the fridge before serving.
Conclusion
Chocolate Chip Cookie Dough Cups are the ultimate dessert for anyone who loves the creamy, chocolatey bliss of cookie dough and chocolate. They’re easy to make, endlessly customizable, and guaranteed to impress. Whether you’re whipping them up for a party, a family gathering, or just because, these little cups of joy will always hit the sweet spot.
So, why wait? Grab your ingredients, get creative, and enjoy the satisfaction of making (and eating!) these delightful no-bake treats. Don’t forget to share them with loved ones—they might just ask for the recipe!
Print
Chocolate Chip Cookie Dough Cups
- Total Time: 20 minutes
- Yield: 6 servings 1x
- Diet: Vegetarian
Description
Chocolate Chip Cookie Dough Cups are the ultimate no-bake treat! These layered delights feature a crunchy cookie crust, a rich chocolate layer, and a creamy, chocolate chip-studded edible cookie dough topping. Perfect for parties or an indulgent snack!
Ingredients
- 1 cup crushed chocolate chip cookies
- 2 tablespoons melted butter
- 1 cup semi-sweet chocolate chips
- 1 tablespoon coconut oil or butter
- 1/2 cup unsalted butter, softened
- 1/3 cup brown sugar
- 2 tablespoons granulated sugar
- 1 teaspoon vanilla extract
- 3/4 cup heat-treated all-purpose flour
- 2 tablespoons milk
- 1/2 cup mini chocolate chips
- Extra chocolate chips for garnish
Instructions
- Crush chocolate chip cookies into fine crumbs using a food processor or rolling pin.
- Mix cookie crumbs with melted butter and press into 6 silicone muffin molds.
- Freeze the crusts for 10-15 minutes to set.
- Melt chocolate chips with coconut oil or butter in the microwave, stirring until smooth.
- Pour the melted chocolate over the chilled cookie crusts and freeze for another 10-15 minutes.
- Beat butter, brown sugar, and granulated sugar until light and fluffy.
- Mix in vanilla extract and milk.
- Gradually add heat-treated flour and mix until combined.
- Fold in mini chocolate chips.
- Scoop cookie dough onto the chocolate layer and spread evenly.
- Sprinkle extra chocolate chips on top for garnish.
- Refrigerate for at least 20 minutes before serving.
Notes
Store in an airtight container in the refrigerator for up to 7 days or freeze for up to 3 months. Serve chilled for the best texture!
- Prep Time: 20 minutes
- Cook Time: 0 minutes
- Category: Dessert
- Method: No-Bake
- Cuisine: American
Nutrition
- Serving Size: 1 cup
- Calories: 320
- Sugar: 22g
- Sodium: 80mg
- Fat: 18g
- Saturated Fat: 10g
- Unsaturated Fat: 6g
- Trans Fat: 0g
- Carbohydrates: 38g
- Fiber: 2g
- Protein: 3g
- Cholesterol: 25mg
Keywords: chocolate chip, cookie dough, no-bake, dessert