Chocolate Chip Cheese Ball Recipe
This chocolate chip cheese ball is the kind of dessert that’s charmingly simple and reliably crowd-pleasing. It blends creamy, tangy softened cream cheese with butter and powdered sugar, studded with mini chocolate chips, and finished by rolling in more chocolate for texture and a little showmanship. It’s quick to assemble and quiet impressive to present.
No fuss, no baking, and minimal equipment: a bowl, mixer, plastic wrap and a plate. It chills into a perfectly sliceable, scoopable dessert that pairs beautifully with graham crackers or mini vanilla wafers. I reach for this recipe when I want something a little nostalgic but undeniably indulgent.
Below you’ll find everything you need to make this—precise ingredients with small tips, clear step-by-step instructions matching the original measurements, storage guidance, and smart swaps for allergies or weather. Let’s make a Chocolate Chip Cheese Ball together.
What’s in the Bowl
Ingredients
- 8 ounces cream cheese, softened — provides the tangy, creamy base; soften to room temperature so it mixes smoothly.
- 1/2 cup (1 stick) butter, softened — adds richness and helps the cheese ball set; room temp butter blends best.
- 3/4 cup powdered sugar — sweetens and helps create a smooth, sliceable texture; sift if lumpy.
- 1 teaspoon vanilla — enhances flavor and balances the sweetness.
- 1 bag mini chocolate chips, divided — one portion is folded into the batter for chocolate throughout; reserve the rest to coat the outside.
- Graham crackers or mini vanilla wafers for serving — crisp vehicles for scooping; both are classic and addictive with this cheese ball.
Chocolate Chip Cheese Ball Recipe Made Stepwise
- Place 8 ounces softened cream cheese and 1/2 cup (1 stick) softened butter in a medium mixing bowl. Use a hand mixer or stand mixer fitted with the paddle or whisk attachment.
- Beat the cream cheese and butter together on medium speed until fully combined and smooth, about 1–2 minutes. Scrape down the bowl once so no streaks remain.
- Add 3/4 cup powdered sugar and 1 teaspoon vanilla to the bowl. Beat again on low to medium speed until the mixture is smooth and homogenous, about 1–2 minutes. Taste and ensure the sugar is fully incorporated.
- Fold in 1/2 cup of the mini chocolate chips with a rubber spatula so that the chips are evenly distributed without overworking the spread.
- Spoon the mixture onto a sheet of plastic wrap placed on your counter. Gather the plastic up around the mixture and shape it into a round ball by pressing and smoothing with your hands through the wrap.
- Twist and seal the plastic wrap snugly around the cheese ball and refrigerate for 4–6 hours or overnight. Chilling firms the shape and makes it easier to coat.
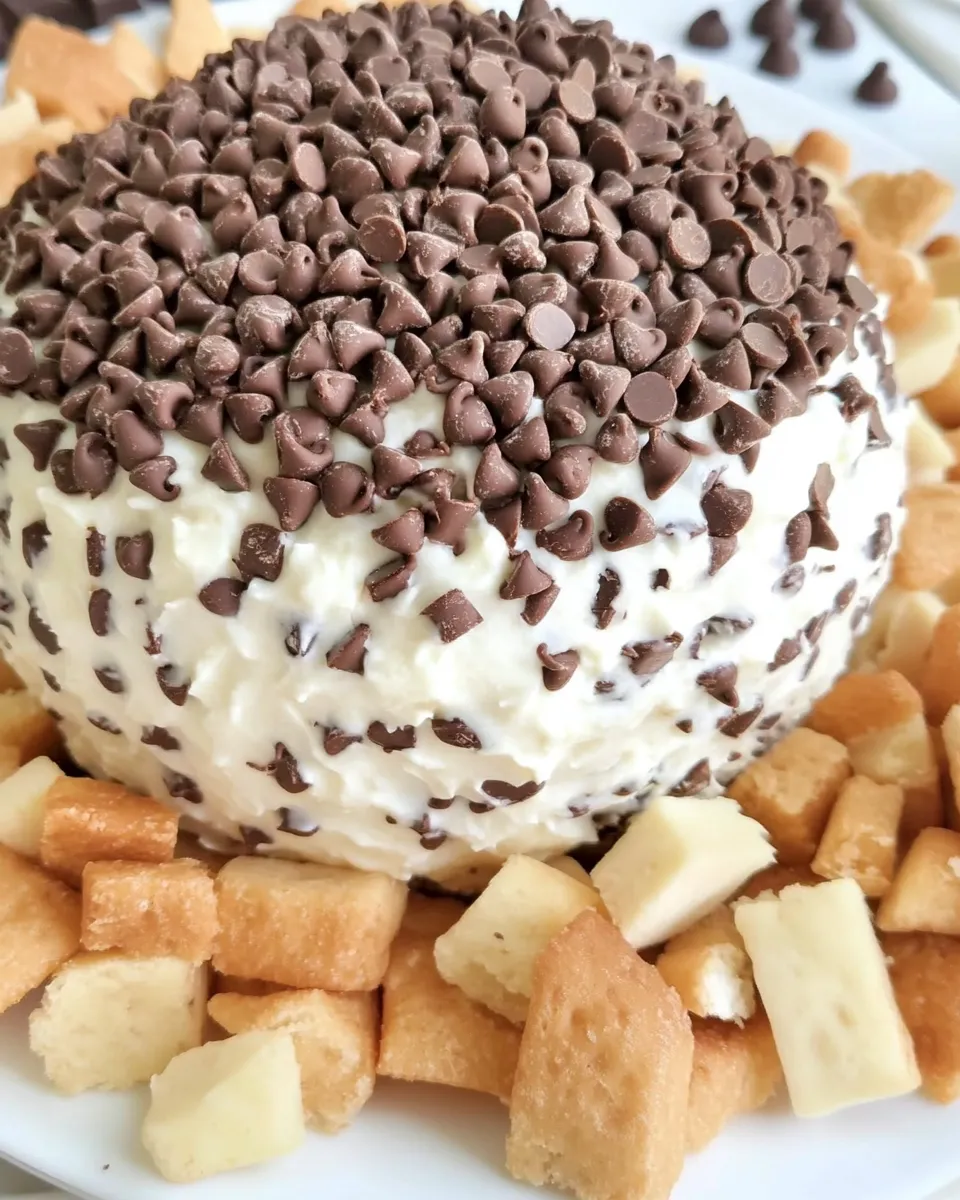
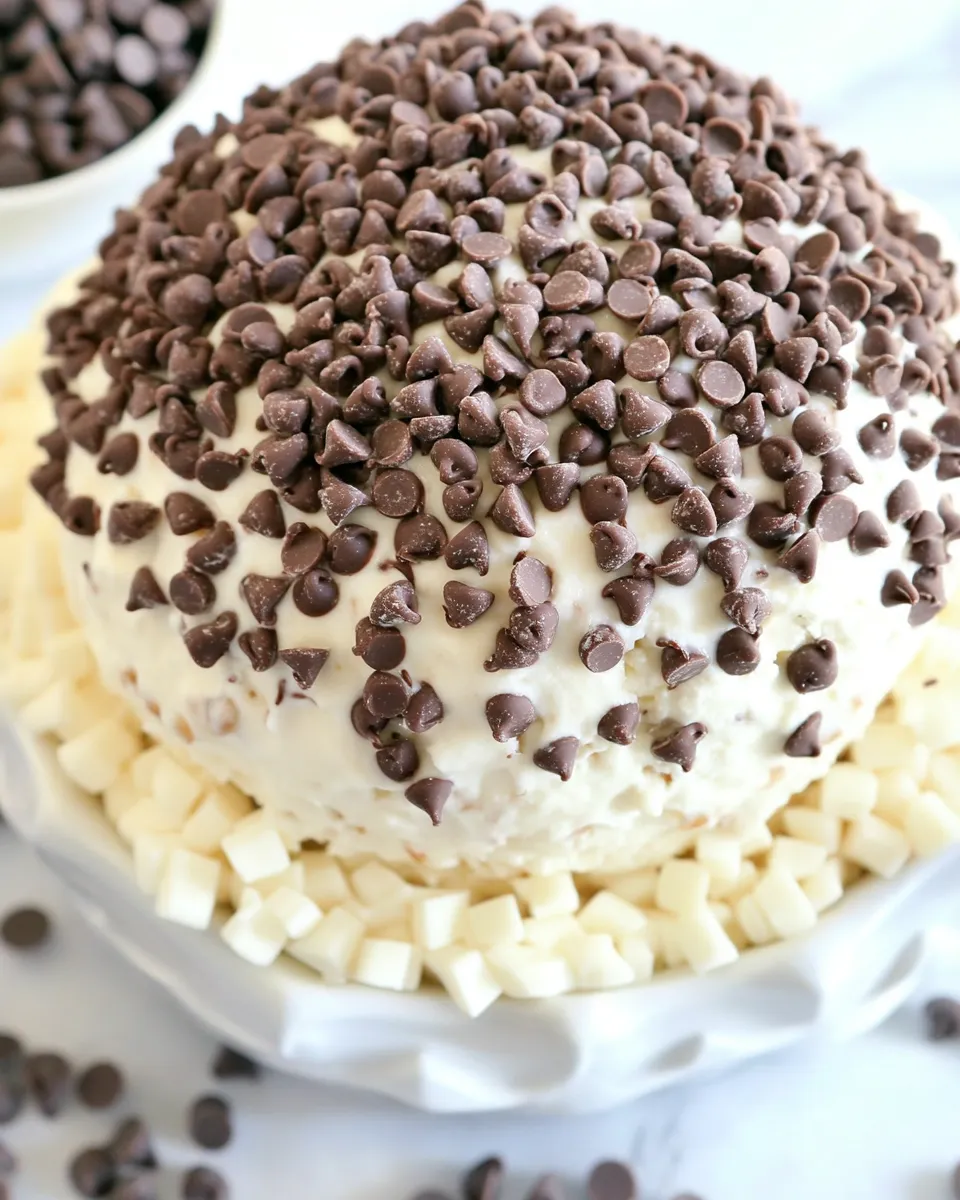
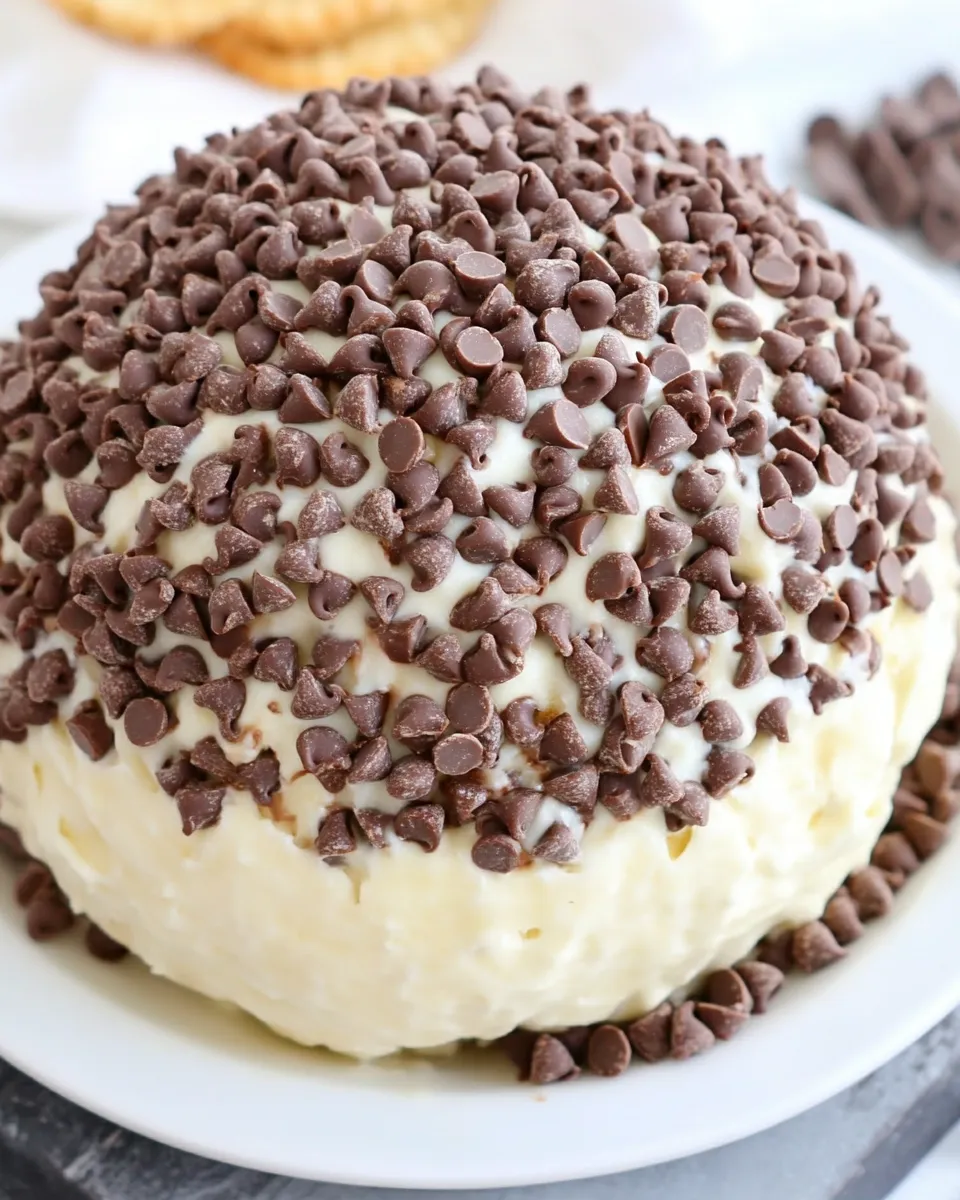
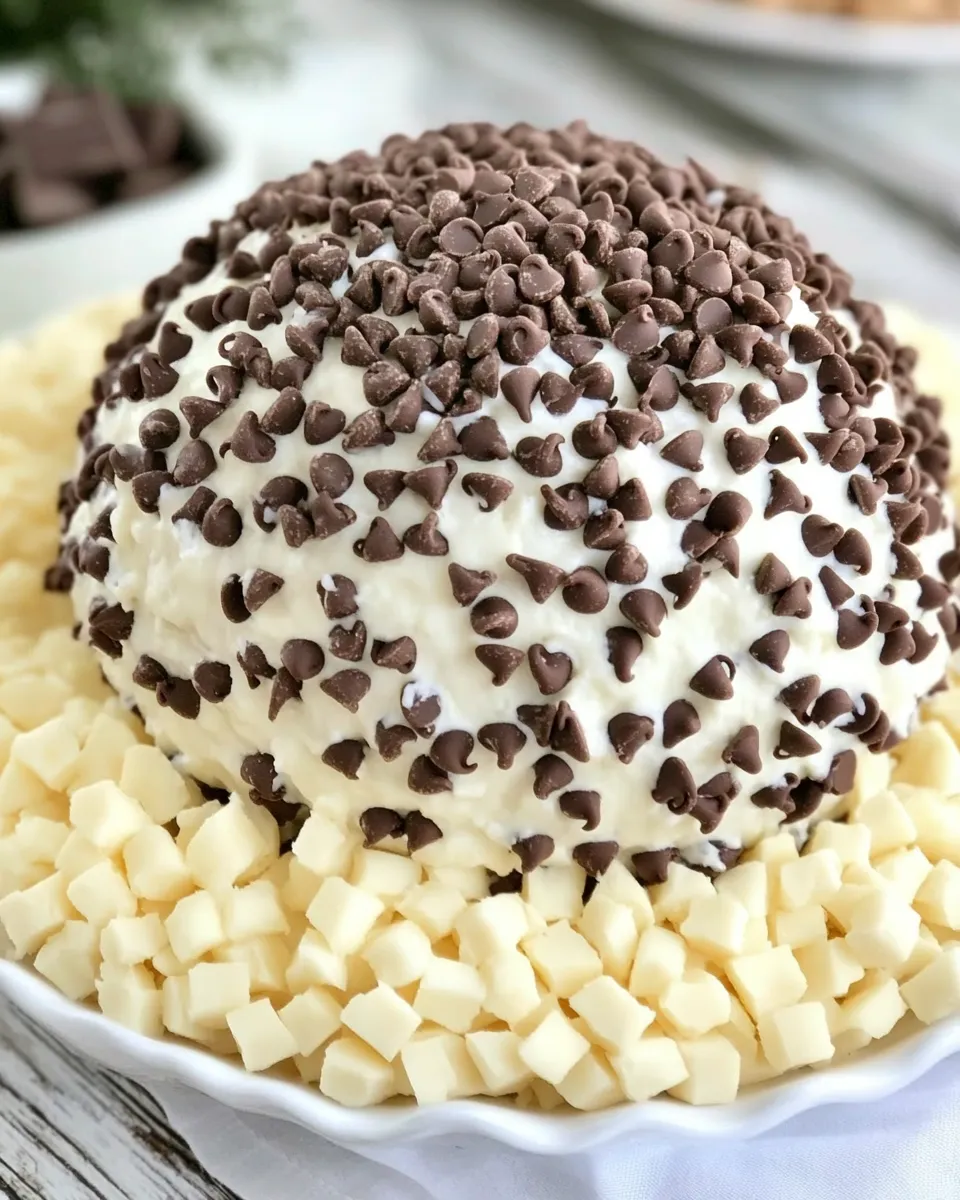
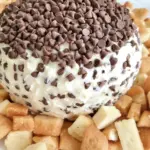
- When chilled, pour the remaining mini chocolate chips onto a plate in an even layer. Unwrap the cheese ball and place it in the center of the chocolate chips.
- Roll the cheese ball around on the plate so the chips stick to the outside. Use your fingers to gently press the chips into the surface for an even coating, taking care not to crush the ball.
- Transfer the finished Chocolate Chip Cheese Ball to a serving platter and surround it with graham crackers or mini vanilla wafers. Serve immediately or keep chilled until ready to eat.
Why You’ll Love This Recipe
It’s quick to make and doesn’t require baking, which keeps it stress-free and ideal for last-minute gatherings. The texture is a delightful mix of creamy and crunchy, thanks to the mini chocolate chips inside and out. Plus, it transports well when wrapped and chilled, making it a reliable potluck winner.
The flavor profile hits a nostalgic sweet spot: buttery cream cheese base, a vanilla lift, and plenty of chocolate. It’s desserty without being heavy, and the portion control is flexible—you can scoop it, spread it, or dip with cookies for any occasion.
Allergy-Friendly Substitutes
- Dairy-free cream cheese — swap for a plant-based cream cheese to avoid dairy; choose a brand with similar texture for best results.
- Vegan butter — use a non-dairy stick butter in place of regular butter to maintain structure and richness.
- Dairy-free chocolate chips — many brands make dairy-free mini chips that work one-for-one; double-check for cross-contact with nuts if needed.
- Gluten-free crackers — serve with gluten-free graham-style crackers or rice crackers to accommodate gluten intolerance.
Equipment & Tools
- Mixing bowl — medium size to comfortably hold and mix the ingredients.
- Hand mixer or stand mixer — speeds assembly and ensures a smooth texture.
- Rubber spatula — for folding in chips and scraping the bowl cleanly.
- Plastic wrap — shapes and chills the cheese ball without sticking to your hands.
- Plate for coating — wide, shallow plate to spread chocolate chips for rolling.
- Serving platter and crackers/wafers — for presentation and dipping.
Avoid These Traps
- Do not use cold cream cheese or butter — cold ingredients won’t blend smoothly and the texture will be lumpy. Soften them to room temperature first.
- Don’t skip chilling — if you try to coat the ball before it’s firm, it will be too soft and will lose shape while rolling in chips.
- Avoid overmixing after adding the chips — long mixing will break up the chips and can warm the mixture; fold gently.
- Don’t overcrowd the plate when coating — spread the reserved chips in a single layer so they adhere evenly to the surface.
Warm & Cool Weather Spins
Warm weather
- Keep the chilled cheese ball on a cooler or insulated tray for outdoor events; heat will soften it quickly.
- Serve smaller portions and replenish from the fridge to prevent a melty presentation at the table.
Cool weather
- Let the cheese ball sit at room temperature 5–10 minutes before serving so it’s creamy enough to scoop easily without losing shape.
- Consider pairing it with warm shortbread or spiced cookies for a cozy contrast.
Chef’s Notes
- Mini chocolate chips distribute better and create a softer texture than larger chips; stick with minis as listed.
- If you prefer a firmer exterior, press a second layer of chips on after the first coating by chilling for 10–15 minutes between coats.
- For a decorative touch, reserve a tablespoon of chips to sprinkle on top just before serving.
- Use a light-colored plate when coating so you can see if any gaps need a few additional chips pressed in.
Storing, Freezing & Reheating
- Storing: Keep the Cheese Ball wrapped tightly in plastic wrap and chilled in the refrigerator for up to 5 days. Bring to the table straight from the fridge or let sit 5–10 minutes if you prefer it softer.
- Freezing: You can freeze the uncoated, wrapped cheese ball for up to 1 month. Thaw overnight in the refrigerator, then roll in the remaining chocolate chips just before serving.
- Reheating: This is a chilled dessert—do not heat. If it becomes too firm from refrigeration, allow it to sit at room temperature a few minutes to soften for serving.
Ask the Chef
Q: Can I use regular chocolate chips instead of mini chips? A: Yes, but the distribution and bite will change—larger chips create pockets of chocolate rather than an even texture. Mini chips are recommended for a balanced mouthfeel.
Q: Can I make this sweeter or less sweet? A: Adjusting the powdered sugar is possible, but the recipe’s balance relies on the listed 3/4 cup. If you reduce sugar, the cheese ball may be tangier and slightly softer—taste the mixed base before chilling and add a little more if needed.
Q: How do I transport it to a party? A: Keep it chilled in a cooler or insulated bag. For short trips, keep it wrapped and place on ice packs inside a box so it doesn’t get jostled and lose shape.
That’s a Wrap
This Chocolate Chip Cheese Ball is deceptively simple and reliably delightful. It takes minutes to assemble, leverages pantry-friendly ingredients, and delivers maximum smiles with minimal effort. Whether you’re bringing it to a potluck or enjoying it at home with coffee, it’s one of those recipes that becomes a go-to.
Make it exactly as written the first time, then experiment with coatings, crackers, or shapes once you know how the texture should feel. Share, scoop, and enjoy. Keep this one in your recipe rotation—you’ll reach for it again and again.
Chocolate Chip Cheese Ball Recipe
Ingredients
- 8 ounces cream cheese softened
- 1/2 cup butter 1 stick, softened
- 3/4 cup powdered sugar
- 1 teaspoon vanilla extract
- mini chocolate chips 1 bag, divided (about 1/2 cup folded in and remaining for coating)
- graham crackers or mini vanilla wafers for serving
Instructions
- In a mixing bowl, beat the softened cream cheese and softened butter together until smooth and well combined.
- Add the powdered sugar and vanilla extract and beat until fully incorporated and creamy.
- Fold in about 1/2 cup of the mini chocolate chips until evenly distributed.
- Place the mixture onto a piece of plastic wrap and shape it into a ball, then wrap tightly.
- Refrigerate the wrapped cheese ball for 4–6 hours or up to overnight until firm.
- Spread the remaining mini chocolate chips on a plate, unwrap the chilled cheese ball, and roll it in the chips, pressing gently so they adhere evenly.
- Serve the chocolate chip cheese ball with graham crackers or mini vanilla wafers.
Equipment
- Mixing Bowl
- electric mixer or hand mixer
- Plastic Wrap
- Spoon or rubber spatula
- plate (for coating)
Notes
- You can refrigerate for at least 4 hours to firm up before coating.
- If you prefer, use mini vanilla wafers or graham crackers for serving.
- Wrap tightly in plastic wrap to maintain shape while chilling.
- Divide the chocolate chips so some are inside and some for the outer coating.