Please share this post with your friends 🤗
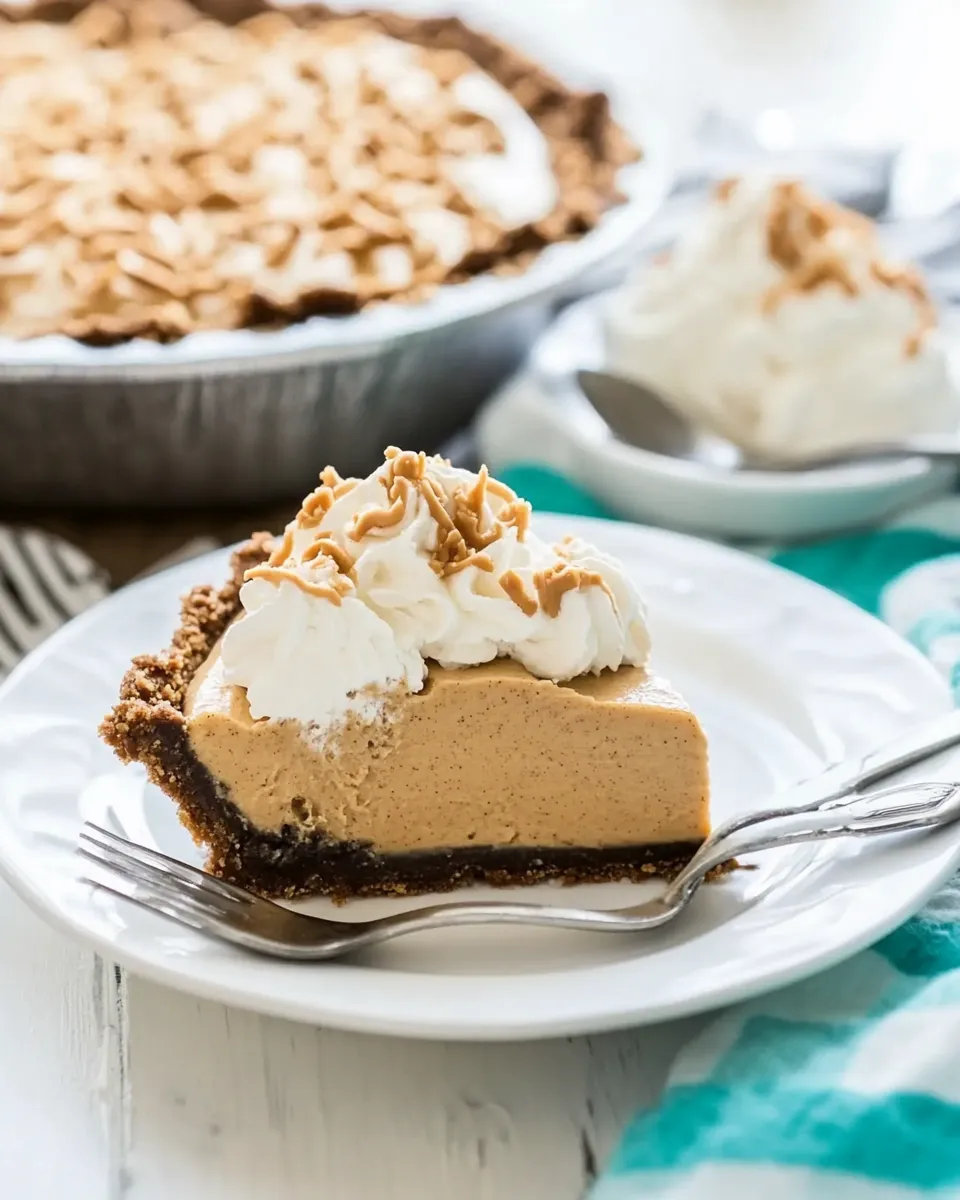
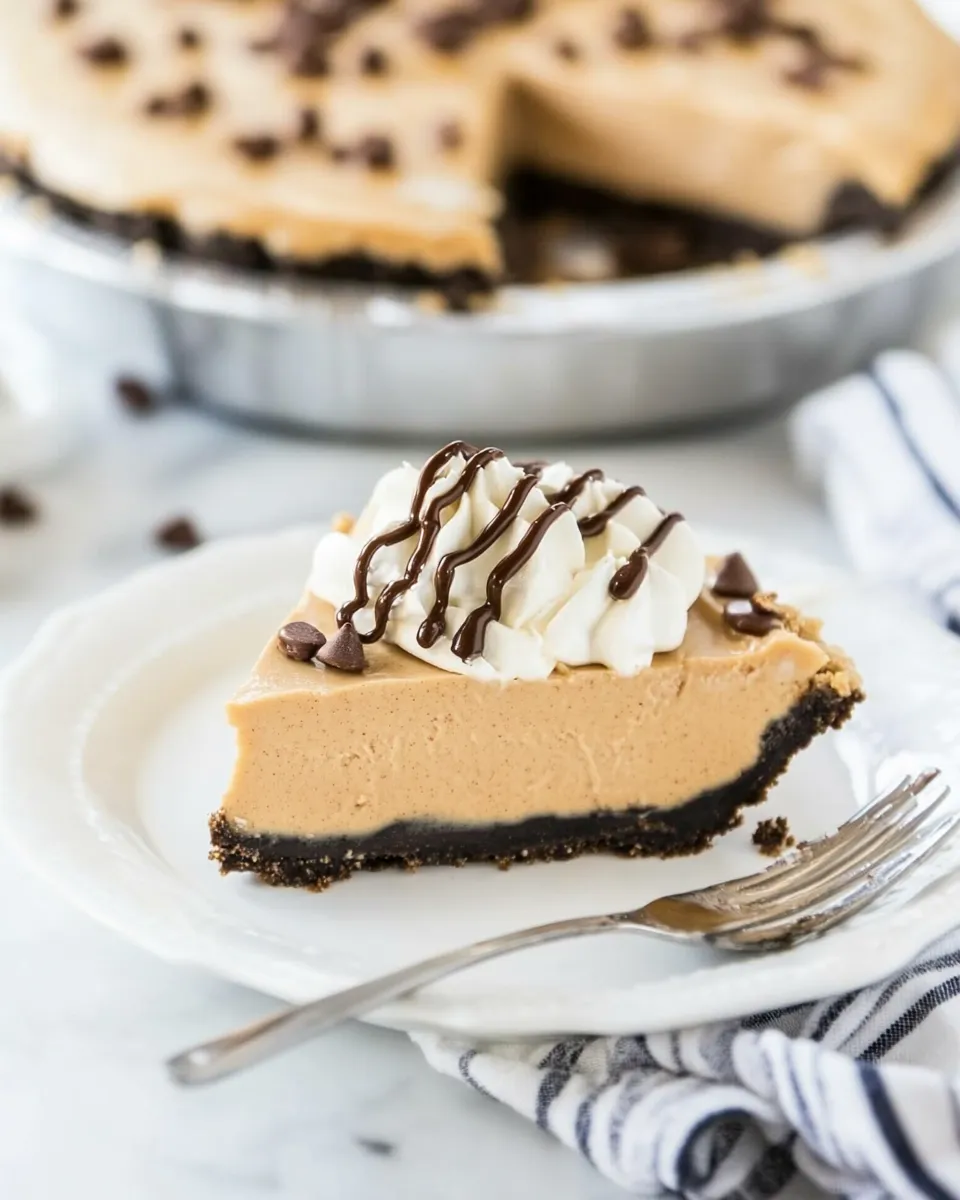
I fell in love with this lighter peanut butter pie the first time I tasted a slice that felt indulgent but didn’t sit heavy afterward. It’s the kind of dessert you bring to a summer potluck when you want flavor without the guilt, or stash in the fridge for a weeknight sweet that actually behaves itself. The texture is creamy and balanced by a crisp chocolate graham crust, and the banana adds a gentle sweetness that plays nicely with peanut butter.
This version trims calories and sugar but keeps what matters: peanut-buttery comfort and a smooth, spoonable filling. The recipe uses reduced-fat cream cheese, sugar-free whipped topping, and a granulated no-calorie sweetener so the pie shines without excess sugar. Read on for practical notes, clear step-by-step instructions, and sensible tips that make this straightforward in any home kitchen.
Ingredient Notes
1 3/4 cups chocolate graham cracker crumbs — Forms the base and gives a chocolatey crunch; measure by gently packing into the cup.
1 tablespoon unsweetened cocoa powder — Deepens the chocolate flavor of the crust without adding sugar.
1/4 cup SPLENDA® No Calorie Sweetener, Granulated — Sweetens the crust; keeps it light while mimicking granulated sugar texture.
6 tablespoons butter, melted — Binds the crumbs and crisps when baked; be sure it’s fully melted so crumbs hold together.
6 ounces reduced-fat cream cheese, room temperature — Gives structure and creaminess; bring to room temp for a lump-free filling.
1 cup natural peanut butter — The star flavor; natural styles may separate, so stir first and use smooth texture for easier mixing.
1 ripe banana — Adds natural sweetness and softens the filling; mash well to avoid stringy bits.
1/3 cup SPLENDA® No Calorie Sweetener, Granulated — Sweetens the filling; taste and adjust slightly if your banana or peanut butter is unusually sweet or bland.
1 (8-ounce) container sugar-free whipped topping — Lightens the filling and adds volume; fold in gently to keep the filling airy.
Lighter Peanut Butter Pie, Made Easy
This pie comes together in three main stages: make and bake the crust, mix the peanut-banana cream, fold in the whipped topping, and chill. Plan about 15 minutes active time and several hours chilling. Equipment is basic — bowl, mixer, pie plate — and steps are forgiving, which makes this a great weekday project.
Work with room-temperature cream cheese and a ripe banana for the smoothest filling. If your schedule allows, chill at least 4 hours so the filling firms up and slices cleanly. For quicker service, you can semi-chill for 2 hours, but slices will be softer.
Top Reasons to Make Lighter Peanut Butter Pie
Lower sugar without sacrificing flavor — uses granulated no-calorie sweetener.
Fast and simple — minimal hands-on time and easy steps.
Kid-friendly and crowd-pleasing — classic peanut butter flavor with a chocolate crust.
Flexible make-ahead dessert — stores well in the fridge for several days.
Smart Substitutions
Chocolate graham cracker crumbs: Use regular graham crumbs plus 1–2 teaspoons cocoa if you only have plain crumbs.
Butter: Light margarine can substitute, but flavor differs slightly.
Reduced-fat cream cheese: Full-fat cream cheese will make the filling richer and firmer if you prefer more decadence.
Natural peanut butter: Creamy commercial peanut butter with stabilizers works if you want a smoother, more predictable texture.
Banana: If allergic, omit banana and add 1–2 tablespoons extra sweetener to taste; texture will rely more on peanut butter.
Sugar-free whipped topping: Fold in lightly sweetened cool-whip or 8 oz of freshly whipped cream with 1–2 Tbsp sweetener if preferred.
What’s in the Gear List
9-inch pie plate — standard size for this recipe.
Mixing bowls — one medium for crust, one medium for filling.
Electric mixer — speeds up smoothing the cream cheese and peanut butter; a sturdy whisk can work with more elbow grease.
Measuring cups and spoons — for accurate ingredient ratios.
Spoon or spatula — for folding whipped topping and pressing crust.
Fork or potato masher — to mash the banana thoroughly.
Oven and refrigerator space — crusts bake briefly, then chilling sets the pie.
Frequent Missteps to Avoid
Using cold cream cheese — causes lumps; let it sit at room temperature.
Under-pressing the crust — crumbs should be compact for a firm base that doesn’t fall apart when sliced.
Overbeating the whipped topping — fold gently to keep the filling light and airy.
Skipping the chill time — the pie needs hours in the fridge to set; otherwise slices will be sloppy.
Using an underripe banana — it won’t sweeten the filling properly; choose a banana with brown speckles.
How to Make It Lighter
Use reduced-fat cream cheese and sugar-free whipped topping to cut calories and saturated fat without losing creaminess.
Replace most sugar with SPLENDA® No Calorie Sweetener, Granulated in both crust and filling to reduce sugar content.
Use natural peanut butter with no added sugar; it provides pure peanut flavor with fewer additives.
Cook’s Notes
Room temperature ingredients blend more smoothly — set the cream cheese and peanut butter out for 20–30 minutes before starting.
When measuring crumbs, gently pack the cup; don’t compact them tightly, which can yield a too-dense crust.
Taste the filling before folding in whipped topping. If you prefer sweeter, add 1 tablespoon of sweetener at a time (the source suggests you may want another tablespoon or two).
If your peanut butter is very oily, stir it well before measuring so you get consistent texture and flavor.
For a firmer pie, chill overnight; for softer slices, 4–6 hours is usually sufficient.
Make-Ahead & Storage
Make up to 24 hours ahead and keep covered in the refrigerator. Chilling overnight improves sliceability and flavor melding.
Stored in an airtight container or tightly wrapped, the pie will keep 3–4 days in the fridge. After that, textures degrade.
Freeze slices individually wrapped for up to 1 month. Thaw in the refrigerator before serving; texture will be slightly softer after freezing.
Popular Questions
Can I use a store-bought crust? — Yes. A prepared chocolate graham crust works; skip the baking step if the crust is ready-made.
What if my filling is too sweet or not sweet enough? — Taste before folding in whipped topping. Add an extra tablespoon or two of the granulated sweetener if it’s too bland; conversely, reduce any added sweetener next time.
Can I omit the banana? — You can, but banana contributes natural sweetness and a softer texture. If omitted, consider adding an extra tablespoon or two of sweetener depending on your peanut butter’s sweetness.
Is this pie stable for transport? — Yes, if it has chilled at least 4 hours and is kept refrigerated until serving. Use a pie carrier for long trips.
Save & Share
If you try this Lighter Peanut Butter Pie, save a photo of your slice and share it with friends or on social — people love a dessert that’s indulgent and sensible. Tag your version with notes about any swaps or tweaks you made; small changes help others decide how to adapt the recipe to their pantry.
Ingredients
1 3/4 cups chocolate graham cracker crumbs — Forms the crust base; press firmly into the pie plate for a stable shell.
1 tablespoon unsweetened cocoa powder — Boosts chocolate flavor in the crust without adding sugar.
1/4 cup SPLENDA® No Calorie Sweetener, Granulated — Sweetens the crust while keeping it lighter.
6 tablespoons butter, melted — Binds the crumbs and crisps the crust when baked.
6 ounces reduced-fat cream cheese, room temperature — Adds creamy structure to the filling; soften before mixing.
1 cup natural peanut butter — Primary flavor; stir if oil separation has occurred.
1 ripe banana — Adds natural sweetness and a softer mouthfeel; mash thoroughly.
1/3 cup SPLENDA® No Calorie Sweetener, Granulated — Sweetens the filling; adjust to taste within the suggested range.
1 (8-ounce) container sugar-free whipped topping — Lightens the filling and increases volume; fold in gently.
Instructions
Preheat the oven to 350°F (175°C).
In a medium bowl, combine 1 3/4 cups chocolate graham cracker crumbs, 1 tablespoon unsweetened cocoa powder, and 1/4 cup SPLENDA® No Calorie Sweetener, Granulated. Stir until evenly mixed.
Pour 6 tablespoons melted butter over the crumb mixture and stir until all crumbs are moistened and the mixture holds together when pressed.
Transfer the crumb mixture to a 9-inch pie plate. Press the crumbs firmly and evenly across the bottom and up the sides to form a compact crust.
Bake the crust at 350°F for 8 to 10 minutes. Remove from the oven and let the crust cool completely on a wire rack before filling.
While the crust cools, work on the filling: in a medium bowl, beat 6 ounces reduced-fat cream cheese, 1 cup natural peanut butter, and 1 ripe banana with an electric mixer until smooth and homogenous. Scrape the bowl as needed to eliminate lumps.
Beat in 1/3 cup SPLENDA® No Calorie Sweetener, Granulated. Taste the filling; if you want it sweeter, add an additional tablespoon or two of the same sweetener, mixing briefly after each addition.
Gently fold in 1 (8-ounce) container sugar-free whipped topping using a spatula. Fold just until the whipped topping is evenly incorporated and the filling is light and airy.
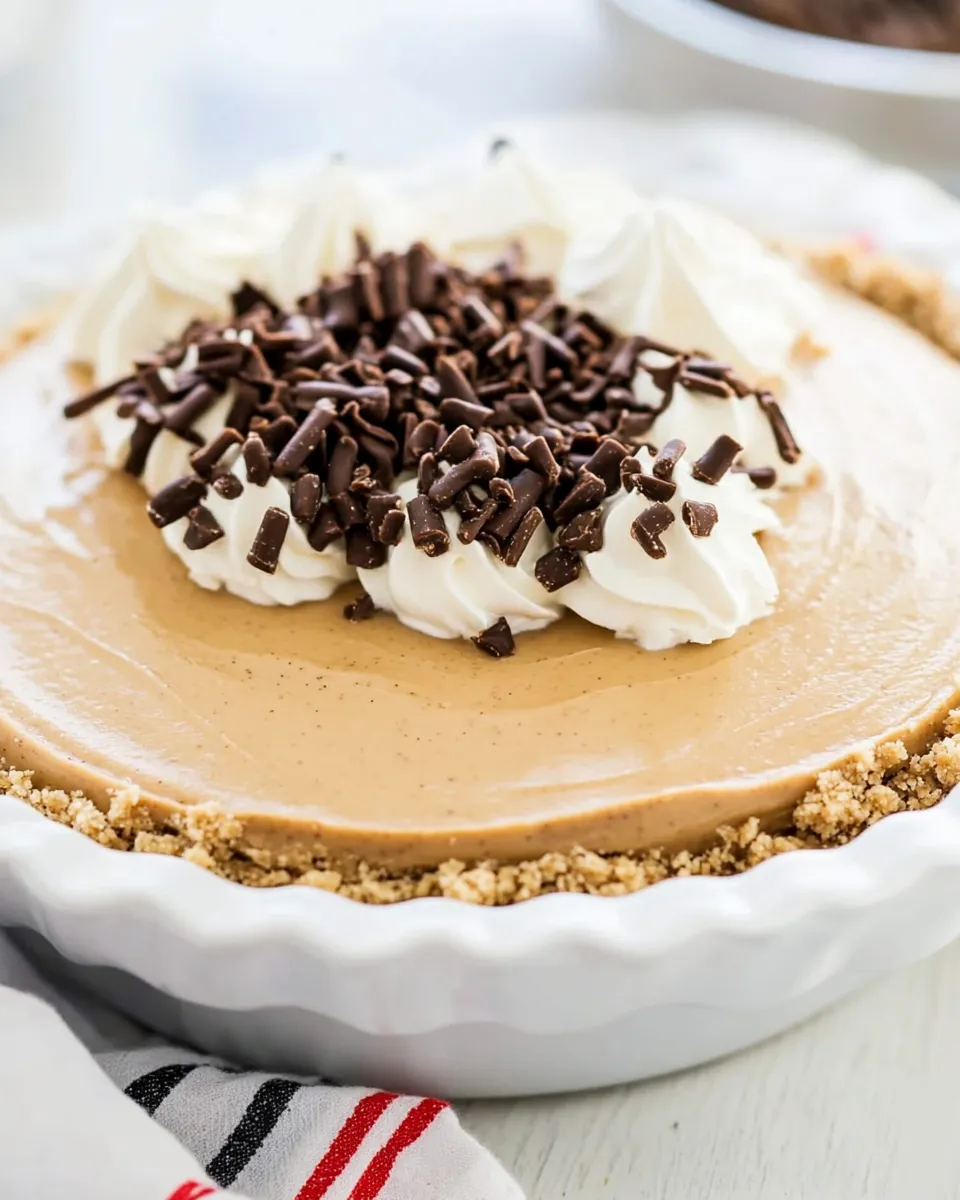
Transfer the filling to the cooled chocolate graham crust. Smooth the top with a spatula.
Refrigerate the assembled pie for at least several hours (4–6 hours recommended) until set. For best sliceability, chill overnight.
When ready to serve, slice with a clean, sharp knife. Store leftovers covered in the refrigerator for 3–4 days.
Lighter Peanut Butter Pie
A lighter, no-sugar-added peanut butter pie with a chocolate graham crust and banana-sweetened filling.
Prep Time2 hours hrs
Cook Time10 minutes mins
Total Time2 hours hrs 10 minutes mins
Servings: 8 slices
- 1 3/4 cups chocolate graham cracker crumbs
- 1 tablespoon unsweetened cocoa powder
- 1/4 cup SPLENDA® No Calorie Sweetener, Granulated
- 6 tablespoons butter melted
- 6 ounces reduced-fat cream cheese room temperature
- 1 cup natural peanut butter
- 1 ripe banana
- 1/3 cup SPLENDA® No Calorie Sweetener, Granulated
- 1 (8-ounce) container sugar-free whipped topping
Preheat the oven to 350°F (175°C).
In a medium bowl, combine the chocolate graham cracker crumbs, cocoa powder, 1/4 cup SPLENDA® and melted butter until evenly moistened.
Press the crumb mixture firmly into the bottom and up the sides of a 9-inch pie plate to form a crust.
Bake the crust for 8 to 10 minutes, then remove and let it cool completely.
In a mixing bowl, beat the reduced-fat cream cheese, peanut butter, and ripe banana with an electric mixer until smooth and combined.
Beat in 1/3 cup SPLENDA® and taste; add an extra tablespoon or two of sweetener if desired for personal taste.
Gently fold the sugar-free whipped topping into the peanut butter mixture until evenly incorporated.
Transfer the filling into the cooled crust, smooth the top, and refrigerate for at least several hours until set before slicing and serving.
- Use a very ripe banana for better natural sweetness.
- Taste the filling before folding in whipped topping to adjust sweetness.
- Press crumbs firmly for a sturdy crust.
- Chill for several hours to allow the pie to set.
Please share this post with your friends 🤗