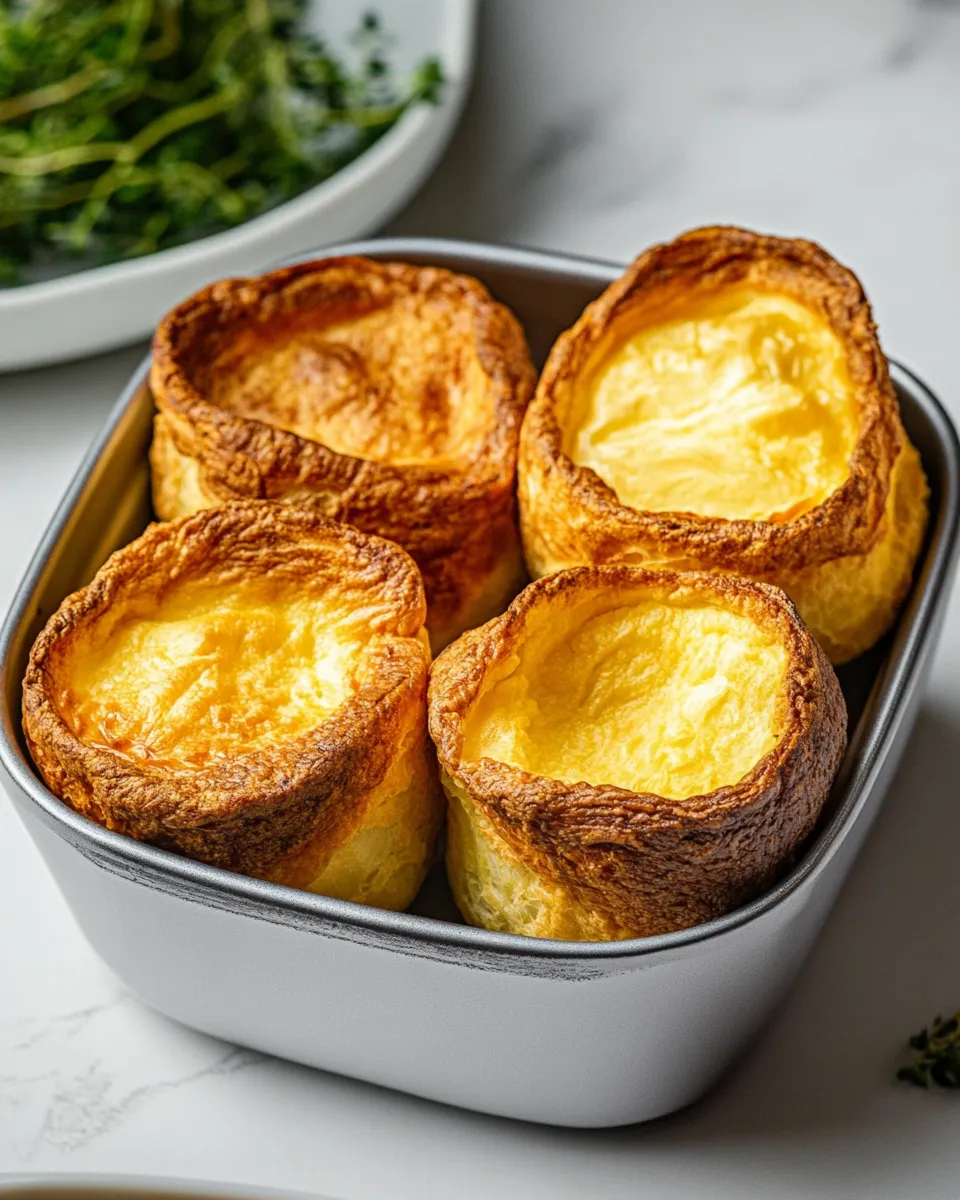
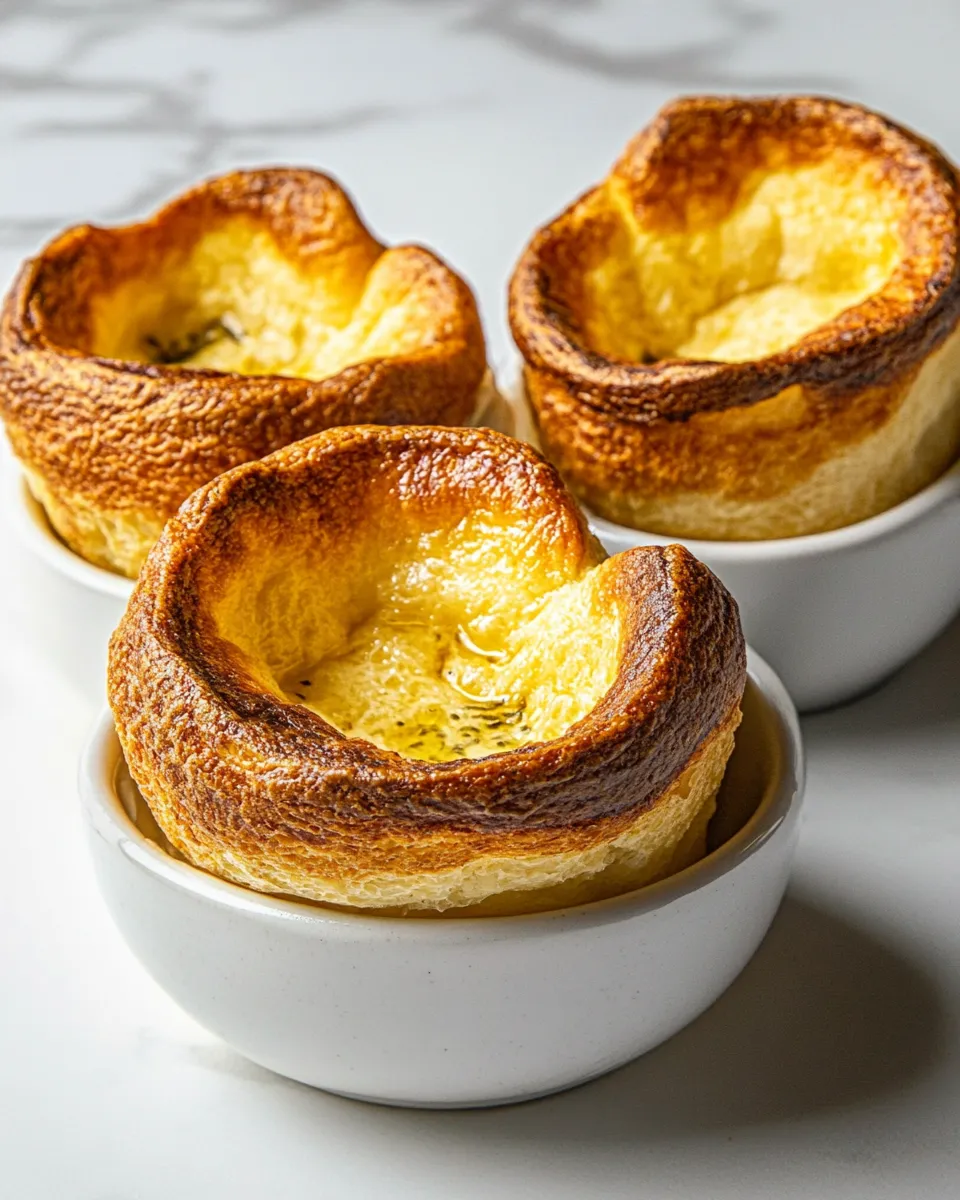
Popovers
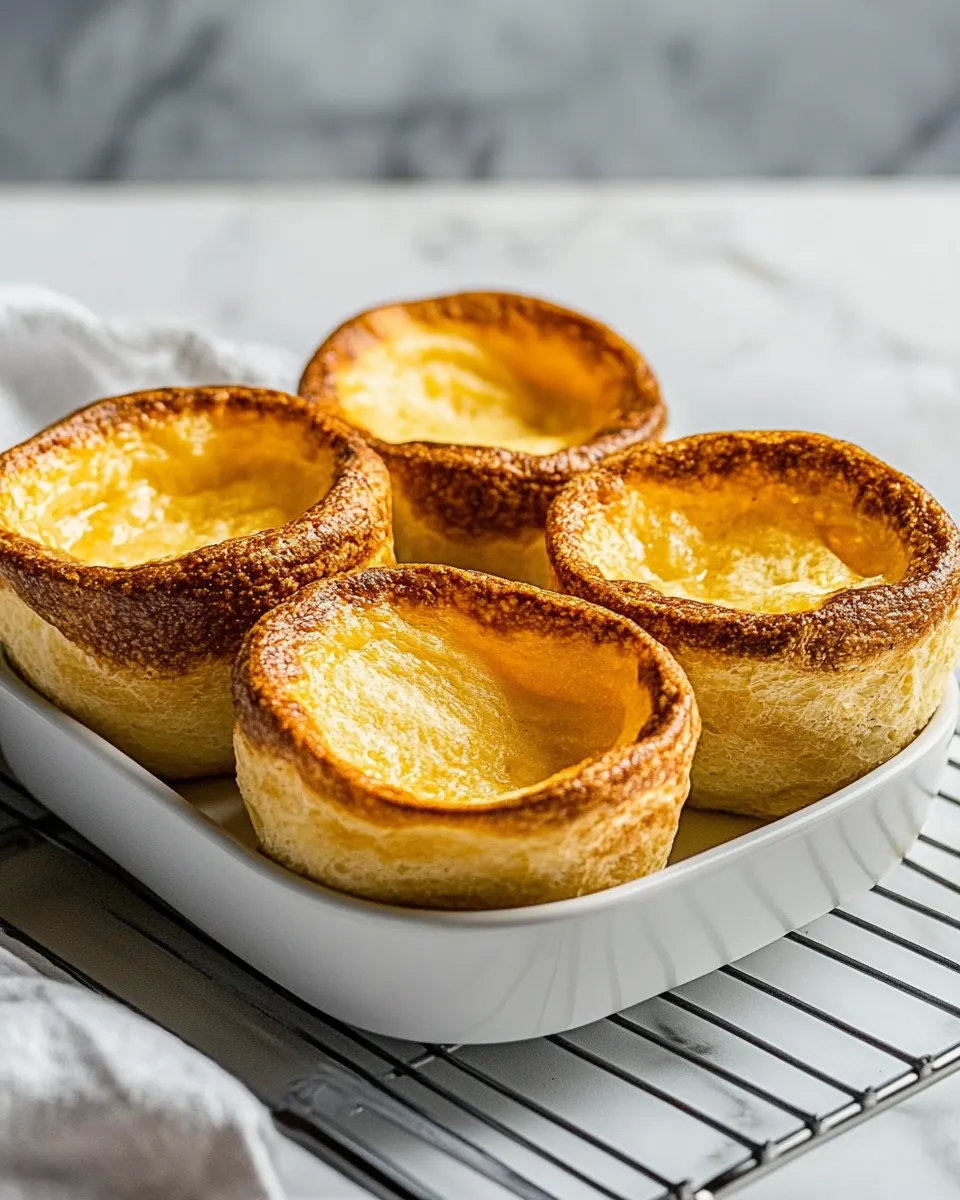
Light, airy, and impossibly crisp—popovers are the kind of small triumphs that make breakfast feel special without much fuss. They puff up dramatically in the oven, creating hollow centers perfect for butter, jam, or a little smear of savory cheese. This recipe is straightforward and dependable, ideal for a weekend brunch or a treat when you want something impressive with minimal effort.
You’ll find the technique matters more than fancy ingredients. Temperatures, timing, and a hot-to-cold transition are what make these popovers soar. Follow the steps below closely, and you’ll get tall, golden cups with a delicate chew and a crisp shell.
Ingredient List
- 2 tablespoons butter, melted and divided — brush pan for browning and flavor; leftover melted butter goes in the batter for richness.
- 3 eggs — provide structure and lift; beat thoroughly so the batter is smooth.
- 1 cup milk — thins the batter to the right consistency; room temperature helps steady rising.
- 1 cup all-purpose flour — gives body; whisk to remove lumps for an even batter.
- 1/4 teaspoon salt — balances flavor; don’t skip it.
Method: Popovers
- Adjust an oven rack to the middle position. Do not preheat the oven yet.
- Brush the inside of a standard 6-cup popover pan with 1 tablespoon of the melted butter so the batter won’t stick and the edges brown nicely.
- In a deep bowl or large measuring cup, combine the remaining 1 tablespoon melted butter, the 3 eggs, and 1 cup milk. Whisk until smooth and homogenous.
- Add 1 cup all-purpose flour and 1/4 teaspoon salt to the wet mixture. Stir gently until just combined—a few small streaks of flour are fine; do not overmix.
- Divide the batter among the prepared popover cups, filling each about two-thirds full. If you prefer precise amounts, each cup gets roughly 1/3 cup plus 1 tablespoon of batter. Tap the pan lightly to level the batter if needed.
- Place the filled popover pan in the cold oven, then immediately set the oven to preheat to 375°F (190°C). Starting in a cold oven helps create the dramatic initial steam burst that puffs the batter.
- Bake until the popovers are tall, deep golden brown, and puffy, about 35 to 45 minutes. For the first 30 minutes, keep the oven door closed—do not peek—so the steam inside the oven can build and lift the popovers.
- When the popovers are done, remove the pan from the oven. Immediately use a paring knife to make a small slit in the side of each popover so steam can escape; this prevents them from collapsing too quickly.
- Cool the popovers in the pan for about 5 minutes, then transfer to a wire rack or serve warm from the pan.
What Sets This Recipe Apart
This method uses a cold-to-hot oven start—a small but crucial technique that encourages a strong initial rise. The split of melted butter (one tablespoon for the pan, one tablespoon in the batter) gives crisp edges and a tender crumb without weighing the batter down. The recipe balances simplicity and precision: just five ingredients, but attention to mixing and timing makes the big difference.
What to Use Instead
- Dairy substitutions — you can swap milk for a mild plant milk (soy or oat) if needed; results may be slightly less rich but still work.
- Butter alternatives — clarify if using neutral oil for brushing, but butter adds flavor and helps with browning.
- Flour alternatives — all-purpose flour is best for structure; whole-wheat or gluten-free flours will change texture and rise and aren’t recommended without recipe adjustments.
Recommended Tools
- Standard 6-cup popover pan — gives the tall, cylindrical shape and consistent results.
- Deep mixing bowl or large measuring cup — makes whisking the batter easy and pouring cleaner.
- Whisk — for combining eggs, milk, and melted butter smoothly.
- Paring knife — to slit the popovers immediately after baking to release steam.
- Wire rack — for cooling so bottoms stay crisp.
Watch Outs & How to Fix
- Popovers won’t rise: Check oven rack placement (middle) and follow the cold-to-hot start. Make sure batter isn’t overmixed—overdeveloped gluten can deflate rise.
- Edges burn before centers are done: Your oven may run hot; reduce temperature by 10–15°F and increase bake time slightly. Also confirm pan placement in the center of the oven.
- Collapsed popovers: Make the small slit right away to release steam; also avoid opening the oven during the first 30 minutes of baking.
- Dense or gummy interior: Don’t underbake—ensure a deep golden brown exterior. Also, measure flour by spooning into the cup and leveling rather than scooping, which packs too much flour.
Holiday & Seasonal Touches
Sweet ideas
- Autumn: Serve warm with maple butter or apple butter and a sprinkle of cinnamon sugar.
- Winter holidays: Fill with lightly sweetened whipped cream and cranberry compote for a festive dessert.
Savory ideas
- Spring: Stuff with herbed ricotta and thinly sliced radish for a bright brunch option.
- Fall/Winter: Spoon in warm mushroom ragù or smoked salmon with a lemon-dill crème fraîche for an elegant starter.
Chef’s Rationale
I favor this straightforward ingredient set because popovers are one of those recipes where technique matters more than bells and whistles. The cold oven start creates a rapid steam burst as the temperature climbs, giving the batter an immediate lift. Melting and dividing the butter ensures the pan is lubricated for release and the batter gets a touch of fat for tenderness and flavor. The ratios—equal parts milk and flour by volume and three eggs—are a classic balance that yields hollow centers and sturdy walls without heaviness.
Freezer-Friendly Notes
Popovers are best eaten the day they’re made to enjoy the crisp exterior. If you need to save extras, cool completely, wrap individually in plastic wrap, and freeze for up to 1 month. To reheat, unwrap and place on a baking sheet in a 350°F oven for 8–12 minutes until heated through and crisped. Microwaving will make them soggy, so avoid that method.
Popular Questions
- Can I make these ahead? Partially: you can mix the batter and refrigerate it for up to 24 hours, but bring it to room temperature and give it a gentle stir before baking. Baking from cold batter with the pan in a cold oven is part of this recipe’s rise strategy, so plan accordingly.
- Why didn’t mine get tall? Most likely reasons: oven door opened too soon, oven temperature wrong, or batter overmixed. Also ensure the pan was well-buttered so the batter can cling and rise.
- Can I use a muffin tin? You can, but popover pans are deeper and designed for vertical rise. Muffin tins yield shorter, more muffin-like results.
Serve & Enjoy
Serve popovers warm straight from the pan after that small slit to release steam. Brush with a little extra melted butter, offer salty butter, preserves, clotted cream, or a savory filling on the side. They pair beautifully with eggs, smoked salmon, a green salad, or a simple bowl of fruit. Sit down while they’re still warm—the contrast between the crisp shell and the airy interior is at its best then.

Popovers
Ingredients
- 2 tablespoons butter melted and divided (see notes)
- 3 large eggs
- 1 cup milk see notes for milk options
- 1 cup all-purpose flour
- 1/4 teaspoon salt
Instructions
- Place a rack in the middle of the oven but do not preheat. Brush the inside of a 6-cup popover pan with 1 tablespoon of the melted butter.
- In a deep bowl or large measuring cup, whisk together the remaining 1 tablespoon melted butter, the eggs, and the milk until combined.
- Add the flour and salt, and stir until just combined; do not overmix—the batter should be slightly lumpy.
- Divide the batter among the prepared popover cups, filling each about two-thirds full (approximately 1/3 cup plus 1 tablespoon per cup).
- Place the popover pan in the cold oven and immediately set the oven to 375°F (190°C) to preheat with the pan inside.
- Bake until the popovers are tall, deep golden brown, and puffy, about 35 to 45 minutes; do not open the oven during the first 30 minutes.
- Remove the pan from the oven and immediately make a small slit in the side of each popover with a paring knife to release steam. Cool in the pan for 5 minutes before serving.
Equipment
- 6-cup popover pan
- small bowl
- Whisk
- Measuring cups and spoons
- paring knife
Notes
- I recommend a 6-cup popover pan such as the Chicago Metallic Professional Popover pan.
- You can omit the tablespoon of butter for brushing and use nonstick cooking spray instead.
- This recipe works with 2% or whole milk; skim milk has not been tested.