Polka Dot Cheesecake
This Polka Dot Cheesecake is one of those elegant desserts that looks like it took hours, but the steps are straightforward and forgiving. It’s a creamy baked cheesecake with chocolate “polka dots” embedded inside the cake that give every slice a fun surprise. The crust is a simple chocolate cookie base that balances the richness of the filling.
I’ll walk you through buying the right ingredients, assembling the crust and batter, piping the chocolate dots, and baking the cheesecake in a water bath for a silky texture. Expect a tender, slightly golden-top cheesecake that firms up as it cools and slices cleanly when you heat your knife between cuts.
Your Shopping Guide
Buy full-fat block cream cheese (not the spread) for the smoothest texture. Get good-quality chocolate for melting—bittersweet or semisweet works well. Chocolate cookie crumbs are often sold ready-made; if you prefer to make your own, buy chocolate sandwich cookies you enjoy.
Check that you have an 8-inch springform pan and heavy-duty aluminum foil if your pan isn’t watertight. Don’t forget a pastry bag or a small plastic bag you can clip for piping the chocolate dots.
Method: Polka Dot Cheesecake
Ingredients
- 1 ¾ cups chocolate cookie crumbs — forms the chocolatey base and provides texture contrast to the creamy filling.
- ½ stick butter, melted — binds the crumbs together; use unsalted or reduce added salt elsewhere.
- 3 tablespoons sugar — sweetens and helps the crust set when baked.
Instructions
Follow these steps in order. Quantities above are the source of truth for the crust; all other filling directions are kept to the original method and clarified into step-by-step form.
- Preheat the oven to 350ºF (175ºC).
- Make the crust: In a bowl combine 1 ¾ cups chocolate cookie crumbs, ½ stick melted butter, and 3 tablespoons sugar. Mix until the crumbs are evenly moistened and hold together when pressed.
- Press the crumb mixture evenly onto the bottom of an 8-inch springform pan, compacting it to form a firm base.
- Bake the crust for 10 minutes. Remove from the oven and set aside to cool while you make the cheesecake batter.
- If your springform pan is not watertight, wrap the outside with heavy-duty aluminum foil to prevent water from seeping in during the water-bath (bain-marie) bake.
- Prepare the cheesecake batter: Place the cream cheese in the bowl of a stand mixer fitted with the paddle attachment. Beat on medium speed for several minutes until the cream cheese is smooth, stopping to scrape the sides and bottom frequently so the texture is uniform.
- Once smooth, add vanilla and almond extracts (as per your original recipe proportions) and the sugar, then beat until well combined. Add the eggs one at a time, mixing each egg in until just combined—do not overbeat the batter.
- Reserve one-third of the completed cheesecake batter by removing it from the mixer bowl and placing it into a separate medium bowl. Keep the remaining two-thirds in the mixer bowl (or pour it) and pour that portion into the prepared pan, smoothing the top gently.
- Melt chocolate (amount per your chocolate preference) and stir it into the reserved one-third cheesecake batter until fully combined and smooth.
- Transfer the chocolate-flecked batter into a pastry bag fitted with a plain #6 tip (½ inch). If you don’t have piping equipment, use a strong quart-size zipper bag and snip a small corner to create a similar opening.
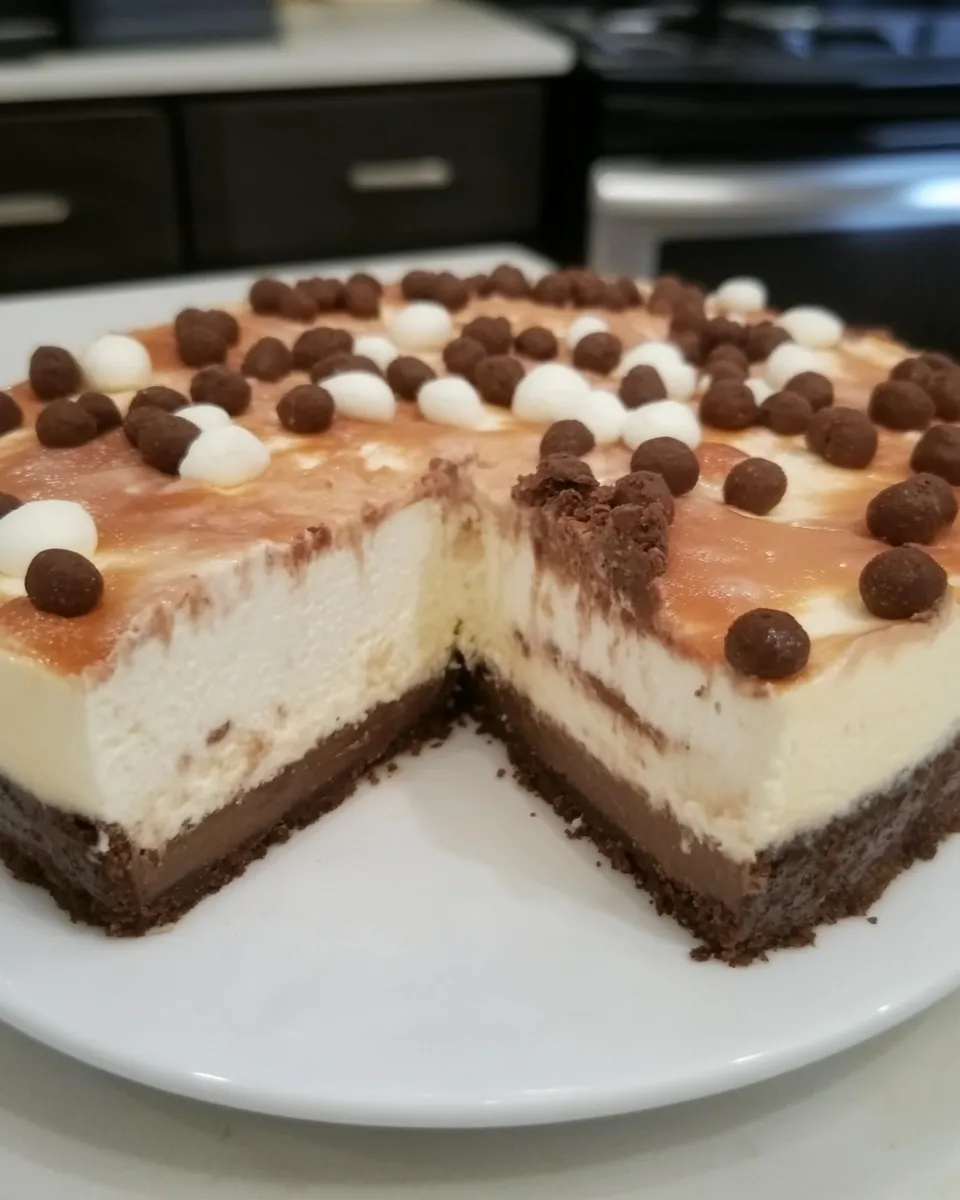
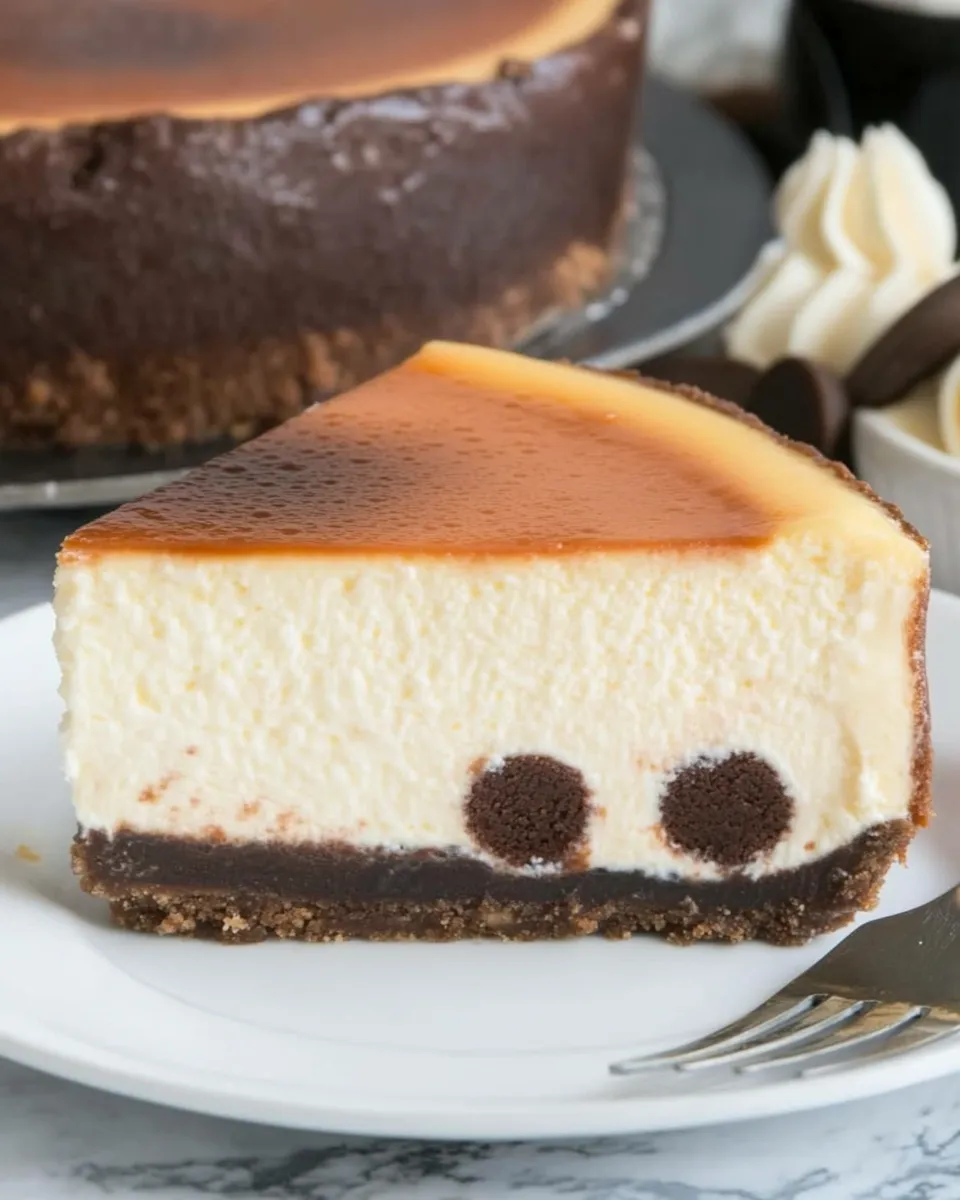
- At table height for better control, position the tip just barely inserted into the center of the cheesecake top. Squeeze to form a chocolate ball roughly the size of a golf ball; this will create a dark circular “polka dot” on the surface about 2 inches wide. Stop squeezing before withdrawing the tip to keep a rounded dot inside the batter.
- Using the same method, pipe six smaller balls around the rim of the cake. Place the first at 12 o’clock, the next at 6 o’clock, then two evenly spaced on each side so the six sit symmetrically. The rim dots should be smaller than the center dot and not touch each other. If you have leftover chocolate batter, add it evenly to the rim dots.
- Place the springform pan inside a larger roasting pan. Carefully transfer both to the oven rack and pour very hot water into the larger pan to a depth of about 1 ½ inches to create a water bath. This moderates oven heat and prevents cracking.
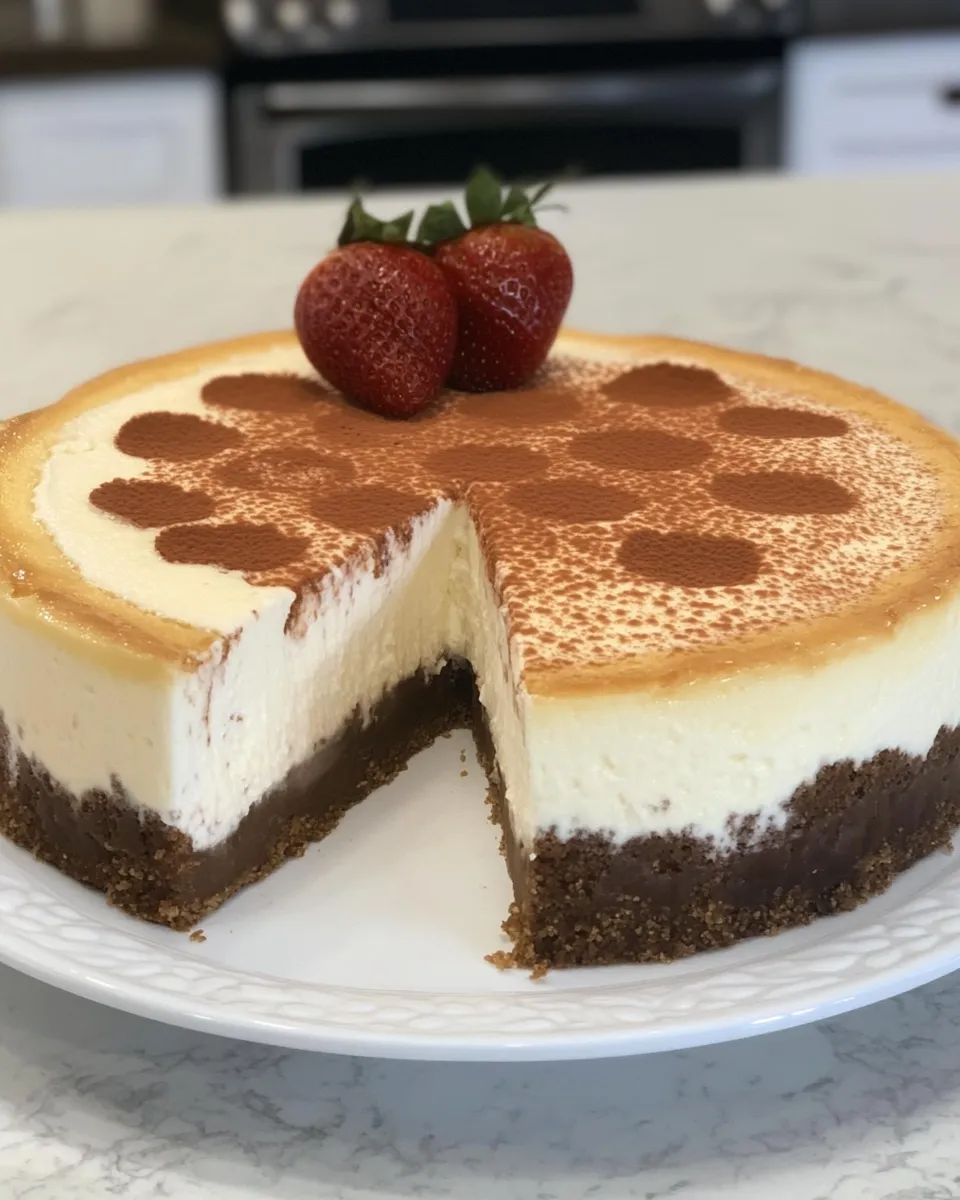
- Bake for 1 ½ hours. The top will take on a golden brown color and feel dry to the touch; the interior will still be creamy and will firm as it cools.
- Carefully lift the springform pan out of the water bath and set it on a cooling rack. Remove the foil if you used it. Let the cheesecake cool in the pan for 2 ½ hours at room temperature.
- After it has cooled, refrigerate the cheesecake for several hours or overnight to fully set and develop flavor.
- To slice, heat a sharp knife under very hot running water or dip it in very hot water before each cut. Shake off excess water but do not dry the blade; the hot blade will make cleaner cuts.
- For best presentation, make the first cut through the middle of one of the smaller rim dots, then make the second cut between two smaller dots so each slice shows polka-dot cross sections.
Why This Recipe Works
The chocolate cookie crust adds structure and a bitter-sweet counterpoint to the rich cheesecake. Prebaking the crust sets it so it won’t become soggy under the moist filling. The water bath evens out oven temperature and keeps the top from cracking while producing a silky interior. Reserving a third of the batter to mix with chocolate ensures the dots are the same texture as the rest of the cake while contrasting visually and in flavor.
Smart Substitutions
- Cookie crumbs: Use crushed graham crackers or oreo-style cookies if you prefer a different balance of sweetness.
- Butter: Replace with melted coconut oil for a slight coconut note and a dairy-free alternative to bind the crust (note: flavor will change).
- Chocolate: Swap semisweet for dark chocolate to lower sweetness, or milk chocolate for a sweeter, creamier dot.
Prep & Cook Tools
- 8-inch springform pan — essential for easy removal.
- Stand mixer with paddle attachment or a handheld mixer and a large bowl — for smooth, lump-free batter.
- Pastry bag with a plain #6 tip or a zipper bag — for piping the polka dots.
- Roasting pan or large ovenproof pan — to hold the water bath.
- Heavy-duty aluminum foil — to wrap a non-watertight pan.
- Cooling rack and a sharp chef’s knife — for resting and slicing the cheesecake cleanly.
Mistakes Even Pros Make
- Overbeating the batter — this incorporates too much air and can cause shrinkage or cracks. Mix eggs in one at a time and stop when just combined.
- Skipping the water bath — leads to dry tops and cracked cheesecakes. The bath keeps temperature even and the texture creamy.
- Piping the dots from too high — insert the tip only slightly into the batter at table height to control dot shape and size.
- Cutting too soon — the cheesecake needs time to firm in the fridge; slicing while still warm will cause crumbling and messy slices.
Seasonal Ingredient Swaps
In fall, stir a teaspoon of pumpkin spice into the main batter and use dark chocolate for the dots. For winter holidays, add orange zest to the crust and orange extract to the batter for a bright contrast. In summer, omit almond extract and fold in a tablespoon of lemon zest to the base batter for a brighter note (keep amounts modest to not upset the original flavor balance).
Testing Timeline
- Day before (or morning of): Buy ingredients and chill the cream cheese if needed.
- 2–3 hours before serving: Make crust, bake, prepare filling, and bake the cheesecake. Cool 2 ½ hours at room temperature.
- Overnight: Refrigerate for best texture and flavor development.
- 30 minutes before serving: Heat your knife and prepare to slice; bring plates and garnishes to the table.
Storing, Freezing & Reheating
Store leftover cheesecake covered in the refrigerator for up to 5 days. To freeze, wrap the fully chilled whole cheesecake (or individual slices) tightly in plastic wrap and then in foil; freeze up to 2 months. Thaw overnight in the refrigerator before serving. Do not microwave to defrost; if you need to soften a slice slightly, let it sit at room temperature for 20–30 minutes.
Reader Q&A
Q: Can I make this in a 9-inch pan? A: You can, but the filling will be shallower and bake faster—reduce bake time slightly and check for doneness earlier. The recipe and ingredient quantities are sized for an 8-inch pan.
Q: My center sank — what happened? A: That can result from overbeating, underbaking slightly, or opening the oven during baking. Let it cool slowly; minor sinking is normal and won’t affect taste.
Q: How do I know when it’s done? A: The edges should look set and the center will still wobble slightly like gelatin. The top should feel dry and lightly golden.
Before You Go
This Polka Dot Cheesecake is a showstopper without being fussy. The key points: prebake the crust, avoid overmixing, pipe the dots at table height, and bake in a water bath. Follow those, chill well, and you’ll slice neat rings of chocolate in every piece. If you make it, I’d love to hear how your dots turned out and what chocolate you chose.
Polka Dot Cheesecake
Ingredients
- 1 3/4 cups chocolate cookie crumbs
- 1/2 stick butter melted
- 3 tablespoons sugar
- cream cheese amount as needed per your cheesecake recipe (see directions)
- vanilla extract amount as needed per your cheesecake recipe
- almond extract amount as needed per your cheesecake recipe
- eggs amount as needed per your cheesecake recipe
- melted chocolate for mixing with a reserved portion of cheesecake batter to make dots
Instructions
- Preheat the oven to 350°F (175°C). Lightly grease an 8-inch springform pan and set aside.
- Make the crust: combine 1 3/4 cups chocolate cookie crumbs, 1/2 stick melted butter, and 3 tablespoons sugar until evenly moistened. Press the mixture firmly into the bottom of the prepared springform pan.
- Bake the crust for 10 minutes. Remove from the oven and let cool while you prepare the cheesecake batter. If your springform pan is not watertight, wrap the outside with heavy-duty aluminum foil.
- Prepare the cheesecake batter: place softened cream cheese in the bowl of a stand mixer fitted with the paddle. Beat on medium speed until smooth, scraping the bowl frequently.
- Add the vanilla and almond extracts and the sugar; beat until combined. Add the eggs one at a time, mixing just until each is incorporated. Do not overbeat.
- Remove about one-third of the finished cheesecake batter and transfer it to a small bowl; pour the remaining batter into the prepared crust and smooth the top.
- Stir the melted chocolate into the reserved batter until evenly combined. Transfer the chocolate batter to a pastry bag fitted with a plain 1/2-inch tip or a heavy zip-top bag with a small corner snipped.
- At table height, insert the tip just slightly into the center of the cheesecake top and squeeze to form a golf-ball–sized mound of chocolate batter (about 2 inches wide) in the center. Repeat to make six smaller balls around the rim, spacing them evenly; they should be smaller than the center dot and not touch each other.
- Place the springform pan into a larger roasting pan. Pour hot water into the outer pan to reach about 1 1/2 inches up the side of the springform pan to create a water bath.
- Bake the cheesecake until the edges are set and the top is golden and feels dry to the touch, about 1 hour and 30 minutes. The center may still have slight give; it will firm as it cools.
- Carefully lift the springform pan from the water bath and remove any foil. Place the pan on a wire rack and cool for about 2 1/2 hours at room temperature.
- Refrigerate the cheesecake for several hours or overnight until fully set.
- To slice, warm a sharp knife under very hot water or hold it under running hot water before each cut, shake off excess water (do not dry the blade), then cut the suggested first slices starting through the middle of one smaller dot and the next between two smaller dots.
Equipment
- 8-inch springform pan
- Mixing Bowl
- stand mixer with paddle attachment
- small bowl
- pastry bag (or heavy-duty zip-top bag)
- large roasting pan or baking pan for water bath
- Measuring cups and spoons
- Wire Rack
Notes
- Wrap the pan in foil if it is not watertight before placing in the water bath.
- Do not overbeat the batter to avoid adding too much air.
- Work at table height when piping the dots for better control.
- Use a pastry bag or a zip-top bag with a small snip for piping.
- Cool fully before refrigerating to prevent cracking.