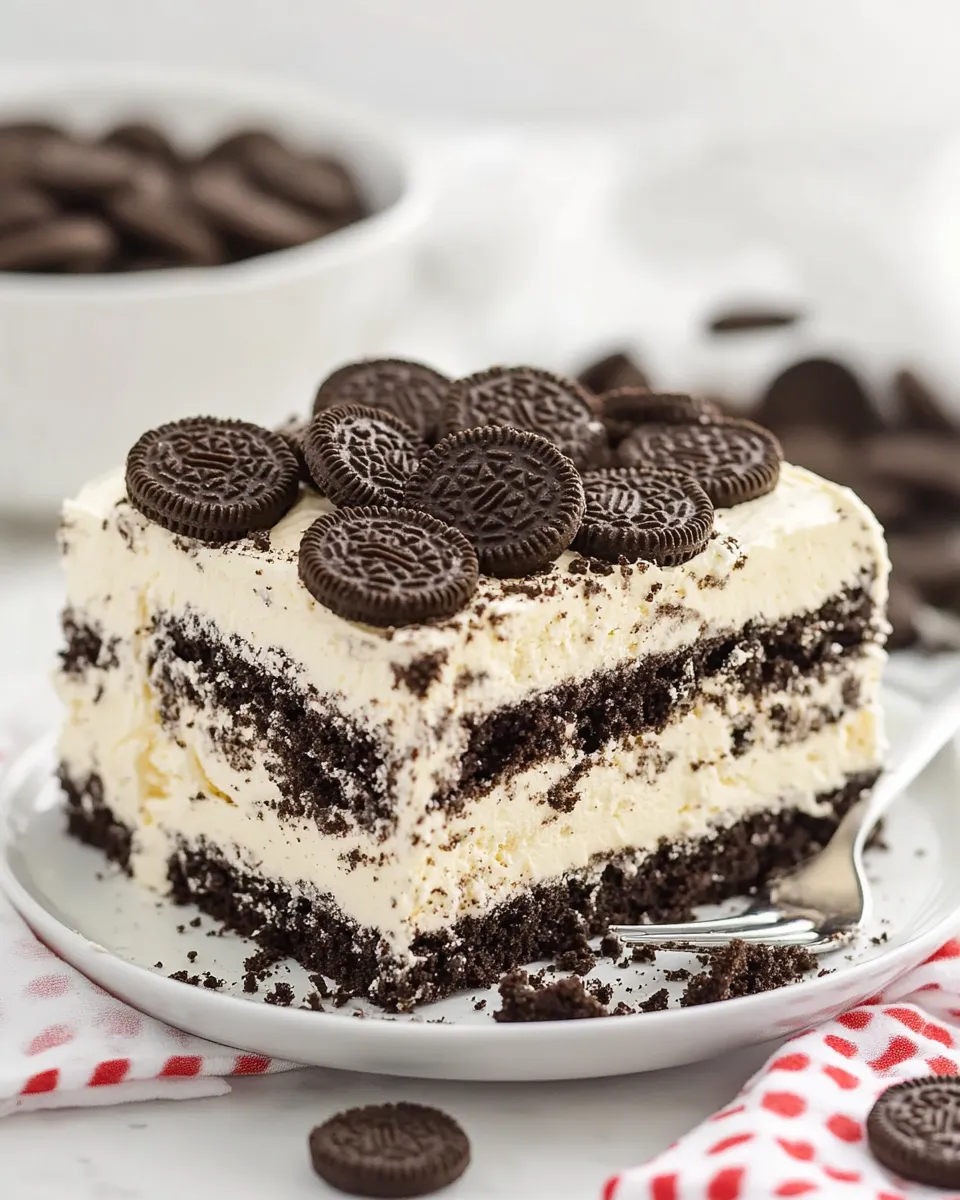
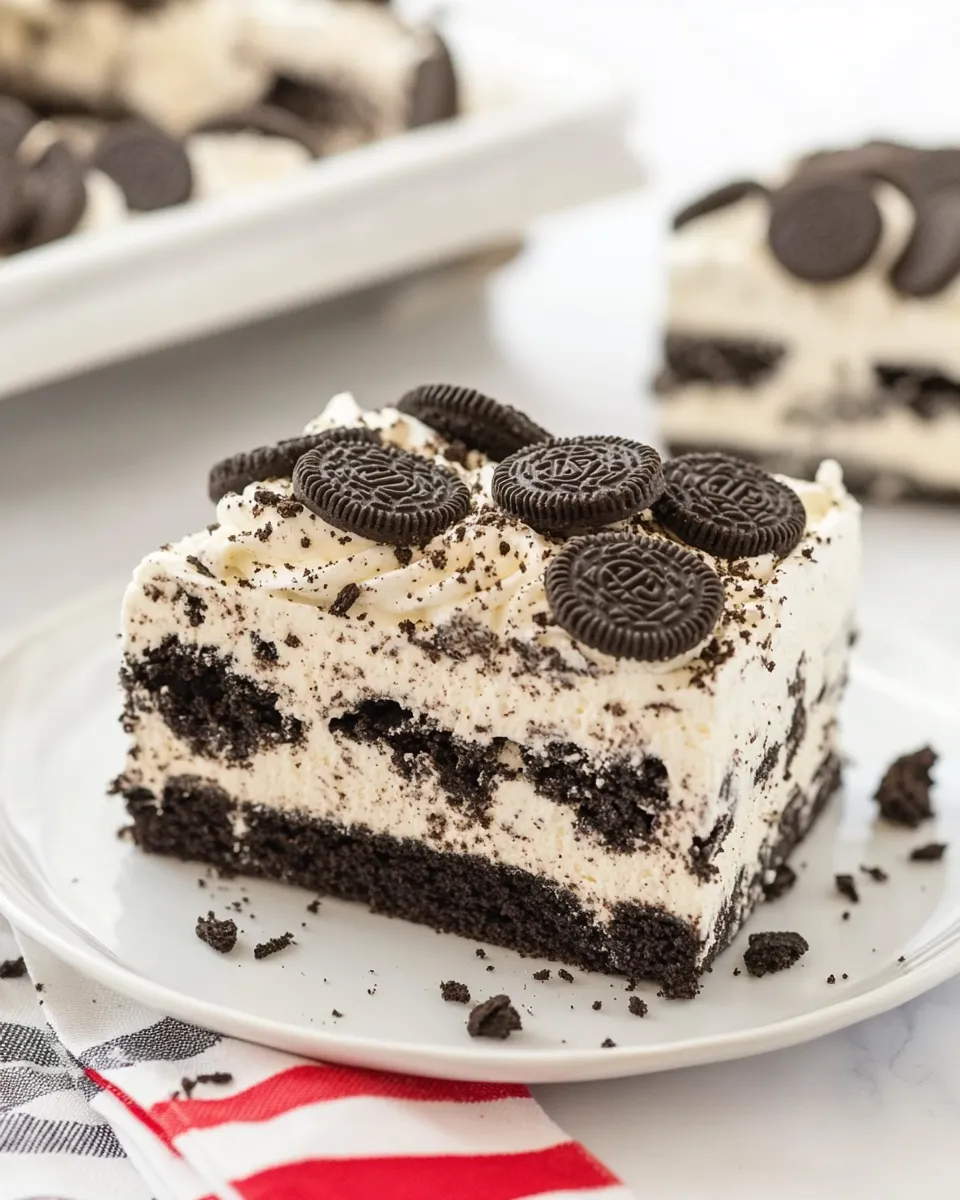
Oreo Icebox Cake
If you’re looking for a no-bake dessert that’s both delicious and incredibly easy to make, look no further than this delightful Oreo Icebox Cake. This dessert is the perfect combination of creamy whipped cream, luscious chocolate, and crunchy Oreo cookies that will slice easily and impress everyone at your gathering. With minimal ingredients and preparation time, you will find this cake to be a wonderful treat for all occasions.
Why This Recipe Is a Must-Try
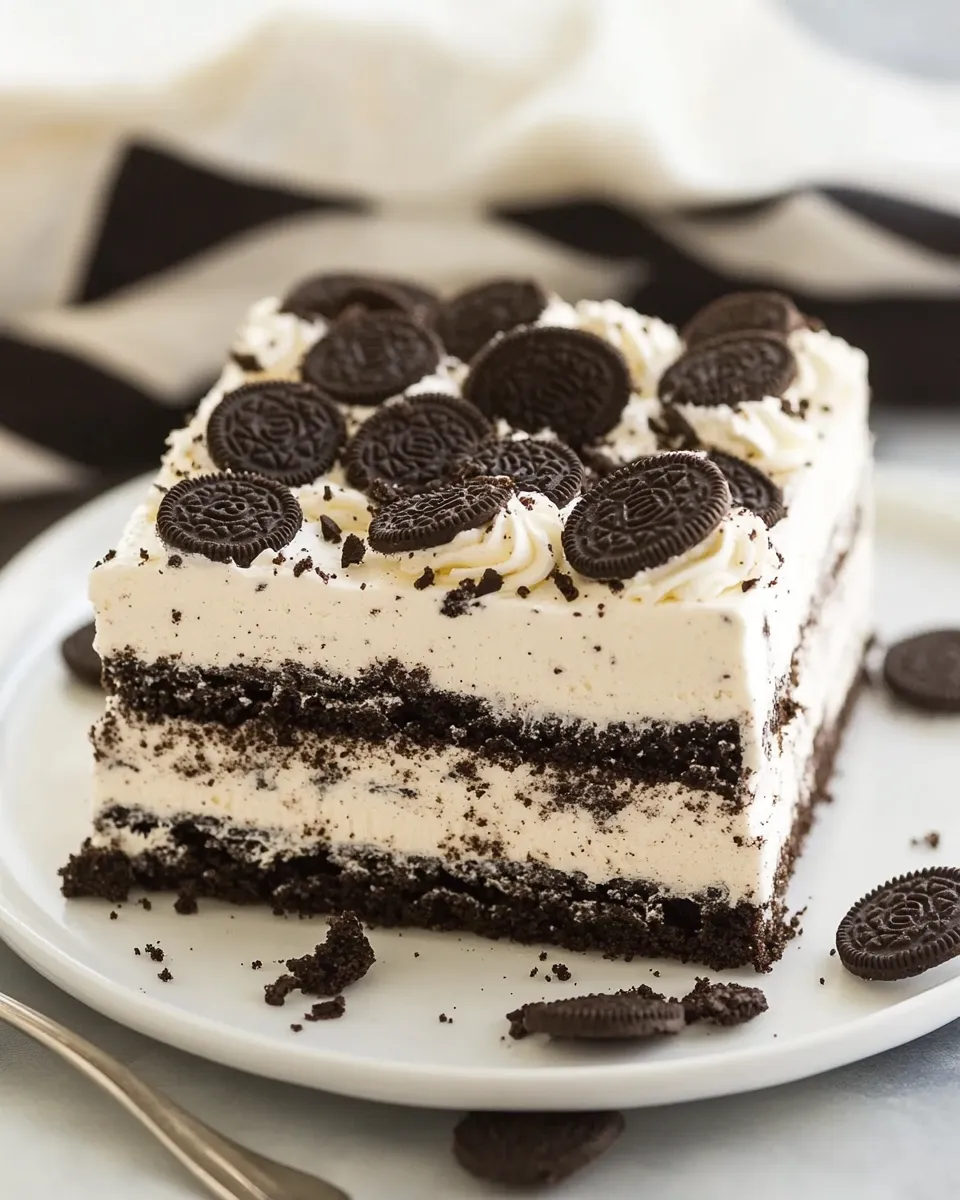
Oreo Icebox Cake is a nostalgic treat that takes you back to simpler times. It’s a dessert that brings together the rich taste of Oreos and the lightness of whipped cream. Plus, it requires no baking, making it an ideal choice for hot summer days or last-minute parties. Whether you’re preparing for a special occasion or simply satisfying a sweet tooth, this icebox cake is sure to delight.
Ingredients
To make this delicious Oreo Icebox Cake, you will need the following ingredients:
- 2 cups (475ml) heavy whipping cream
- 2 tablespoons powdered sugar
- 1 teaspoon pure vanilla extract
- 32 Oreo cookies whole
- 3 Oreo cookies crushed
Make sure to gather all your ingredients before starting for a seamless baking experience!
How To Make Oreo Icebox Cake
Step 1: Prepare the Whipped Cream
In a large mixing bowl, pour in 2 cups of heavy whipping cream. Using an electric mixer, beat the cream on medium-high speed until it starts to thicken. Once it thickens slightly, add in the 2 tablespoons of powdered sugar and 1 teaspoon of pure vanilla extract. Continue beating until stiff peaks form. This should take about 3-5 minutes. Be careful not to overmix, or you may end up with butter!
Step 2: Layer with Oreos
Now it’s time to start layering. Begin by taking a rectangular or square baking dish. Place a layer of whole Oreo cookies on the bottom of the dish. You can arrange them in a single layer, making sure they are snugly fit together.
Step 3: Add the Whipped Cream
Once the Oreo layer is set, spread a generous layer of the prepared whipped cream over the Oreos. Make sure every part of the Oreo layer is covered with the whipped cream.
Step 4: Repeat Layers
Continue building your cake by repeating the layers: another layer of whole Oreo cookies followed by another layer of whipped cream. Aim for a total of 3 layers of Oreos and 3 layers of whipped cream, finishing off with whipped cream on top. This means you will use a total of 32 Oreo cookies and all of the whipped cream.
Step 5: Crush the Final Touch
Take the 3 reserved Oreo cookies and crush them. Sprinkle the crushed Oreos on top of the final layer of whipped cream to add a beautiful finishing touch and a little extra crunch.
Step 6: Chill and Set
Cover the baking dish with plastic wrap or aluminum foil and place it in the refrigerator. Allow the cake to chill for at least 4 hours, but overnight is even better. This waiting time allows the flavors to meld beautifully and gives the cookies time to soften, making every bite melt in your mouth.
Expert Tips
- Make sure the heavy cream is cold for best results when whipping.
- If you want a sweeter cake, feel free to add an extra tablespoon of powdered sugar to the cream.
- For a stiffer whipped cream, consider adding a tablespoon of cornstarch to stabilize it.
- Do not skip chilling the cake; it’s essential for the flavors to blend and for the cake to hold its shape when sliced.
Variations and Customizations

- For a chocolate twist, you can mix in cocoa powder into the whipped cream.
- Add a layer of chocolate or caramel sauce in between layers for extra flavor.
- Consider using different types of cookies such as chocolate chip or mint Oreos for a fun variation.
- Top with fresh berries or sliced bananas for added freshness and color.
How to Store Leftovers
Leftovers can be stored in an airtight container in the refrigerator for up to 3 days. Keep in mind that as it sits, the Oreos will continue to soften, which some might actually prefer!
FAQ
Can I use low-fat cream instead of heavy whipping cream?
While you can use low-fat cream, the texture and richness of the icebox cake will be altered. Heavy whipping cream is recommended for that light and fluffy feel.
Is it necessary to use powdered sugar?
Powdered sugar is recommended because it dissolves easily into the whipped cream, providing sweetness without granules. Granulated sugar can also be used, but you may need to whip the cream a bit longer for it to fully incorporate.
Can this cake be made ahead of time?
Absolutely! In fact, it’s best when made ahead of time, as chilling it overnight allows the flavors to develop beautifully.
Can I freeze Oreo Icebox Cake?
Yes! You can freeze this cake for up to a month. Just make sure to wrap it tightly in plastic wrap and foil to prevent freezer burn. When ready to serve, let it thaw in the refrigerator overnight before slicing.
Conclusion
Oreo Icebox Cake is a delightful dessert that balances creamy, chocolatey, and crunchy textures all in one slice. It’s easy to partner with a variety of events, from casual gatherings to celebratory occasions. Each bite provides a rich experience that will keep your guests coming back for more. With its simple preparation and delectable flavors, this cake is a must-try for all dessert lovers. Enjoy your delicious creation, and remember, the best part is that it’s incredibly simple to make!
Print
Oreo Icebox Cake
- Total Time: 4 hours 10 minutes (including chilling time)
- Yield: 8 servings 1x
- Diet: Vegetarian
Description
A no-bake Oreo Icebox Cake featuring layers of chocolatey Oreos and fluffy whipped cream, perfect for any occasion!
Ingredients
- 2 cups (475ml) heavy whipping cream
- 2 tablespoons powdered sugar
- 1 teaspoon pure vanilla extract
- 32 Oreo cookies, whole
- 3 Oreo cookies, crushed
Instructions
- In a large mixing bowl, beat heavy whipping cream until it begins to thicken.
- Add powdered sugar and vanilla extract, then continue beating until stiff peaks form.
- In a baking dish, arrange a layer of whole Oreo cookies.
- Spread a generous layer of whipped cream over the cookies.
- Repeat the layering process, finishing with a final layer of whipped cream.
- Crush 3 Oreo cookies and sprinkle over the top.
- Cover and refrigerate for at least 4 hours, preferably overnight.
- Slice and serve chilled!
Notes
For best results, let the cake chill overnight to allow the cookies to soften and flavors to meld.
- Prep Time: 10 minutes
- Cook Time: 0 minutes
- Category: Dessert
- Method: No-Bake
- Cuisine: American
Nutrition
- Serving Size: 1 slice
- Calories: 350
- Sugar: 20g
- Sodium: 150mg
- Fat: 24g
- Saturated Fat: 14g
- Unsaturated Fat: 8g
- Trans Fat: 0g
- Carbohydrates: 30g
- Fiber: 1g
- Protein: 3g
- Cholesterol: 45mg
Keywords: Oreo icebox cake, no-bake dessert, easy summer cake, whipped cream cake