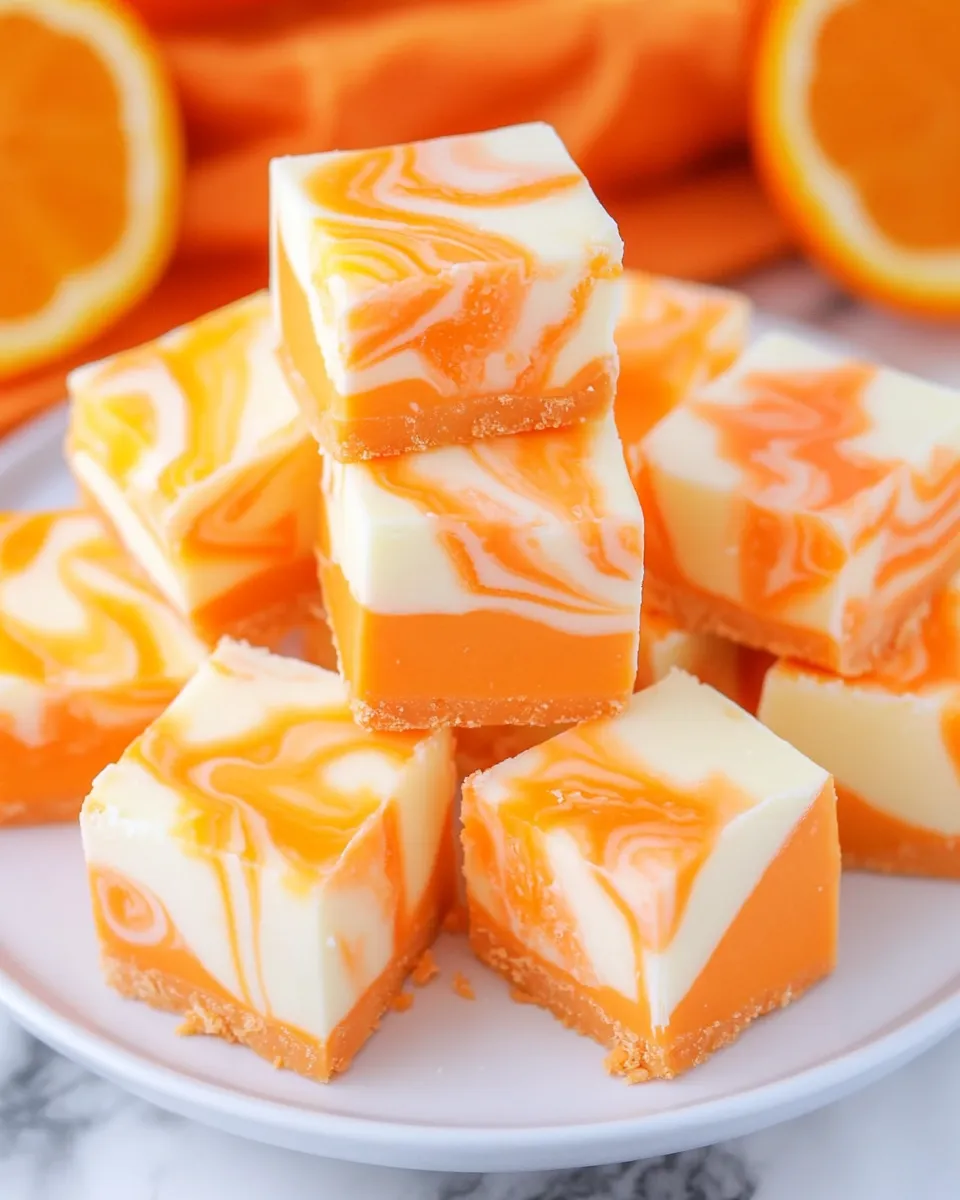
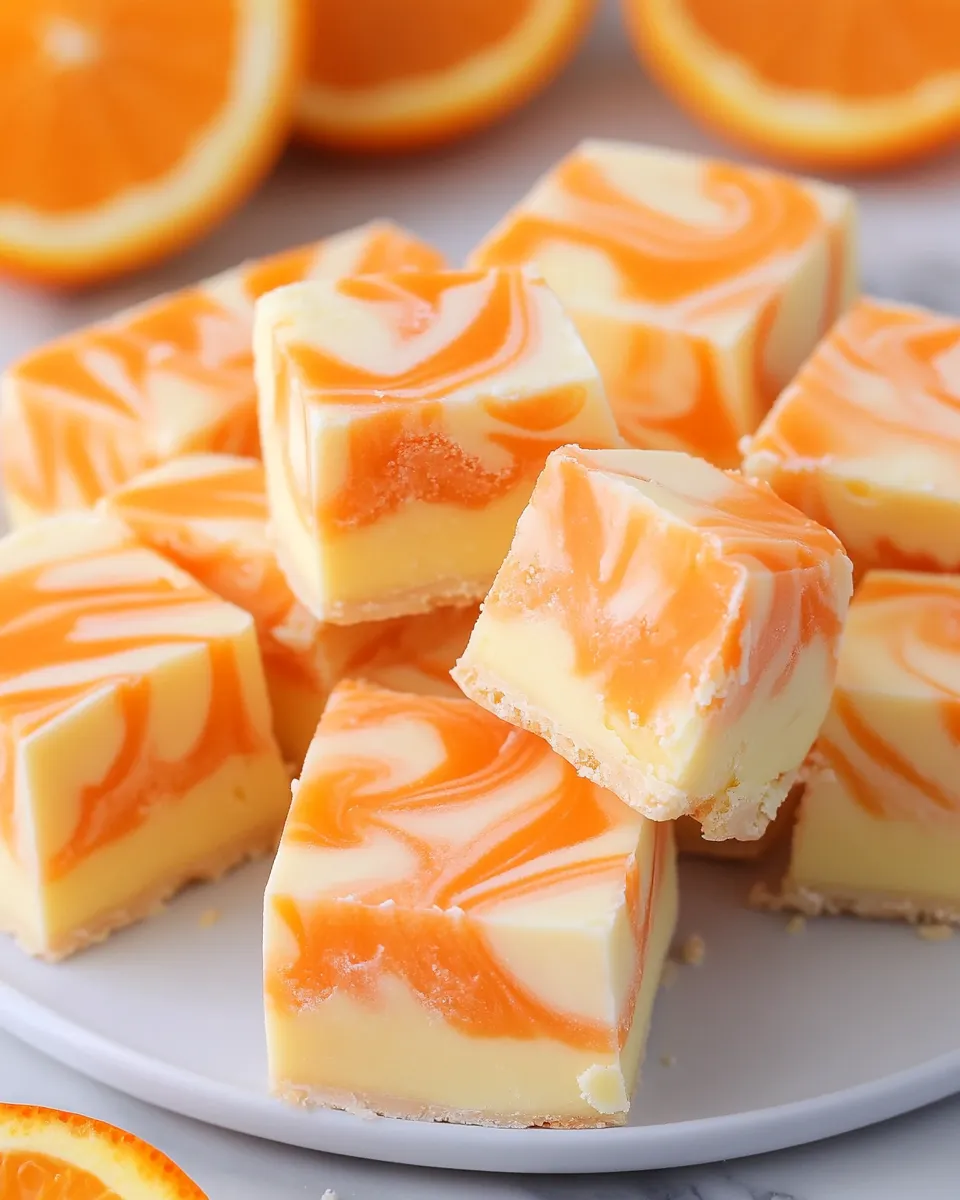
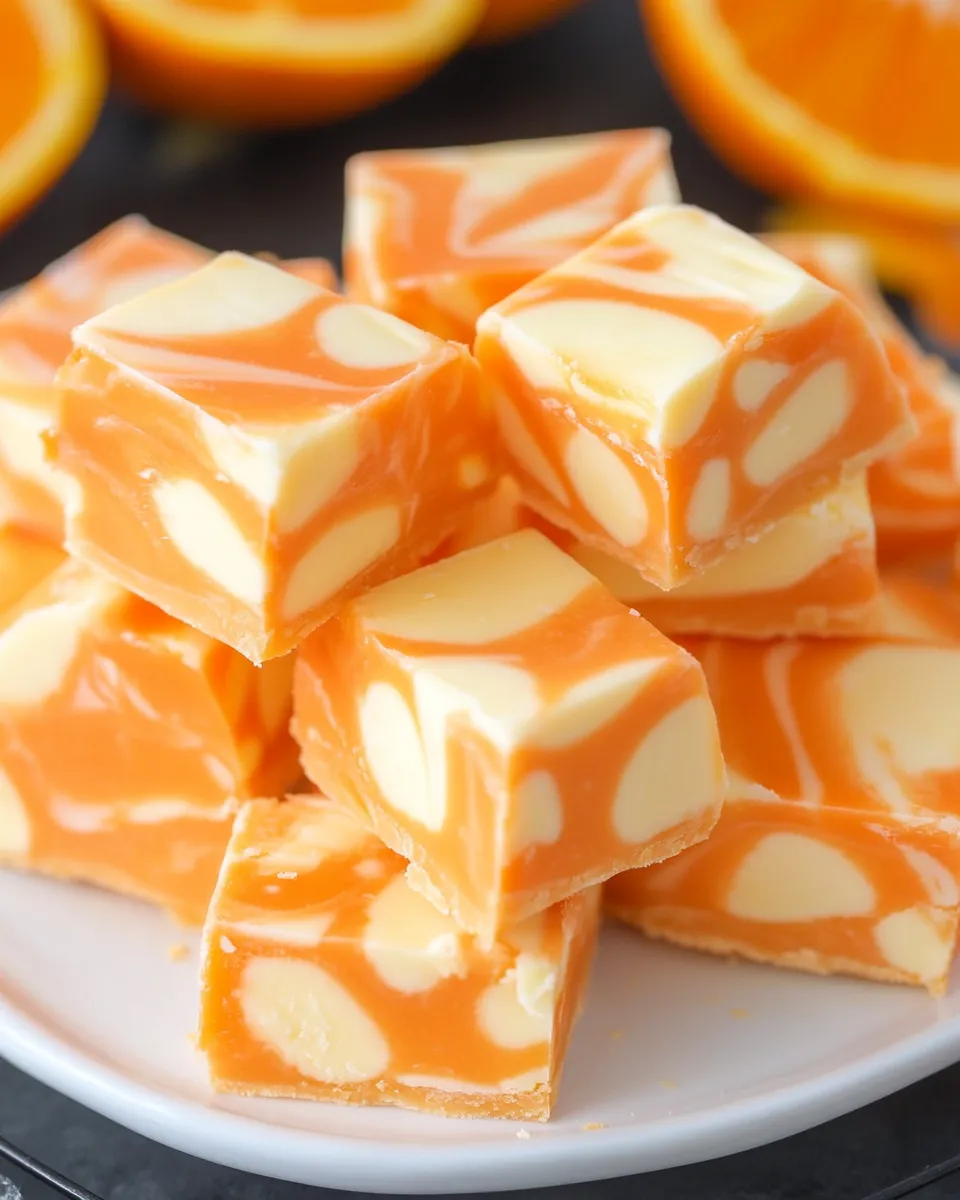
Orange Creamsicle Fudge
Imagine a warm sun-soaked day, the excitement of ice cream trucks wafting through the neighborhood, and the sweet, zesty flavor of orange creamsicles dancing on your taste buds. That nostalgic delight can be yours year-round with this Orange Creamsicle Fudge recipe. This delectable treat blends creamy white chocolate and vanilla frosting with a burst of orange flavor, making it the perfect sweet indulgence. Whether it’s for a gathering, a snack at home, or simply to satisfy your sweet tooth, this fudge is guaranteed to please.
This recipe is not only easy to prepare, but it also brings a delightful burst of color and flavor to your dessert table. You’ll be enjoying this cool and creamy treat in no time at all. Let’s dive into why this recipe is a must-try and how you can make it yourself!
Why This Recipe Is a Must-Try
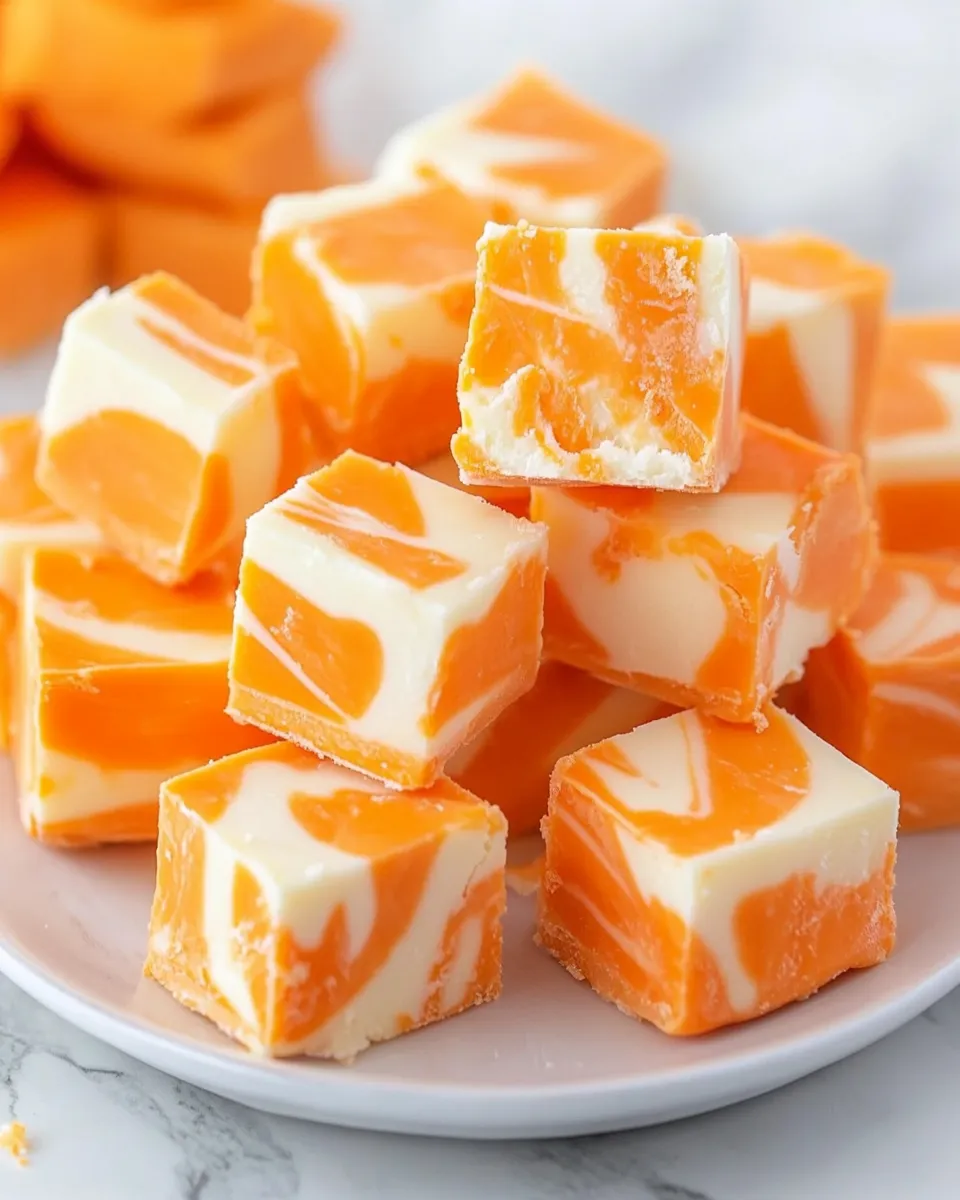
If you’re searching for an effortless and fun dessert that impresses with minimal effort, look no further. The combination of velvety white chocolate and luscious vanilla frosting creates a melt-in-your-mouth experience that pairs perfectly with the vibrant orange flavor. It’s rich, creamy, and just the right amount of sweet. Plus, making fudge means you can cut it into bite-sized pieces, making it perfect for sharing—or keeping all to yourself!
This treat also serves as a fantastic canvas for customizing flavors and colors, ensuring that it can be adapted to your tastes or special occasions. Let’s explore the simple ingredients you’ll need!
Ingredients
To make your Orange Creamsicle Fudge, gather the following ingredients:
- 12 ounces white chocolate chips
- 16 ounces store-bought vanilla frosting (1 tub)
- ½ teaspoon orange extract
- Orange food coloring (see note)
These ingredients combine to give you a velvety, creamy fudge that tastes just like the classic summer treat we all adore.
How To Make Orange Creamsicle Fudge
Making this fudge is as simple as it is rewarding. Follow these steps to create your own batch!
Step 1: Prepare Your Baking Dish
Start by lining an 8×8 inch baking dish with parchment paper. This will help you easily lift the fudge out once it has set. Make sure to leave some overhang, as it will serve as handles.
Step 2: Melt the White Chocolate Chips
In a microwave-safe bowl, add the white chocolate chips. Heat in the microwave in 30-second intervals, stirring in between, until completely melted and smooth. Be careful not to overheat; you want the chocolate to be melted but not burnt.
Step 3: Mix in the Frosting
Once the white chocolate is melted, add the entire tub of vanilla frosting to the bowl. Stir until the mixture is well combined and creamy. The combination of the white chocolate and frosting will give you a rich and smooth base for your fudge.
Step 4: Add Flavor and Color
Incorporate the ½ teaspoon of orange extract into the mixture for that refreshing creamsicle flavor. Next, add orange food coloring to achieve your desired shade of orange. Mix well until the color is uniform.
Step 5: Pour the Mixture into the Dish
Pour your creamy orange mixture into the prepared baking dish. Use a spatula to spread it evenly, smoothing out the top as much as possible.
Step 6: Chill to Set
Refrigerate the fudge for at least 2 to 3 hours, or until fully set. You can also place it in the freezer to speed up the setting process, but keep an eye on it to avoid freezing.
Step 7: Cut and Enjoy
Once it’s set, lift the fudge out of the dish using the overhanging parchment paper. Place it on a cutting board and cut it into squares or rectangles. Serve and enjoy the delightful taste of your homemade Orange Creamsicle Fudge!
Expert Tips
- Make sure your white chocolate chips are of good quality for the best flavor and texture.
- Allow the fudge to cool completely before cutting to ensure clean lines.
- If you want a more intense orange flavor, consider adding a bit more orange extract but be careful not to overpower the other flavors.
- For a decorative touch, you can sprinkle some orange zest on top of the fudge before it sets.
Variations and Customizations
This Orange Creamsicle Fudge can easily be tailored to suit your taste buds. Here are some fun variations and customizations you could try:
- Substitute half of the white chocolate chips with milk chocolate or dark chocolate for a different flavor profile.
- Add in mini chocolate chips or sprinkles for added texture and fun.
- Try using lemon or lime extract for a citrus twist instead of orange.
- For a nutty flavor, mix in some chopped nuts such as pistachios or almonds.
How to Store Leftovers
Storing leftover fudge is easy! Keep it in an airtight container at room temperature for up to a week. If you want to keep it fresh for a longer period, you can store it in the refrigerator. Just make sure to allow it to come to room temperature before serving, as it can solidify a bit more in the cold.
FAQ
Can I use a different type of chocolate for this recipe?
Yes! While white chocolate gives the classic creamsicle flavor, you can experiment with milk or dark chocolate chips for a different flavor twist. Just keep in mind that the final taste will vary.
Is there a vegan substitute for the frosting?
Absolutely! Look for a vegan alternative for vanilla frosting, which will work perfectly in this recipe. There are several brands available that offer delicious vegan frosting options.
Can I freeze this fudge?
Yes, you can freeze Orange Creamsicle Fudge! Just cut it into pieces, wrap it tightly in plastic wrap, and place it in a freezer-safe container. It can be stored for up to 3 months. Thaw in the refrigerator before enjoying.
How can I make this fudge more colorful?
To make your fudge even more colorful, you can layer different shades of orange or even mix in other colors based on the occasion. Just be sure to blend the food coloring in well to maintain a uniform consistency.
Conclusion
There you have it! A delightful, creamy, and bright dessert that captures the essence of summer right in your kitchen: Orange Creamsicle Fudge. With just a handful of ingredients and a little bit of time, you can whip up a batch that’s perfect for any occasion. Whether you’re sharing with friends, or keeping it all to yourself for a little sweet indulgence, this fudge is sure to delight. Embrace your inner baker and enjoy the sweet, citrusy goodness that this fudge has to offer!
Orange Creamsicle Fudge
Ingredients
Ingredients
- 12 ounces white chocolate chips
- 16 ounces store-bought vanilla frosting (1 tub)
- ½ teaspoon orange extract
- orange food coloring (to desired shade)
Instructions
- Step 1: Prepare Your Baking Dish - Start by lining an 8×8 inch baking dish with parchment paper. This will help you easily lift the fudge out once it has set. Make sure to leave some overhang, as it will serve as handles.
- Step 2: Melt the White Chocolate Chips - In a microwave-safe bowl, add the white chocolate chips. Heat in the microwave in 30-second intervals, stirring in between, until completely melted and smooth. Be careful not to overheat; you want the chocolate to be melted but not burnt.
- Step 3: Mix in the Frosting - Once the white chocolate is melted, add the entire tub of vanilla frosting to the bowl. Stir until the mixture is well combined and creamy.
- Step 4: Add Flavor and Color - Incorporate the ½ teaspoon of orange extract into the mixture for that refreshing creamsicle flavor. Next, add orange food coloring to achieve your desired shade of orange. Mix well until the color is uniform.
- Step 5: Pour the Mixture into the Dish - Pour your creamy orange mixture into the prepared baking dish. Use a spatula to spread it evenly, smoothing out the top as much as possible.
- Step 6: Chill to Set - Refrigerate the fudge for at least 2 to 3 hours, or until fully set. You can also place it in the freezer to speed up the setting process, but keep an eye on it to avoid freezing.
- Step 7: Cut and Enjoy - Once it’s set, lift the fudge out of the dish using the overhanging parchment paper. Place it on a cutting board and cut it into squares or rectangles. Serve and enjoy!
Equipment
- Microwave-safe Bowl
- 8x8-inch Baking Dish
- Spatula