Homemade Snickers Bars: Better Than Store-Bought Chocolate CandyHomemade Snickers
These homemade Snickers are the kind of candy that stops conversation. They’re chewy, nutty, and layered the way a classic Snickers should be — but without the mystery ingredients and preservatives. Once you make them, you’ll see why making candy at home is worth the extra tenacity: the texture, the fresh flavors, and the control over every component beat store-bought bars every time.
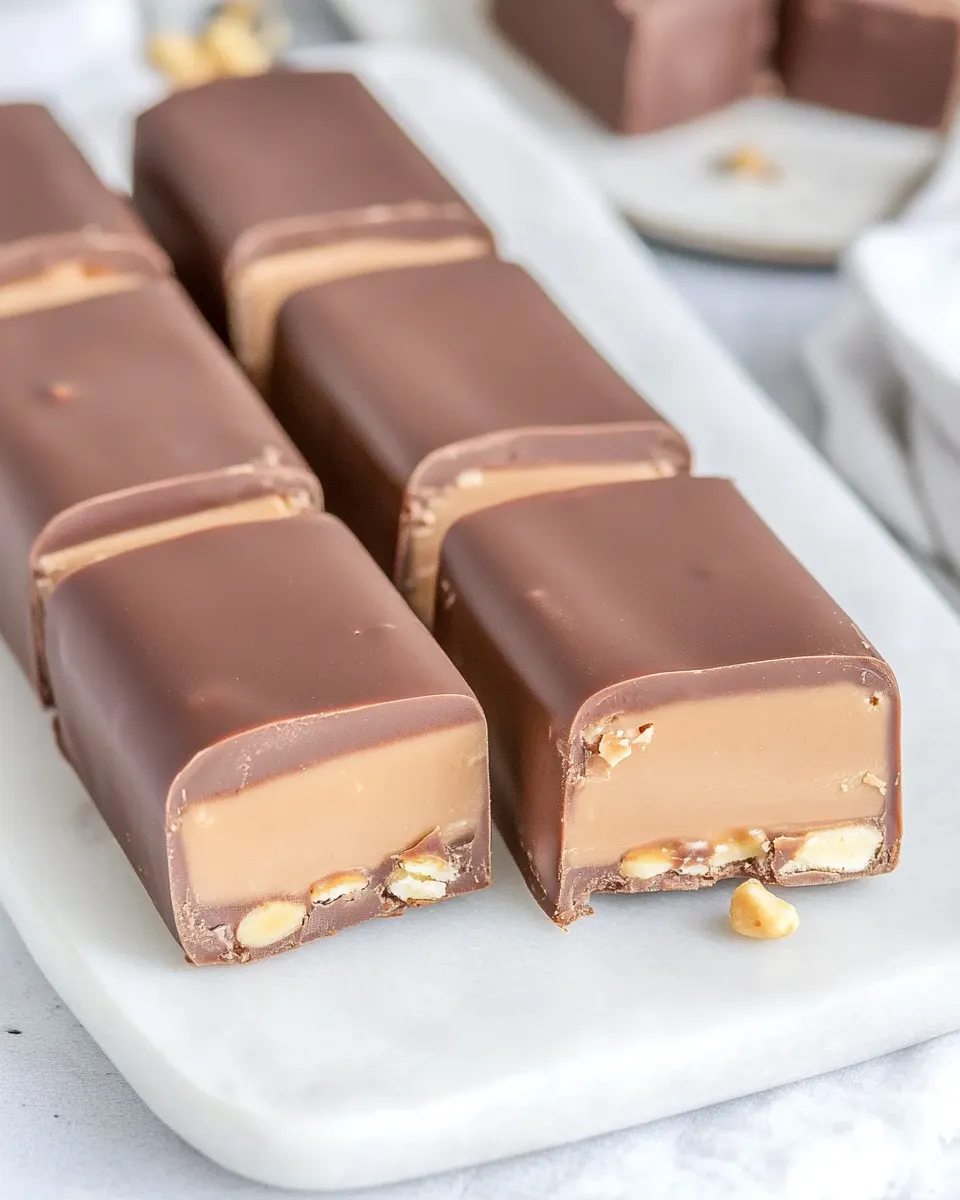
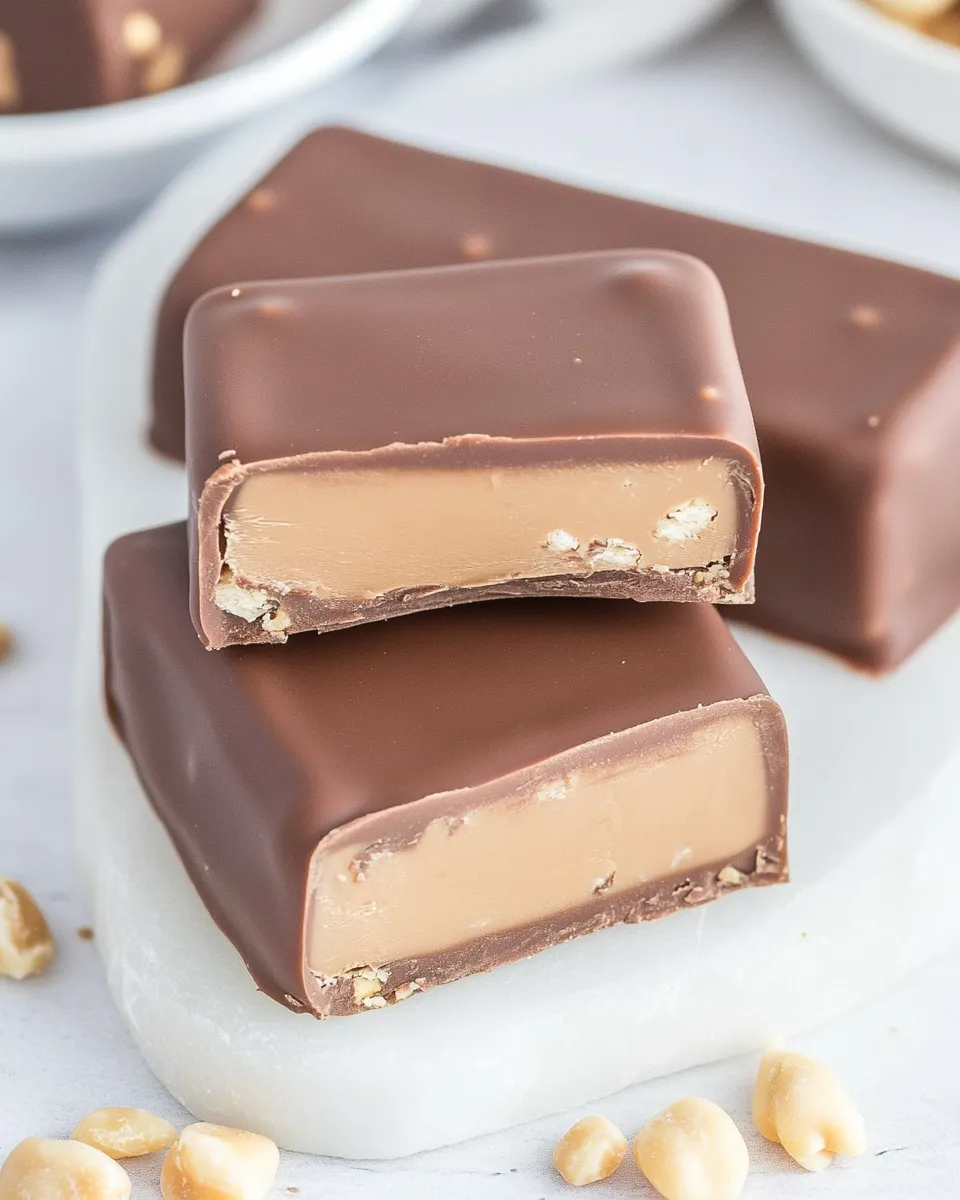
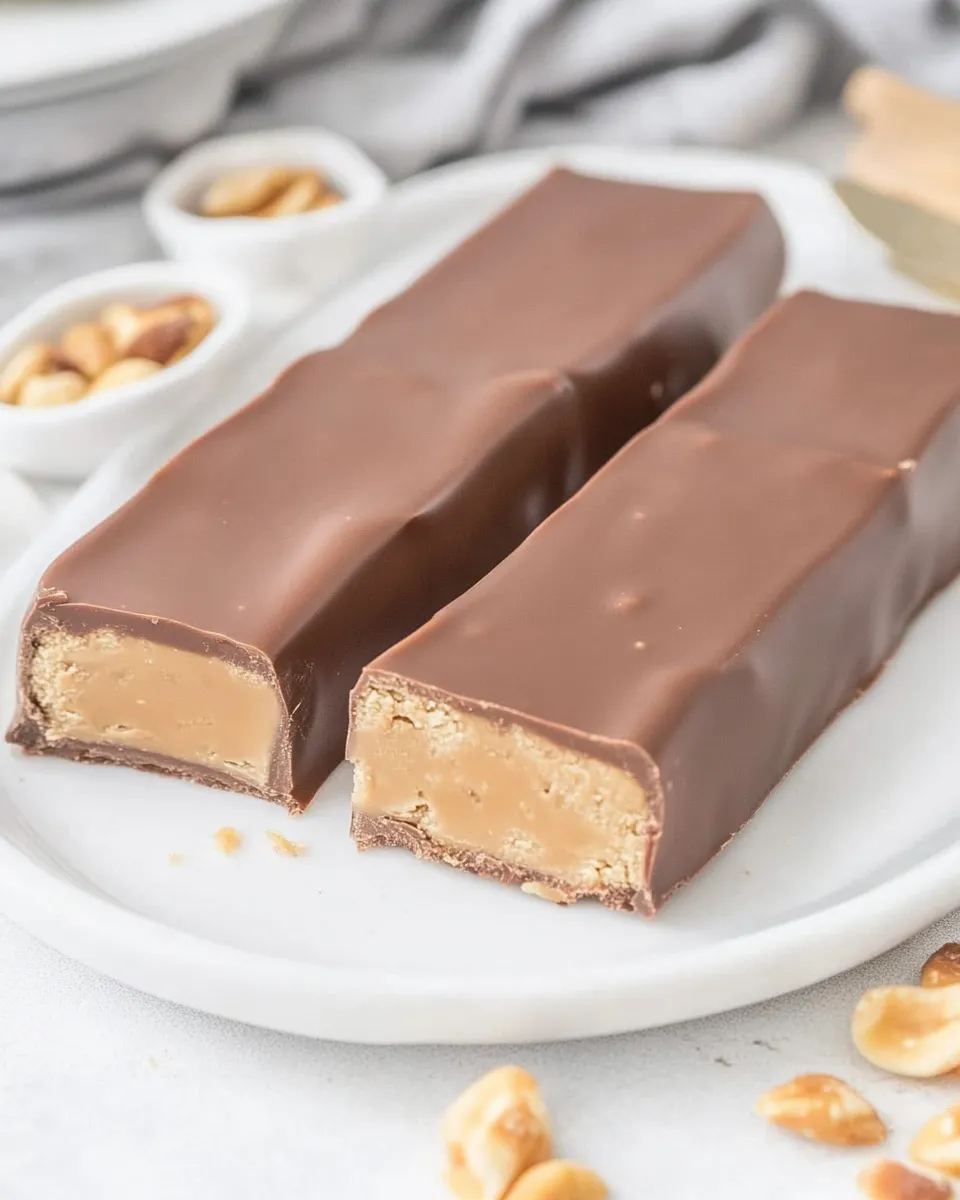
I keep this recipe straightforward and pantry-friendly. There’s a marshmallow layer for that pillowy nougat texture, a salty roasted-peanut layer for crunch, a buttery caramel layer for chew, and a shiny dark chocolate coating. The method uses melting wafers and a few microwaving bursts so you don’t need tempering gear, and the entire thing sets in the fridge.
If you’re comfortable with a little stirring and patient chilling, these come together reliably. I’ve rewritten the original directions into clear, practical steps and added small tips where they help — you’ll still follow the source ingredients and amounts exactly, but with fewer headaches.
What Goes Into Homemade Snickers Bars: Better Than Store-Bought Chocolate CandyHomemade Snickers
Ingredients
Method: Homemade Snickers Bars: Better Than Store-Bought Chocolate CandyHomemade Snickers
Follow these steps in order. Quantities and sequence follow the source directions exactly but are reorganized for clarity.
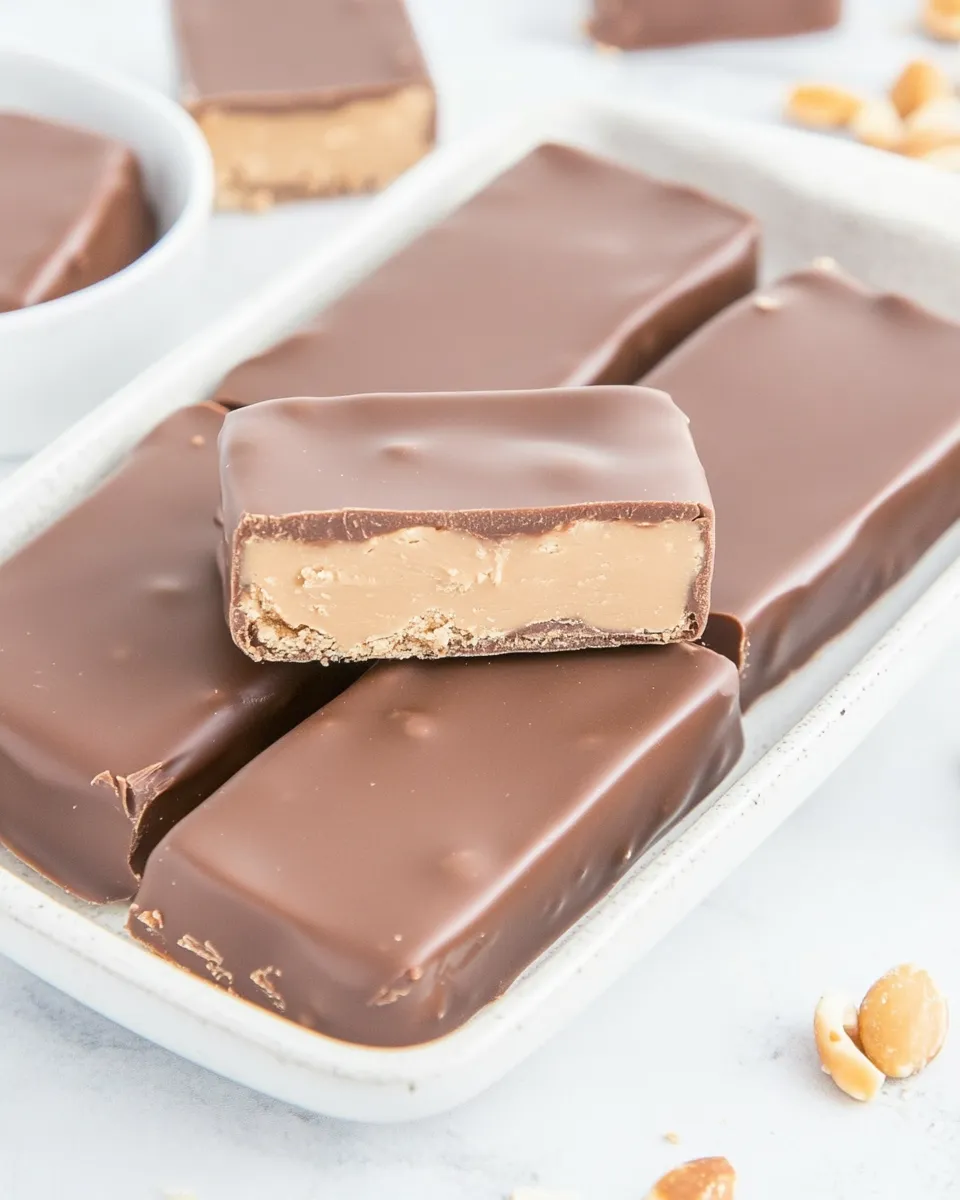
- Line an 8×8 inch baking pan with parchment paper, leaving an overhang on two sides for easy removal later. Set aside.
- Place a medium saucepan over low–medium heat. Add the 2 cups milk chocolate melting wafers, ½ cup peanut butter, and 1½ tablespoons (half of the 3 tablespoons) evaporated milk. Stir constantly with a rubber spatula until the mixture is fully combined, thick, and fluffy. Keep the heat gentle to avoid scorching.
- Reduce the heat to low. Add the 7 ounces marshmallow fluff (mallow cream) and fold it into the chocolate–peanut butter mixture, stirring constantly until fully incorporated and smooth. Remove from heat.
- Pour the nougat mixture into the prepared 8×8 pan and spread gently; it will self-level but you can nudge it with an offset spatula to an even thickness. Sprinkle the 1 cup lightly salted roasted peanuts evenly over the nougat layer and set the pan aside.
- In a microwave-safe bowl, combine the ½ (10.8 ounce) bag of soft chew caramels with the remaining 1½ tablespoons evaporated milk. Microwave on 50% power for 1 minute. Remove and stir — the mixture may be very stiff; use a sturdy utensil and scrape the sides if needed.
- Return the caramel to the microwave in 30-second bursts at 50% power, stirring between each burst, until the caramel is completely smooth and pourable. Take care — caramels retain heat and can be sticky.
- Pour the warm, smooth caramel over the peanut layer, distributing it evenly to fully cover the peanuts. Use an offset spatula to gently spread if necessary.
- Place the pan in the refrigerator and chill for at least 4 hours or overnight until fully set and firm.
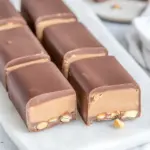
- When set, remove the pan from the fridge and lift the slab out using the parchment-paper overhang. Place it on a cutting board. Using a sharp knife, make one cut down the middle from top to bottom, then make five perpendicular cuts the other way to yield individual bars. Clean the knife between cuts if the caramel sticks.
- Line a large baking sheet with fresh parchment paper. Transfer each cut Snickers bar to the sheet and return the sheet to the refrigerator to keep the bars chilled while you melt the coating chocolate.
- In a medium microwave-safe bowl, combine 1½ cups dark chocolate melting wafers and 2 tablespoons vegetable oil. Microwave at 50% power for 1 minute, stir, then continue heating in 30-second bursts at 50% power, stirring between bursts, until the chocolate is silky and smooth.
- Using two forks or dipping tools, dip each chilled Snickers bar into the melted dark chocolate, coating completely. Gently tap or shake off excess chocolate, then place the coated bar back on the parchment-lined baking sheet. Work quickly so the bars remain chilled and the caramel doesn’t soften.
- Once all bars are coated, return the baking sheet to the refrigerator for about 30 minutes or until the chocolate is fully hardened.
- Serve immediately after the chocolate sets, or store as directed in the Storage Pro Tips section.
Top Reasons to Make Homemade Snickers Bars: Better Than Store-Bought Chocolate CandyHomemade Snickers
Freshness: You control every ingredient, so flavors are brighter and textures are cleaner.
Texture control: Make them as chewy, soft, or firm as you like by adjusting chilling time (follow recipe amounts exactly for best results).
Ingredient transparency: No preservatives, and you can choose higher-quality chocolate or peanut butter for a noticeable upgrade.
Allergy-Friendly Substitutes
Peanut allergy: Substitute the ½ cup peanut butter with sunflower seed butter and replace the roasted peanuts with roasted sunflower kernels. Note: flavor shifts but texture remains similar.
Dairy-free: Use dairy-free milk chocolate and dark chocolate melting wafers labeled vegan; swap evaporated milk for a concentrated coconut cream with similar volume if you need a dairy-free evaporated option (texture will vary).
Nut-free caramel: Many soft caramels are nut-free; always check labels. If unsure, make a small-batch caramel from sugar and coconut cream following a trusted dairy-free caramel method and match the same volume.
Tools & Equipment Needed
Errors to Dodge
Overheating chocolate or caramels: Use low power and short bursts in the microwave, stirring between each burst. High heat scorches chocolate and makes caramels grainy.
Not chilling long enough: Cutting or dipping before the caramel and nougat are fully set leads to squashed bars and messy coating. Allow at least 4 hours chilled, preferably overnight.
Skipping the parchment overhang: Without the overhang you’ll wrestle the slab out of the pan. Always line the pan with parchment that extends beyond two sides.
Using crunchy peanut butter: The recipe assumes creamy peanut butter. Crunchy will change texture and may prevent a smooth nougat.
Holiday-Friendly Variations
For Thanksgiving
Scatter a few toasted pecans with the peanuts or swap half the peanuts for pecans for a richer, toasty flavor that pairs well with darker chocolate.
For Halloween
Tint part of the dark chocolate with orange-colored candy melts and drizzle for a festive look. Alternatively, add a few pieces of crushed candy corn into the caramel layer sparingly.
For Christmas
Sprinkle flaky sea salt on the chocolate while it’s still wet and top with crushed peppermint or candied ginger for a seasonal kick.
Author’s Commentary
I make these when I want classic candy nostalgia with cleaner ingredients. The recipe’s strength is its simplicity: nothing fancy, just thoughtful technique. The marshmallow layer keeps the bars light so the peanuts and caramel shine. The vegetable oil thins the dark chocolate just enough to make dipping efficient without thinning flavor. Expect this to be a repeat recipe once you’ve mastered the timing.
Storage Pro Tips
Room temperature: Not recommended — caramel will soften and chocolate may bloom if your kitchen is warm.
Refrigerator: Store in an airtight container layered between sheets of parchment for up to 2 weeks. Bring to room temperature for 15–20 minutes before serving so the chocolate regains a pleasant bite.
Freezer: Wrap bars individually in parchment and place in a freezer-safe container for up to 2 months. Thaw overnight in the fridge to avoid condensation on the chocolate.
Helpful Q&A
Q: Can I skip the vegetable oil in the chocolate?
A: You can, but the oil helps the chocolate remain smooth and easy to dip. Without it, melting wafers may still work but can thicken quickly and be harder to use.
Q: My caramel seems grainy after microwaving. What went wrong?
A: Graininess usually comes from overheating or undissolved sugar in homemade caramel. With store-bought soft caramels, use lower power and stir thoroughly between bursts to fully melt and homogenize the mixture.
Q: Why does the nougat get sticky when I cut the bars?
A: If the slab isn’t fully chilled, the caramel and marshmallow layer remain tacky. Chill at least 4 hours or overnight before cutting for clean edges.
Bring It to the Table
These bars are great on a dessert platter, wrapped individually for gift boxes, or sliced into smaller bite-sized pieces for parties. For presentation, dust the tops lightly with flaky sea salt or drizzle leftover dark chocolate decoratively across the plates. Serve with coffee or a bold black tea to cut the sweetness.
Make a batch, keep a few in the fridge, and share the rest. Homemade Snickers aren’t just an upgrade — they’re customizable candy that proves the extra step is worth it.
Homemade Snickers Bars: Better Than Store-Bought Chocolate CandyHomemade Snickers
Ingredients
- 2 cups milk chocolate melting wafers
- 1/2 cup peanut butter
- 3 tablespoons evaporated milk divided
- 7 ounces marshmallow fluff
- 1 cup lightly salted roasted peanuts
- 1/2 bag (10.8 ounces) soft chew caramels about half of a 10.8 oz bag
- 1 1/2 cups dark chocolate melting wafers
- 2 tablespoons vegetable oil
Instructions
- Line an 8×8-inch pan with parchment paper and set aside.
- In a medium saucepan over low–medium heat, combine the 2 cups milk chocolate wafers, 1/2 cup peanut butter, and 1 1/2 tablespoons of the evaporated milk; stir constantly with a rubber spatula until the mixture is thick and fluffy and fully combined.
- Reduce the heat to low, fold in the 7 ounces marshmallow fluff, and stir until completely combined and smooth.
- Pour this chocolate-peanut butter-marshmallow layer into the prepared pan and smooth; it will self-level.
- Evenly sprinkle 1 cup lightly salted roasted peanuts over the chocolate layer and set the pan aside.
- In a microwave-safe bowl, combine the soft caramels (about half of a 10.8 oz bag) with the remaining 1 1/2 tablespoons evaporated milk.
- Microwave the caramels at 50% power for 1 minute, stir (it will be thick), then continue heating in 30-second bursts at 50% power, stirring between bursts, until the caramel is smooth and pourable.
- Pour the warm caramel evenly over the peanuts, spreading gently so it covers the nuts without disturbing the layer below.
- Refrigerate the pan until firm, about 4 hours or overnight.
- Lift the chilled slab from the pan using the parchment paper and place on a cutting surface; cut into 12 bars (make one lengthwise cut, then five crosswise cuts for 12 pieces) using a sharp knife.
- Place the cut bars on a parchment-lined baking sheet and return the sheet to the refrigerator to keep the bars chilled while you melt the dark chocolate.
- In a medium microwave-safe bowl, heat 1 1/2 cups dark chocolate wafers at 50% power for 1 minute, add 2 tablespoons vegetable oil, stir, then continue heating in 30-second bursts at 50% power, stirring until the chocolate is silky smooth.
- Using two forks or dipping tools, dip each chilled bar into the melted dark chocolate to coat completely, shake off excess, and return to the parchment-lined sheet.
- Refrigerate the coated bars until the chocolate is fully hardened, about 30 minutes, then serve.
Equipment
- 8x8-inch Baking Pan
- Parchment Paper
- Medium Saucepan
- rubber spatula
- Microwave-safe Bowl
- large baking sheet
- Sharp Knife
- Two forks or dipping tools
Notes
- The caramel won’t spread like the chocolate, so pour and distribute it evenly over the peanuts.
- Store these bars refrigerated to prevent melting.
- Rub a small amount of vegetable oil on your knife blade for cleaner cuts.
- Do not use the full bag of caramels—half is recommended to avoid overflow after cutting.
- Marshmallow fluff melts best when heated gently on the stove as directed.