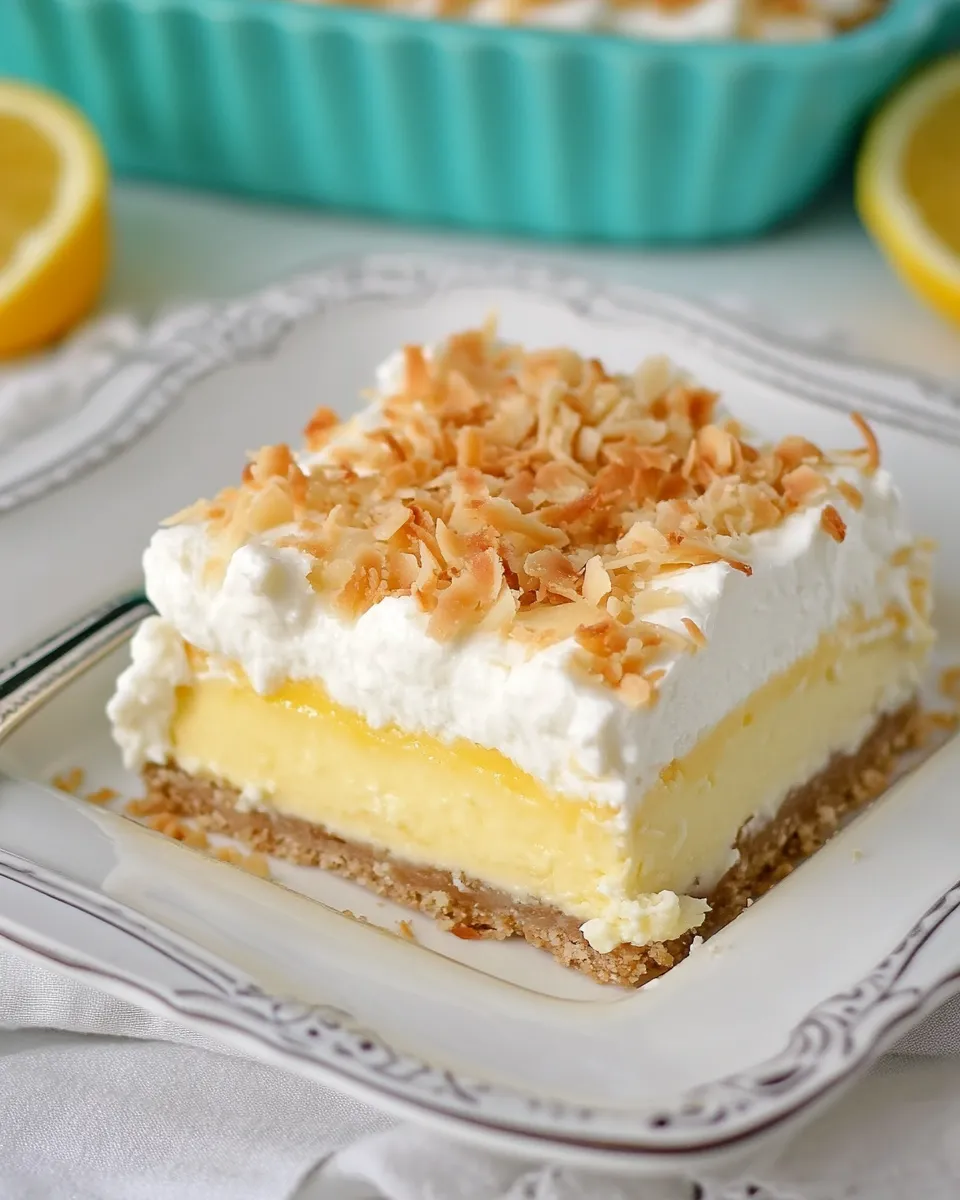
Coconut Cream Cheesecake Bars
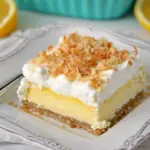
I love a dessert that looks like you spent hours but actually comes together in a relaxed afternoon. These Coconut Cream Cheesecake Bars hit that sweet spot: a buttery wafer crust, a tangy cream cheese layer, and a silky coconut pudding topper finished with fluffy whipped topping and toasted coconut. They’re bright, not too heavy, and hold up well for potlucks or a casual dessert after dinner.
The method is straightforward and forgiving, which is exactly what I want on a busy weeknight or when I’m baking for a crowd. You’ll do a little pressing, some mixing, and a short chill—no baking required. Little tips through the steps keep things smooth, especially when you’re layering the different textures.
If you like coconut, this will become a go-to. If you’re not sure, the toasted coconut adds a crunchy, nutty note that makes the bars feel special without overpowering the cream cheese base. Read through the notes and storage section to make this ahead and keep it looking fresh.
What to Buy
- Vanilla wafers (84 wafers) — for the crust and decorative edge; you’ll reserve 24 whole wafers and crush the rest for the base.
- Butter (6 Tbsp.), melted — binds the crushed wafers into a firm, buttery crust.
- PHILADELPHIA Cream Cheese (1 package, 8 oz.), softened — the tangy, creamy base for the cheesecake layer; bring to room temp so it mixes smoothly.
- Sugar (2 Tbsp.) — sweetens and balances the cream cheese.
- COOL WHIP Whipped Topping (1 tub, 8 oz.), thawed, divided — lightens the cream cheese and pudding layers; you’ll use it in parts.
- JELL-O Vanilla Flavor Instant Pudding (2 packages, 3.4 oz. each) — makes the coconut pudding layer silkier and quicker than cooked custard.
- Cold milk (2-1/2 cups) — hydrates the instant pudding mixes to the right consistency.
- BAKER’S ANGEL FLAKE Coconut, toasted (1-1/2 cups), divided — adds texture and coconut flavor; divide for the pudding layer and the topping.
Coconut Cream Cheesecake Bars in Steps
Prep and crust
- Reserve 24 whole vanilla wafers. Set them aside—these will be arranged around the edge of the pan later.
- Crush the remaining vanilla wafers until fine crumbs form. You can use a food processor, place them in a zip-top bag and crush with a rolling pin, or pulse in a blender.
- Transfer the crushed wafers to a bowl and stir in 6 tablespoons melted butter until the crumbs look evenly moistened and hold together when pressed.
- Press the crumb mixture firmly and evenly into the bottom of a 13×9-inch baking pan to form the crust. Use the bottom of a measuring cup or a flat glass to compact it.
- Chill the crust in the refrigerator while you make the filling so it firms up and holds the layers well.
Cream cheese layer
- In a mixing bowl, beat 1 (8 oz.) package PHILADELPHIA Cream Cheese (softened) with 2 tablespoons sugar until smooth and creamy. Use a handheld mixer or stand mixer on medium-low to avoid overbeating.
- Gently whisk in 1 cup of thawed COOL WHIP until the mixture is light and uniform. This keeps the cream cheese layer airy and spreadable.
- Carefully spread the cream cheese mixture over the chilled crust in an even layer. Take your time and use an offset spatula or the back of a spoon to avoid disturbing the crust.
- Stand the 24 reserved whole vanilla wafers upright around the perimeter of the pan, pressing them slightly into the cream cheese so they stay in place. This creates a decorative edge and a bit of crunch.
Pudding and finish layers
- In a medium bowl, pour 2-1/2 cups cold milk over both packages (2 x 3.4 oz.) of JELL-O Vanilla Instant Pudding mixes. Whisk vigorously for 2 minutes until the pudding starts to thicken and is smooth—instant pudding needs full whisking to set properly.
- Stir 1 cup of the remaining COOL WHIP into the pudding until incorporated, then fold in 3/4 cup of the toasted coconut. This will lighten the pudding and distribute the coconut flavor evenly.
- Spread the pudding-coconut mixture gently over the cream cheese layer, smoothing it to the edges.
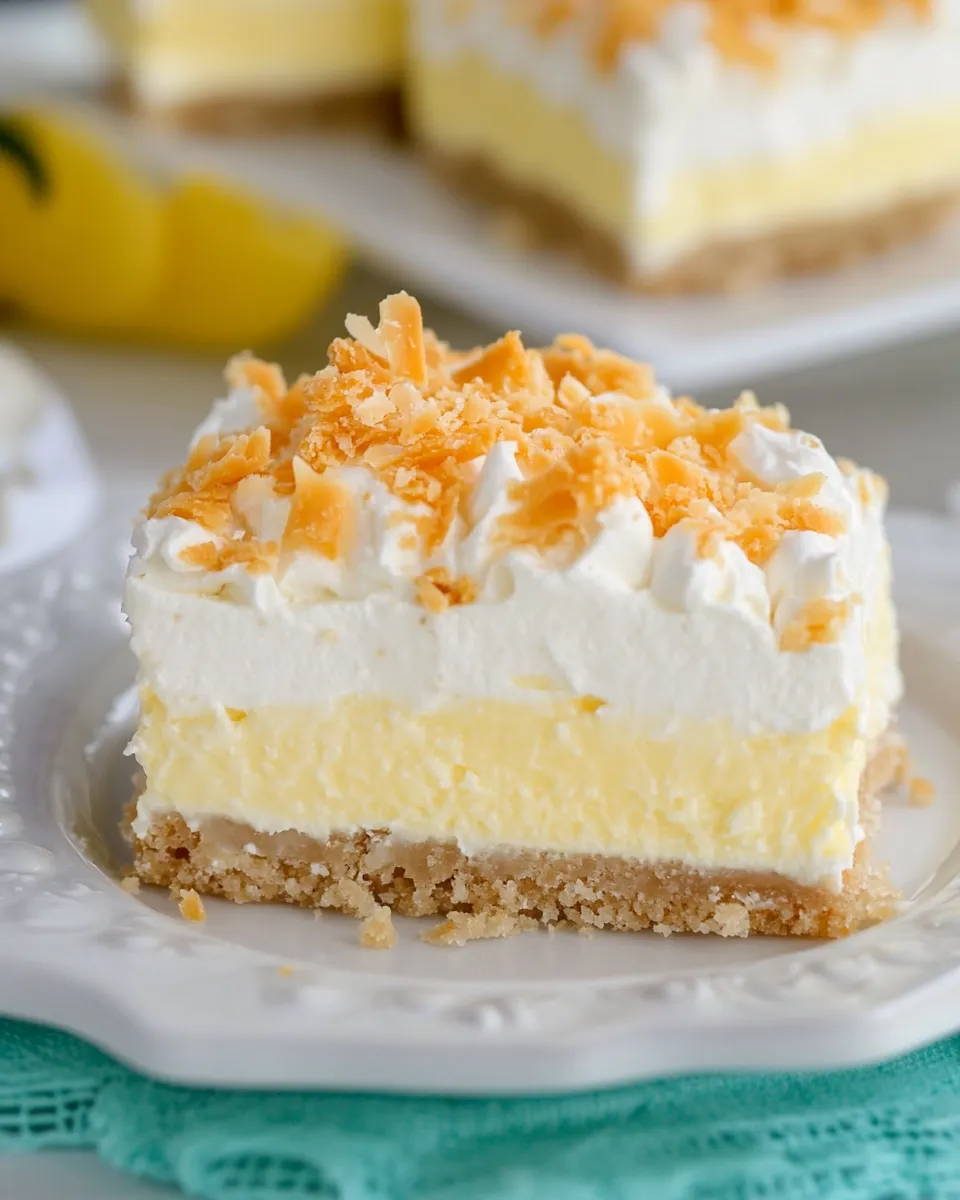
- Top with the remaining COOL WHIP (spread evenly) and sprinkle the remaining toasted coconut over the top for flavor and texture.
- Cover the pan and refrigerate for at least 5 hours to set fully. Chilling allows the layers to firm and the flavors to meld—overnight is even better for cleaner slices.
Why This Recipe is a Keeper
- Minimal hands-on time: mostly whisking and spreading, with no baking.
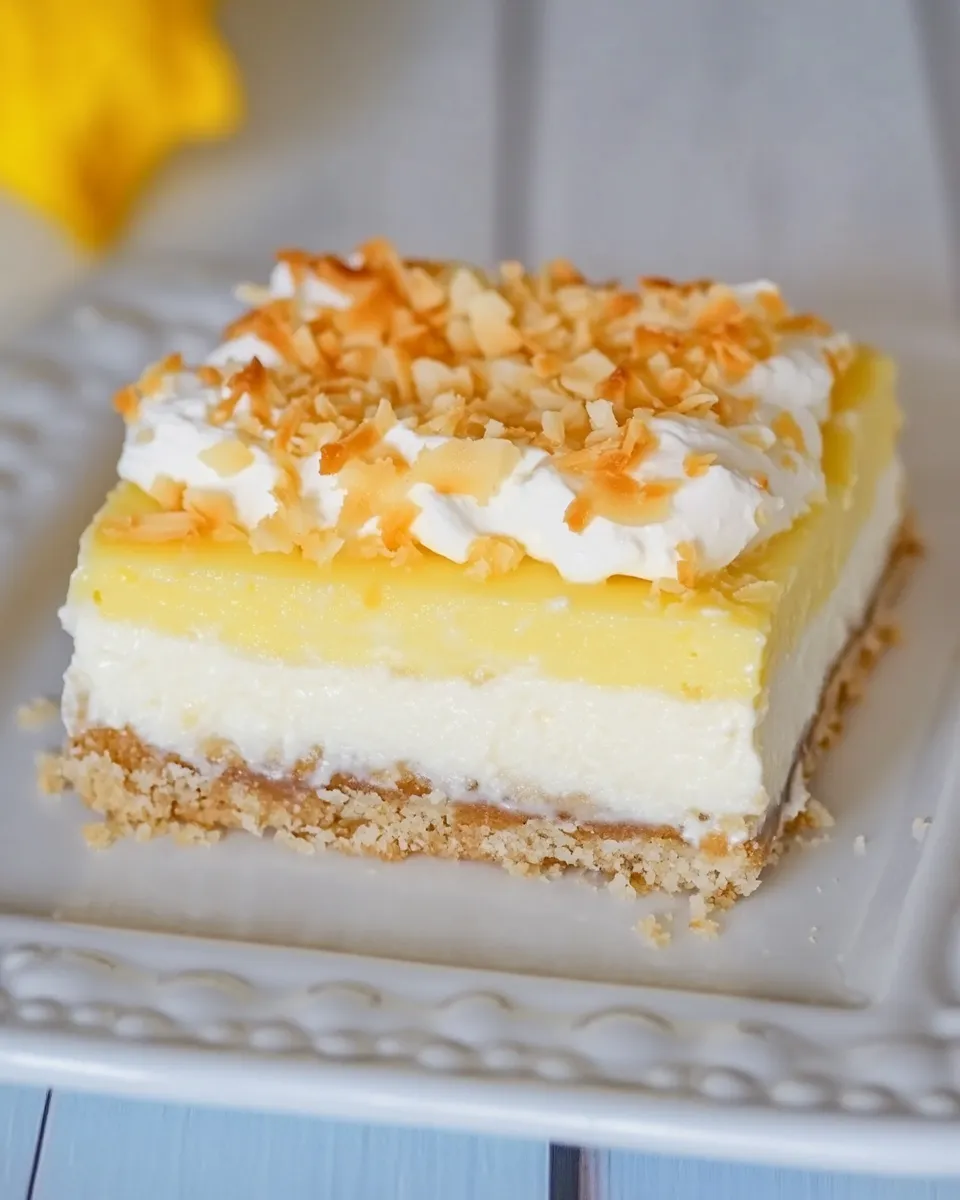
- Layered textures: crisp crust, creamy tangy cheesecake, pillowy pudding, and toasted coconut crunch.
- Scales well for gatherings: a 13×9 pan feeds a crowd and slices neatly after chilling.
- Make-ahead friendly: flavors improve after time in the fridge, so you can prepare it a day early.
No-Store Runs Needed
- If you already keep staples like vanilla wafers, instant pudding, and COOL WHIP in the pantry/freezer, this is very likely a one-stop bake.
- Butter, cream cheese, sugar, and milk are common fridge staples—double-check quantities before starting.
- Toasted coconut can be omitted in a pinch, but it does change the character; keep a bag of unsweetened flaked coconut in the pantry for flexibility.
Kitchen Gear Checklist
- 13×9-inch baking pan
- Mixing bowls (medium and large)
- Hand mixer or stand mixer
- Whisk
- Measuring cups and spoons
- Food processor or rolling pin and zip-top bag for crushing wafers
- Offset spatula or flat-bottomed measuring cup for pressing crust and spreading layers
Watch Outs & How to Fix
- Crust too loose: If your crust feels crumbly after pressing, press it more firmly and chill longer before adding the cream cheese layer so it binds with the butter.
- Lumpy cream cheese: Make sure the cream cheese is fully softened to room temperature. Beat until smooth before adding COOL WHIP.
- Pudding not setting: Whisk the instant pudding with the full 2-1/2 cups cold milk for the full 2 minutes. If it still seems thin, refrigerate longer; instant pudding firms as it chills.
- Layers blend together: Chill the crust first and work gently when spreading each layer to keep clean divisions.
Variations by Season
- Summer: Add a scatter of fresh sliced strawberries or mango on top before serving for bright fruit contrast.
- Fall: Fold a teaspoon of cinnamon or a pinch of nutmeg into the cream cheese layer for warm spice notes.
- Holiday: Use toasted sweetened coconut and add a few chocolate shavings on top for a festive look.
- Spring: Mix a tablespoon of lime zest into the pudding layer for a light, citrusy lift.
Notes on Ingredients
- Vanilla wafers: The recipe specifies 84 wafers divided—24 are reserved whole for the edge, and the remainder are crushed for the crust.
- Butter (6 Tbsp.): Melted butter binds the crushed wafers. Measure after melting for accuracy.
- Cream cheese: Use the named brand (PHILADELPHIA) or any full-fat brick-style cream cheese; avoid low-fat varieties for best texture.
- COOL WHIP (8 oz. tub), thawed: The tub is divided across layers—1 cup goes into the cream cheese, 1 cup into the pudding, and the rest tops the bars.
- Instant pudding: Two 3.4 oz. packages of vanilla are used with 2-1/2 cups cold milk. Follow the whisking time to ensure proper set.
- Toasted flaked coconut (1-1/2 cups): Divide as directed (3/4 cup into the pudding, remainder on top). Toasting deepens the flavor—do it in a dry skillet over medium heat until golden, stirring constantly.
Keep It Fresh: Storage Guide
- Refrigerator: Store covered for up to 3–4 days. The crust softens a bit over time but the bars remain delicious.
- Freezing: You can freeze the bars (cut into squares) for up to 1 month. Wrap individual pieces tightly in plastic wrap and place in a freezer container. Thaw in the refrigerator before serving.
- Transport: Keep chilled in a cooler with ice packs when bringing to potlucks. Slice after the final chill and keep the slices on a chilled tray if possible.
Handy Q&A
- Q: Can I make this without COOL WHIP? A: The recipe relies on COOL WHIP for lightness and stability; using whipped cream instead may work but will be softer and less stable over time.
- Q: Can I use full-size or different wafers? A: Vanilla wafers are specified for flavor and texture. Chocolate wafers change the taste profile but can be used if you’re aiming for a different dessert.
- Q: Do I have to toast the coconut? A: Toasting isn’t strictly required but it adds nuttiness and crunch. Untoasted coconut will be softer and less flavorful.
- Q: How do I get clean slices? A: Chill thoroughly (5 hours or overnight), and use a sharp knife warmed under hot water and wiped dry between slices for neat pieces.
Serve & Enjoy
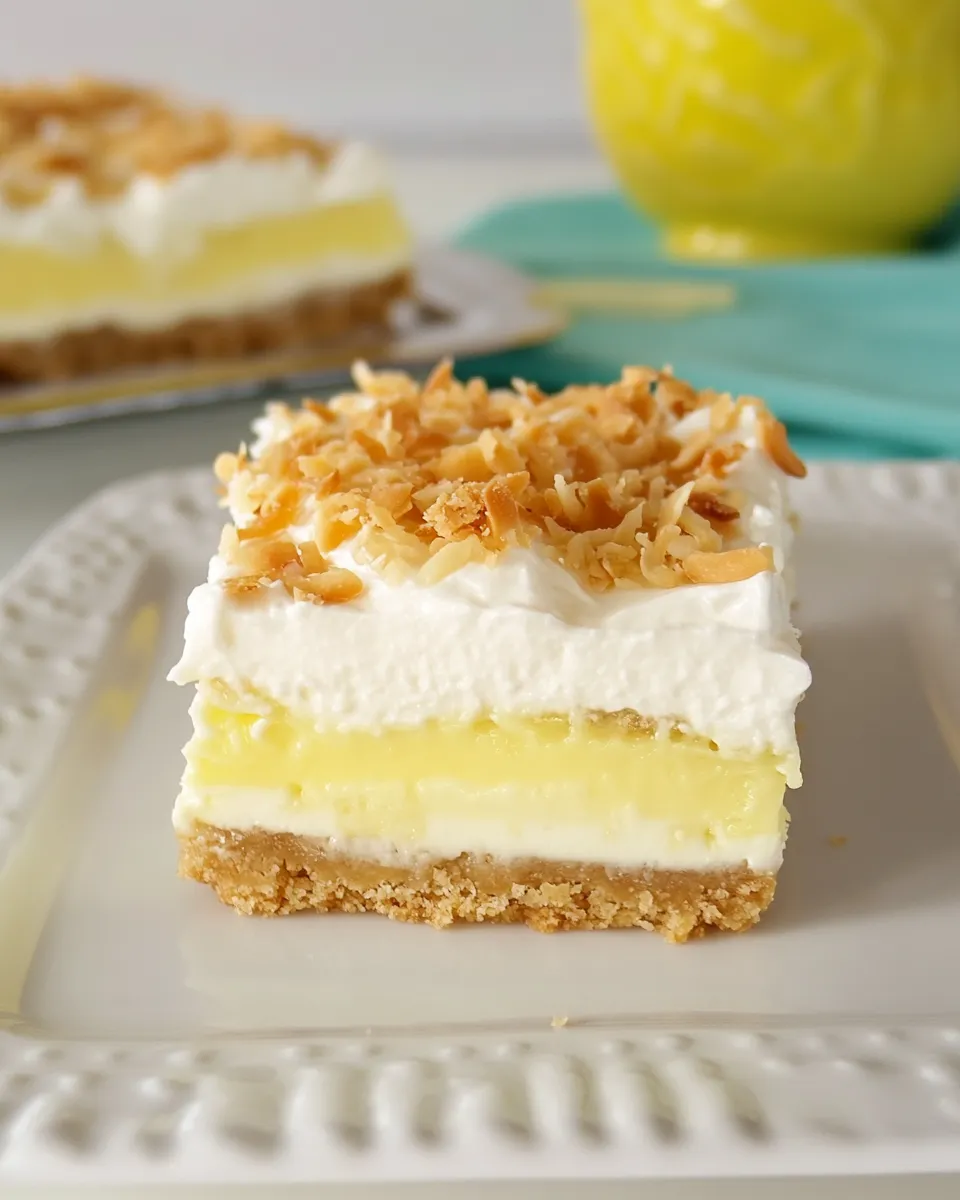
- Cut the chilled bars into squares and serve chilled. Garnish with a sprinkle of extra toasted coconut or a few toasted coconut flakes on each piece for presentation.
- Pair with coffee or a bright, fruity tea to balance the richness. These bars are also lovely alongside fresh berries for a lighter plate.
- Leftovers slice nicely for lunchbox treats or a quick after-school snack. They’re one of those make-ahead desserts that keep everyone happy without fuss.
Coconut Cream Cheesecake Bars
Ingredients
- 84 vanilla wafers divided
- 6 Tbsp butter melted
- 1 pkg PHILADELPHIA Cream Cheese 8 oz, softened
- 2 Tbsp sugar
- 1 tub COOL WHIP Whipped Topping 8 oz, thawed, divided
- 2 pkg JELL-O Vanilla Flavor Instant Pudding 3.4 oz each
- 2.5 cups milk cold
- 1.5 cups BAKER'S ANGEL FLAKE Coconut toasted, divided
Instructions
- Reserve 24 vanilla wafers whole and set aside.
- Place the remaining vanilla wafers in a large zipper bag or food processor and crush into fine crumbs.
- Mix the crushed wafers with 6 tablespoons melted butter until evenly combined, then press the mixture firmly into the bottom of a 13x9-inch pan to form the crust; refrigerate while preparing the filling.
- In a bowl, beat the 8 oz softened cream cheese with 2 tablespoons sugar using an electric mixer until smooth and blended.
- Fold 1 cup of the thawed COOL WHIP into the cream cheese mixture until smooth, then spread this layer evenly over the chilled crust.
- Stand the 24 reserved whole wafers around the edges of the pan, pressing gently into the cream cheese layer.
- In a medium bowl, whisk together the two 3.4 oz pudding mixes and 2 1/2 cups cold milk for 2 minutes until thickened.
- Stir 1 cup of the remaining COOL WHIP and 3/4 cup of the toasted coconut into the pudding until combined, then spread this coconut pudding layer evenly over the cream cheese layer.
- Top with the remaining COOL WHIP and sprinkle the remaining toasted coconut evenly over the top.
- Refrigerate the assembled bars for at least 5 hours or until set before slicing and serving.
Equipment
- 13x9-inch baking pan
- Mixing bowls
- electric mixer or hand mixer
- Whisk
- Measuring cups and spoons
- Spatula
Notes
- Use chilled milk for the best pudding texture.
- Toast coconut if not already toasted for extra flavor.
- Press crust firmly to prevent crumbling when slicing.
- Let bars chill fully before cutting.