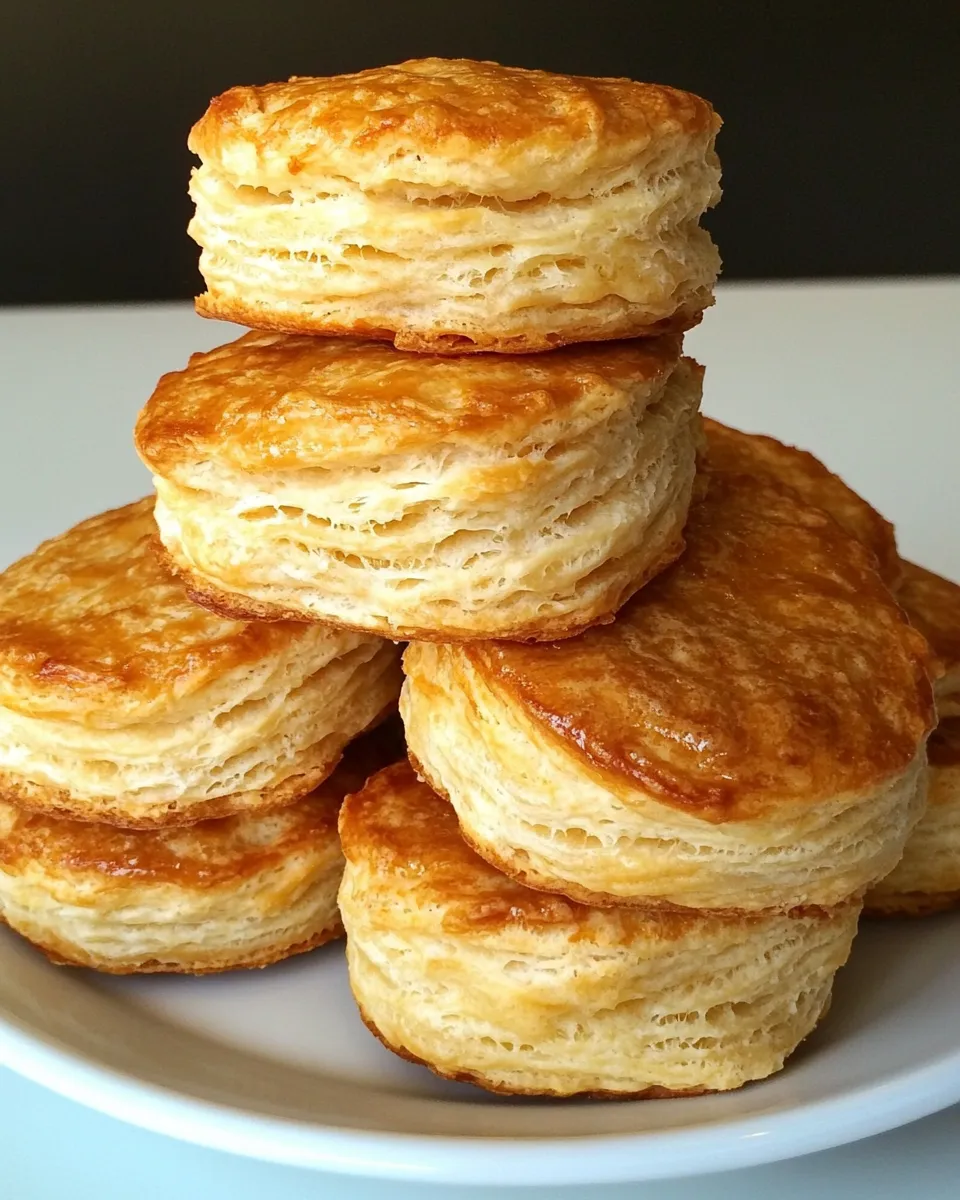
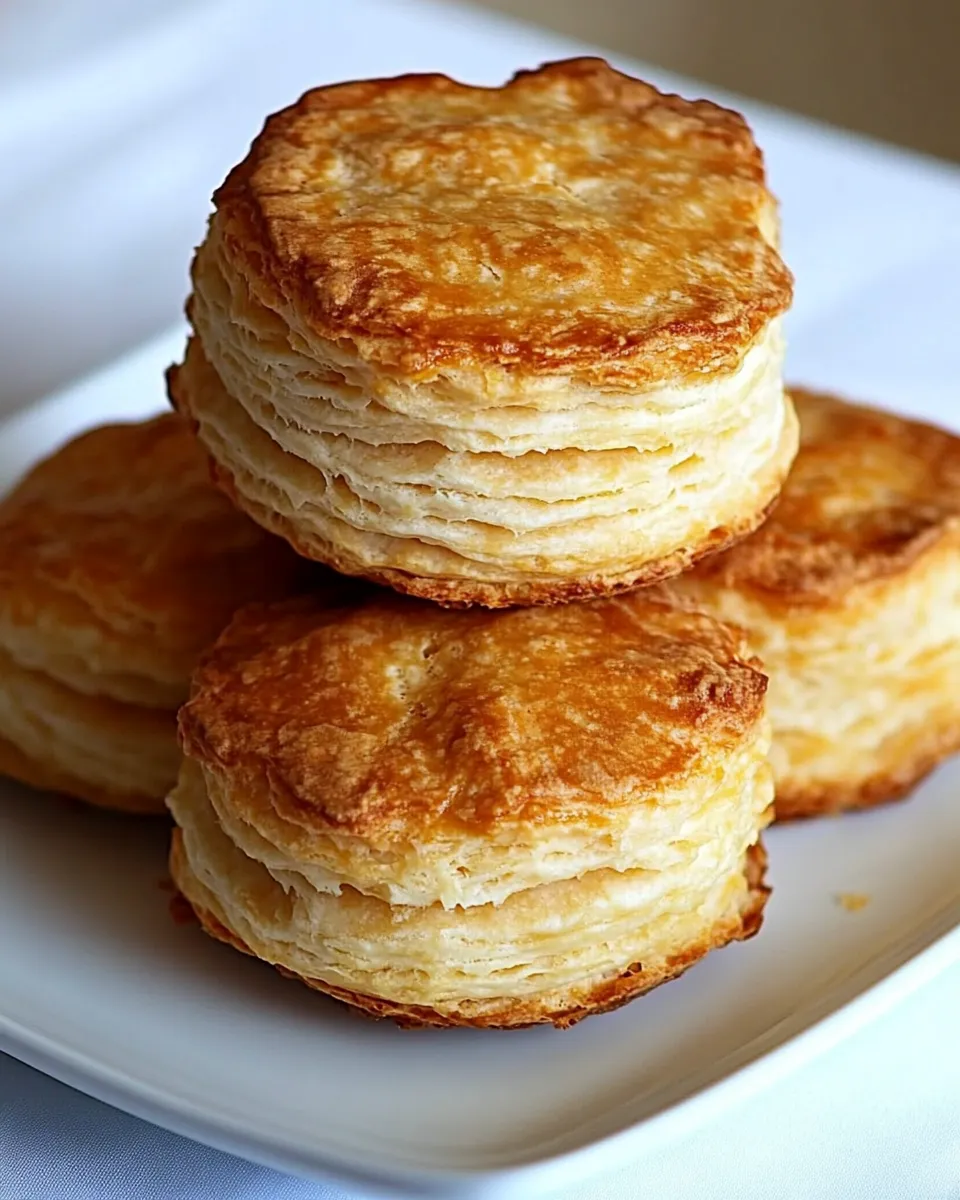
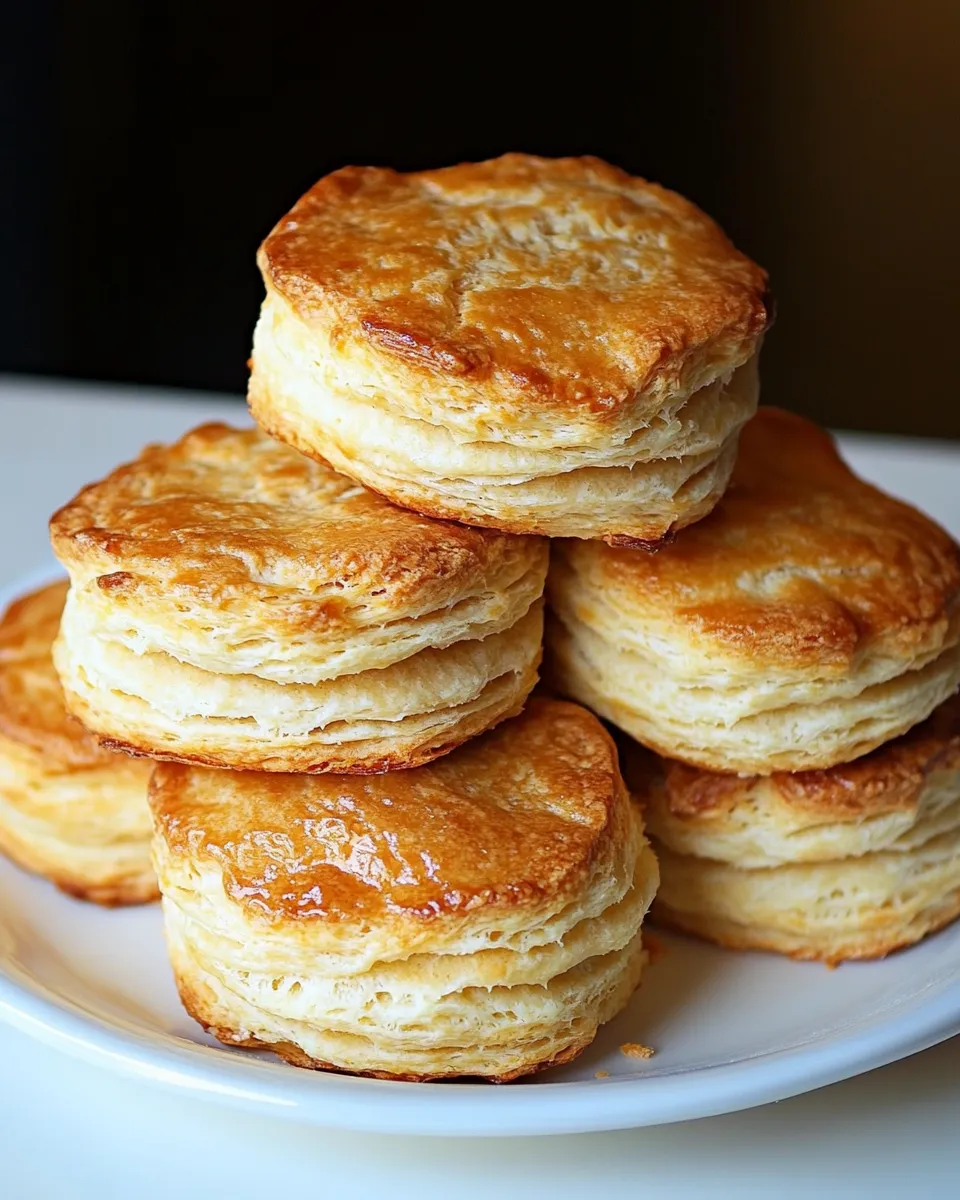
Buttermilk Biscuits
Flaky, buttery biscuits are a kitchen staple—and the kind of recipe that rewards precise technique more than fuss. These buttermilk biscuits come together quickly with pantry ingredients and a few simple handling rules that deliver lift, layers, and a tender crumb. I keep this recipe in heavy rotation for weekend breakfasts and last-minute dinner rolls.
Read through the steps before you start. The dough benefits from cold butter and minimal handling; folding the dough builds layers, and a hot oven gives the biscuits their dramatic rise. I’ll walk you through the exact sequence, plus notes on equipment, common mistakes, and ways to adapt the recipe for holidays or dietary needs.
If you want biscuits that are buttery, tall, and slightly crisp at the edge, this is the one to bookmark. The method below preserves the original ingredient amounts while clarifying each step for home cooks.
Gather These Ingredients
- 2½ cups all-purpose flour — the structure for the biscuits; measure by spooning into the cup and leveling for accuracy.
- 1 teaspoon salt — balances flavor; use fine salt so it blends evenly.
- 2 tablespoons baking powder — primary leavening to give the biscuits lift.
- ½ teaspoon baking soda — supports the baking powder and reacts with the buttermilk for extra rise.
- 2 teaspoons granulated sugar — a touch of sweetness to enhance browning.
- ½ cup salted butter (cold and cut into pieces) — cold butter creates the flaky layers; keep it well chilled until cutting into the flour.
- 1 cup buttermilk (plus 1–2 tablespoons more for brushing the tops) — the liquid for the dough and the source of tang and tenderness; the extra is for brushing before baking.
Stepwise Method: Buttermilk Biscuits
- Preheat the oven to 425°F. Line a cookie sheet with parchment paper and set it aside so it’s ready when you cut the biscuits.
- In a large bowl, sift (or whisk) together 2½ cups all-purpose flour, 1 teaspoon salt, 2 tablespoons baking powder, ½ teaspoon baking soda, and 2 teaspoons granulated sugar until evenly combined.
- Scatter the ½ cup cold, diced salted butter over the flour mixture. Using a pastry blender (or two forks or a food processor pulse), cut the butter into the flour until the pieces are the size of peas. Small, cold butter bits are what make the biscuits flaky.
- Pour 1 cup cold buttermilk into the flour-and-butter mixture. Use a spatula to stir just until the dough comes together—the mixture should be slightly wet and still in sections rather than a smooth ball. Do not overmix.
- Turn the dough out onto a lightly floured surface. Gently gather the pieces with your hands to bring the dough together, then press or pat it into a rectangle about ¾ inch thick. Keep your touch light to preserve air pockets.
- Fold the rectangle into thirds like a letter: bring the left side across the center, then fold the right side over the top. Rotate the dough so the folded edge sits horizontally in front of you. Pat the dough back into a rectangle about ¾ inch thick again. Repeat this pat-and-fold sequence a total of four times (the initial pat counts as the first). These folds build visible layers without extensive rolling.
- After the fourth repetition, pat or lightly roll the dough into a rectangle ½ to ¾ inch thick. Using a floured 2½-inch biscuit cutter, press straight down through the dough without twisting to cut as many biscuits as you can. Set each biscuit on the prepared cookie sheet with the edges touching—this encourages taller sides.
- Gather any remaining scraps, pat them together once (do not overwork), and cut additional biscuits as needed. Fewer re-rolls means more tender biscuits.
- Brush the tops of the biscuits lightly with an additional 1–2 tablespoons of buttermilk to help them brown.
- Bake in the preheated 425°F oven for about 15 minutes, until the biscuits have puffed and the tops are golden brown.
- Remove from the oven and serve immediately, or cool and store in an airtight container once at room temperature.
Why Cooks Rave About It
These biscuits strike a rare balance: easy to make but with layered, bakery-style texture. The cold butter bits create steam pockets in the oven, which separate the layers and produce flaky tenderness. The buttermilk contributes both acidity—for flavor—and acidity-driven leavening with the baking soda, giving an extra lightness.
The folding technique is simple but transformative. You don’t need laminated pastry skills—just a few folds to create distinct layers. And because the recipe calls for basic pantry items, you can pull this together quickly for mornings, weeknight dinners, or to accompany soups and stews.
Dairy-Free/Gluten-Free Swaps
Dairy-free options
- Butter substitute — Use a cold dairy-free block baking stick, cut into pieces the same way as butter. The texture will be slightly different but still flaky if kept cold.
- Buttermilk substitute — Make 1 cup of non-dairy “buttermilk” by adding 1 tablespoon vinegar or lemon juice to 1 cup unsweetened soy or oat milk; let sit 5 minutes until slightly thickened.
Gluten-free approach
- Flour swap — Replace the all-purpose flour with a 1:1 gluten-free baking flour blend designed for biscuits and cakes. Expect a slightly different crumb and be extra gentle when handling the dough.
- Leavening notes — Keep baking powder and baking soda amounts the same; they still react the same with gluten-free flours and buttermilk.
Setup & Equipment

- Mixing bowl — large enough to combine dry ingredients and add buttermilk without splashing.
- Pastry blender — ideal for cutting butter into flour; two forks or a food processor can substitute.
- Measuring cups and spoons — accuracy matters for lift; spoon and level flour instead of scooping.
- 2½-inch biscuit cutter — straight-sided cutter gives the best rise; if unavailable, use a sharp round cutter or a floured glass pressed straight down.
- Parchment-lined cookie sheet — ensures even browning and easy cleanup.
- Rolling pin (optional) — handy for even thickness, but patting by hand works well and preserves layers.
Mistakes Even Pros Make
- Overworking the dough — kneading or re-rolling too much develops gluten and toughens biscuits. Limit handling and re-roll scraps minimally.
- Warm butter — if butter softens, you lose flakiness. Keep it very cold until cutting into the flour.
- Twisting the cutter — turning the cutter seals the edges and prevents lift. Press straight down and lift straight up.
- Low oven temperature — biscuits need a hot 425°F oven for immediate steam and rise. Underpowered ovens give dense results.
- Cut biscuits spaced too far apart — placing them apart produces crispier sides but shorter biscuits. To get tall, tender sides place them touching on the sheet.
Holiday & Seasonal Touches
- Herbed winter biscuits — fold in 1–2 tablespoons of chopped fresh rosemary or thyme with the flour for savory holiday sides.
- Autumn cheddar and chive — add ½ cup grated sharp cheddar and 2 tablespoons chopped chives into the dry mix for rich, savory rolls that pair with soups and roast meats.
- Sweet fruit-topped — brush with melted butter and a sprinkle of coarse sugar after baking; serve with spiced honey for brunch.
- Spiced maple finish — for a seasonal glaze, combine 2 tablespoons maple syrup with a pinch of cinnamon and brush warm biscuits right before serving.
Chef’s Rationale
The recipe’s structure is intentional: a high oven temp, minimal liquid just to bring the dough together, and repeated folds rather than heavy rolling. Cold butter in pea-sized pieces ensures that each bit produces steam in the oven, creating separated layers. The buttermilk’s acidity reacts with the baking soda for additional lift and a tender crumb. Folding creates visible layers without over-developing gluten, so you get both height and flakiness.
Brushing with buttermilk before baking helps the tops brown evenly without adding extra fat. Finally, placing the biscuits touching encourages them to rise straight up instead of spreading outward, which gives the tall, bakery-style profile we all love.
Save It for Later
- Refrigerate — Unbaked cut biscuits can be chilled on the sheet, wrapped tightly, and baked within 24 hours for a fresher rise when you’re ready.
- Freeze — Arrange unbaked biscuits on a tray, freeze until solid, then transfer to a freezer bag. Bake straight from frozen, adding a few minutes to the bake time and covering with foil for the first half to prevent over-browning.
- Reheat — Warm leftover biscuits in a 350°F oven for 8–10 minutes, or split and toast them for sandwiches.
Buttermilk Biscuits Q&A
- Q: Can I use salted butter if the recipe calls for it? — Yes; the recipe uses ½ cup salted butter. If you only have unsalted, add a pinch more salt to the dry mix.
- Q: Why fold instead of roll repeatedly? — Folding builds layers without overworking the gluten. Repeated vigorous rolling develops toughness.
- Q: My biscuits don’t rise tall—why? — Likely causes: warm butter, overworked dough, a cold oven, or twisting the cutter. Keep ingredients cold, handle minimally, and bake at 425°F.
- Q: Can I make smaller or larger biscuits? — Yes; adjust bake time. Smaller biscuits will take less time, larger ones more. Keep an eye on color to avoid over-browning.
Final Thoughts
These buttermilk biscuits are reliable, fast, and forgiving—so long as you respect the cold butter and gentle handling. They reward a little technique with a big payoff: tall, flaky layers and a tender, buttery interior. Keep the recipe on hand for weekends, holiday dinners, or any time you want a warm, comforting bread that feels homemade but comes together without drama.

Buttermilk Biscuits
Ingredients
- 2 1/2 cups all-purpose flour
- 1 teaspoon salt
- 2 tablespoons baking powder
- 1/2 teaspoon baking soda
- 2 teaspoons granulated sugar
- 1/2 cup salted butter cold and cut into pieces
- 1 cup buttermilk plus 1–2 tablespoons more for brushing tops
Instructions
- Preheat the oven to 425°F (220°C). Line a baking sheet with parchment paper and set aside.
- In a large bowl, sift or whisk together the all-purpose flour, salt, baking powder, baking soda, and granulated sugar.
- Scatter the cold, cubed butter over the flour mixture.
- Use a pastry blender or two forks to cut the butter into the dry ingredients until the butter pieces are about pea-size.
- Pour 1 cup buttermilk into the flour and butter mixture and stir gently with a spatula until just combined; the dough will be slightly wet and in lumps.
- Turn the dough onto a lightly floured surface and gently bring it together. Pat it into a rectangle about 3/4 inch thick.
- Fold the rectangle into thirds (like a letter), rotate so it lies horizontally, and pat into a rectangle again. Repeat the pat-and-fold sequence a total of four times.
- After four folds, pat or roll the dough out to about 1/2–3/4 inch thickness. Using a floured 2½-inch biscuit cutter, cut out biscuits and place them on the prepared baking sheet with the edges touching.
- Gather and gently rework the scraps as little as possible to cut additional biscuits.
- Brush the tops of the biscuits with 1–2 tablespoons buttermilk.
- Bake for about 15 minutes, or until the biscuits have puffed and are golden brown on top.
- Serve warm.
Equipment
- Mixing Bowl
- Measuring cups and spoons
- pastry blender or fork
- Spatula
- rolling pin or hands
- 2½-inch biscuit cutter
- Baking Sheet
- Parchment Paper
Notes
- Keep the butter cold for flakier biscuits.
- Do not overwork the dough to avoid tough biscuits.
- Brush with buttermilk for a golden top.