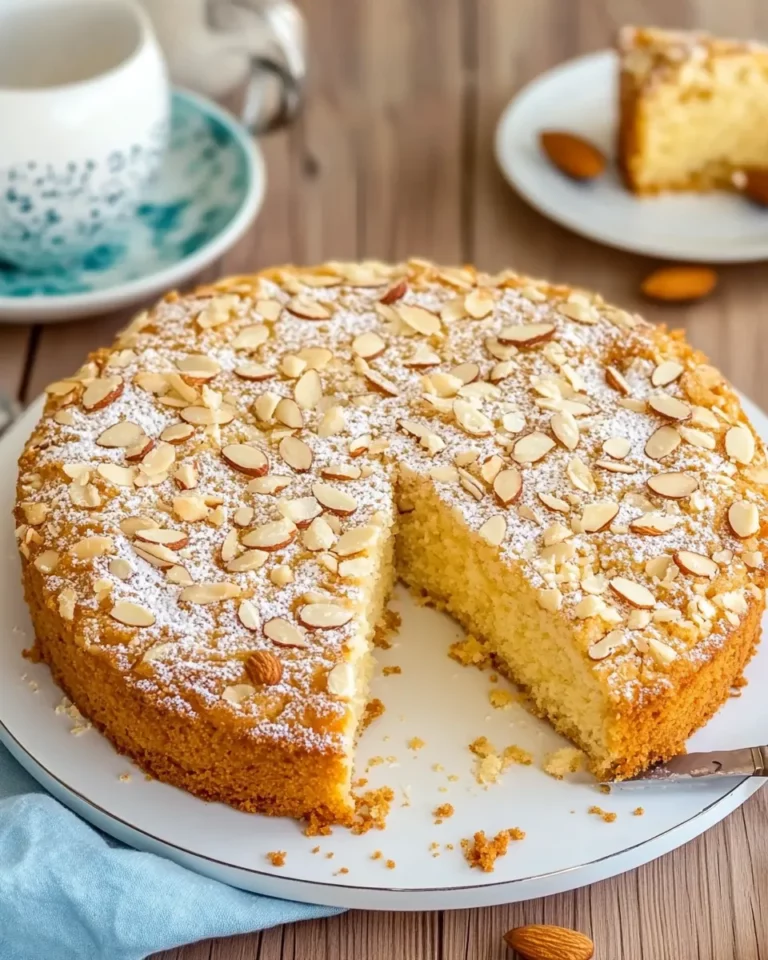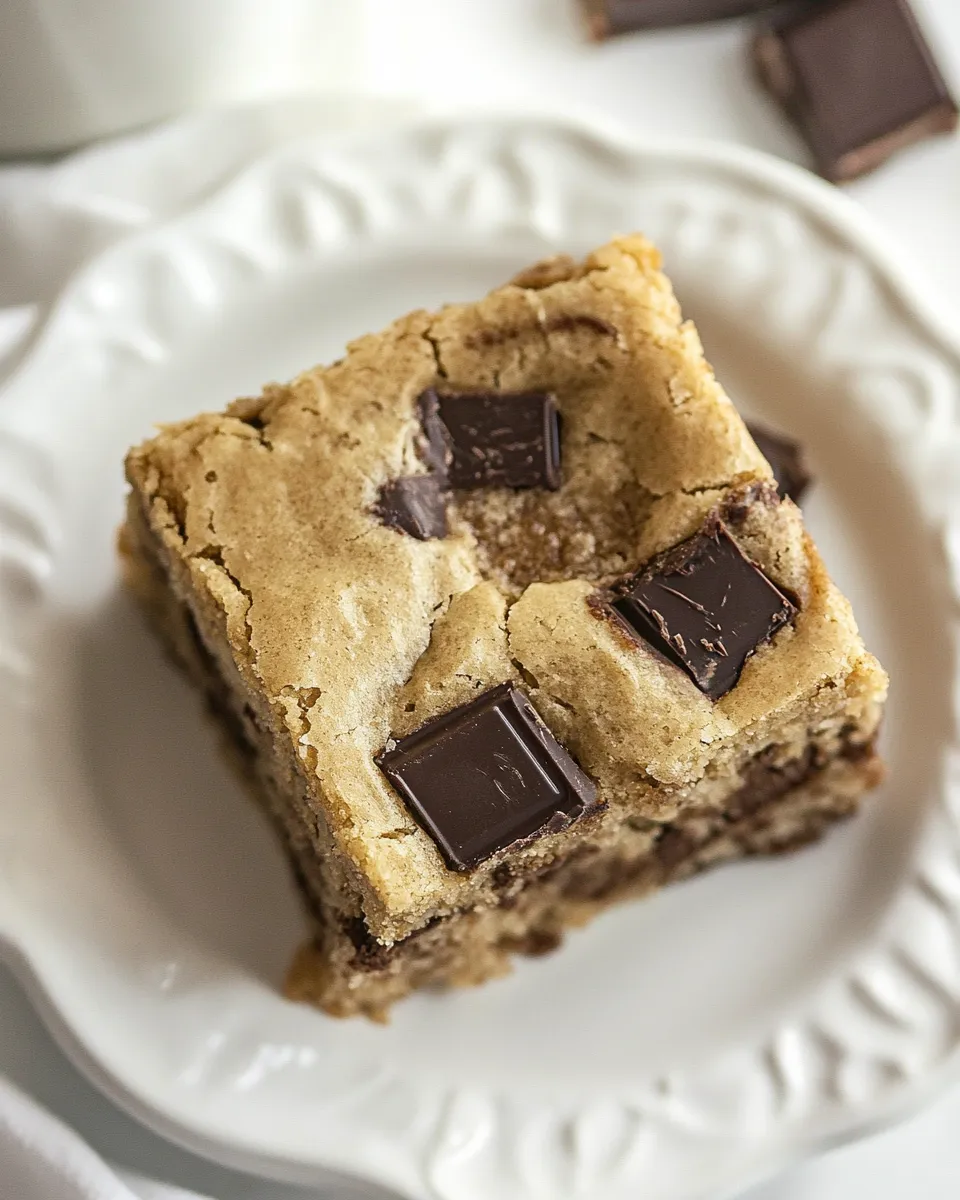
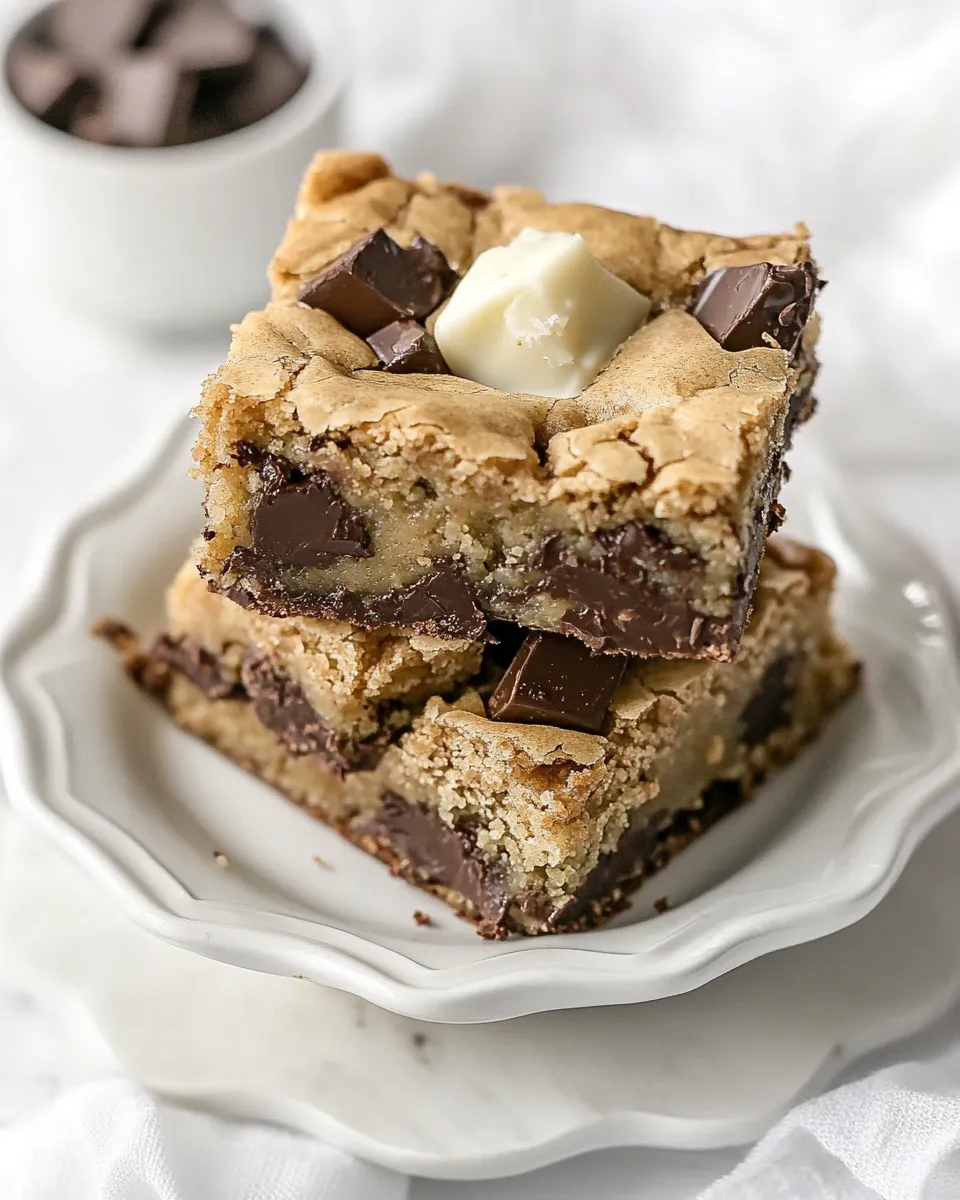
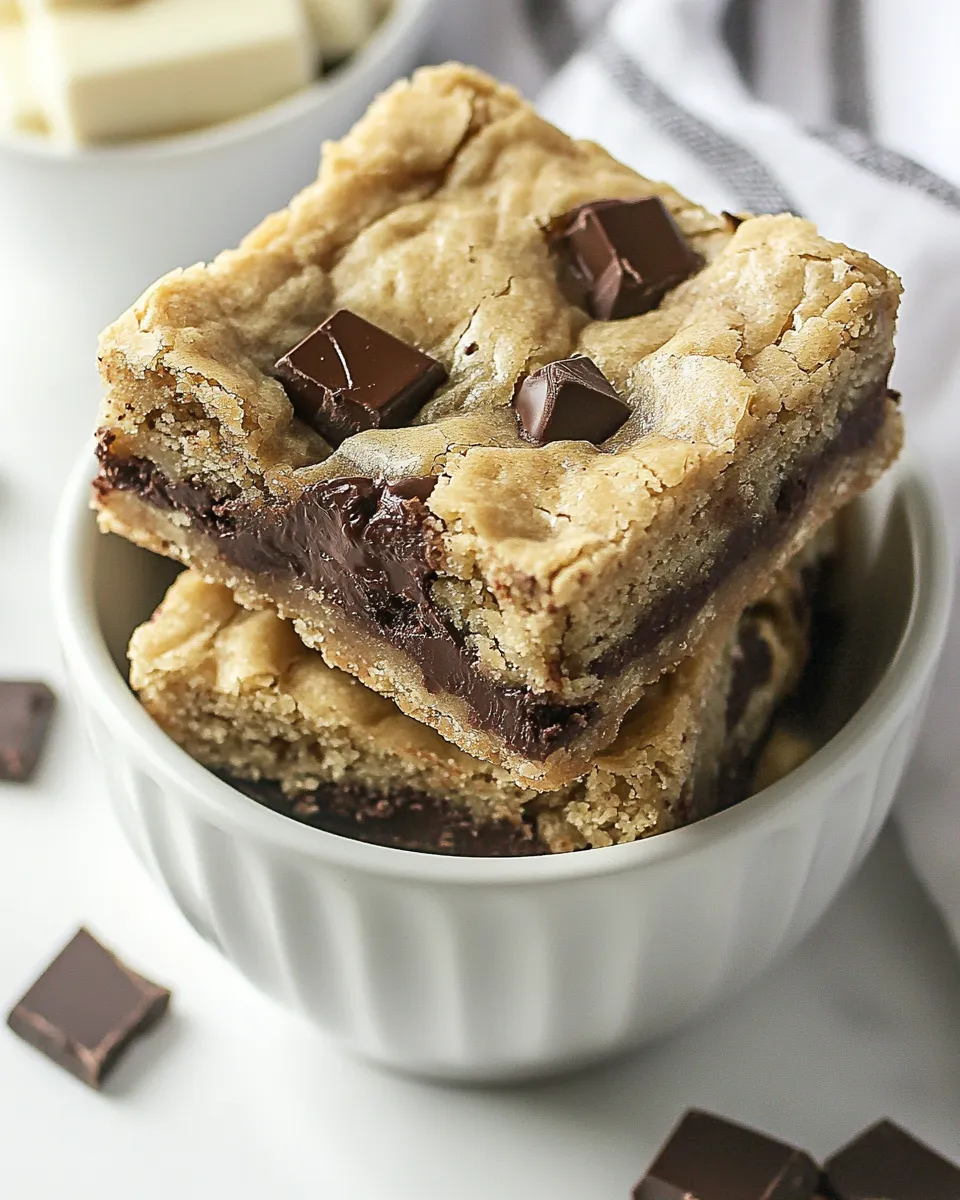
Brown Butter Chocolate Chunk Bars
Brown butter adds a toasty, nutty backbone to these chocolate-studded bars, turning a familiar cookie-like batter into something richer and more grown-up. The texture is tender but sturdy enough to cut into squares that hold up for snacking, gifting, or a quick dessert after dinner. These bars are straightforward to make, forgiving, and perfect when you want something chocolatey without fuss.
I like to brown the butter slowly and let it cool to room temperature while I measure and prep. That step gives the bars depth without extra ingredients. The chocolate mix—milk, semisweet, and white—creates pockets of different sweetness and texture in each bite. No complicated techniques here: cream, fold, press, bake, cool, slice.
Ingredient Notes
- 2 sticks butter (browned, then cooled to room temperature) — Browning concentrates flavor; cool it so it won’t melt the sugars or eggs when creamed.
- ¾ cup brown sugar — Adds moisture and a hint of molasses; helps keep bars chewy.
- ¾ cup white sugar — For sweetness and structure; balances the brown sugar.
- 2 eggs — Bind the dough and provide lift; room temperature eggs incorporate more evenly.
- 2 teaspoons vanilla — Enhances overall flavor; pure vanilla is best if you have it.
- 2 ½ cups flour — All-purpose flour provides the body; measure by spooning into the cup and leveling for accuracy.
- 1 teaspoon baking soda — Gives a bit of rise and a lighter crumb.
- 1 teaspoon salt — Balances sweetness and amplifies chocolate flavor.
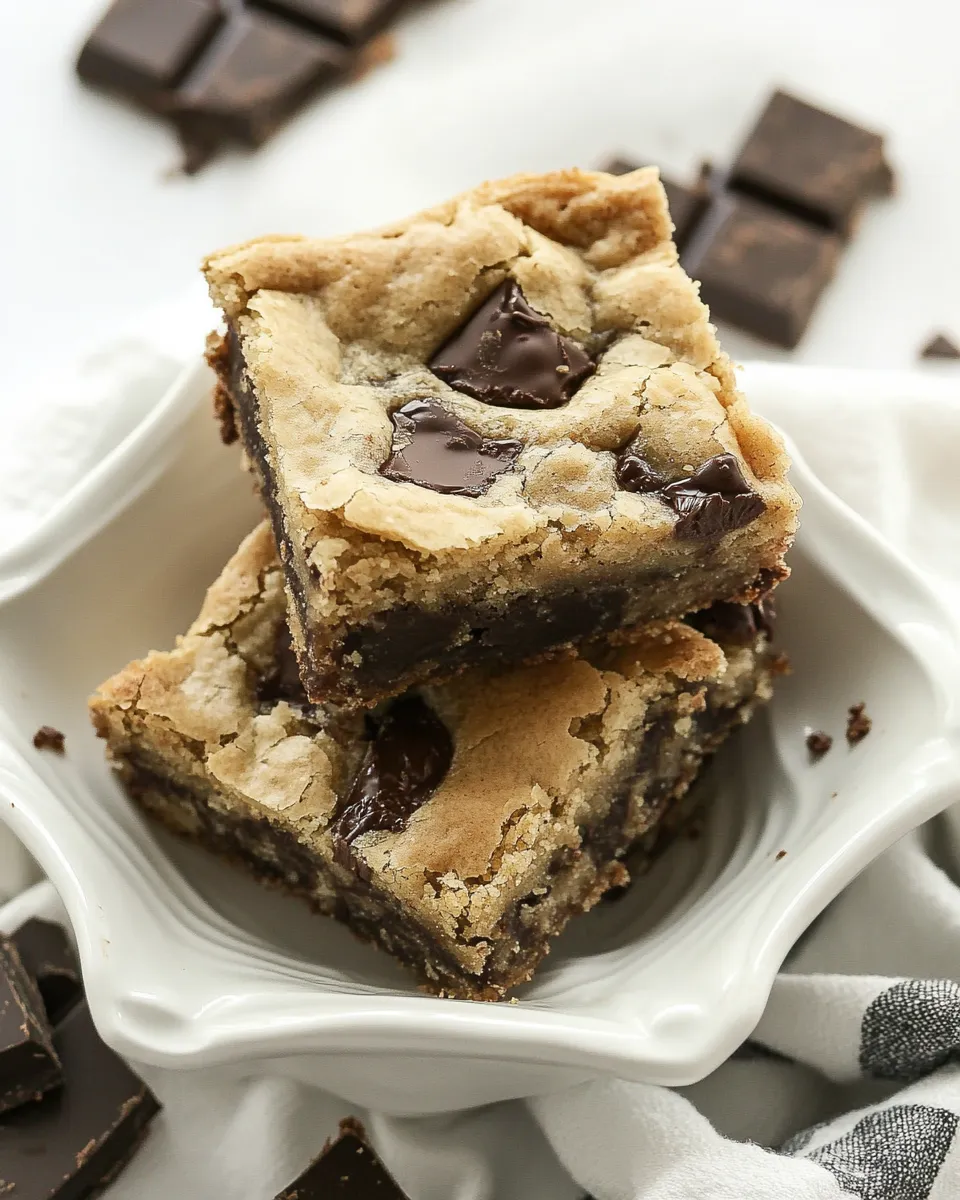
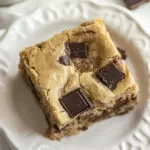
- 12 ounces chopped chocolate (I used 4 ounces milk chocolate, 4 ounces semisweet chocolate and 4 ounces white chocolate) — A mix of chocolates creates contrast; reserve a few chunks to scatter on top before baking for a prettier finish.
The Method for Brown Butter Chocolate Chunk Bars
- Line a 9 x 13-inch pan with nonstick foil or regular foil sprayed with nonstick cooking spray. Set the pan aside so it’s ready when the dough is mixed.
- Preheat the oven to 350°F (175°C).
- Brown the butter: melt 2 sticks of butter in a light-colored skillet over medium heat, stirring frequently. Watch for foam, then the foamy bits will turn golden and a nutty aroma will appear. Remove from heat and pour into a heatproof bowl. Let cool to room temperature before using so it doesn’t cook the eggs when mixed.
- Cream the sugars into the cooled brown butter: in a mixing bowl, combine ¾ cup brown sugar and ¾ cup white sugar with the cooled browned butter. Beat until the mixture is smooth and slightly fluffy.
- Add eggs and vanilla: add 2 eggs and 2 teaspoons vanilla to the butter-sugar mixture. Mix until everything is combined and the batter is homogeneous.
- Combine the dry ingredients: in a separate bowl, whisk together 2 ½ cups flour, 1 teaspoon baking soda, and 1 teaspoon salt to ensure even distribution.
- Incorporate the dry into the wet: add the flour mixture to the wet ingredients and stir until just combined. Do not overmix; stop when there are no streaks of flour.
- Mix in the chocolate: fold in 12 ounces chopped chocolate, reserving a few pieces to press on top of the dough. Use a spatula so the chunks distribute evenly without overworking the dough.
- Press into the pan: transfer the dough into the prepared 9 x 13-inch pan and press it evenly into the corners and across the surface. Smooth the top and press the reserved chocolate pieces lightly into the surface.
- Bake: place the pan in the preheated oven and bake for 25–30 minutes. Start checking at 25 minutes; the bars are done when the edges are golden and a toothpick inserted near the center comes out with a few moist crumbs but no raw batter.
- Cool and cut: remove the pan from the oven and let the bars cool completely in the pan on a wire rack. Once cool, lift them out using the foil and cut into squares. Cooling fully helps them set and slice cleanly.
Why This Recipe Is Reliable
These bars are consistent because they rely on straightforward ratios and basic techniques. Browning the butter is the one step that adds complexity of flavor without changing the chemistry of the recipe; the butter still contributes fat and moisture but with a deeper taste. The balance of brown and white sugar ensures chewiness from the brown sugar and structure from the white. The baking time window (25–30 minutes) accounts for oven variances—start checking at 25 minutes and use visual cues rather than an exact minute to avoid overbaking.
The recipe’s forgiving nature comes from using a single dough pressed into a pan rather than formed cookies. That minimizes uneven baking and handling variability. Finally, mixing a variety of chocolate types reduces the risk that any one chocolate will dominate the flavor or texture, producing consistent, well-rounded bars every time.
Allergy-Friendly Substitutes
- Dairy-free butter substitute — Use a plant-based stick margarine suitable for baking; brown it carefully (some alternatives brown differently) or add a touch of toasted nut oil for a browned flavor note if browning isn’t possible.
- Egg replacer — For each egg, use 1/4 cup unsweetened applesauce or a commercial egg replacer per package directions. Texture will be slightly different—more cake-like but still pleasant.
- Gluten-free flour — Substitute a 1:1 gluten-free baking blend that contains xanthan gum. Expect a slightly different crumb; chill briefly before slicing for cleaner cuts.
- Chocolate — Use allergen-free chocolate chips labeled free from cross-contamination if needed; note texture and melting behavior may differ from chopped bars.
Equipment at a Glance
- 9 x 13-inch baking pan — Needed for shaping and baking the bars.
- Nonstick foil or regular foil + nonstick spray — Eases removal and cleanup.
- Skillet — For browning the butter; a light-colored pan helps monitor color change.
- Mixing bowls — One for wet ingredients and one for dry.
- Hand mixer or stand mixer (optional) — Speeds creaming but a sturdy spoon works too.
- Spatula — For folding chocolate and pressing dough into the pan.
- Wire rack — For cooling the bars completely before slicing.
Common Errors (and Fixes)
- Butter too hot when mixed — If the browned butter is warm, it can melt the sugars and scramble the eggs. Fix: cool the butter to room temperature before creaming.
- Overbaking — Bars that bake too long become dry. Fix: check at 25 minutes; remove when the center yields a few moist crumbs on a toothpick.
- Uneven browning of butter — Butter can go from browned to burned quickly. Fix: brown over medium heat in a light pan, stir constantly, and remove from heat as soon as you detect a nutty aroma and golden flecks.
- Dense or gummy texture — Overmixing develops gluten. Fix: combine just until the flour disappears.
- Bars don’t slice cleanly — Cutting while warm causes crumbling. Fix: cool completely in the pan, then chill briefly if needed before slicing.
Spring to Winter: Ideas
- Spring — Stir in ½ cup dried cherries or raspberries for a fruity lift that brightens the chocolate.
- Summer — Fold in ½ cup toasted coconut and replace white chocolate with dark chips for a tropical, less-sweet profile.
- Autumn — Add 1 teaspoon ground cinnamon and ¼ teaspoon nutmeg to the flour for warm spice notes; swap milk chocolate for all semisweet.
- Winter — Sprinkle flaky sea salt on top before baking and add ½ teaspoon instant espresso powder to deepen the chocolate flavor.
Cook’s Notes
- Measuring flour — Spoon flour into the measuring cup and level with a knife; packed flour leads to dense bars.
- Browning butter tips — Use a light-colored pan and scrape browned bits from the bottom into the butter for maximum flavor.
- Chocolate pieces — Large chopped chunks create pockets of molten chocolate; chop to varying sizes for interest.
- Pan lining — Nonstick foil makes removal and cutting neater. If you use regular foil, spray it well so the bars lift out easily.
- Room temperature ingredients — Eggs at room temp incorporate better; cold eggs can cause the batter to seize.
Best Ways to Store
- Room temperature — Store in an airtight container for up to 3 days; keep out of direct heat to prevent chocolate from sweating.
- Refrigerator — Keep in an airtight container for up to 7 days; chill for firmer bars and cleaner slices.
- Freezer — Wrap individual bars in plastic wrap and place in a freezer-safe bag for up to 3 months. Thaw at room temperature before serving.
Handy Q&A
- Can I skip browning the butter? — Yes, but you’ll lose that nutty depth. Use plain melted butter as a substitute if you’re short on time.
- Can I use chocolate chips instead of chopped chocolate? — Absolutely. Chips melt differently and hold shape better; both work well.
- Why use both brown and white sugar? — Brown sugar adds chew and moisture; white sugar gives structure and sweetness—together they balance texture and flavor.
- How large should the chocolate chunks be? — Roughly ½- to 1-inch pieces for uneven pockets of melted chocolate and pleasant bite.
Wrap-Up
These Brown Butter Chocolate Chunk Bars are practical, forgiving, and quick enough for a weeknight treat yet special enough to bring to a potluck. Browning the butter is the single step that elevates the whole recipe—do it slowly, cool it, and you’ll get bars with deep, nutty flavor and soft, chocolate-studded texture. Make a pan, let them cool, and enjoy a reliably delicious tray-bake that’s easy to share.
Brown Butter Chocolate Chunk Bars
Ingredients
- 2 sticks butter browned, then cooled to room temperature
- 3/4 cup brown sugar
- 3/4 cup white sugar
- 2 eggs
- 2 teaspoons vanilla
- 2 1/2 cups all-purpose flour
- 1 teaspoon baking soda
- 1 teaspoon salt
- 12 ounces chopped chocolate about 4 oz milk, 4 oz semisweet, 4 oz white; reserve a few pieces to garnish
Instructions
- Line a 9 x 13-inch pan with nonstick foil or regular foil and spray the foil with nonstick cooking spray; set aside.
- Preheat the oven to 350°F (177°C).
- Brown 2 sticks of butter in a saucepan over medium heat, stirring frequently, until it develops a nutty aroma and brown flecks; remove from heat and let cool to room temperature.
- In a large bowl, cream the cooled brown butter with 3/4 cup brown sugar and 3/4 cup white sugar until combined and slightly fluffy.
- Add 2 eggs and 2 teaspoons vanilla to the butter-sugar mixture and beat until fully incorporated.
- Stir in 2 1/2 cups flour, 1 teaspoon baking soda, and 1 teaspoon salt until just combined; do not overmix.
- Fold in the 12 ounces chopped chocolate, reserving a few chunks to press on top if desired.
- Press the dough evenly into the prepared pan and arrange reserved chocolate pieces on top.
- Bake for 25–30 minutes, until the edges are golden and a toothpick inserted into the center comes out with a few moist crumbs.
- Allow the bars to cool completely in the pan, then lift out using the foil and cut into bars.
Equipment
- 9 x 13-inch baking pan
- Nonstick cooking spray or foil
- Mixing bowls
- Hand mixer or stand mixer
- Measuring cups and spoons
- Spatula
- Saucepan for browning butter
Notes
- Cool the browned butter completely before creaming to avoid scrambling the eggs.
- Reserve some chocolate pieces to press on top for a prettier finish.
- Do not overbake; the bars will firm up as they cool.