Please share this post with your friends 🤗
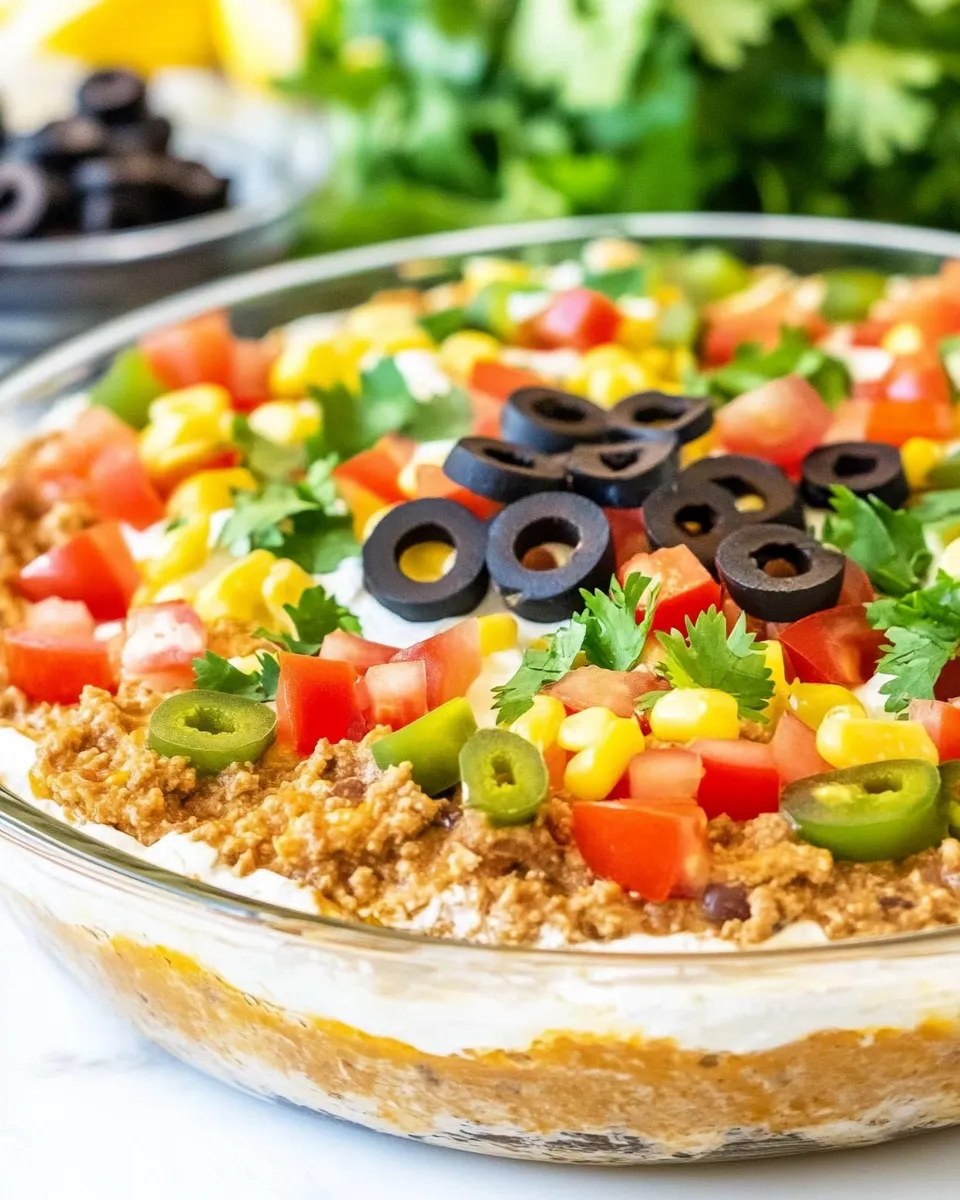
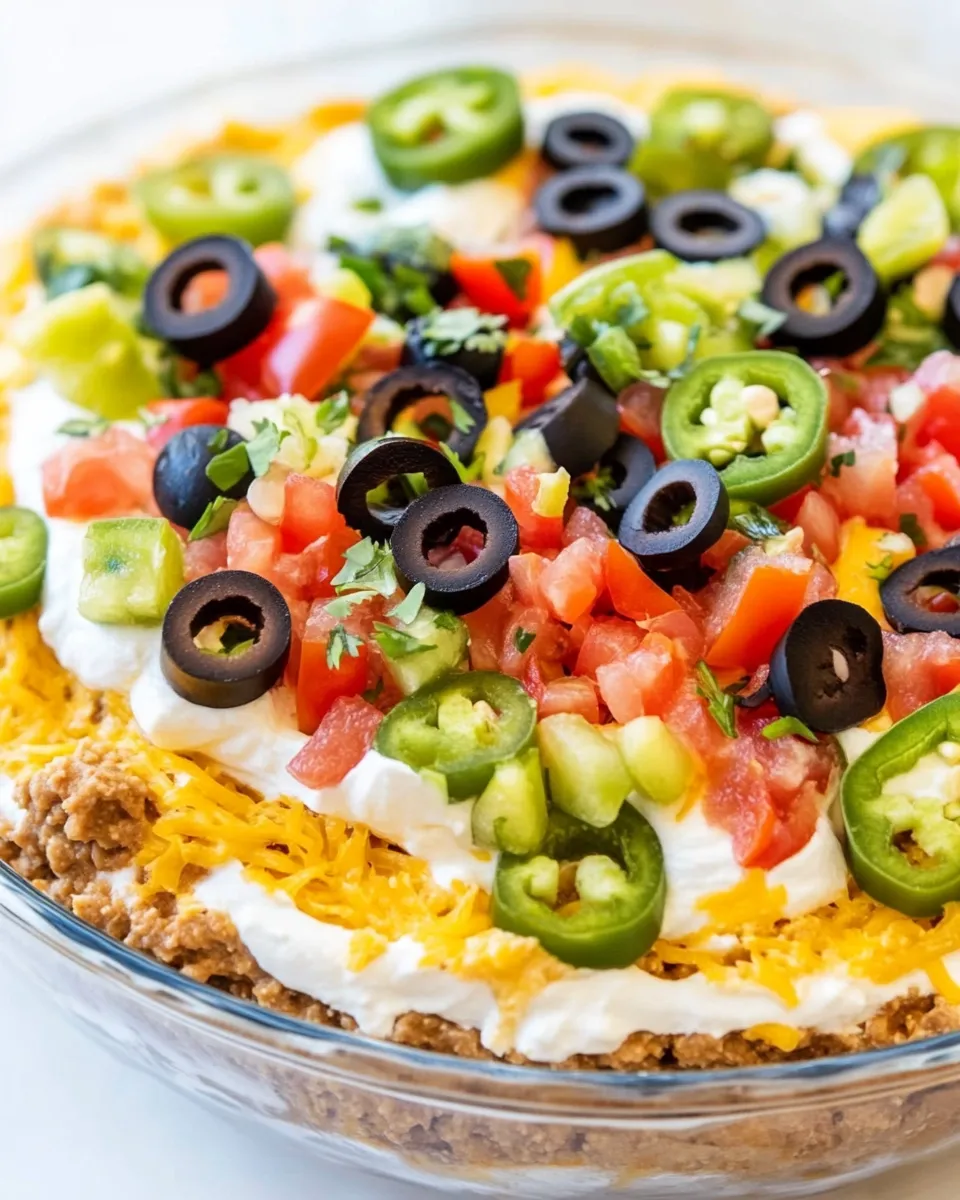
This LOADED Taco Dip is the kind of party food that disappears faster than you can refill the chip bowl. It layers bold, familiar taco flavors into a creamy, scoopable dip that’s perfect for game day, potlucks, or a last-minute snack attack. The texture is a win: creamy base, meaty middle, and a fresh, crunchy finish on top.
It’s straightforward to put together and plays well with chips, sliced bell peppers, or even as a filling for soft tacos. I keep the seasoning simple and rely on a store-bought taco mix to keep the prep quick without sacrificing flavor.
Below you’ll find a tidy shopping list, ingredient notes, and step-by-step instructions that stick to the exact amounts in the recipe. I’ll also share swaps for common allergies, troubleshooting tips, and a few small tweaks to lighten things up without losing the fun.
Shopping List
4 oz cream cheese — softened; builds the creamy base and helps stabilize the dip.
1 cup sour cream — adds tang and creaminess to the base layer.
3 tbsp taco seasoning (1 store bought packet) — divides between meat and cream layers for consistent flavor.
1 lb ground beef — the main savory protein; brown and season for the meat layer.
16 oz refried beans — spread as the first layer to give body and scoopability.
4 oz lettuce, shredded — provides a fresh, crunchy top layer contrast.
1/2 cup tomatoes, diced — brightens the dip and adds freshness.
1/4 cup green onions, diced — mild onion flavor and color accent.
1/2 cup Mexican blend cheese, shredded — adds melty, savory richness.
1/4 cup black olives, sliced — briny contrast and visual appeal.
1/4 cup jalapeno slices (optional) — for heat; use fresh or jarred per preference.
Directions: LOADED Taco Dip
Preheat and prep: No oven required. Have a 2.5-quart casserole dish ready and gather all ingredients so assembly goes smoothly.
Brown the beef: Heat a skillet over medium heat. Add 1 lb ground beef and cook, breaking it apart with a spatula, until fully browned and no pink remains (about 6–8 minutes).
Drain and season meat: Drain excess fat from the skillet. Return the meat to the skillet and stir in half of the taco seasoning (1.5 tbsp). Cook briefly, about 1 minute, to toast the seasoning and distribute flavor. Remove from heat and set the seasoned meat aside to cool slightly.
Layer the base: Spread the entire 16 oz of refried beans evenly across the bottom of your 2.5-qt casserole dish so you have a uniform base for scooping.
Make the creamy layer: In a medium bowl, combine 4 oz softened cream cheese, 1 cup sour cream, and the remaining taco seasoning (1.5 tbsp). Whisk or beat until smooth and fully combined.
Spread the cream layer: Gently spread the cream cheese mixture over the refried beans, making an even layer without mixing the two layers together.
Add the meat layer: Evenly distribute the seasoned ground beef over the cream cheese layer, covering the surface.
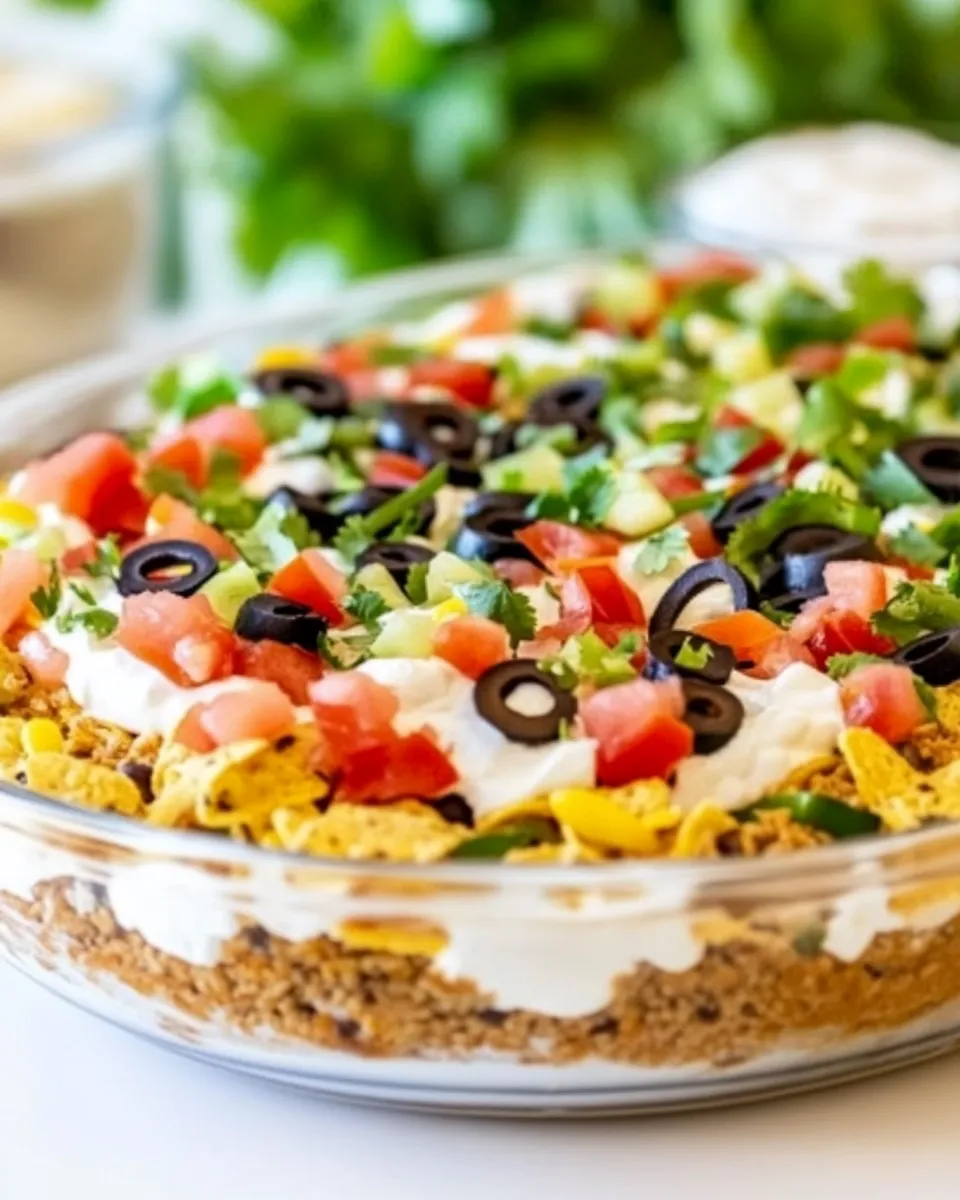
Top with cheese and vegetables: Sprinkle 1/2 cup shredded Mexican blend cheese over the meat. Follow with 4 oz shredded lettuce, 1/2 cup diced tomatoes, 1/4 cup diced green onions, 1/4 cup sliced black olives, and 1/4 cup jalapeño slices if using. Arrange evenly so each scoop will have a bit of everything.
Serve or chill: You can serve the dip immediately with tortilla chips or sweet pepper wedges. For a slightly firmer, colder presentation, chill the assembled dip up to 4 hours before serving.
Top Reasons to Make LOADED Taco Dip
Big, familiar flavors that please a crowd — taco seasoning, beef, cheese, and fresh toppings.
Quick assembly — most of the time is browning the meat; the rest is layering.
Versatile serving options — pairs with chips, veggies, or even as a sandwich spread.
Make-ahead friendly — chilling up to 4 hours improves slicing and service at parties.
Allergy-Friendly Substitutes

Dairy-free: Replace cream cheese with a dairy-free cream cheese and sour cream with a plain dairy-free yogurt or sour cream alternative. Use dairy-free shredded cheese.
Beef-free: Swap 1 lb ground beef for the same amount of cooked plant-based crumbles or cooked lentils seasoned the same way.
Gluten-free: Ensure the taco seasoning and refried beans are labeled gluten-free (some seasoning mixes contain wheat).
Nightshade-sensitive: Omit jalapeños and tomatoes; boost flavor with diced cucumbers and a sprinkle of smoked paprika in the cream layer.
Equipment & Tools
2.5-quart casserole dish — required for the assembled layers and serving.
Skillet — to brown and season the ground beef.
Mixing bowl and whisk or fork — to blend cream cheese, sour cream, and seasoning.
Spatula or spoon — for spreading layers cleanly.
Colander or fine-mesh strainer — to drain excess fat from the cooked beef.
Watch Outs & How to Fix
Watery or runny dip: If the cream cheese isn’t fully softened, the cream layer can be lumpy. Soften cream cheese to room temperature first and beat until smooth. If the dip seems loose after assembly, chill for 30–60 minutes to firm up.
Overly salty or spicy: Taste the taco seasoning portion before adding the full amount at once. If the mix is very salty, reduce the amount slightly. For less heat, omit the jalapeño slices or use mild pickled peppers.
Separation of layers when scooping: Scoop straight down and lift to reduce mixing. Chilling the dip for at least 30 minutes helps layers hold together better.
Cold beef temperature: If you prefer the dip warm, let the seasoned beef cool slightly but still warm before layering so it won’t melt the cream layer; alternatively, skip chilling and serve immediately.
Health-Conscious Tweaks
Reduce fat: Use low-fat or light sour cream and a reduced-fat cream cheese to cut calories and saturated fat. Keep in mind texture will be slightly lighter.
More veggies: Increase the amount of shredded lettuce, tomatoes, and green onions, or add diced bell peppers for extra fiber and nutrients.
Lean protein: Use 93% lean ground beef or ground turkey to reduce fat while keeping the meaty flavor.
Smaller portions: Serve in smaller dishes or pre-portion into small cups to help with portion control at gatherings.
Cook’s Notes
Make ahead timing: Assemble and chill up to 4 hours ahead for best texture. Avoid making more than a day ahead—toppings can get soggy.
Cheese options: Mexican blend gives a melty, familiar flavor. Pepper jack adds heat; cheddar adds sharpness.
Serving temperature: Both chilled and room-temperature versions work. If chilled, let sit 10 minutes at room temp before serving for easier scooping.
Leftovers: Store in an airtight container for up to 2 days. Stir before serving; freshen with a few extra diced tomatoes or green onions if desired.
Save It for Later
Bookmark or print: Save the recipe page and add it to your party-planning folder.
Scale up: For larger gatherings, double the recipe and use a 9×13-inch pan for similar layering results.
Note for next time: Keep a spare packet of taco seasoning in your pantry — it makes this dip a go-to quick party option.
Quick Questions
Can I make this vegetarian? Yes — substitute the ground beef with seasoned cooked lentils or a plant-based beef substitute using the same amount and seasoning.
Can it be served warm? The dip is designed to be layered cold or at room temperature; if you prefer warm, briefly warm the beef before layering and serve immediately.
How long can it sit out at a party? For food safety, don’t leave the dip out for more than 2 hours. Return leftovers to the fridge promptly.
The Last Word
This LOADED Taco Dip hits the sweet spot between effortless and crowd-pleasing. It’s dependable, forgiving, and fast to pull together while delivering all the taco flavors guests expect. Keep the ingredients exact for the classic result, and use the swaps and tips here to adapt it to your needs. Whether it’s game day or just a snack, this dip is one to keep in your entertaining rotation.
LOADED Taco Dip
A layered, crowd-pleasing taco dip with refried beans, seasoned beef, creamy topping, and classic taco fixings.
Prep Time10 minutes mins
Cook Time5 minutes mins
Total Time15 minutes mins
Servings: 12 servings
- 4 oz cream cheese softened
- 1 cup sour cream
- 3 tbsp taco seasoning reserve half for meat (use 1 store-bought packet total)
- 1 lb ground beef
- 16 oz refried beans
- 4 oz lettuce shredded
- 1/2 cup tomatoes diced
- 1/4 cup green onions diced
- 1/2 cup Mexican blend cheese shredded
- 1/4 cup black olives sliced
- 1/4 cup jalapeño slices optional
Heat a skillet over medium heat and cook the ground beef until browned, breaking it up with a spatula as it cooks.
Drain excess fat from the browned beef, then stir in half of the taco seasoning (about 1.5 tbsp). Remove from heat and set aside.
Spoon the refried beans into the bottom of a 2.5-quart casserole dish and spread into an even layer.
In a mixing bowl, combine the softened cream cheese, sour cream, and the remaining taco seasoning (about 1.5 tbsp) until smooth and well blended.
Spread the cream cheese mixture evenly over the layer of refried beans.
Top with the seasoned taco meat in an even layer over the cream cheese mixture.
Layer the shredded lettuce, shredded Mexican blend cheese, diced tomatoes, diced green onions, sliced black olives, and jalapeño slices (if using) over the meat.
Serve immediately with tortilla chips or chill up to 4 hours before serving.
Skillet
Spatula
casserole dish (2.5 qt)
Mixing Bowl
Knife
Cutting Board
- Use a 2.5-quart dish for best layering.
- Adjust jalapeños to taste.
- One store-bought taco seasoning packet equals about 3 tbsp.
Please share this post with your friends 🤗